A great many users want to create aSurface recovery imagebut dont know how to do that.
In this article,MiniToolwill explain how to download/create/use Surface recovery images in detail.
The recovery image can be used as arestore pointfor your system.

So, a lot of people want to create a recovery image for their computers.
However, many of them dont know how to create a recovery image for Surface devices.
We will walk you through detailed steps in the following parts.
What to do if you forgot BitLocker password?
How to recover the lost BitLocker recovery key?
If you are still vexed by these questions, read this post now.
In addition, a flash USB drive is required to download the image.
However, both the two tools have limitations in formatting a USB drive larger than 32 GB.
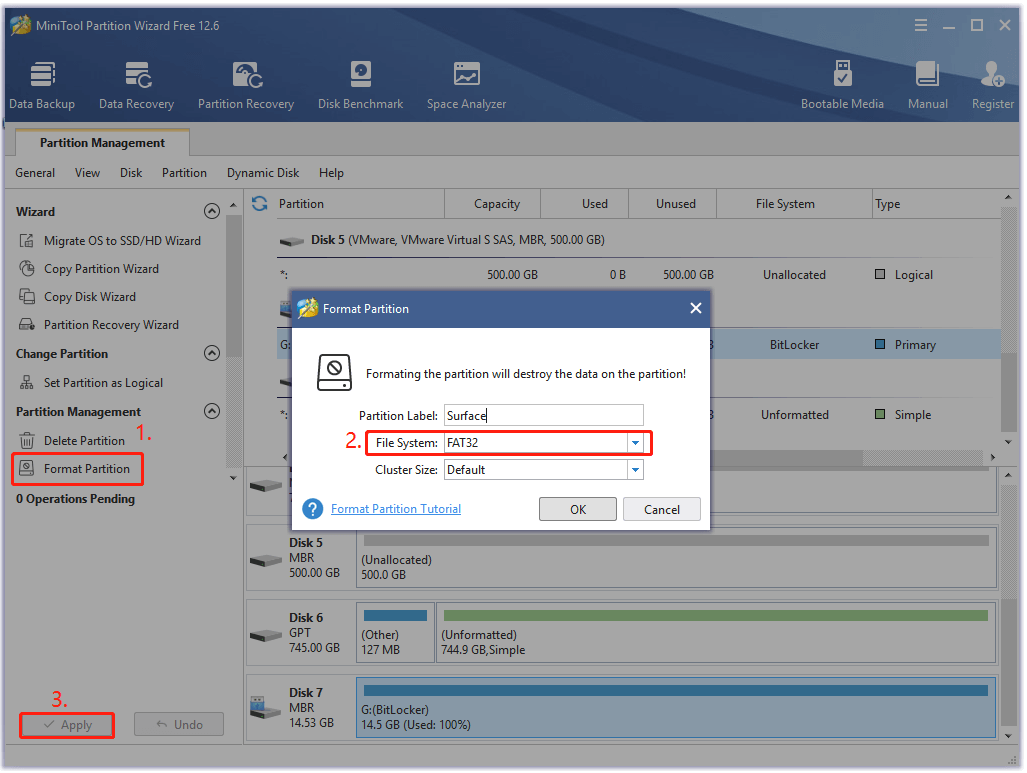
It is a multifunctional partition manager that can format a USB drive to FAT32/NTFS/exFAT/Ext/Linux Swap with a few clicks.
Also, you could right-poke the USB drive and selectFormat.
Step 2.In the pop-up dialog box, selectFAT32from theFile Systemdrop-down menu and click onOKto save the change.
Here it’s possible for you to set thePartition LabelandCluster Sizeaccording to your needs.
Step 3.Click onApplyto execute the pending changes.
After that, you’re free to create a Surface recovery image using the USB drive.
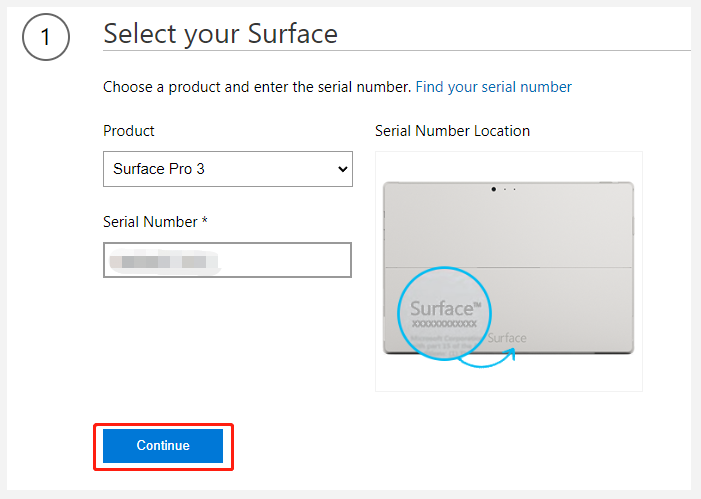
Step 1.Clickhereto bring up the Microsoft Surface Recovery Image Download page.

Step 3.choose theDownload recovery imagelink and select a location to save the recovery_rd.img zip file on your Surface laptop.
Step 4.Decompress the downloaded recovery_rd.img file.
If possible, we recommend you use a USB 3.0 drive.
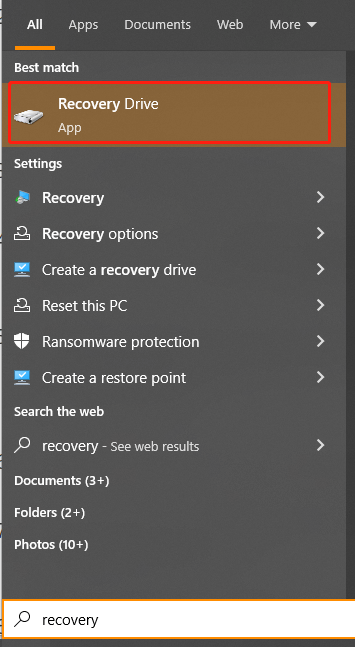
Step 2.Typerecoveryin theSearchbox and select theRecovery DriveorCreate a recovery driveapp from the top result.
Then click onYesin theUser Account Controlwindow to confirm the operation.
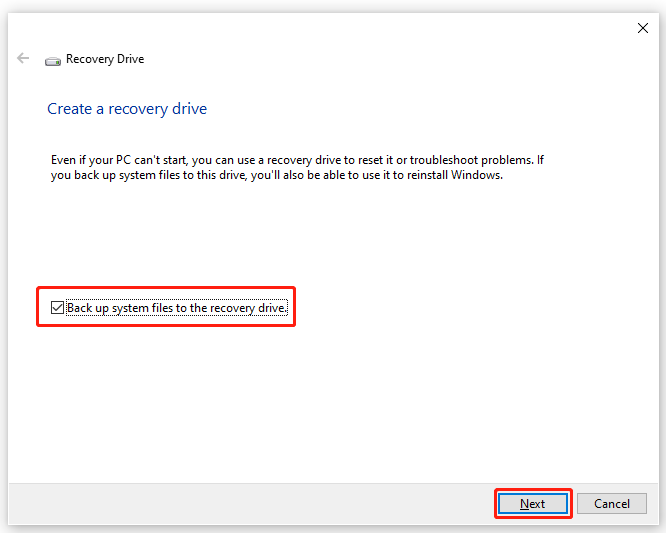
Step 4.Wait for the tool to detect your USB drive automatically.
Once detected, select theUSB driveand click onNext > Create.
Step 5.When the Surface Pro recovery image is created, click onFinish.
Then wait for the copying process to complete.
Once done, check that youSafely eject the USB drivefrom the taskbar.
How to reset the Surface using the USB recovery drive?
Step 1.confirm that your Surface isturned offand the USB recovery drive is inserted into your machine properly.
Step 2.Press and hold thevolume-downbutton at the side of your Surface while you press and release thePowerbutton.
Step 3.Once theSurfaceorMicrosoftlogo appears, release thevolume-downbutton.
Step 4.Select theLanguageandKeyboard layoutthat you want when prompted.
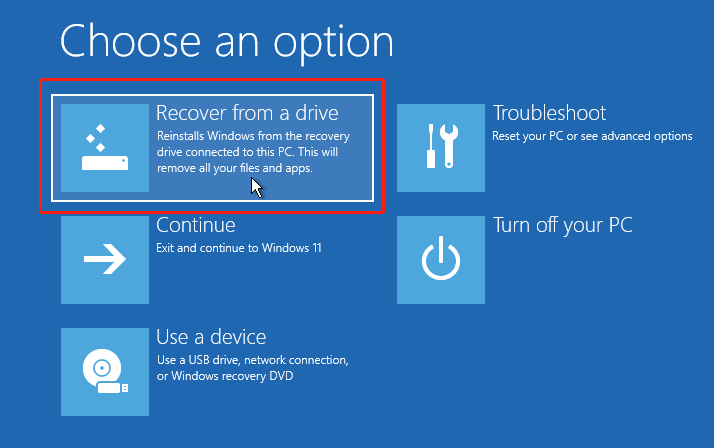
Step 5.In theChoose an option, selectTroubleshootand selectRecover from a drive.
If you are asked for a recovery key, select theSkip this driveat the bottom of the screen.
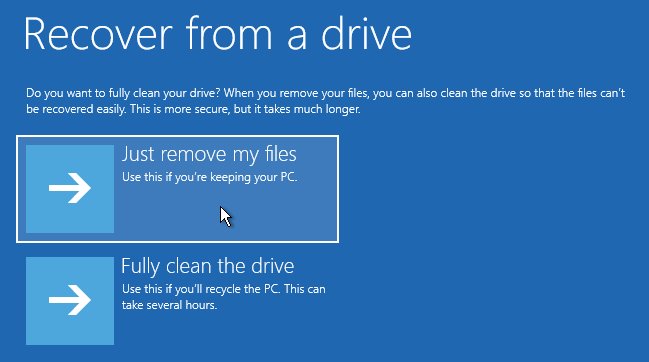
Step 6.it’s possible for you to select eitherJust remove my filesorFully clean the drive.
Step 7.Click onRecover, then your Surface will restart and display the Surface logo during the resetting process.
Here we will show you how to set the USB as the first boot order.
Step 2.Press and hold theVolume-downbutton on your Surface while you press and release thePowerbottom.
Step 3.When theSurfacelogo screen appears, release thevolume-upbutton and then your Surface will enter into the UEFI menu.
Step 4.Navigate to theBoot configurationorConfigure Alternate System Boot Ordertab and put theUSB recovery driveto the first boot location.
Step 5.SelectExit > Restart NoworExit Setup > Yesto save and exit the boot menu.
Then your Surface should reboot from the USB drive.
I want to create a Surface Pro 4 recovery image but cant find a full guide with detailed steps.
Fortunately, this post helped me a lot.
How to create a Surface recovery USB drive and use it to reset the Surface?
All these answers have been illustrated in the given post.
In addition, we also provide solutions to fix the Surface recovery USB drive not working issue.
