How to upgrade the ASUS X505ZA SSD?
If you are searching the guide for this question, you come to the right place.
This post ofMiniToolprovides a comprehensive guide on theASUS X505ZA SSD upgrade.
The ASUS X505ZA is a popular budget-friendly laptop known for its sleek design and decent performance.
However, its stock storage, typically a slow and sluggish HDD, can hold it back.
Upgrading to an SSD can dramatically improve your laptops speed, responsiveness, and overall user experience.
Why Need to Upgrade the ASUS X505ZA SSD?
Here are the main aspects that you should probably notice:
1.
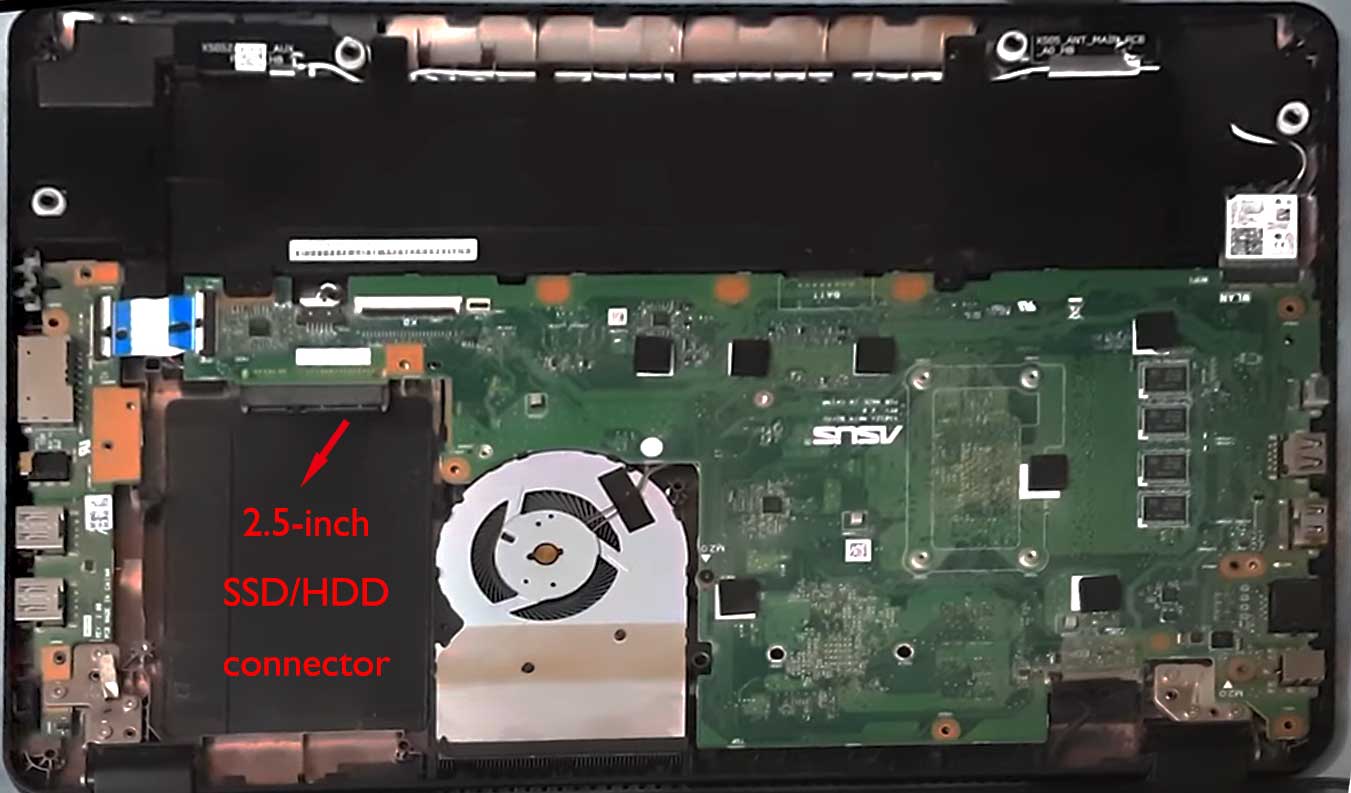
Form Factor:The ASUS PC features a standard 2.5-inch SATA SSD/HDD slot.
Additionally, it supports the addition of an M.2 SATA 2280 SSD.
verify the SSD you choose supports SATA III for optimal performance.
Capacity:The capacity you choose depends on your storage needs.
Consider how much space you currently use and how much space you anticipate needing in the future.
Generally, higher read and write speeds translate to faster system load times and overall responsiveness.
How Can You Perform ASUS X505ZA SSD Upgrade?
How to perform ASUS X505ZA SSD upgrade?
Heres how to use the MiniTool Partition Wizard to transfer system and data:
Method 1.
So, you’re free to try using this feature to achieve your goals.
Heres the way:
Step 1.Use the SSD closure to connect the new SSD to your setup.
Download and install MiniTool Partition Wizard on your gear, and then launch this app on your gear.
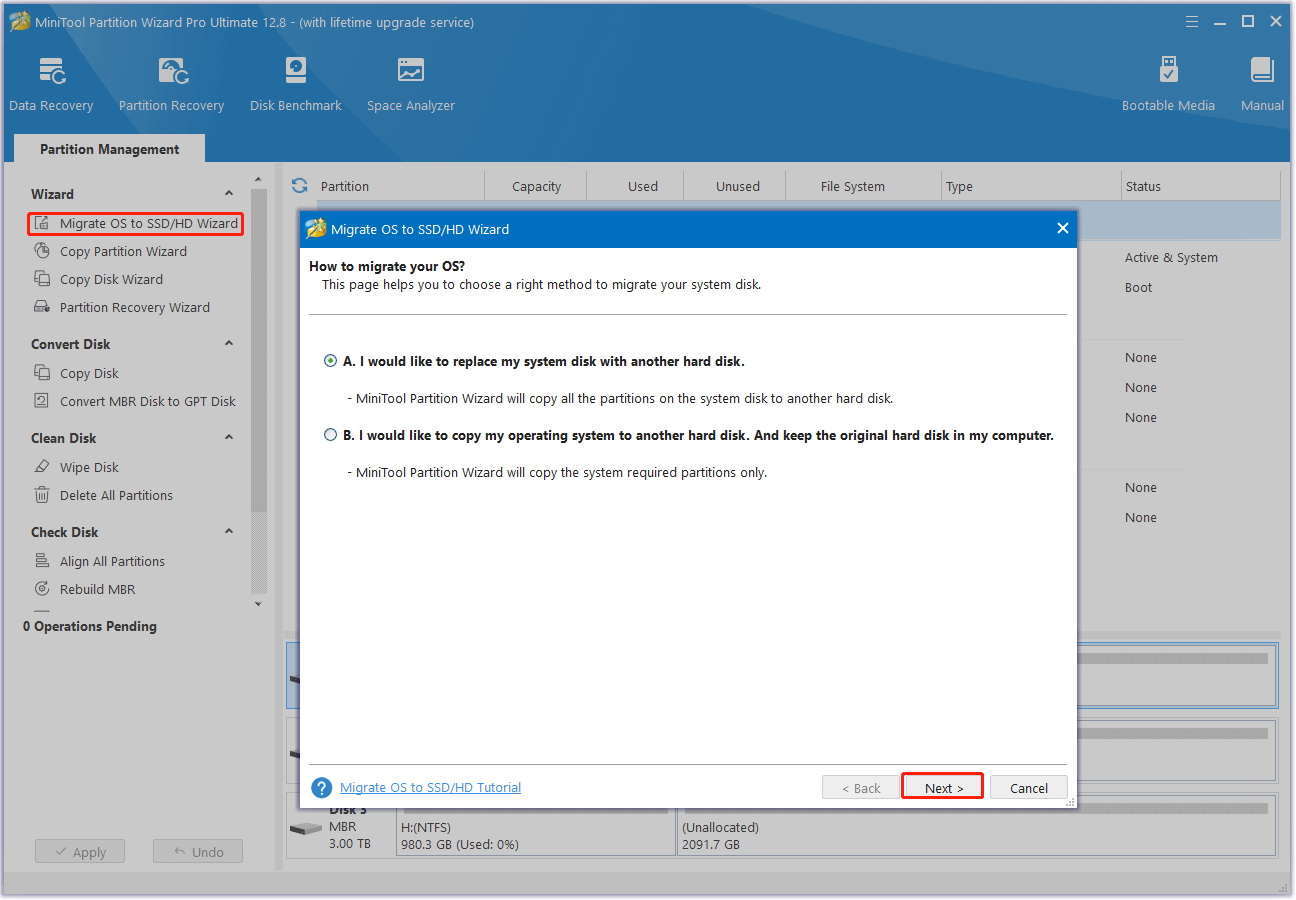
In the pop-up window, choose an option to migrate the OS based on your needs.

In the next window, go for the new SSD and clickNext.
When prompted, clickYesto continue.
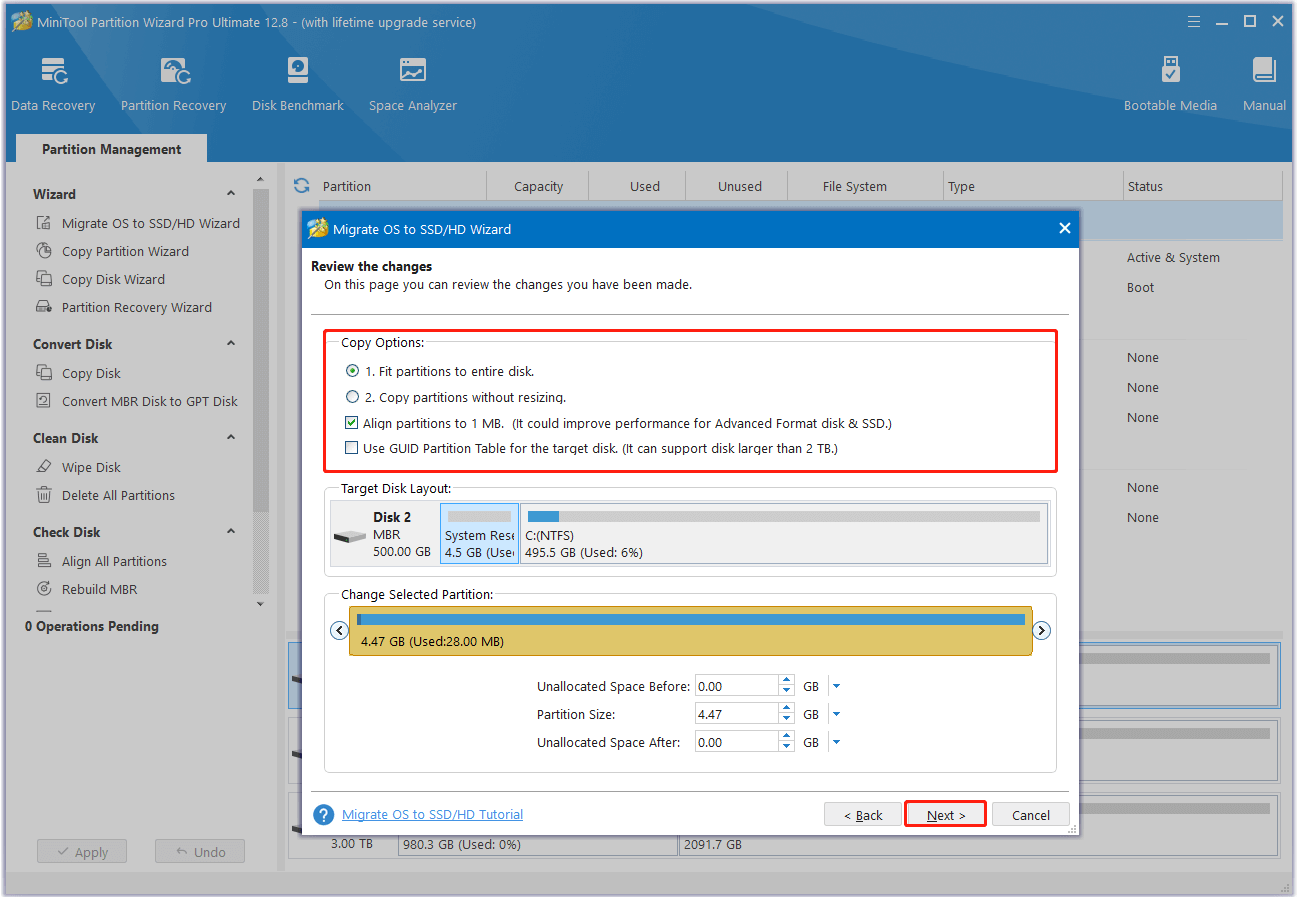
After that, choose the desired copy options and clickNext.
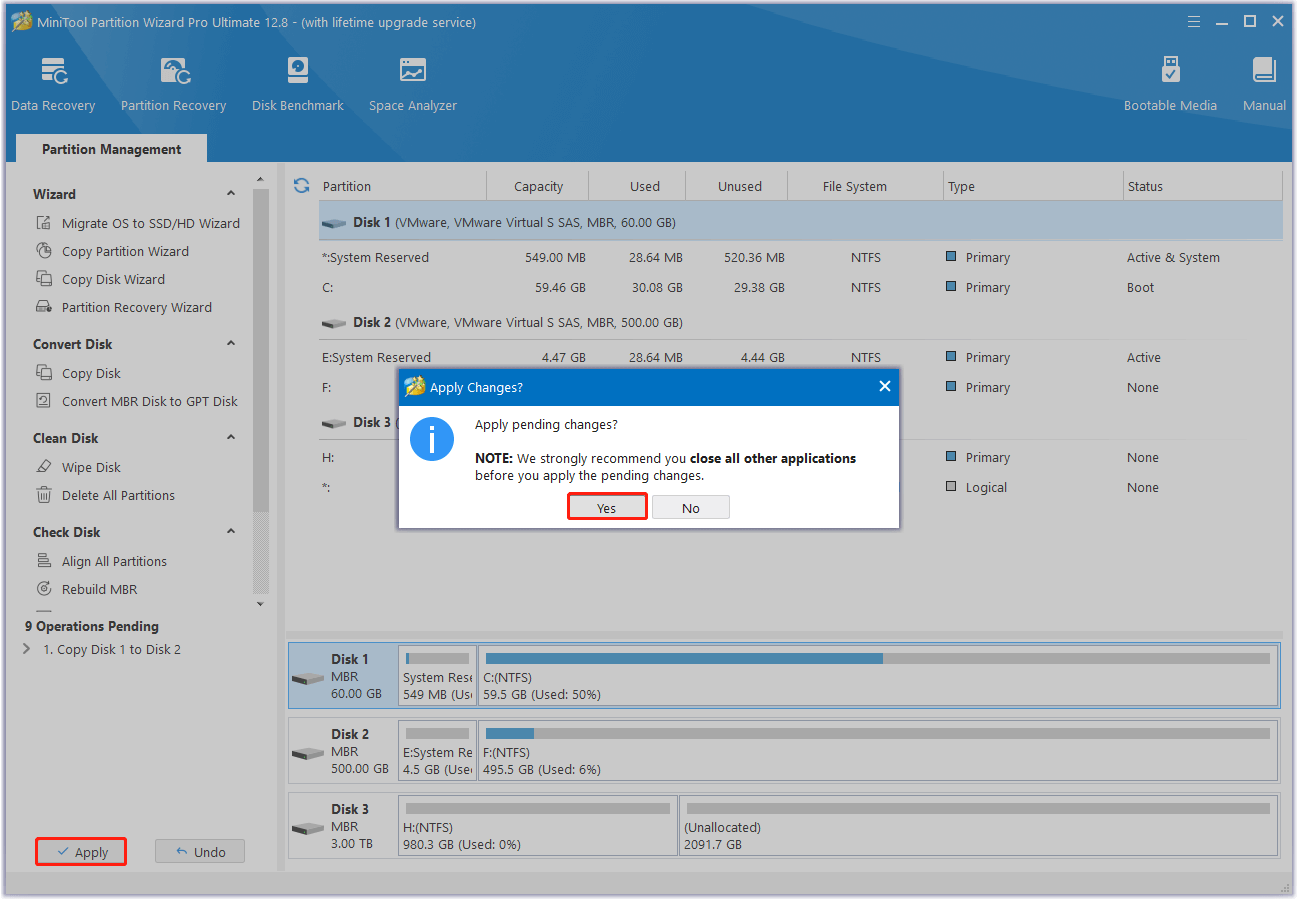
Finally, clickFinishandApplyto save the pending operation.
Use the Copy Disk Feature
TheCopy Diskfeature can help you copy data to a new SSD as well.
If you are interested in this way, you might also have a try.
Heres how to do that:
Step 1.Connect the SSD externally using a compatible enclosure.
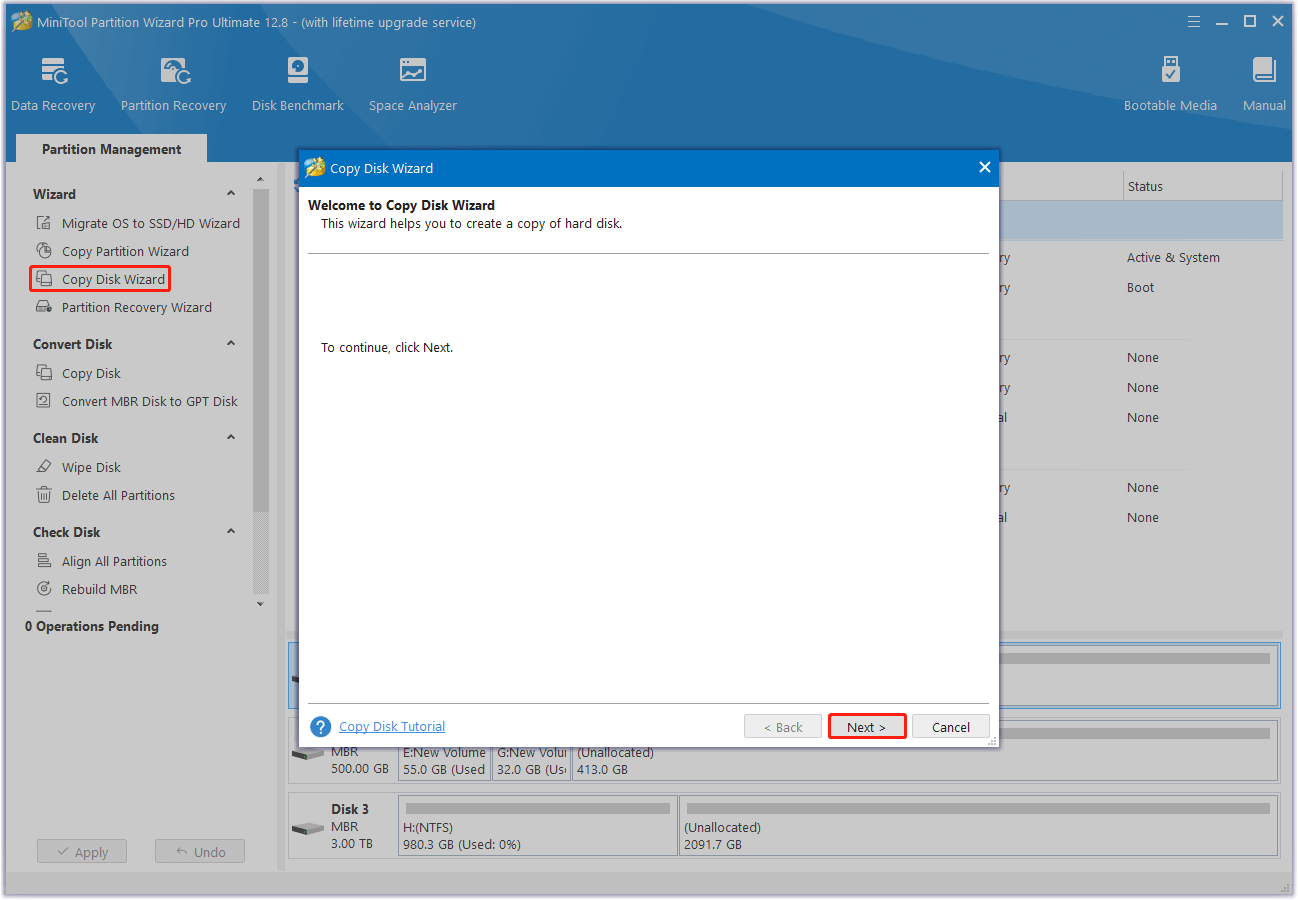
Step 2.Launch MiniTool Partition Wizard to its main interface, and choose theCopy Disk Wizardfeature from the left pane.
Then, clickNextin the pop-up window.
Step 3.In the next window, choose the disk to copy and clickNext.
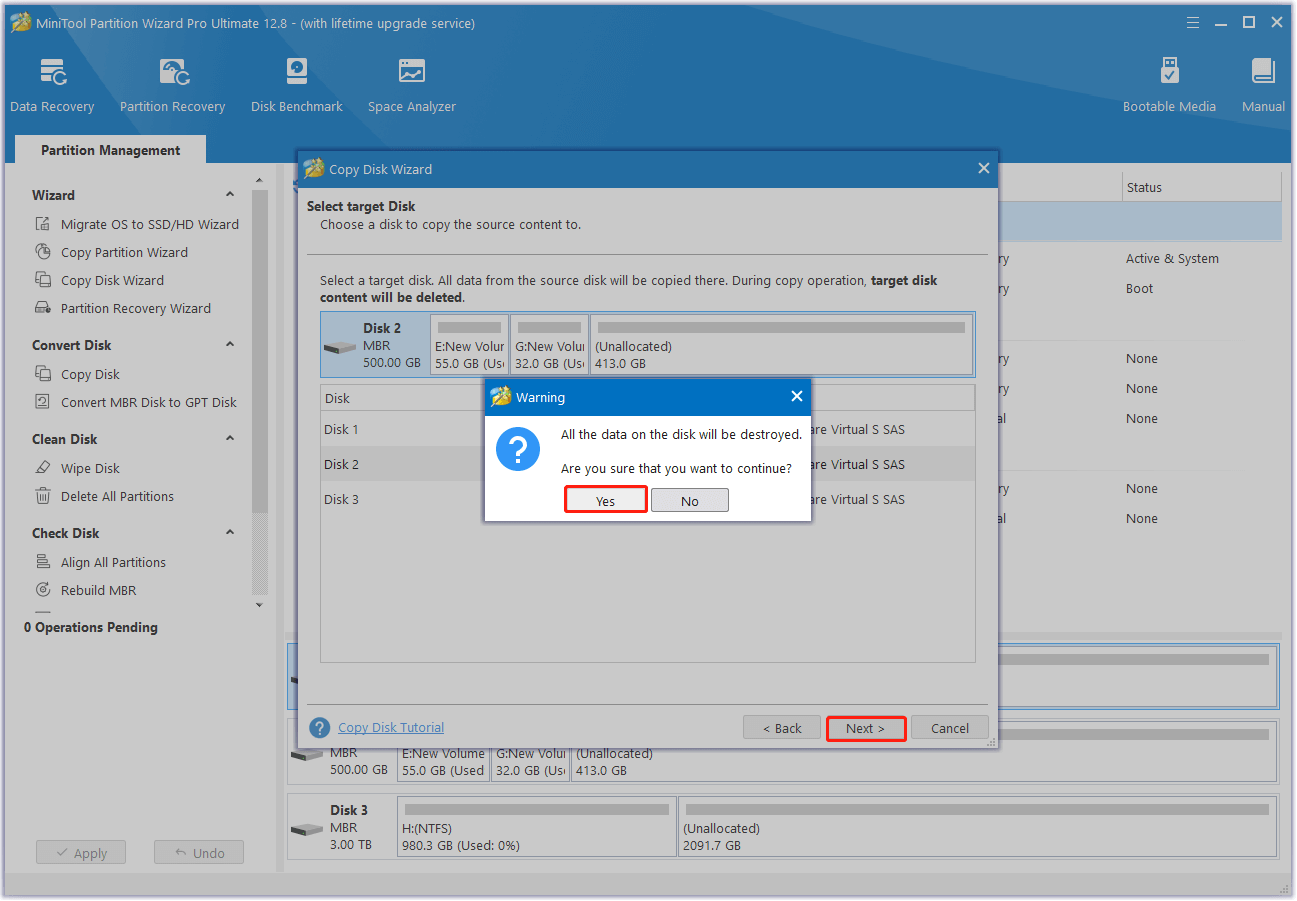
Step 4.Choose the new SSD and pressNext.
In the pop-upWarningwindow, tap theYesbutton.
Step 5.Set the copy options and change the disk layout according to your preferences.
Then, clickNextandFinishto continue.
Step 6.After that, tapApplyandYessequentially to execute the changes.
# 1.
Ensure your laptop is completely powered off and unplugged from the power source.
Step 2.Turn the laptop over so the bottom side faces you.
Step 3.Carefully use a Phillips-head screwdriver to remove all the screws securing the bottom panel.
Step 4.Using a plastic opening tool or a spudger, gently pry launch the bottom panel.
Avoid using excessive force to damage the laptops casing.
Step 5.Disconnect the power cord and connection cable between the touchpad & keyboard and then the motherboard.
Step 7.The hard disk is secured in the rack by 4 screws.
Remove these screws to release the hard disk from the rack.
Step 8.Mount the SSD onto the rack and secure it with screws.
Step 9.After that, reassemble everything in reverse order.
Step 10.Once done, reboot your ASUS X505ZA laptop.
Then, you have successfully upgraded the ASUS X505ZA SSD.
# 2.
Step 3.Find the M.2 SSD slot on the motherboard.
Then, insert the M.2 SSD on the motherboard and fasten it with a screwdriver.
And retrace your steps to reassemble everything.
I want to upgrade my ASUS X505ZA laptop SSD as its running speed became slow after a time using.
Luckily, this post of MiniTool Partition shows a step-by-step guide for that.
