With it, you are able to play your PC games in the Steam library wherever you are.
If you want to store many games on Steam Deck, then you need enough storage.
Do you know how much storage your Steam Deck has?
In this section, we will discuss Steam Deck storage.
According to the official website, Valve offers three different versions of Steam Deck for you to choose from.
The Steam Deck storage capacity, price, and some other features differ from one another.
you’ve got the option to choose the best one according to your own needs.
How Much Steam Deck Storage Do You Need?
It totally depends on what you plan to do with your Steam Deck.
How can you get more storage space?
Does Steam Deck have expandable storage?
Go on with the next part and you may find what you want to know.
Its possible for you to run out of the Steam Deck storage quickly if you install several space-consuming games.
When that happens, a question may come out to your mind.
That is: Does Steam Deck have expandable storage?
Fortunately, the answer is Yes.
All in all, the Steam Deck expandable storage is supported no matter which version you own.
[Solved] Get Stuck in Steam software Load Error 3:0000065432?
To do this, it’s possible for you to try the following three methods.
To execute the operation successfully, you gotta format the microSD card to EXT4.
Herere two effective ways for you to finish the formatting process.
Its a comprehensive partition managing program that enables you to perform various operations on your disks and partitions.
For example, you could create/format/delete partitions, check disk health,migrate OS to SSD/HDD, etc.
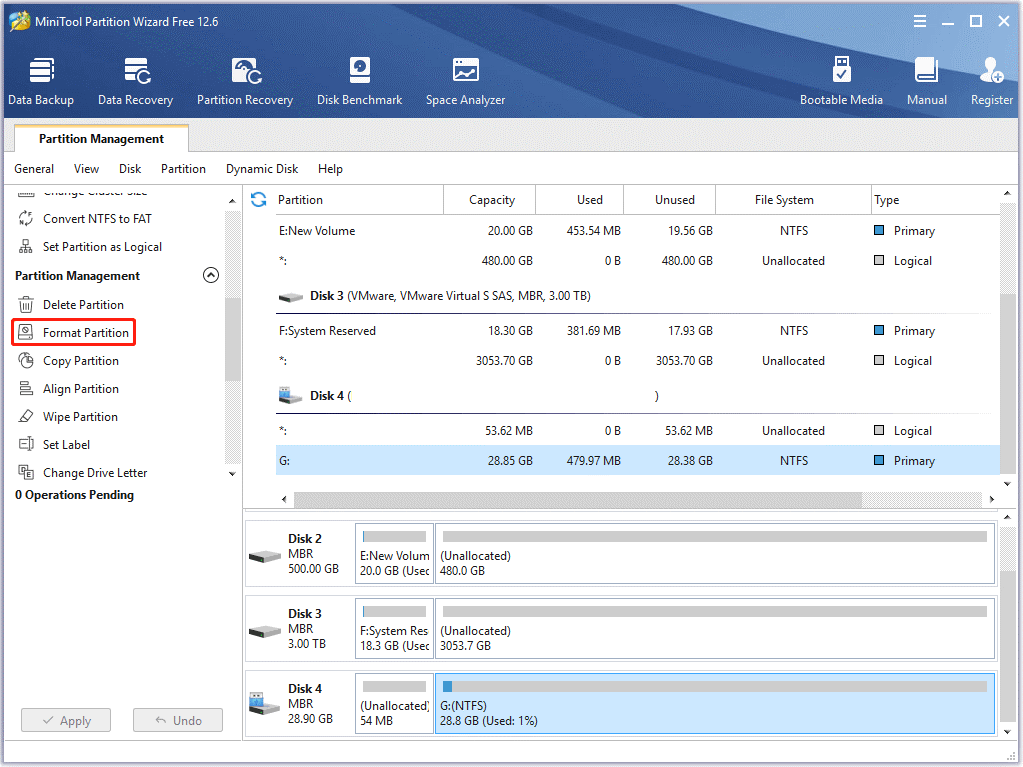
To format the microSD card using MiniTool Partition Wizard, follow the steps below.
Note:The format will delete all the data saved in the SD card.
So, you shouldmake a backupin advance to avoid data loss.
Step 1: Connect the SD card to your system via a card reader.
Step 2: Download and installMiniTool Partition Wizardon your PC.
Then launch this app to enter its main interface.
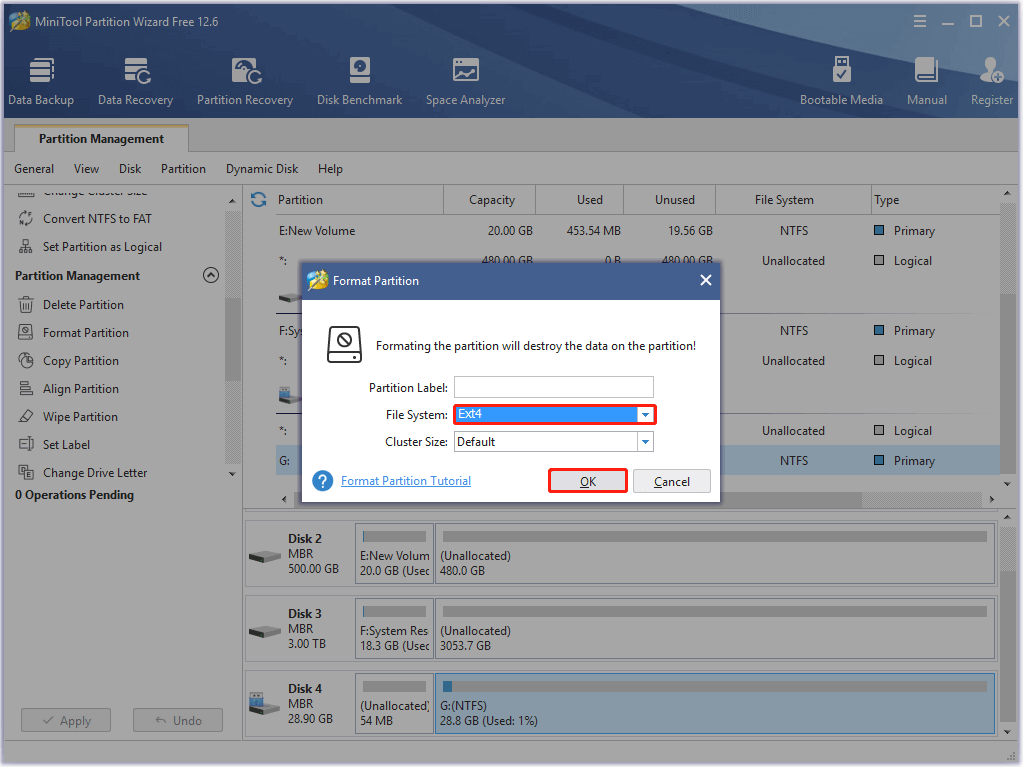
Step 4: In the pop-up window, selectExt4as the file system and clickOK.
Step 5: After that, clickApplyto carry out the operation.
Step 1: Insert the microSD card you prepare into the microSD card slot.
It is on the bottom edge of your Steam Deck.
Step 2: Press theSTEAMbutton to pop launch the main menu.
Step 3: After that, go toSettings>System.
Step 4: Scroll down to findFormat SD Cardfrom the right panel.
Step 5: HitConfirmwhen you see theConfirm Format SD Cardwindow pops up.
Then Steam Deck will begin testing your SD card and formatting it.
Note:If the SD card doesnt pass the test, just try inserting it once more.
Additionally, you’re free to also try restarting your Steam Deck to see if it works.
If both fail, then use another different SD card.
Step 6: Wait patiently until the process is completed.
However, this way is a little more complicated.
For instance, you have to enter desktop mode every time you connect the USB drive.
Charging your Steam Deck is not allowed while using an external hard drive.
In addition, the battery will drain faster.
Here is a complete guide for adding your Steam Deck removable storage with a USB flash drive.
Note:This way requires you to connect a keyboard and mouse to your Steam Deck.
Step 1:Delete all the partitionson the USB flash drive.
Then connect the drive to your Steam Deck.
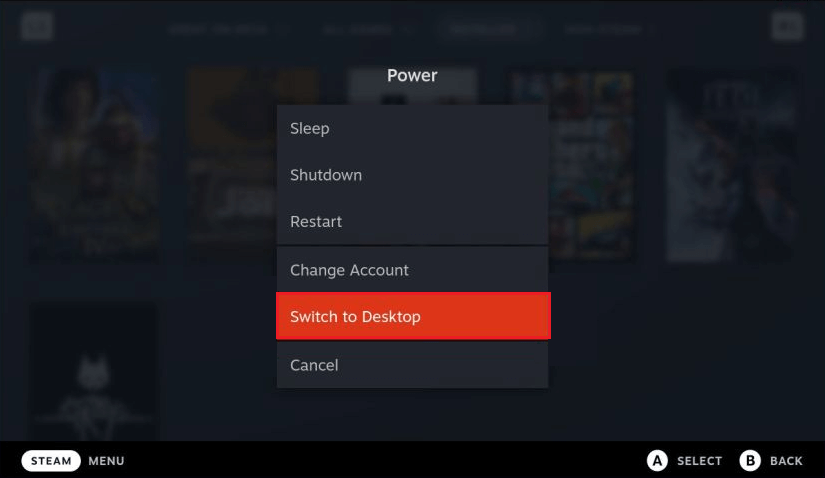
Step 3: Navigate toSystem>Konsole.
Then typepasswordin the terminal and you will be asked to set a password.
Tip:If you have entered theDesktopmode and set a password before, just skip to the next step.
Step 4: Go back toSystemand selectKDE Partition Manager.
Then key in your password to get into this partition manager.
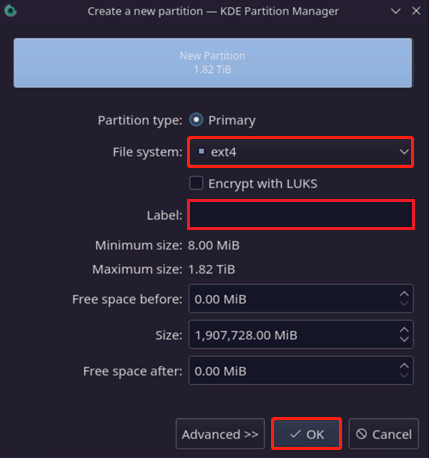
Step 5: Right-pick the target USB drive and selectNew.
Step 7: ClickApplyat the top-left corner to execute the pending operations.
Once done, you will see the drive in your taskbar.
Step 8: Go toKonsoleagain and typesudo chown deck /run/media/deck/[drive label].
This command will change the ownership of the USB drive fromroottodeck, allowing SteamOS to access it.
Step 9: Open Steam.
Then clickSteamat the top-left corner and selectSettings.
Step 10: Go to theDownloadstab and clickSTEAM LIBRARY FOLDERS.
However, it is a complex method and can cause some unexpected issues.
So, you have to be very careful if you decide to perform a Steam Deck storage upgrade.
Step 1: Remove the eight screws from the back of your Steam Deck.
Step 2: Pry at the top middle of the case with a plastic tool.
Be careful and do not damage the circuit board or any ribbon cables.
Step 3: Once the top separates, start prying at each side.
Then remove the battery gently.
Step 5: Remove the SSD screw and remove the SSD you are using currently.
Step 6: Move the metal shield from the old SSD to the new one.
Then place the new SSD in the socket and screw it down.
Now you should reassemble your Steam Deck.
Step 8: Connect the bootable USB drive to your Steam Deck.
Then shut down the Steam Deck.
Press and hold theVolume Downbutton and click thePowerbutton until you hear a chime.
This will make you enterBoot Manager.
Step 9: After you enterBoot Manager, selectEFI USB gadget.
Step 10: Wait for about one minute and you will boot intoRecovery Environment.
Just selectRe-image Steam Deck.
Is Steam Deck storage not enough?
Are you looking for ways to add your Steam Deck storage?
Do you know how to install Windows 10/11 on the Steam Deck?
