To solve this issue, some effective methods are listed in this post.
Simply follow them to sort out your problem if you face the same issue.
Besides, you canrun a specified scanto verify if there is a virus preventing Windows from assigning drive letters.
just dont worry if you dont know how to format a hard drive on Windows 11.
This page shows you some effective disk formatting methods.
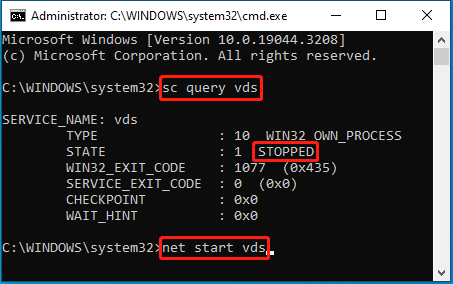
Therefore, once you run into this issue, youd better peek if the Virtual Disk service is enabled.
If not, follow the guide below to start it.
Tip:If the service has been started, you could try right-clicking it and selectRestartto re-enable it.
This may sometimes help solve problems.
Step 1: PressWindows+Rto open theRundialog.
Step 2: Typeservices.mscin the text box and then clickOKto enter theServiceswindow.
Step 3: Scroll down to findVirtual Diskin the right panel.
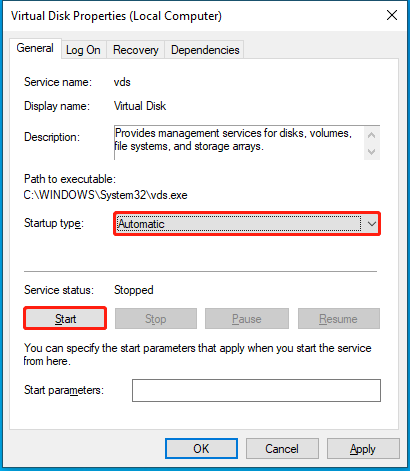
Then right-click this service and selectProperties.
Step 4: In the next window, setStartup typeasAutomatic.
Then click theStartbutton to run this service.
Step 5: At last, clickApplyandOKto save the changes.
Heres a full guide on how to do this.
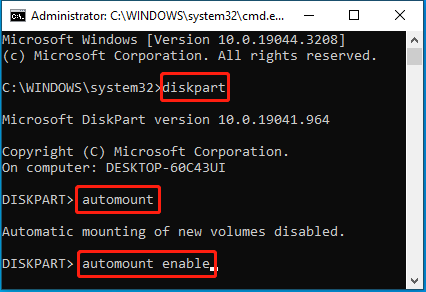
Step 1: RunCommand Promptas an administrator.
Step 2: Typediskpartand pressEnterto fire up the Diskpart utility.
Step 3: After that, typeautomountand pressEnterto check the status of the automount feature.
To do this, follow the steps below.
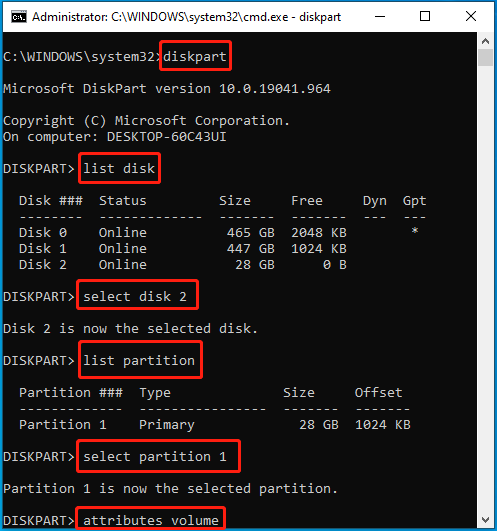
Step 1: see to it the problematic storage rig is connected to your rig.
Then runCommand Promptas an administrator.
Step 2: In the elevatedCommand Promptwindow, typediskpartand pressEnter.
Step 4: If theHiddenandNo Default Drive Letterattributes showYes, you should execute the following commands to disable them.
In this part, this post summarizes several ways that can help you complete the drive letter assignment.
Just pick one according to your preference.

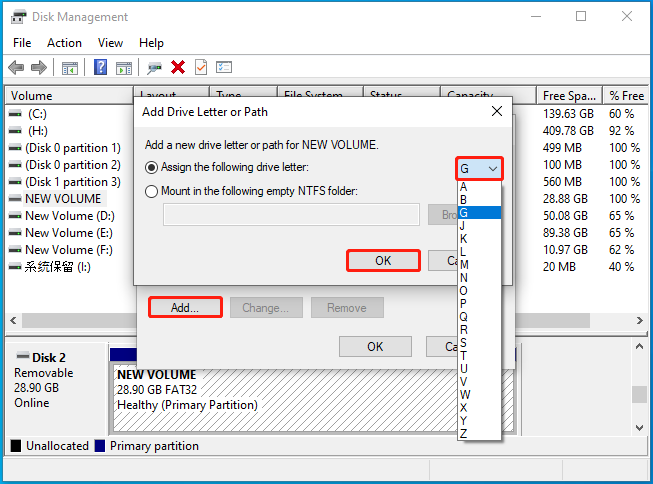
Step 1: Right-click theStarticon and selectDisk Management.
Step 2: Right-smack the partition on the connected disk.
Then selectChange Drive Letter and Paths.
Step 3: In the pop-up window, click theAddbutton to continue.
Step 4: SelectAssign the following drive letterand then choose a suitable drive letter from the drop-down menu.
Step 5: After that, clickOKto save the change.
The following are details about this operation.
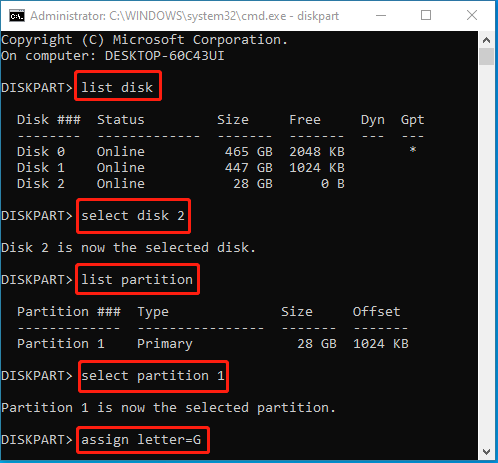
Step 1: Open theRundialog.
Then typediskpartin the text box and pressEnterto run Diskpart.
Step 2: To assign a drive letter, you should initiate the following commands one by one.
In such cases, its recommended that you take advantage of third-party disk partition software.
As for this, MiniTool Partition Wizard is a great choice.
Its a professional partition manager that provides a wide range of features related to partitions and disks.
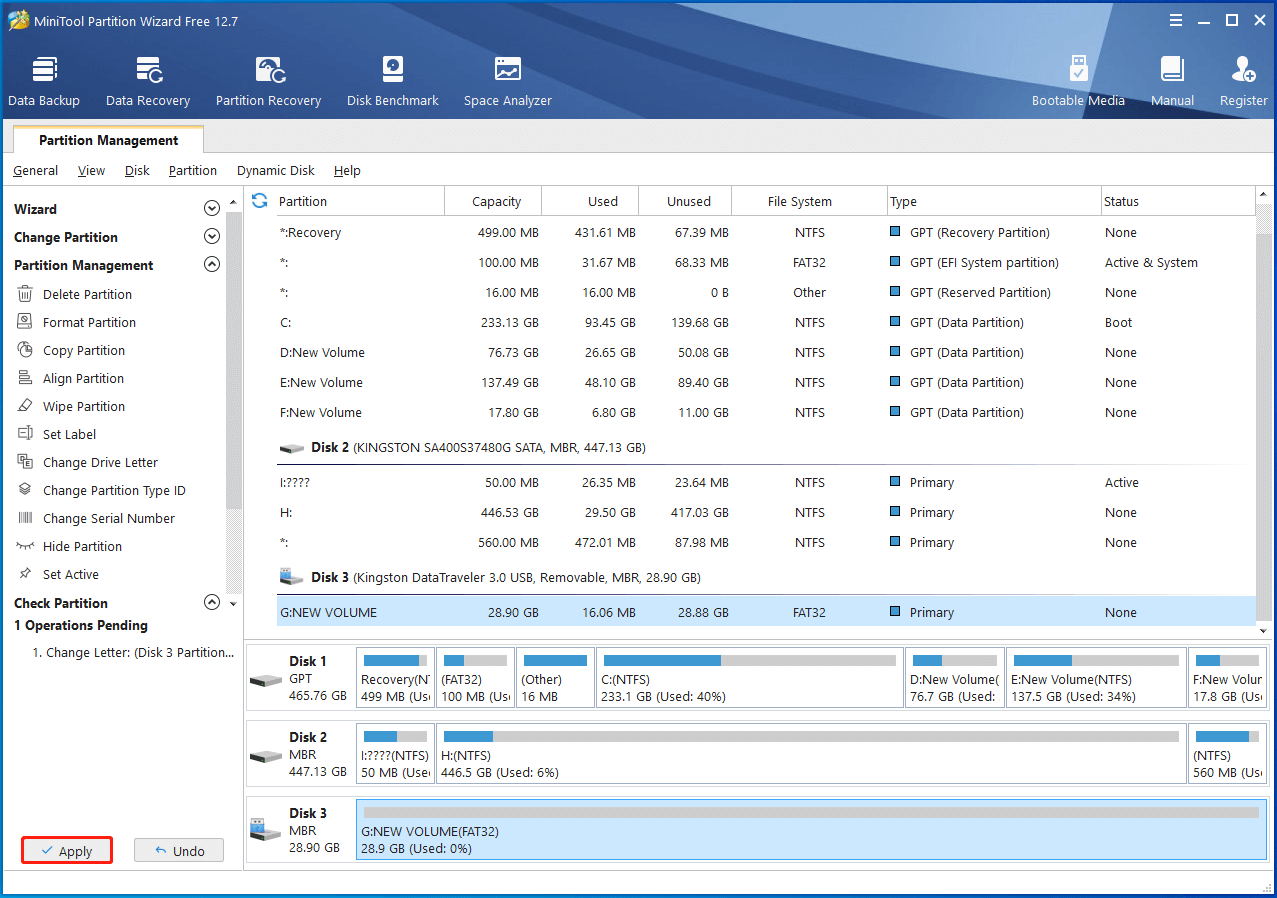
Here, MiniTool Partition Wizard introduces how to assign a drive letter step by step.
you could have a try.
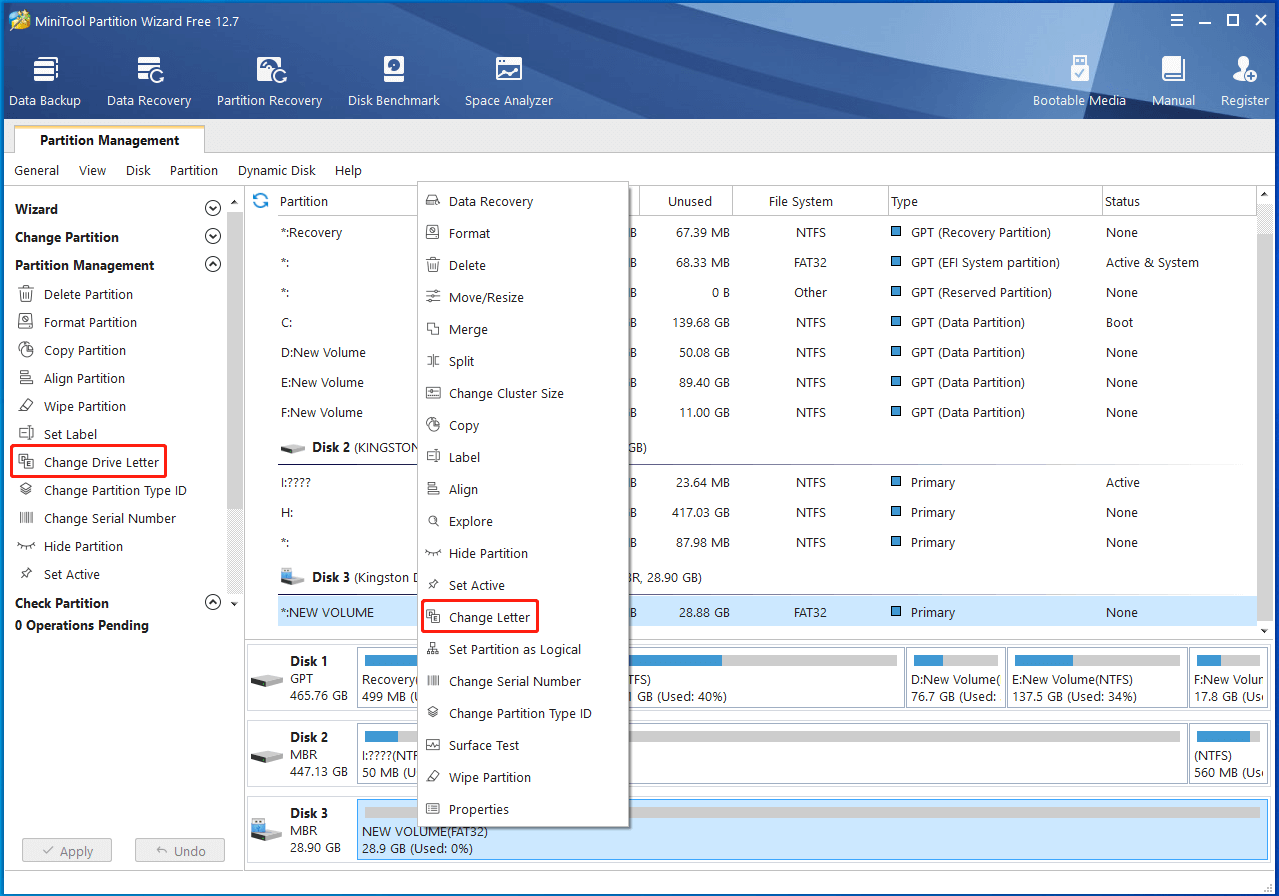
Step 1: Download and install this program on your PC.
Then launch it to get into the main interface.
Alternatively, you’re able to highlight the target partition and selectChange Drive Letterfrom the left action panel.
Step 3: Select a preferred drive letter and then clickOK.
Step 4: Finally, clickApplyto execute this operation.
Click to Tweet: What to do when the Windows not assigning drive letter issue comes out?
If you have no clue, Id like to share this post with you.
Well reply to you as soon as possible.
