Want to improve the performance of your Surface Pro 4 computer?
If so, you could do a Surface Pro 4 hard drive upgrade.
About Surface Pro 4
Surface Pro 4 is a high-performance 2-in-1 tablet released by Microsoft in 2015.

It combines the portability of a tablet with the functionality of a laptop.
However, over time, the computer can store fewer files and the computers response speed also decreases.
Obviously, performing a Surface Pro 4 SSD upgrade is a good choice.
Here is a way to upgrade hard drive in Surface Pro 4 without reinstalling the system.
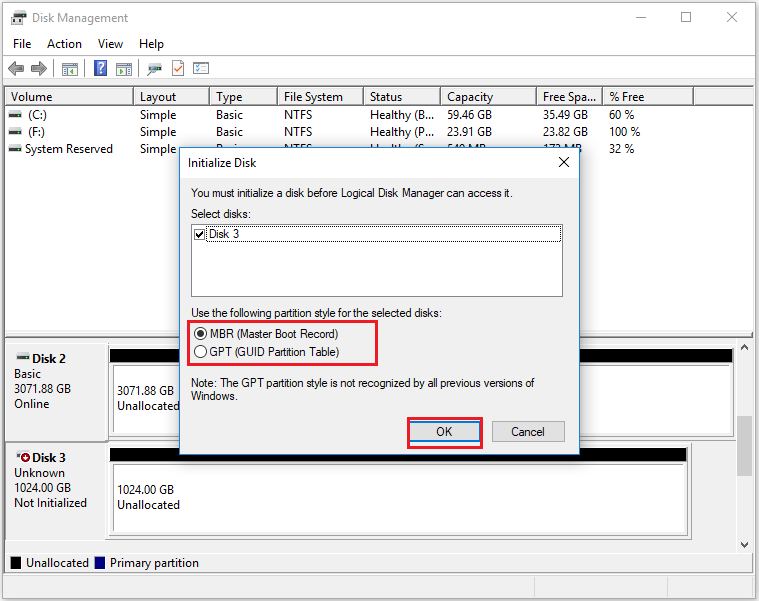
Therefore, the operating system cannot use it directly to store data.
The initialization process ensures that the SSD is properly identified and prepared for data storage.
Step 2: Right-tap the new SSD and selectInitialize Disk.
Well, in this section, I will demonstrate two methods for cloning data to a new SSD.
it’s possible for you to choose the method that best suits your situation.
MiniTool Partition Wizard DemoClick to Download100%Clean & Safe
#1.
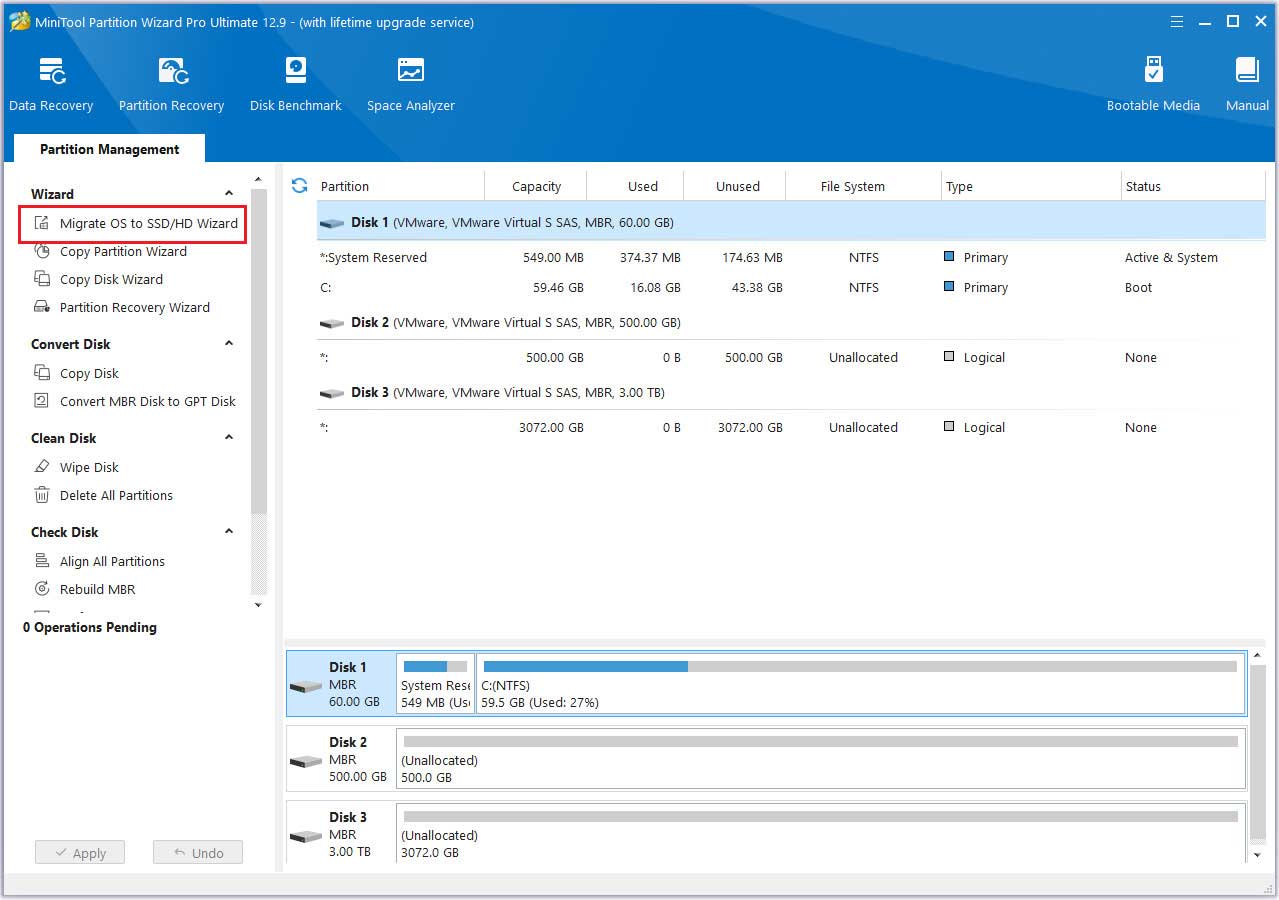
MiniTool Partition WizardsMigrate OS to SSD/HDfeature can help you do it.
This migration method also saves time.
select theMigrate OS to SSD/HD Wizardfeature from the left action panel.
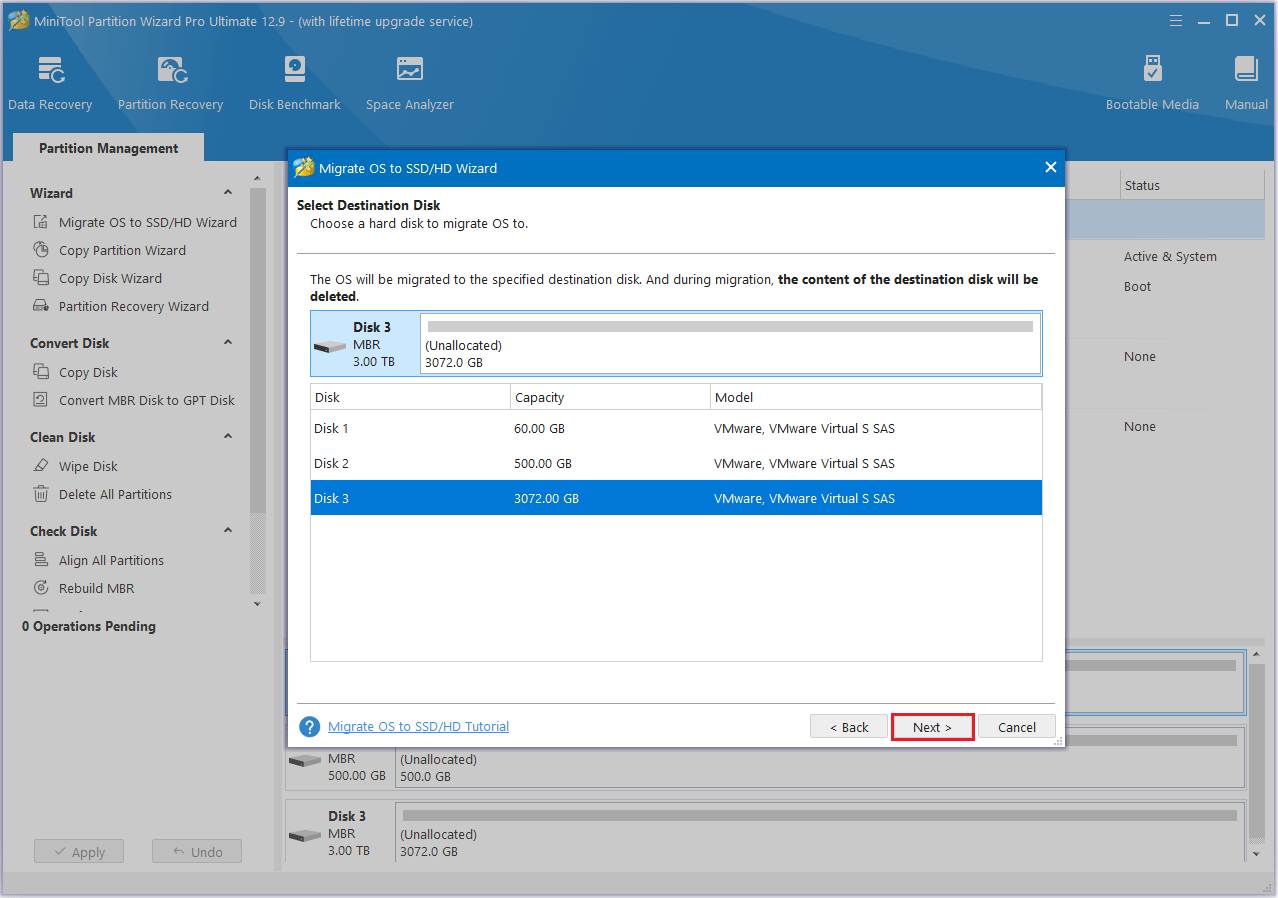
Step 3: Choose the new SSD as the destination disk, then clickNext.
A warning message will appear, read it and clickYesto proceed.
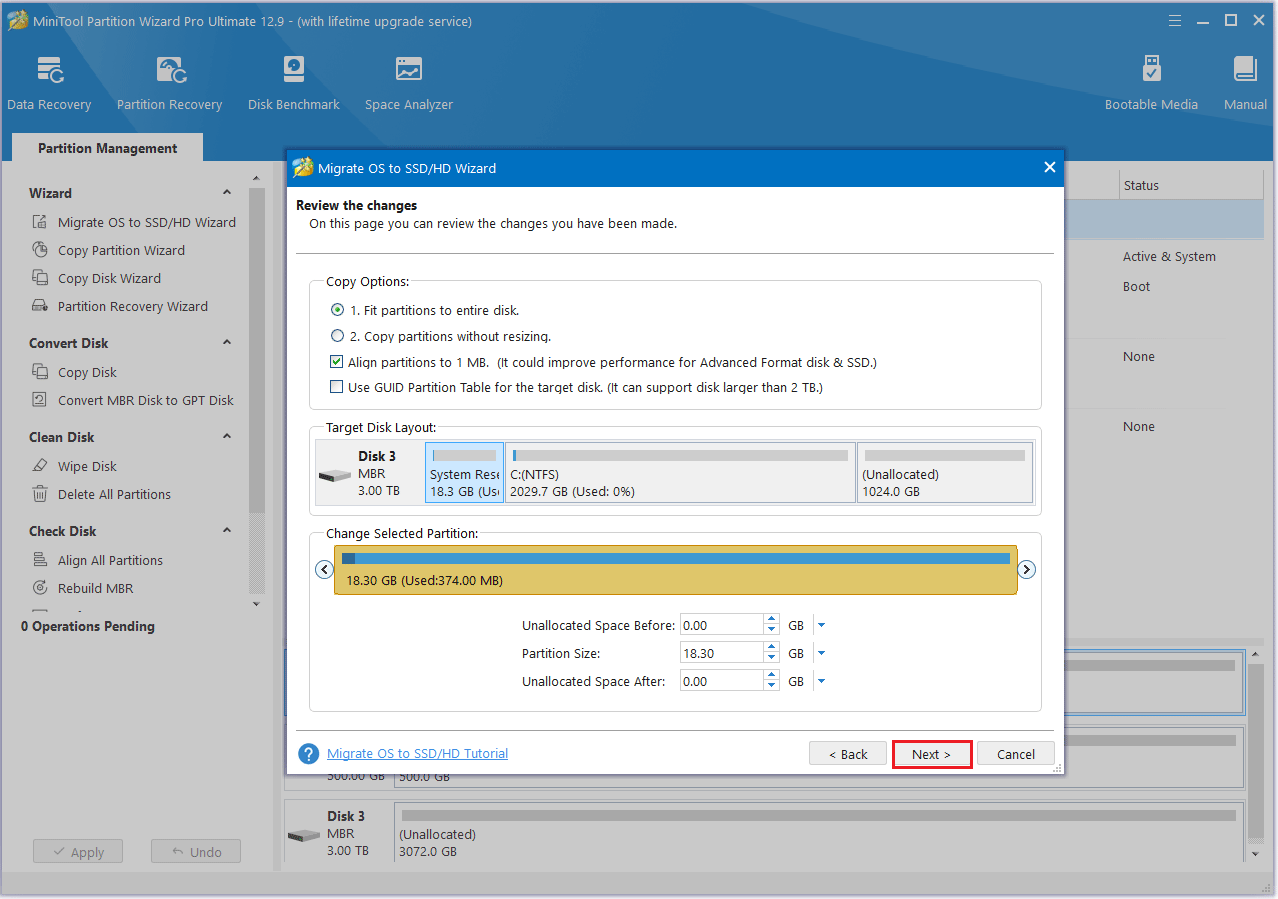
Step 4: Modify the disk layout in theReview the Changeswindow and then clickNext.
Step 5: Read the NOTE information and then clickFinish.
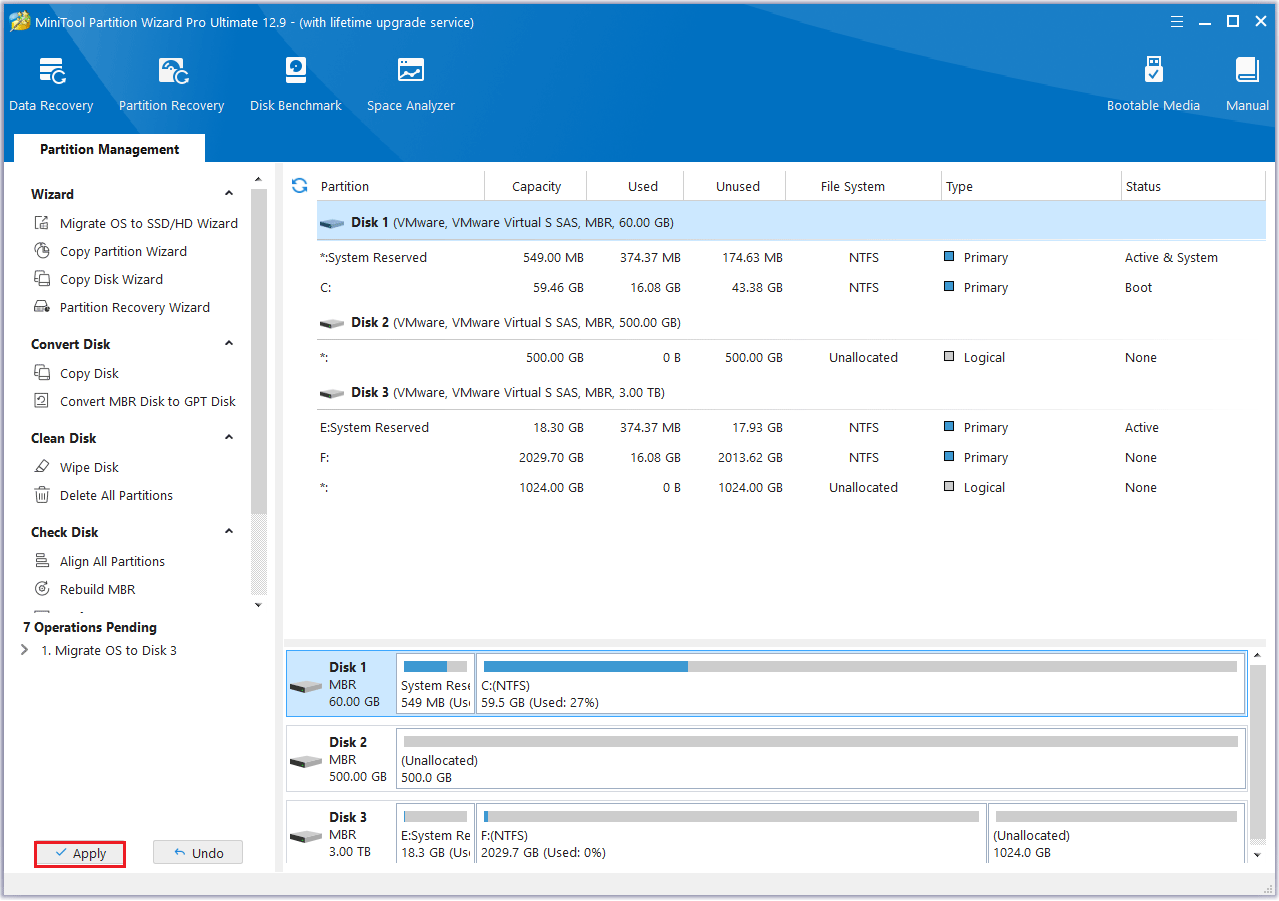
Step 6: Then, click theApplybutton to execute the pending operation.

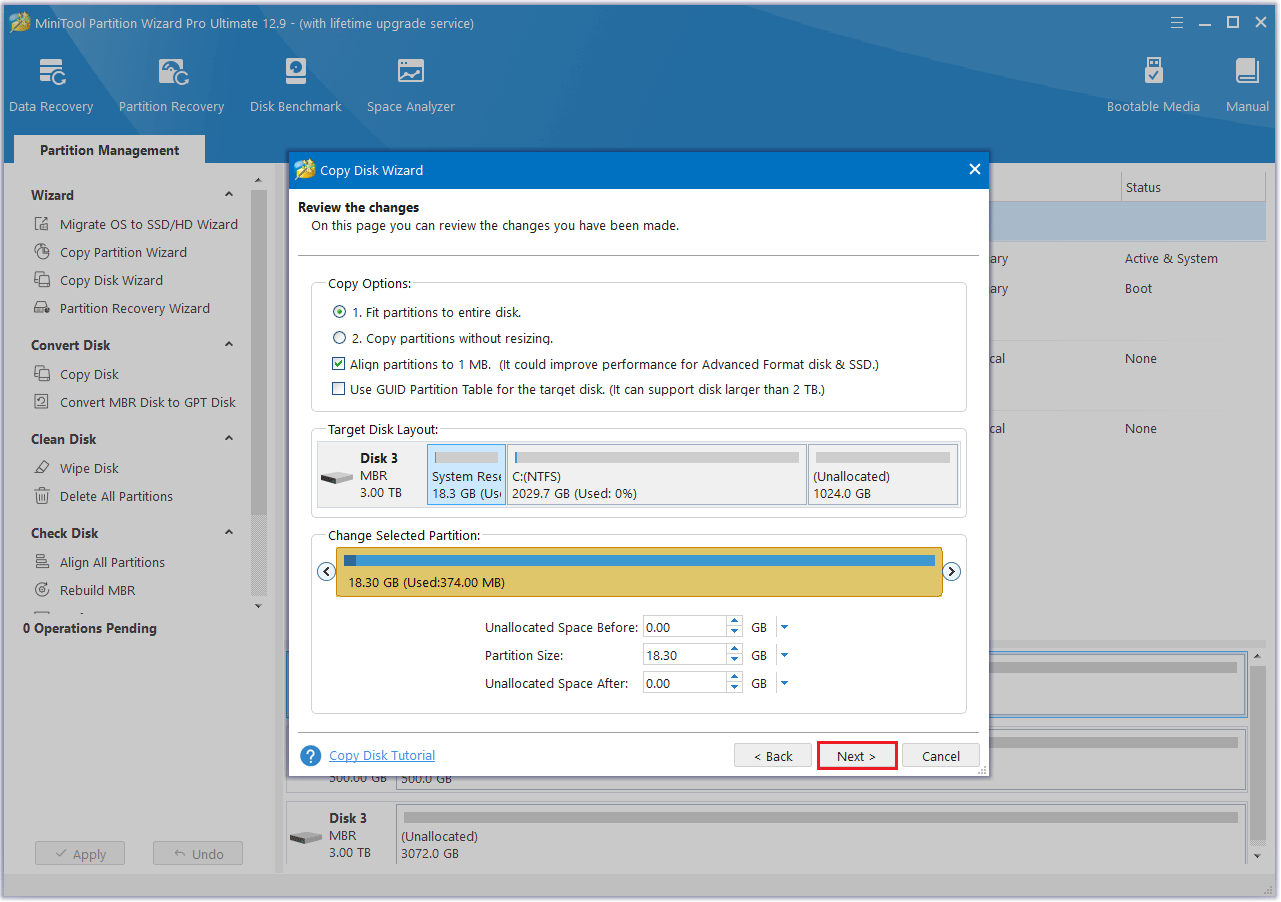
Use Copy Disk Feature
Step 1: Connect the SSD to your machine via a USB adapter.
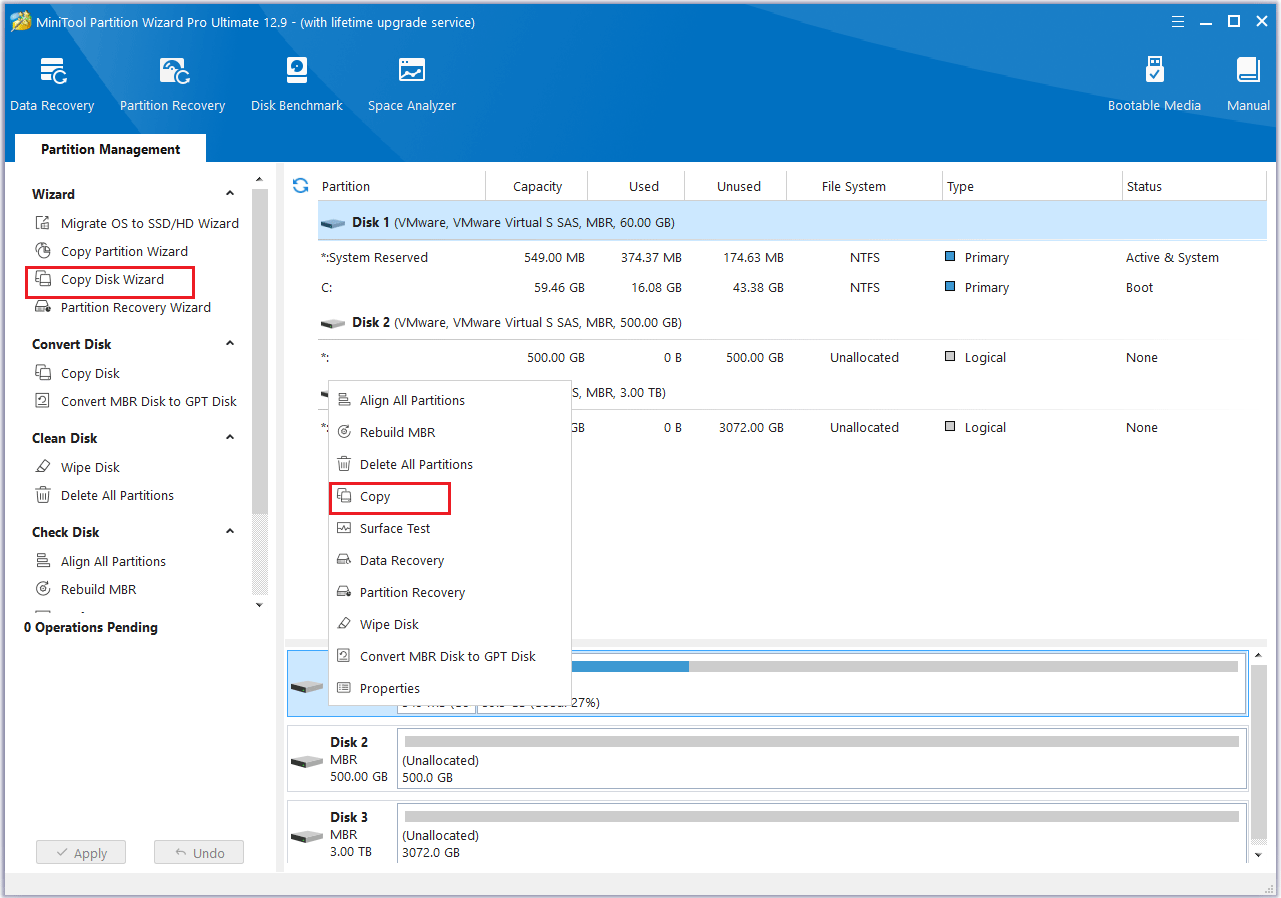
Step 2: Launch MiniTool Partition Wizard to its interface.
Right-smack the disk and then selectCopyfrom the menu.
Also, it’s possible for you to click theCopy Diskfeature from the left action panel.
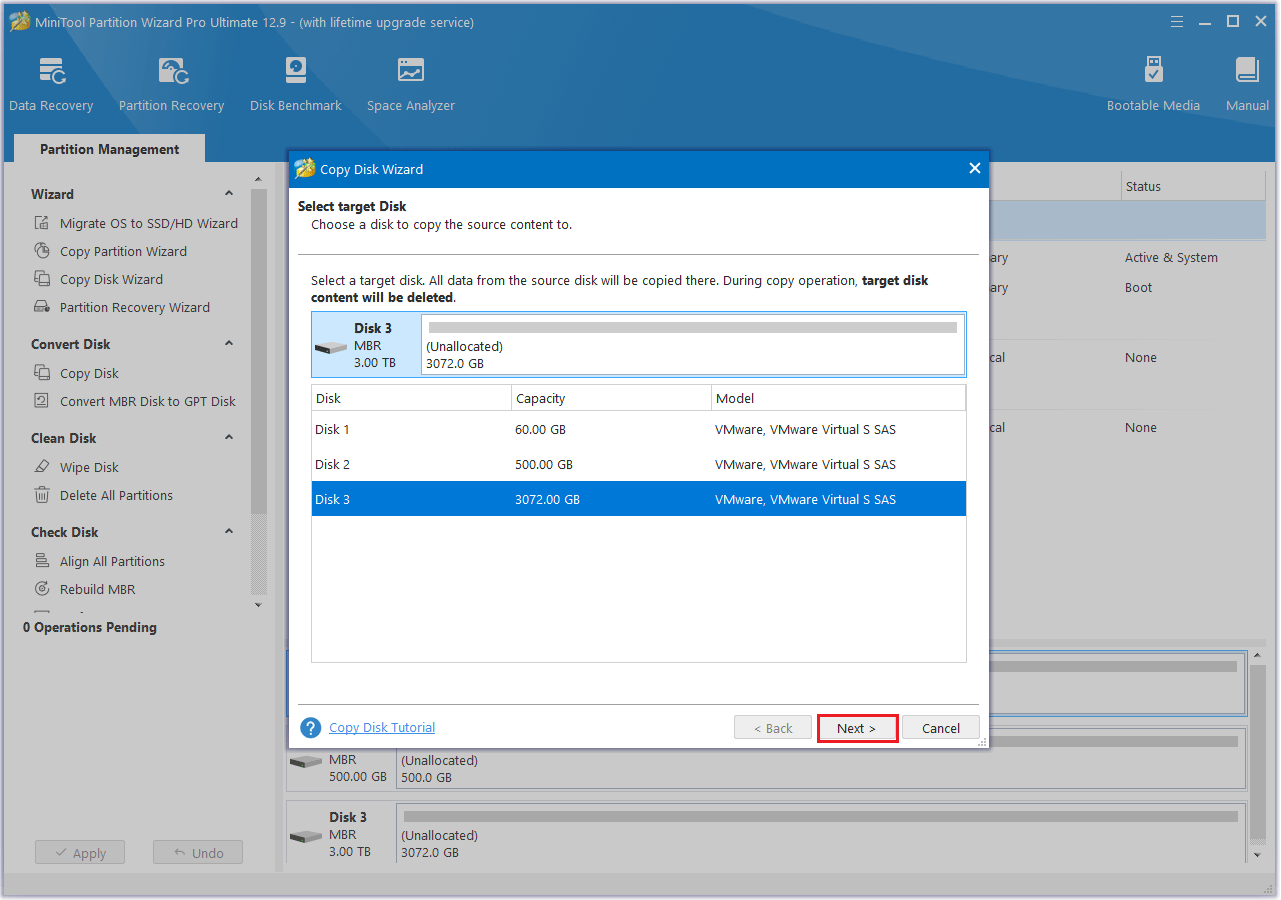
Step 3: On the pop-up window, select new SSD as the target disk and then clickNext.
ClickOKwhen it asks you whether you are sure to continue.
Note that all data on the target disk will be destroyed.
Step 4: Review the chosenCopy OptionsandTarget Disk Layout.
If everything looks correct, clickNext.
Step 6: Click theApplybutton to initiate the pending operation and wait for the cloning process to finish.
you might refer to the steps below.
Step 1: Disconnect the power cable of the Surface Pro 4 and turn off your gear.
Step 5: set up the new SSD and then secure it.
What to Do with the Replaced Surface Pro 4 SSD?
What to do with the replaced Surface Pro 4 SSD?

Before donating or selling it, it’s crucial that you wipe the data on it.
How to do it?
It still needs the help of third-party tools MiniTool Partition Wizard to complete it.

Step 2: Select one of the five wiping methods shown in the pop-up window and clickOK.
The longer the process takes, the greater the level of security it provides.
Step 3: ClickApplyto initiate the operation.
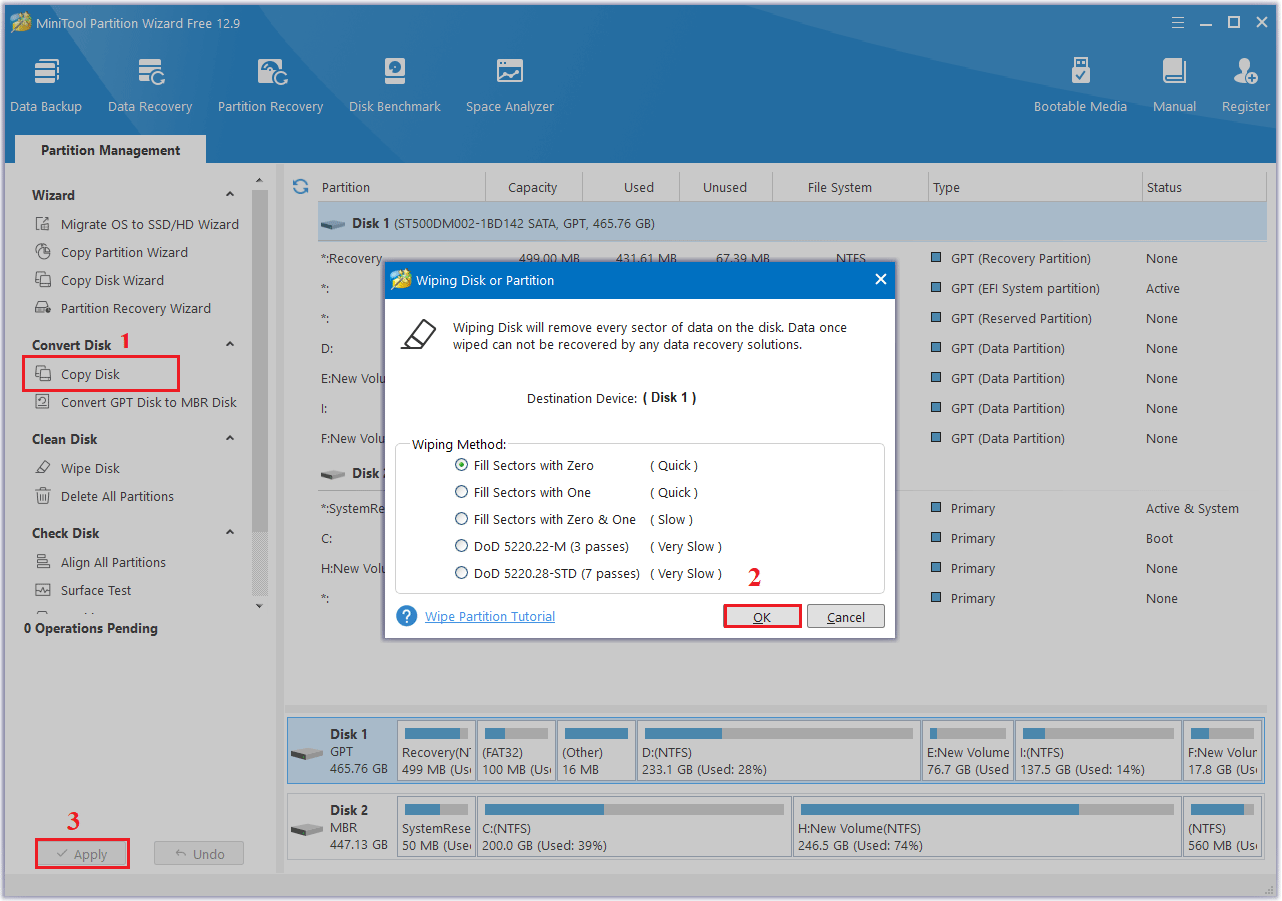
The wiping process will begin automatically, and all you better do is wait patiently for it to complete.
Looking to replace the SSD in your Surface Pro 4 laptop?
If so, this guide can help you upgrade SSD in Surface Pro 4.
It is worth reading.
If so, this article is worth checking out.
