We take screenshots for many things.
They are a great way to store information, share data, and guide others.
Like Android, there isnt any built-in feature for taking scrolling screenshots.
How to Take Scrolling Screenshots in Desktop Apps?
With so many options available in the market, choosing the best one can seem daunting.
Here are they:
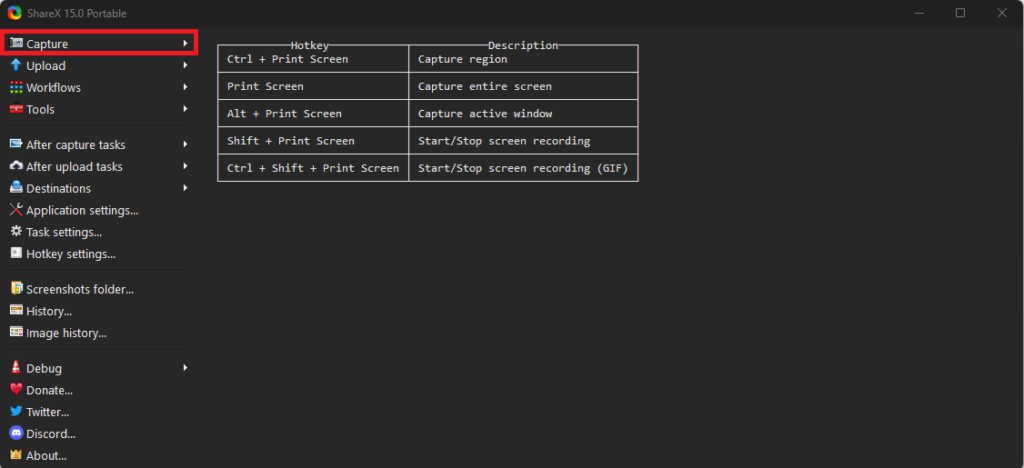
ShareX is a free and open-source scrolling screenshot-taking tool for Windows 11. you could download the ShareX from itsofficial website.
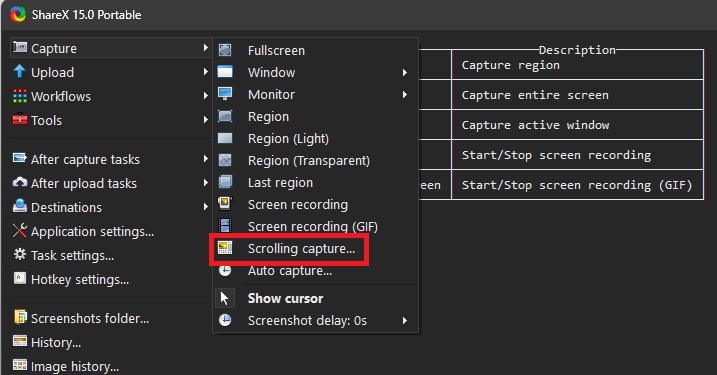
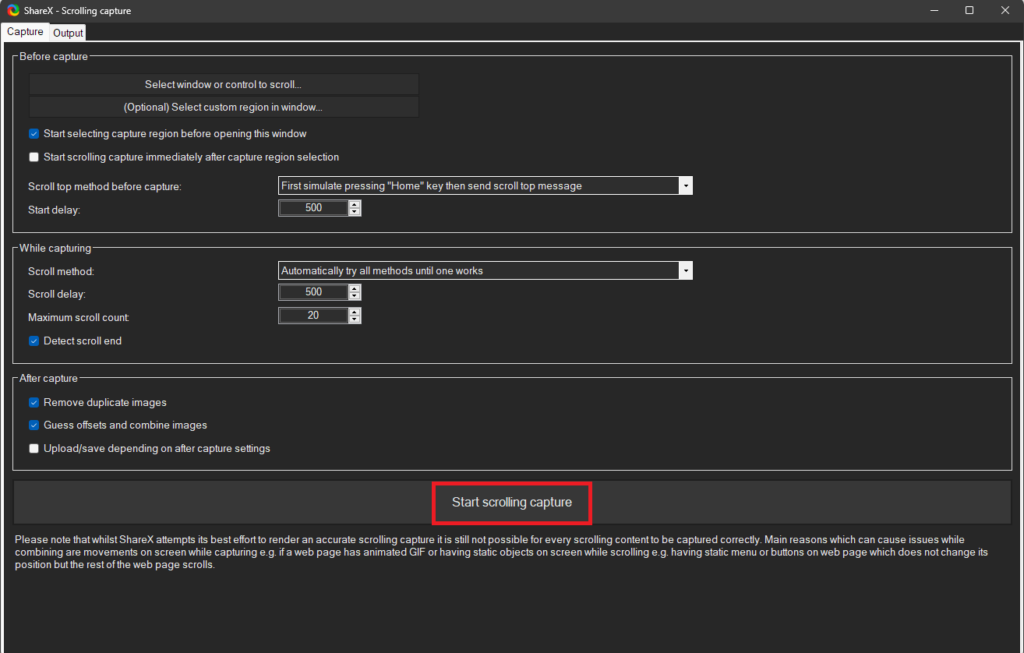
2.Select theScrolling capture…option.
3.Choose the area for which you want to take the scrolling screenshot.
For selecting an area, the app will automatically suggest a suitable screen space as you move the cursor.
4.Click theStart scrolling captureoption, and the app will automatically scroll your windows and take the screenshot.
6.Once you make all the changes, save the screenshot.
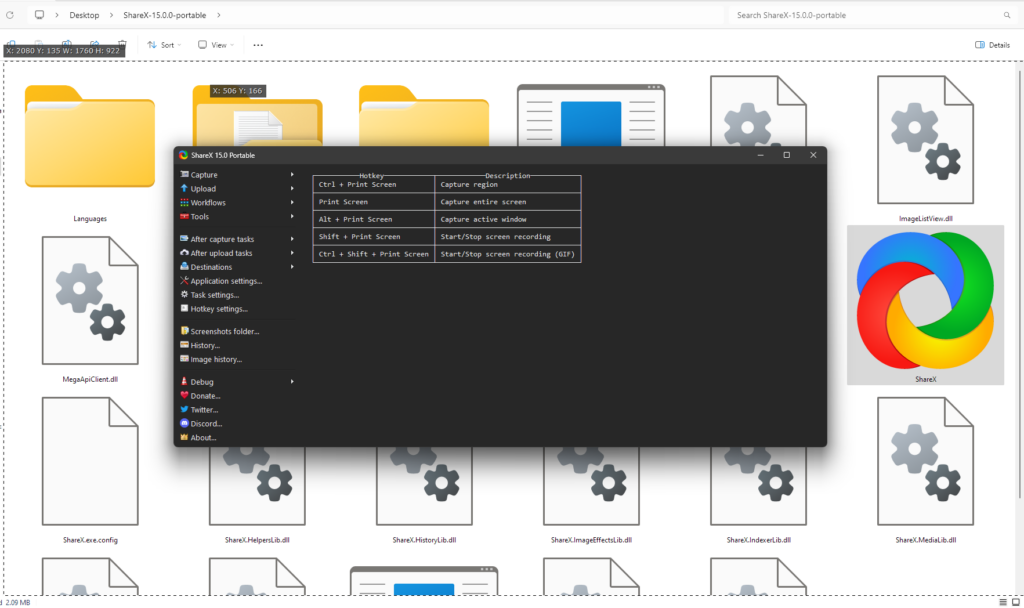
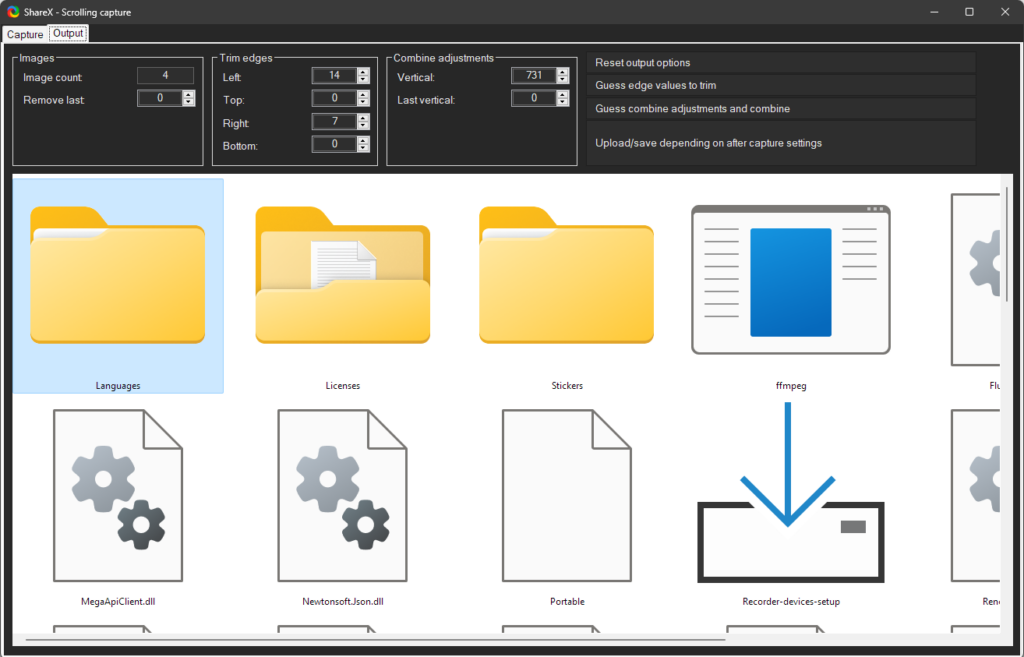
you’re able to enter the captured scrolling screenshot from theShareX>Screenshotslocation in the ShareX apps folder.
PicPick is a freemium screenshot and image editing tool for Windows 11.
Like ShareX, this also boasts a wide range of features and multiple options for taking scrolling screenshots.
Talking about the utility, PicPick has a more user-friendly interface when compared with the ShareX app.
you’re free to download the installer for PicPick from itsofficial website.
After installing PicPick, do these things to take a scrolling screenshot in Windows 11:
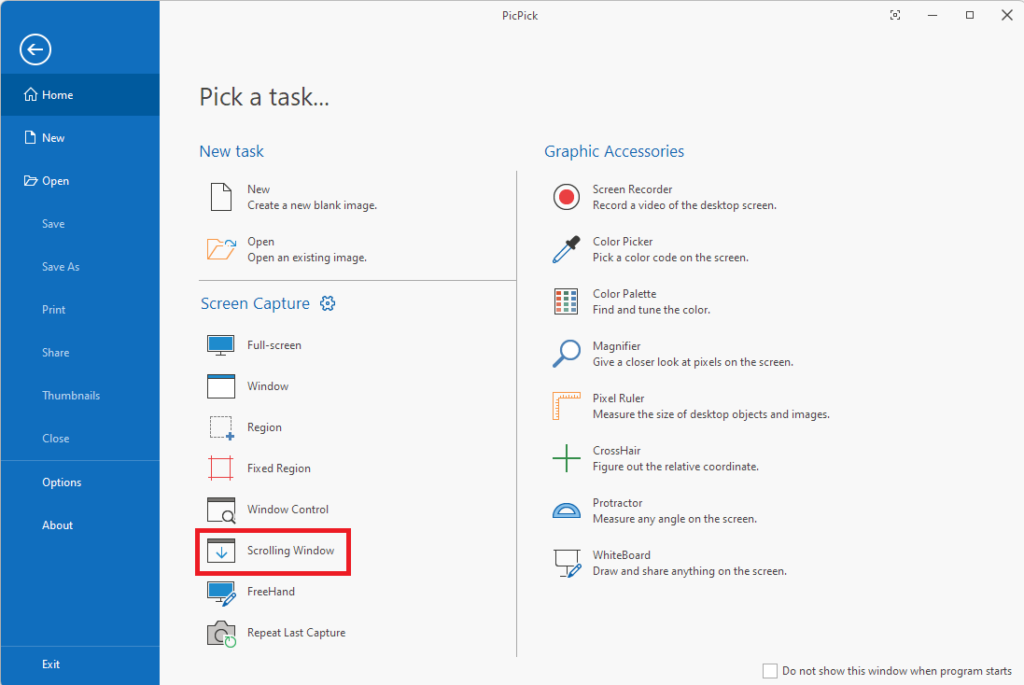
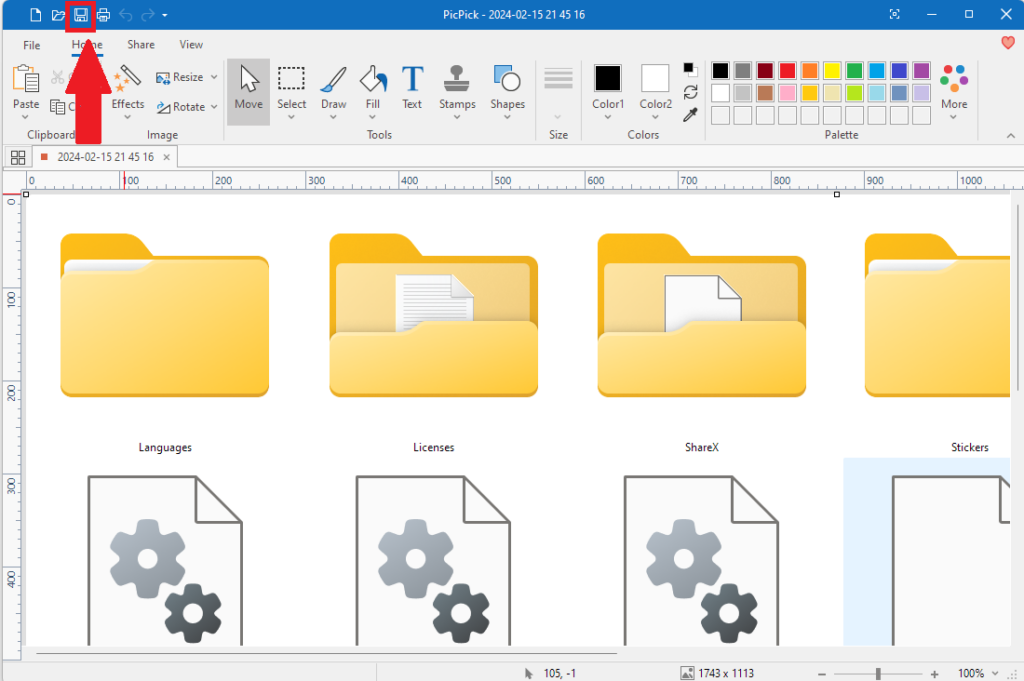
1.Launch thePicPickapplication.
2.Click theScrolling Windowsoption on thePick a task…page.
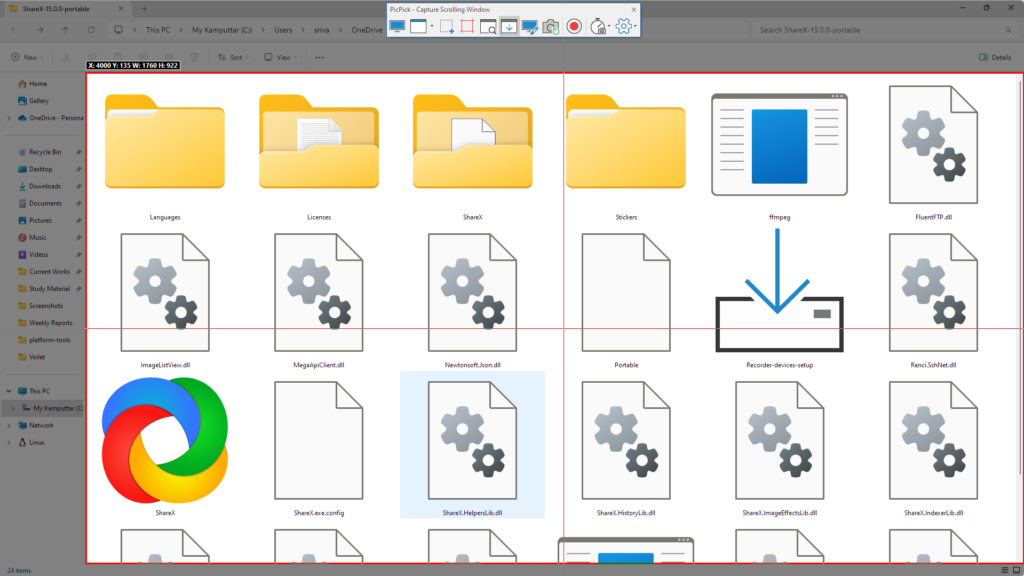
3.Select and press the area for which you want to take the scrolling screenshot.
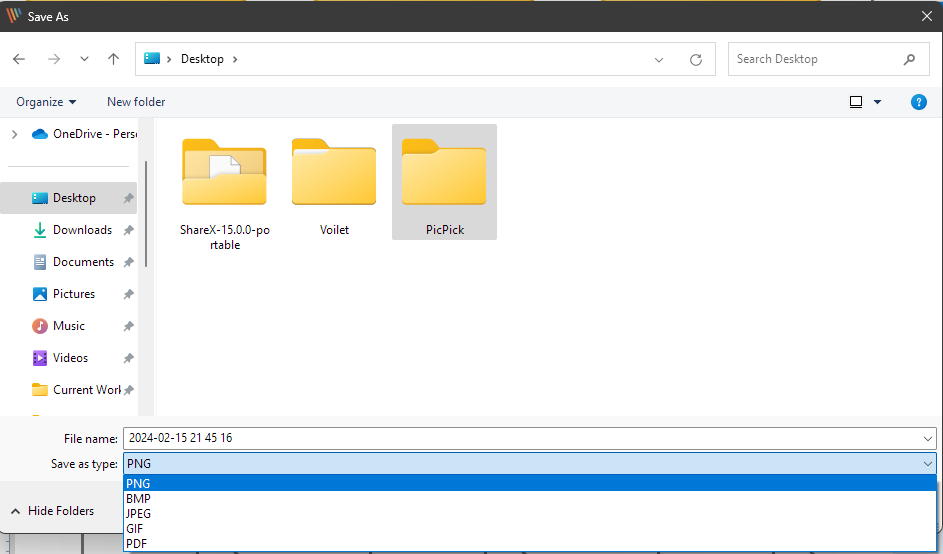
5.Make the necessary changes and click theSavebutton from the top right to save the scrolling screenshot.
it’s possible for you to also useCtrl+Sshortcut.
If youre confused between both these apps, dont worry, well help you.
Ultimately, the best choice depends on your personal needs, budget, and technical comfort level.
Both PicPick and ShareX offer powerful scrolling capture features but differ in user-friendliness, additional functionalities, and price.
How to Take Scrolling Screenshots in Browsers?
These browsers have built-in tools for taking scrolling screenshots of web pages.
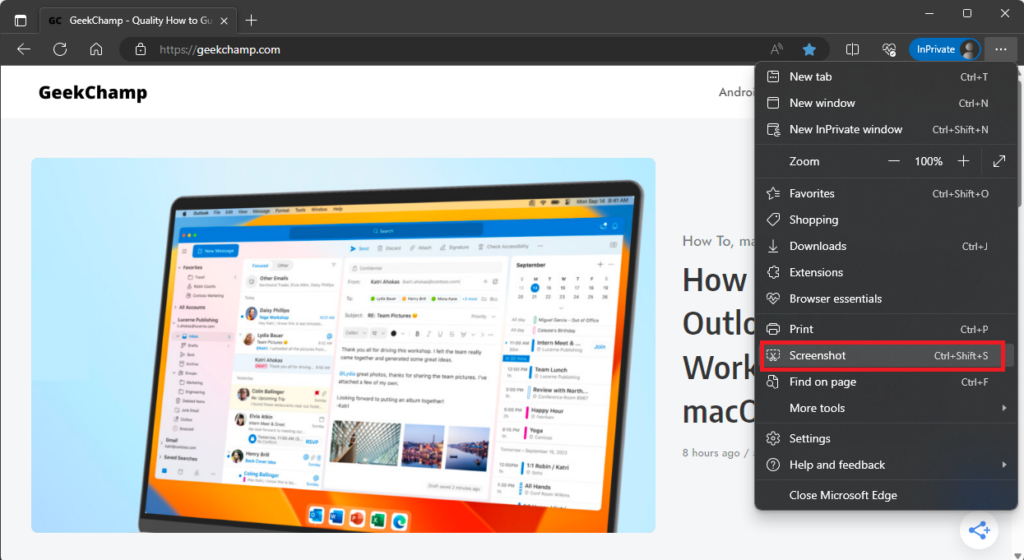
2.choose themeatballsmenuin the top right corner.
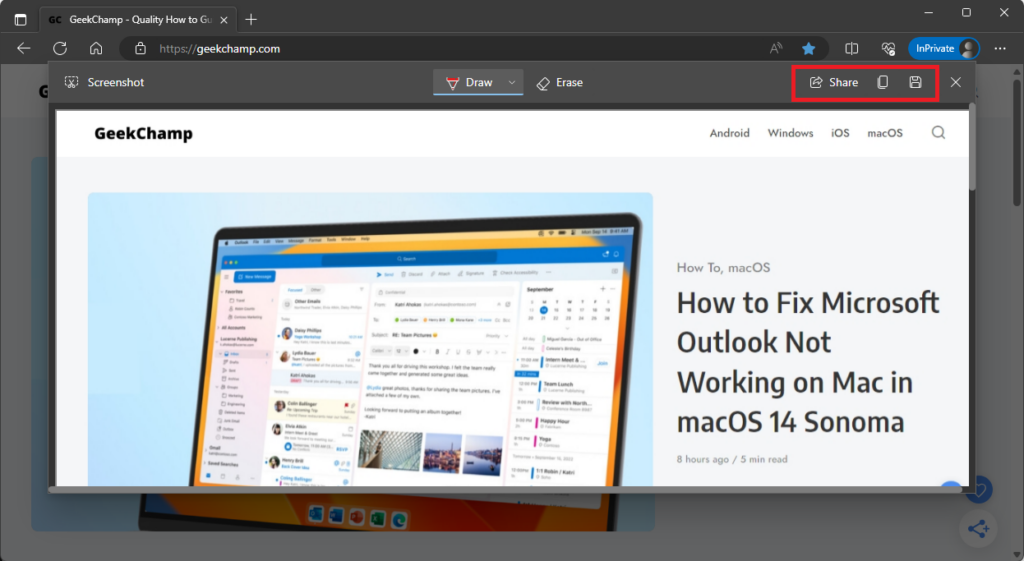
you’re able to also bring up the web page capturing tool using theCtrl+Shift+Sshortcut.
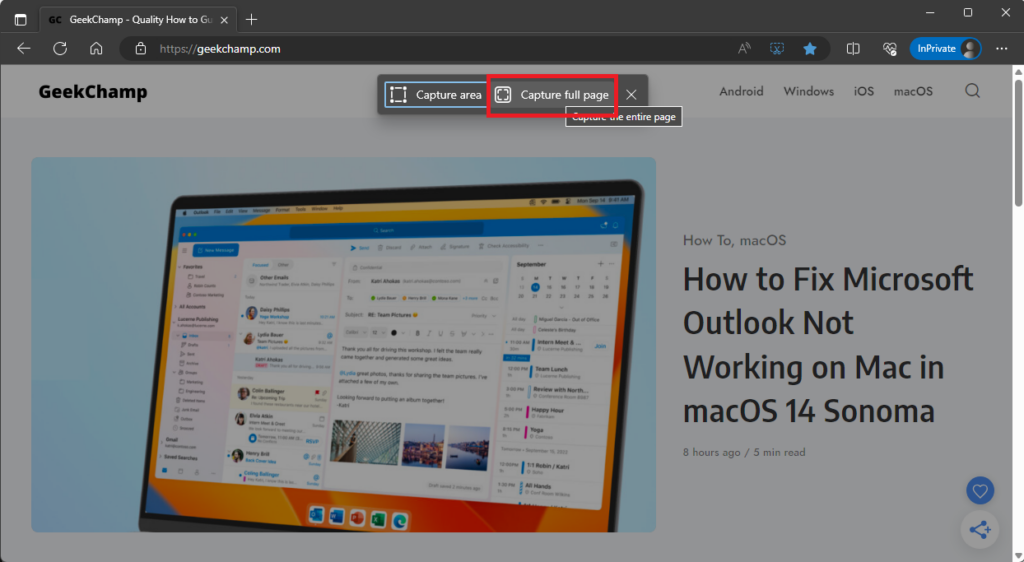
4.select theCapture full pageoption, and it will take a scrolling screenshot of the complete webpage.
5.Edit the image if you want.

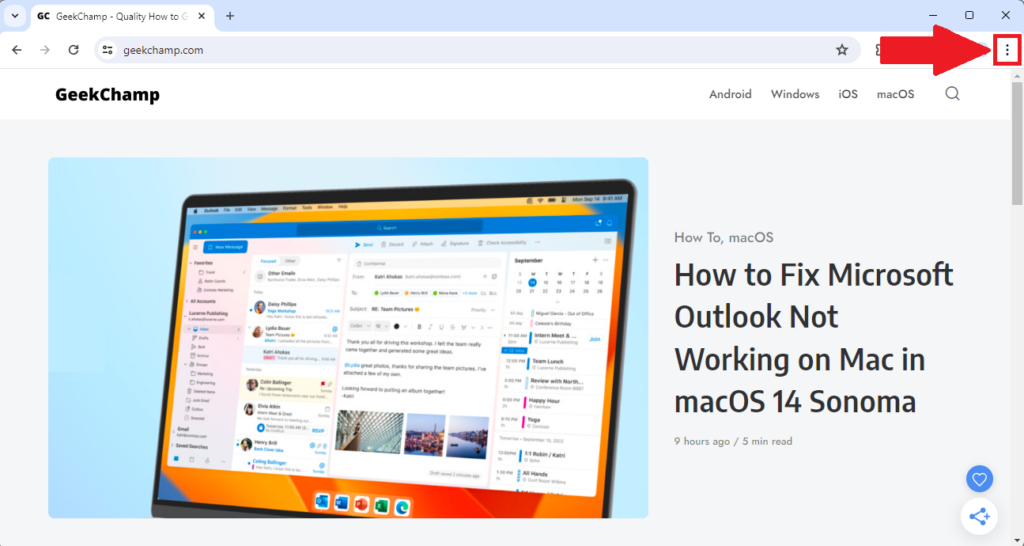
Google Chrome is the web web app that has the largest market share.
1.initiate the website for which you intend to take a scrolling screenshot for the complete web page.
2.Open thekebabmenufrom the top right.
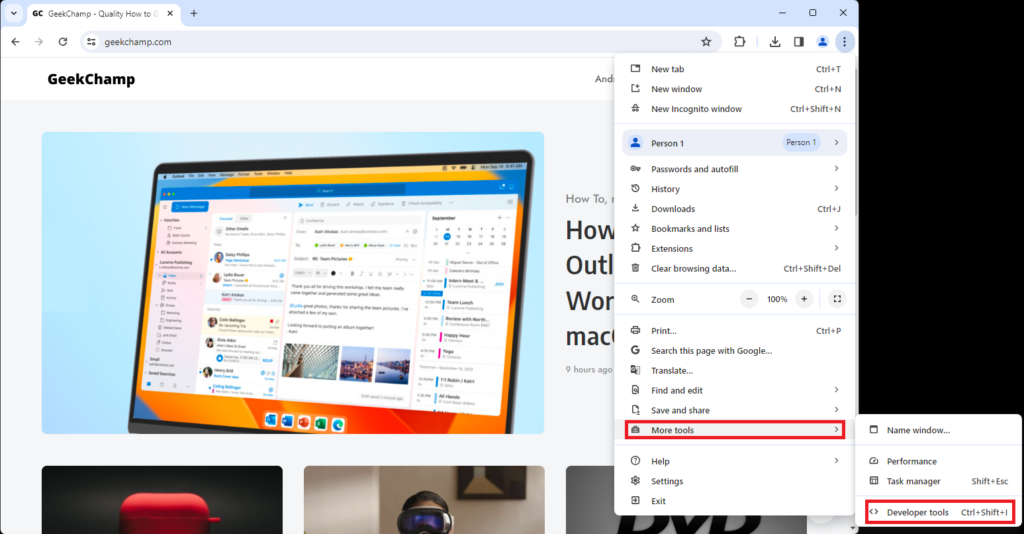
3.Click onMore toolsand head toDevelopers tools.
you’re free to also openDevelopers toolsby pressing theCtrl+Shift+Ishortcut.
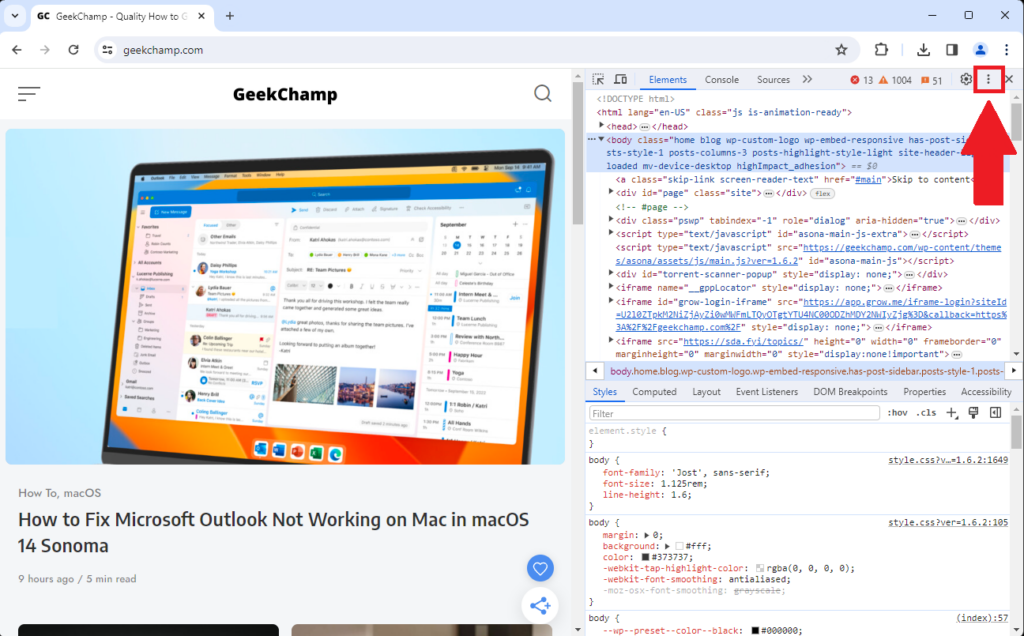
4.hit thekebab menuforDevelopers tools.
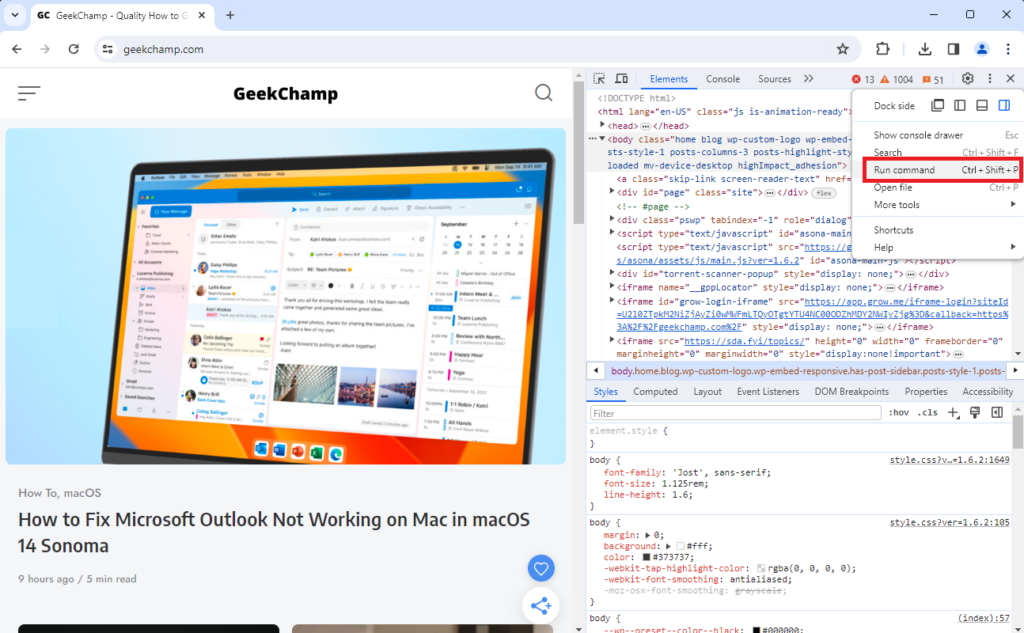
you’re free to also use theCtrl+Shift+Pshortcut.
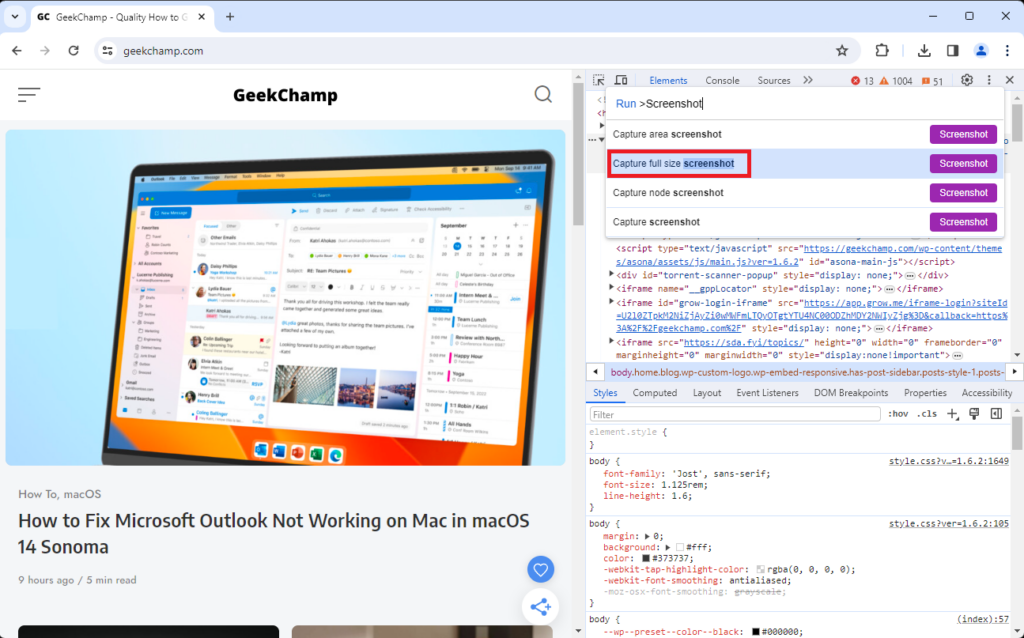
6.TypeScreenshotand select theCapture full size screenshotto take a scrolling screenshot of the complete web page.
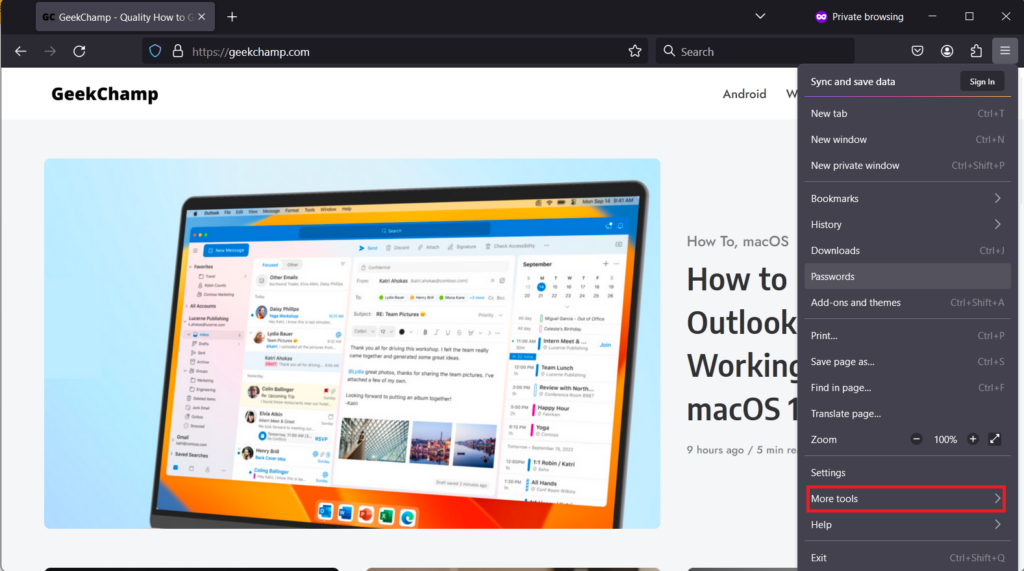
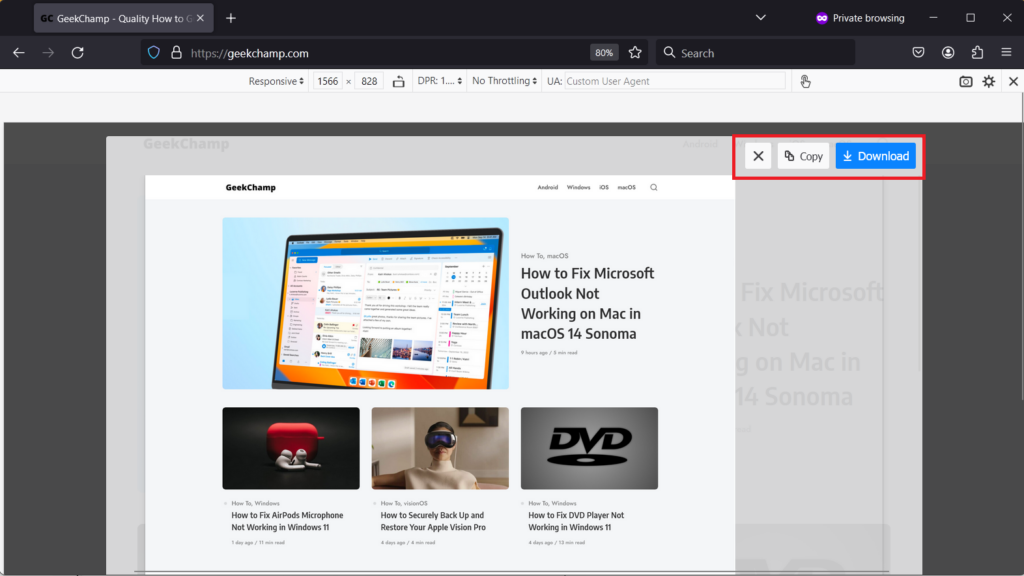
The lastweb surfing app on this listis Mozilla Firefox.
It is a famous alternative to the Google Chrome net web client.
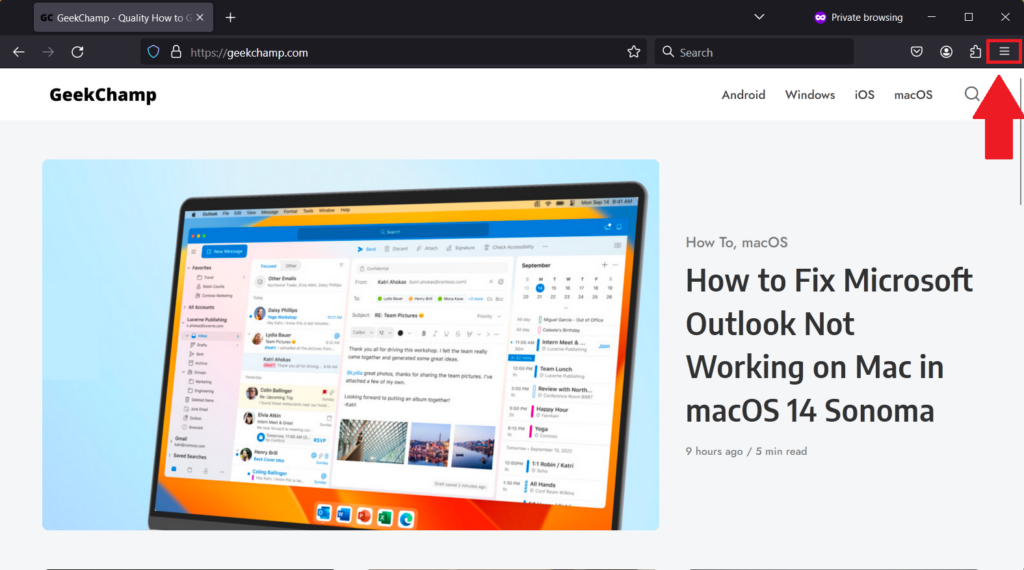
2.Click thedouble hamburger menufrom the top right.
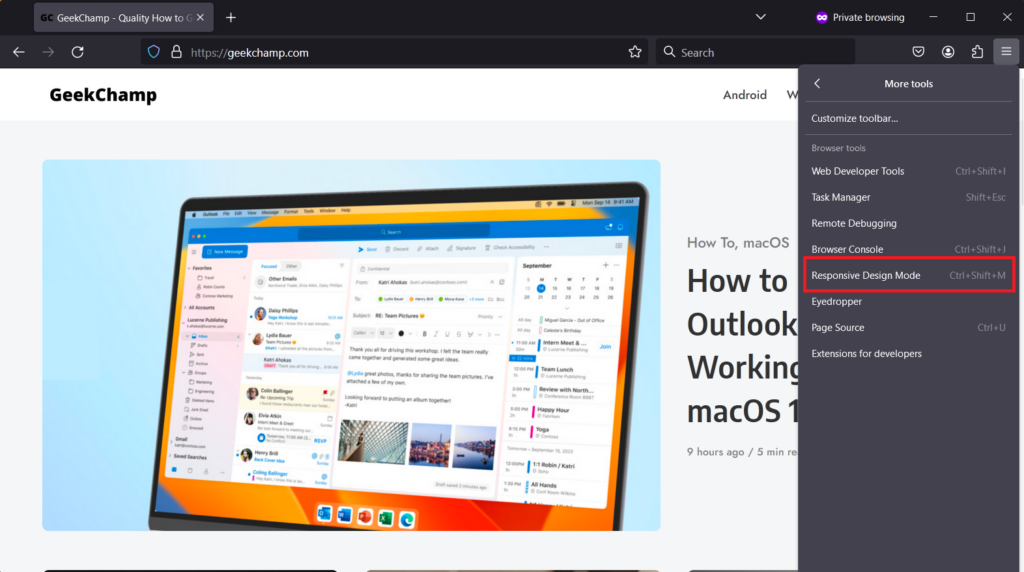
4.Enable theResponsive Design Mode.
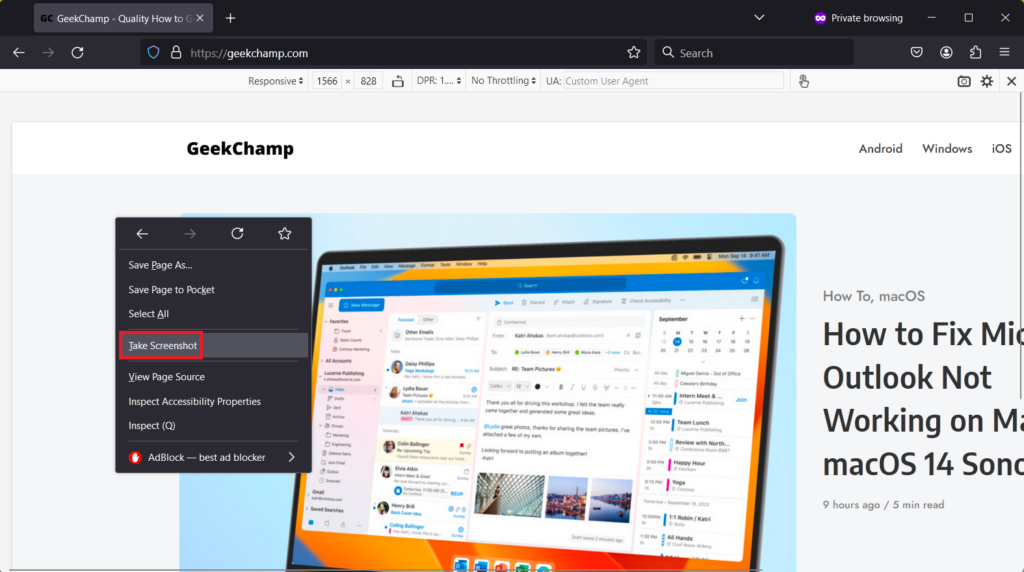
5.Right-punch an empty space and select theTake Screenshotoption.
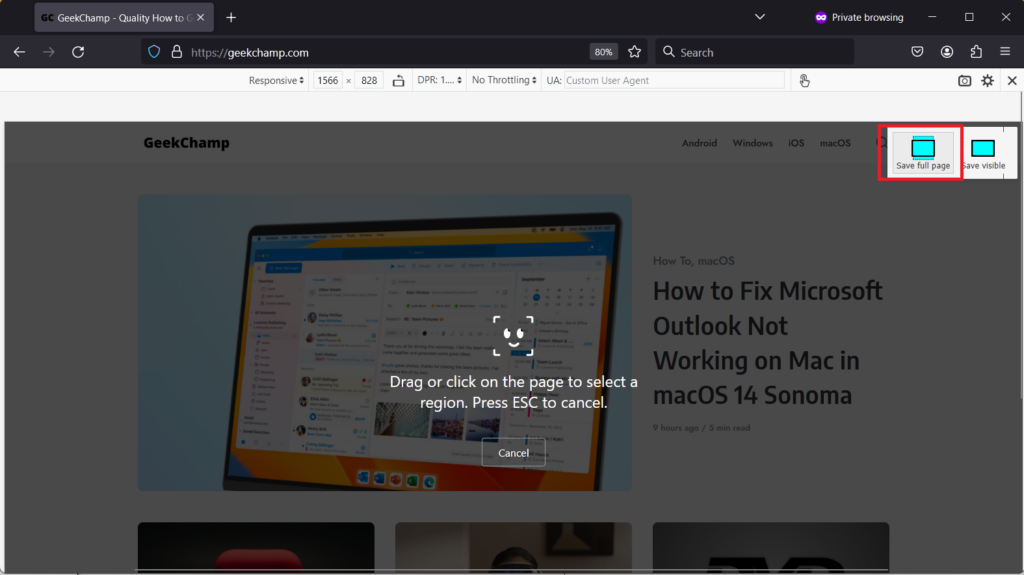
6.Choose theSave full pageoption.
7.Preview the scrolling screenshot and then use the copy or download button according to your needs.
So, what are you waiting for?
Choose the methods that best suit your needs and share more information in a single, long screenshot.