As the successor of the Windows 10 operating system,Windows 11brings many new features and improvements.
Since its release, a great many people have installed the new OS.
This post will guide you through detailed steps to dual boot Linux and Windows 11.

Can Windows 11 Dual Boot with Linux
Can Windows 11 dual boot with Linux?
To answer this question, it’s crucial that you figure out the Secure Boot technology.
It is a mandatory safety feature that your gear must support to install and run Windows 11.
However, a difficulty is that many versions of Linux distros are not compatible with Secure Boot.
According to theWindows 11 requirements and specifications, the Secure Boot technology comes along with the TPM 2.0.
To dual boot Windows 11 and Linux smoothly, you have 2 choices.
it’s possible for you to eitherdisable the Secure Bootin Windows 11 BIOS or use a compatible Linux distribution.
Obviously, the latter is a better choice because your gear might be attacked without Secure Boot.
Here comes a new question, which Linux distribution is compatible with Windows 11.
We find the answer from the user reports.
Only Fedora and Ubuntu can work with Windows 11.
How to back up the Windows system without reinstalling OS?
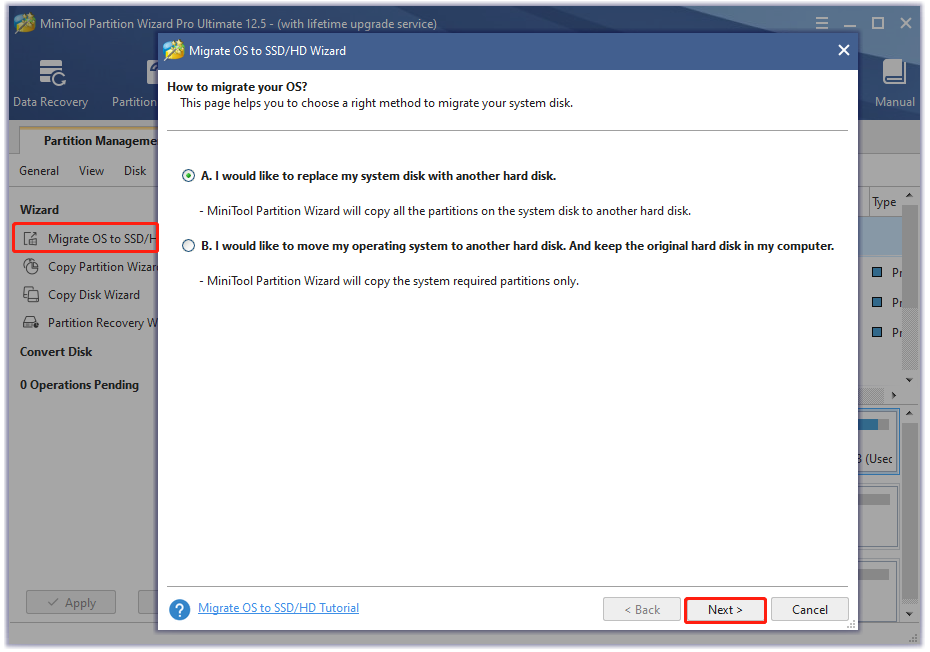
MiniTool Partition Wizard can help youmigrate OSand even copy the whole hard disk easily.
Lets use this professional disk backup tool now.
Note this operation mainly show you how to install Linux from Windows 11.
Part 1.
Here confirm that your hard drive has enough free space.
Heres how:
Way 1.
Use Windows 11 Disk Management
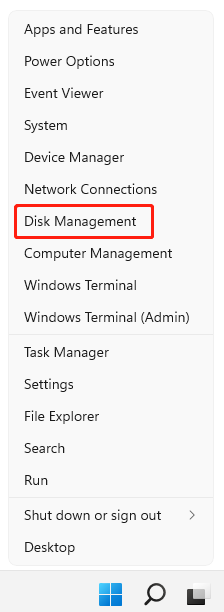
Step 1.Right-click theStartmenu at the bottom and selectDisk Managementfrom the context menu.
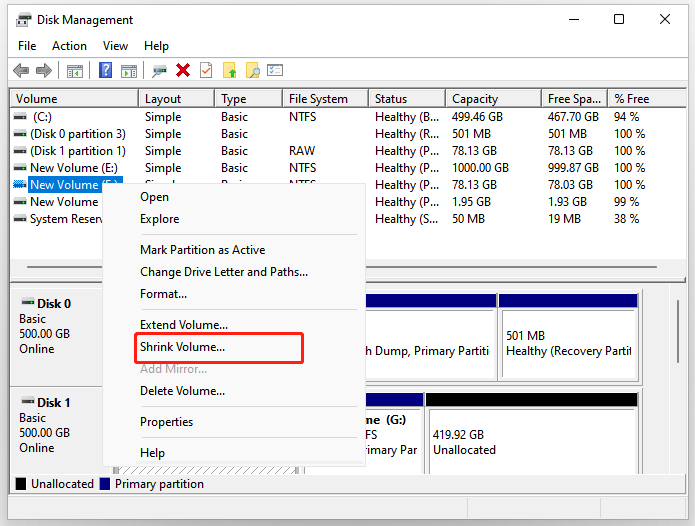
Step 2.In theDisk Managementwindow, right-tap the primary partition that has enough free space and selectShrink Volume.
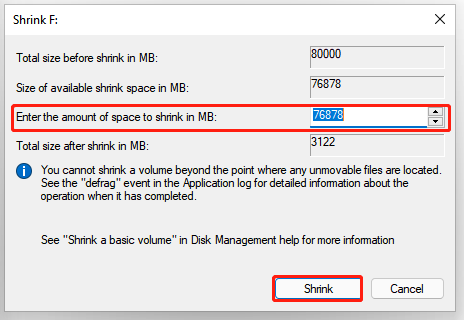
Step 3.Enter the desired amount of space to shrink in the box and click onShrink.
After that, you will get the unallocated space.
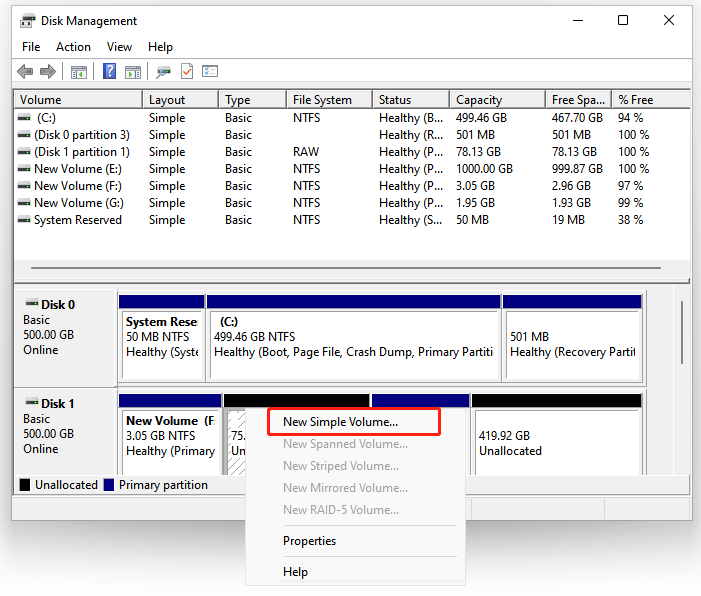
Step 4.Right-click theUnallocated spacenext to the volume thats just adjusted and selectNew Simple Volume.
Step 5.Click onNext, and then set the simple volume size to the maximum possible value and click onNext.
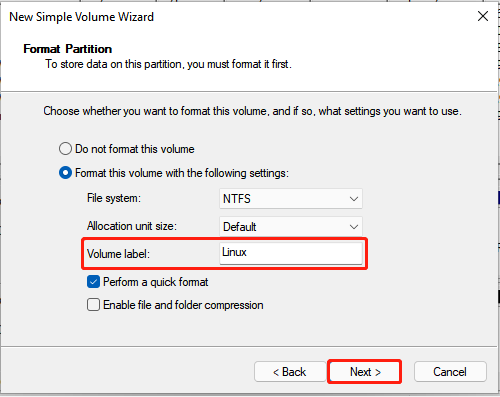
Step 6.Assign a drive letter for the new partition and set its label toLinux.
After that, click onFinishto complete the process.
For instance, theshrink volume button is greyed outeven if there is enough space available for shrink.
In this case, MiniTool Partition Wizard is a good choice.
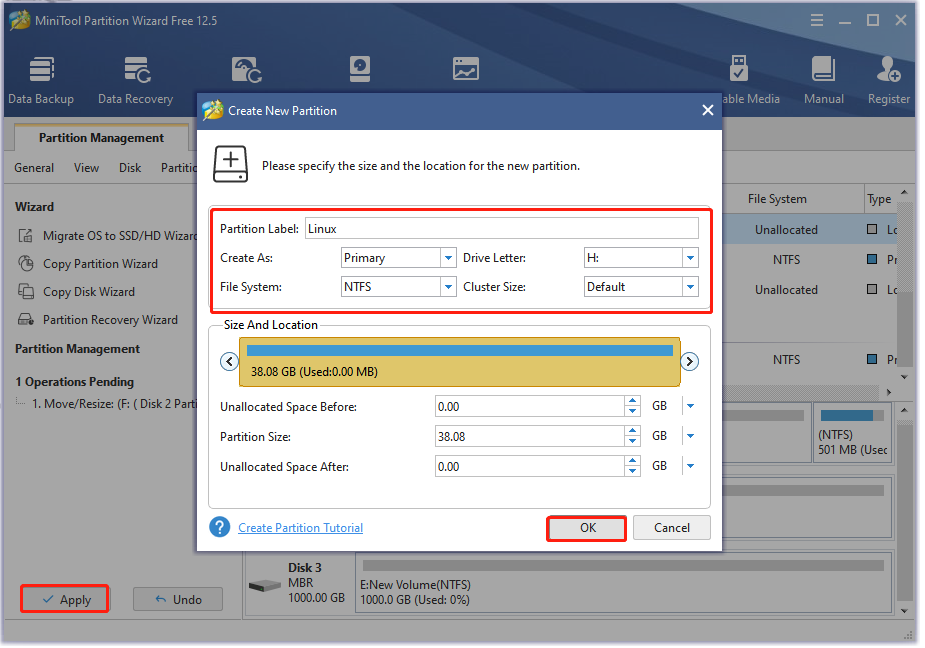
Use MiniTool Partition Wizard
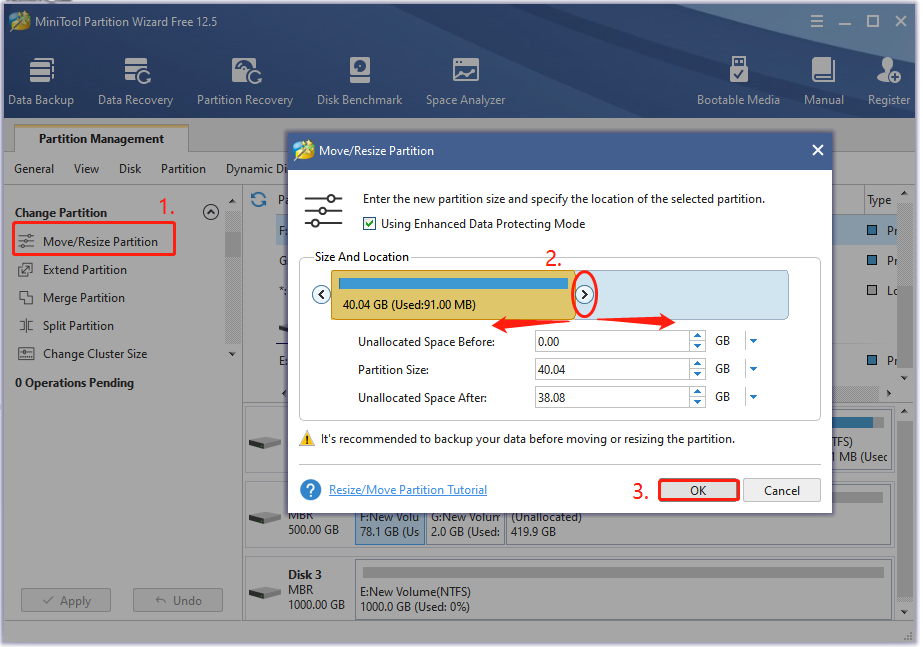
MiniTool Partition Wizard is simpler and more effective than the Windows tool to shrink volume.
ItsMove/Resize Partitionfeature can help you enlarge or shrink partition easily.
Also, you might input the specific number in theUnallocated Space Before,Partition Size, andUnallocated Space After.
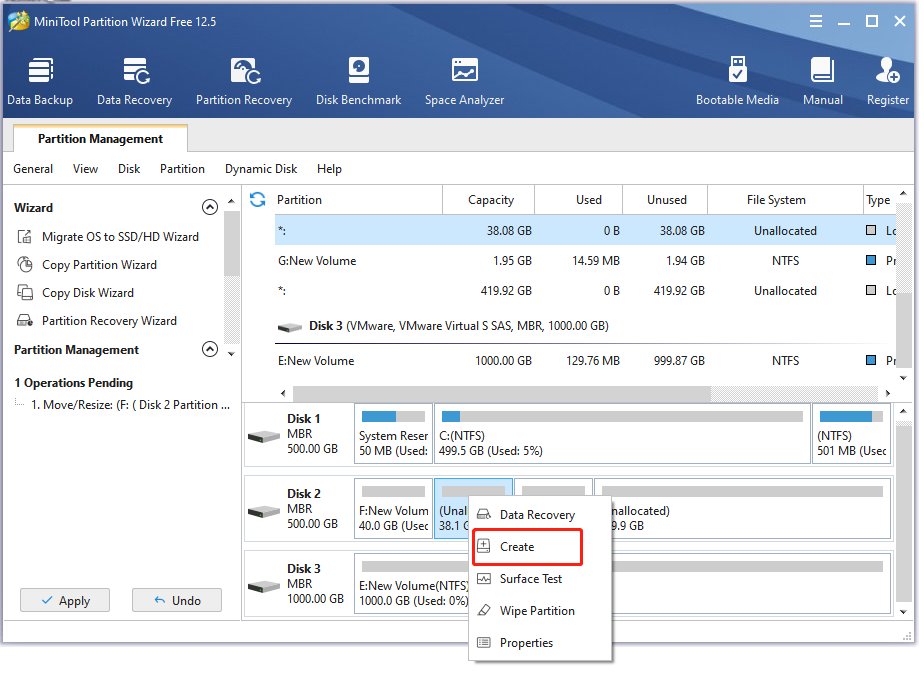
Step 3.Right-click theUnallocated spacefrom the disk map and selectCreate.
Once confirmed, click onOK.

Step 5.Click onApplyto execute the pending changes.
Part 2.
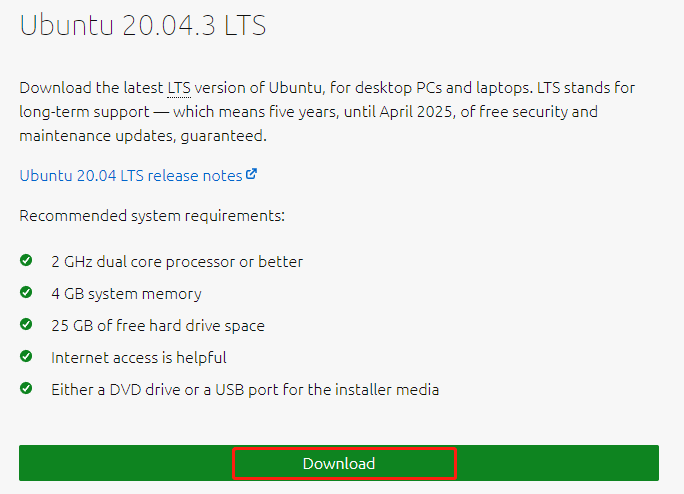
Download a Right Linux Distribution
Now, it’s crucial that you download the right Linux distro.
Here are take Ubuntu for example.
Step 2.Select a location to save the ISO and click onSave.
Once done, you should have a file with the ISO file extension.
Part 3.
Herere detailed steps:
Step 1.Insert your USB drive into your Windows PC.
Step 2.Launch Rufus, and then grab the USB drive from theDevicedrop-down menu.
Step 3.Click onSelectand snag the Linux ISO file that you downloaded.
Step 4.see to it other controls are correct and click onStart.
Then click onOKin the pop-up confirmation window.
Once the process is completed, you should have a bootable Linux USB drive.
Lets see how to dual boot Windows 11 and Linux in the following part.
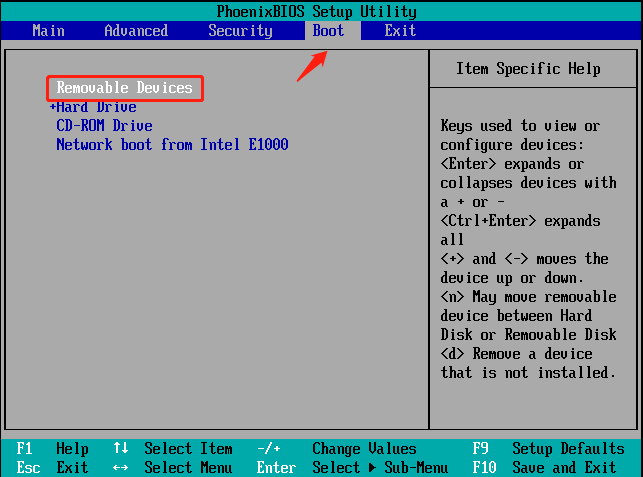
Part 4.
Step 3.your machine should boot from the USB drive.
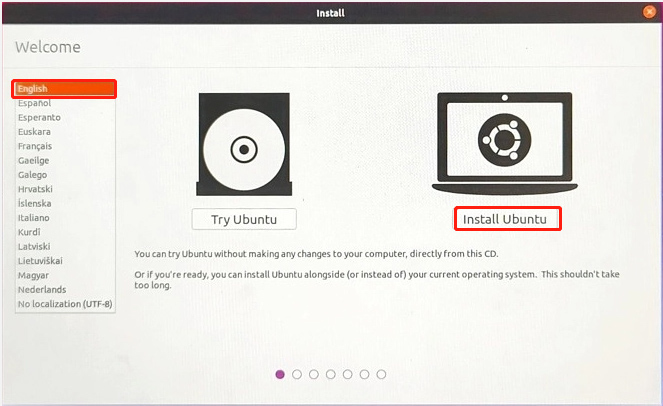
Select theUbuntuas boot menu and pressEnterto boot into Ubuntu.
Step 5.Select your connection if you want to download the third-party software for your graphics card and media unit.
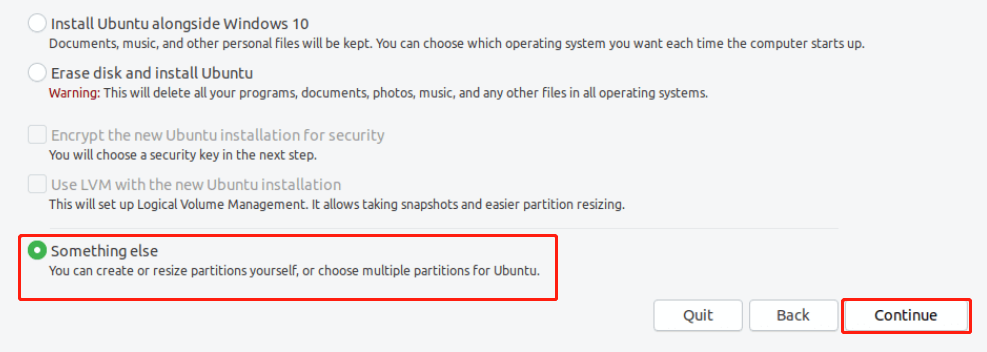
Step 6.In theInstallation typepage, select theSomething elseoption and click onContinueto set the boot partition for Ubuntu.
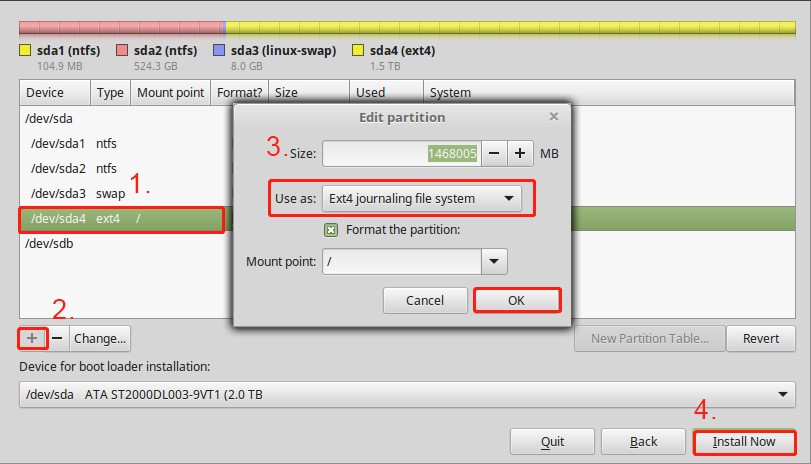
Step 7.pick the partition you created at the beginning and hit the+ iconfrom the lower-left corner.
Here you better use the following configuration for the Linux boot partition.
After that, click onOKin the dialog box.
This will install Ubuntu on the partition without affecting your Windows 11 installation.
Step 9.Once installed, click onRestart Nowand enter BIOS again by pressing theDeletekey.
Then set your hard drive as the first boot rig and pressF10to save the change.
Step 10.Now, you will be asked to chooseWindows 11orLinuxto boot the computer.
Well, you oughta snag the desired operating system each time you boot the computer.
Do you want to dual boot Linux and Windows 11?
This post shows a full guide on how to set up Windows 11 and Linux dual boot.
A complete guide has been illustrated.
Now, its your turn to have a try.
If you have any supplements and opinions, c’mon leave them in the comment area.
