Why Reset Windows Backup to Default
System accidents can lead to system crashes or data loss.
However, when using the Windows Backup tool to back up your PC, it sometimes fails to work.
you gotta spend much time taking measures to fix the backup problems.
Some Windows 11 users encounter issues when backing up their Windows 11.
This post tells you how to get rid of the Windows 11 backup error.
The resetting process only resets the options to its default value and wont delete any previously backed-up files.
If you oughta delete them, manually do this thing.
Well then, how can you reset Backup and Restore?
Move to the next part to find 2 useful ways.
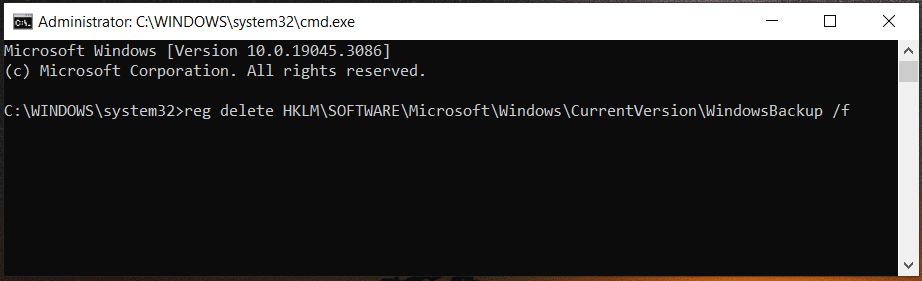
When prompted by the UAC window, clickYesto run Command Prompt with admin rights.
Step 2: In the CMD window, enter the command reg delete HKLM\SOFTWARE\Microsoft\Windows\CurrentVersion\WindowsBackup /fand pressEnter.
This can help to restore Windows Backup to the default configuration.

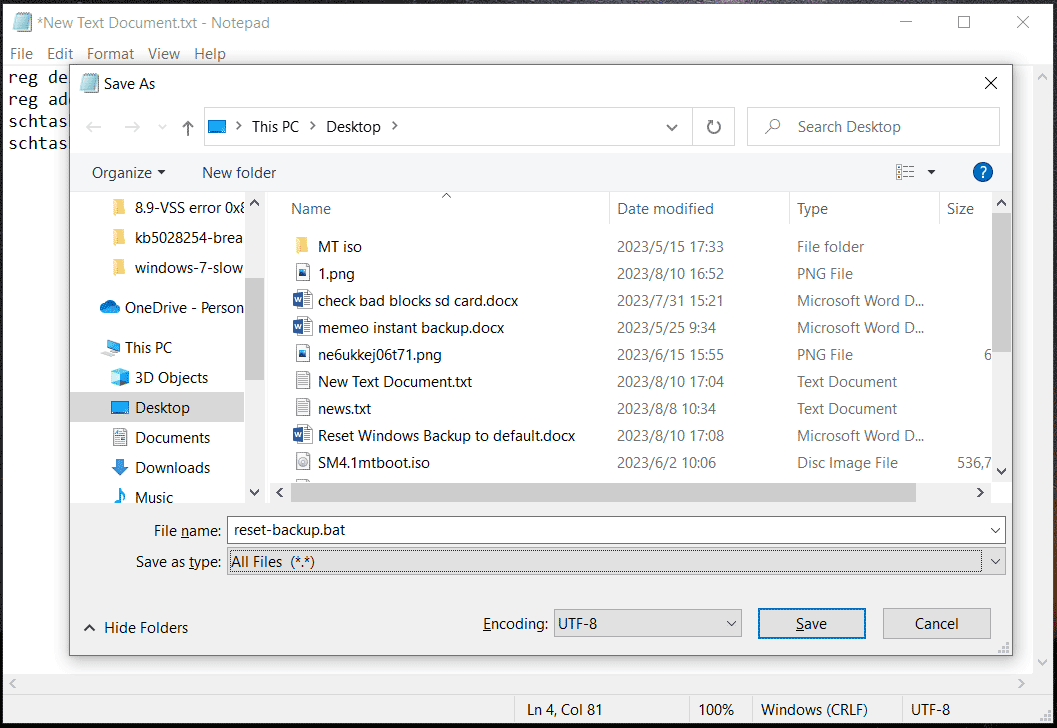
To recreate the WindowsBackp entry, launch the command reg add HKLM\SOFTWARE\Microsoft\Windows\CurrentVersion\WindowsBackup.
Then, chooseAll Filesfrom theSave as typedrop-down menu, selectDesktopas the storage location, and clickSave.
Step 3: Right-press this .bat file and chooseRun as administrator.

Next, clickYesto run some commands in the file to reset Windows Backup to default.
On the market, MiniTool ShadowMaker stands out due to its flexible and powerful features.
Want to create automatic file backups in Windows 10/11?
This post shows you how to automatically back up files to an external hard drive with ease.
Now download MiniTool ShadowMaker Trial Edition and install it on your PC to have a try.
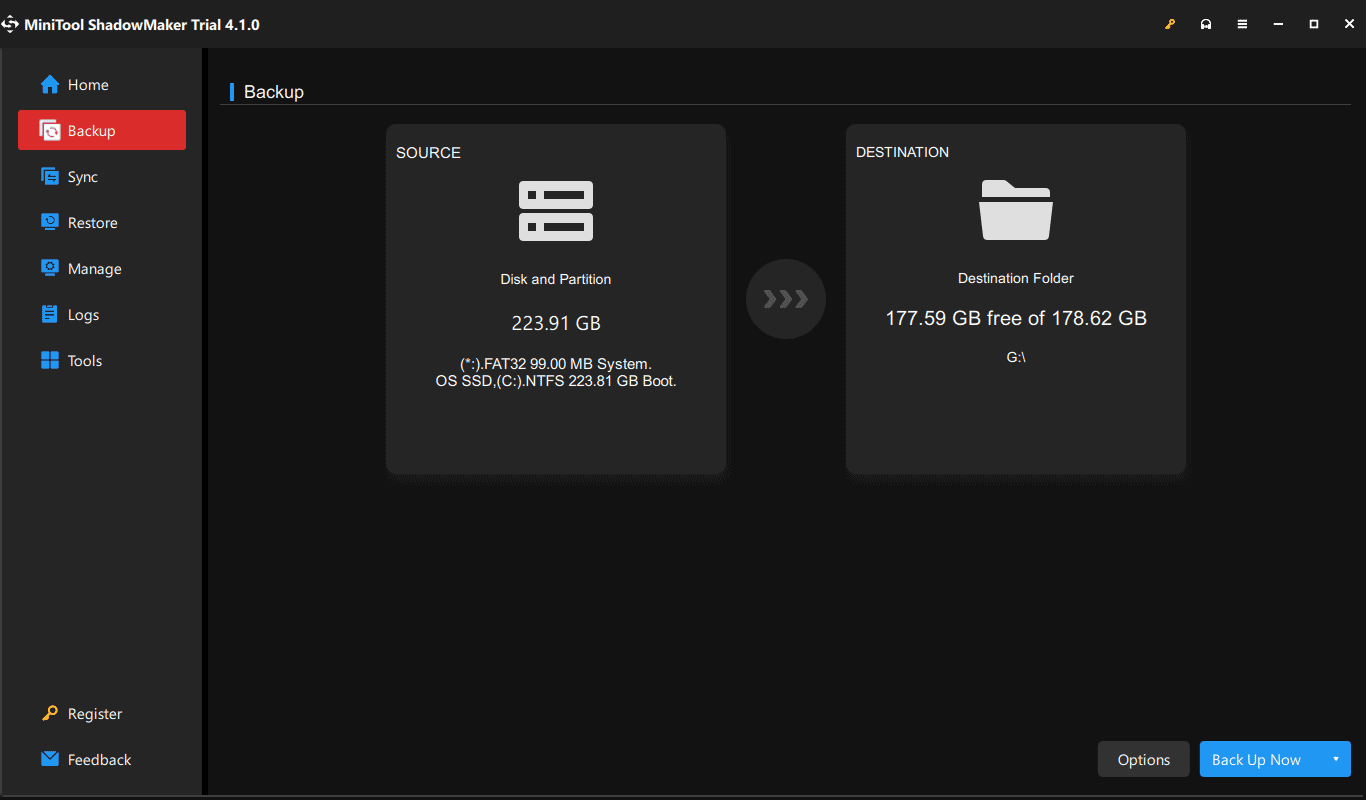
Step 2: By default, MiniTool ShadowMaker backs up the system.
you might directly choose an external drive to save the system image file by tapping onDESTINATION.
Step 3: Click onBack Up Nowto start the system backup at once.
