But have you ever felt the need to access specific notes instead of digging into the entire app?
Well, I cant tell about you but it has happened to me many a time.
And this is where the Pinning feature comes into play.
Let me show you how to pin notes in Apple Notes on iPhone, iPad, and Mac.
So, What Happens When You Pin a Note in Apple Notes App?
To begin with, lets briefly discuss how the notes-pinning feature works!
When you pin a note, it goes right to the top of the list.
If you have used the pinning feature in iMessage, you may already be familiar with it.
Moreover, Apple allows you to pin multiple notes at once.
Thus, you have the desired flexibility to tuck as many notes as you need.
However, I would recommend you avoid going for overkill as it would defeat the prime purpose.
2.Now, head over to the note that you want to pin.
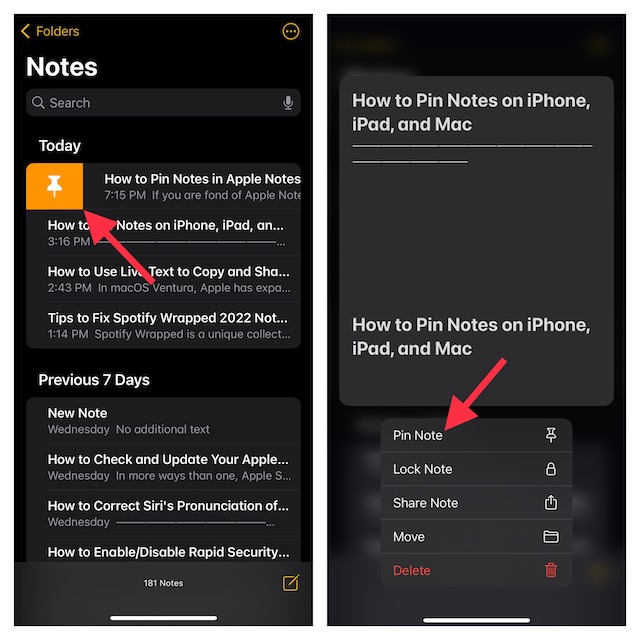
3.After that, swipe towards the right on a note and hit thePin icon.
Alternately, long-press on a note and choosePin Notein the menu.
And thats about it!
You have successfully pinned your favorite note.
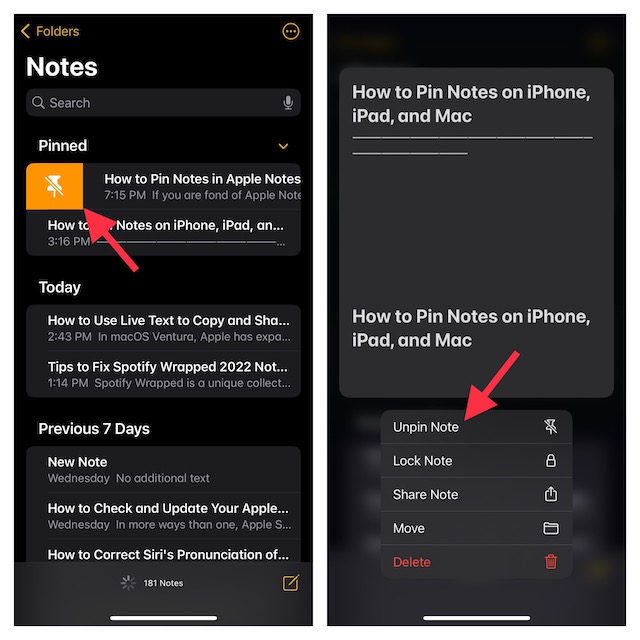
Or, long-press on the note and selectUnpin Notein the contextual menu.
Pin Notes in Apple Notes on Mac
Pinning a note on Mac is just as straightforward.
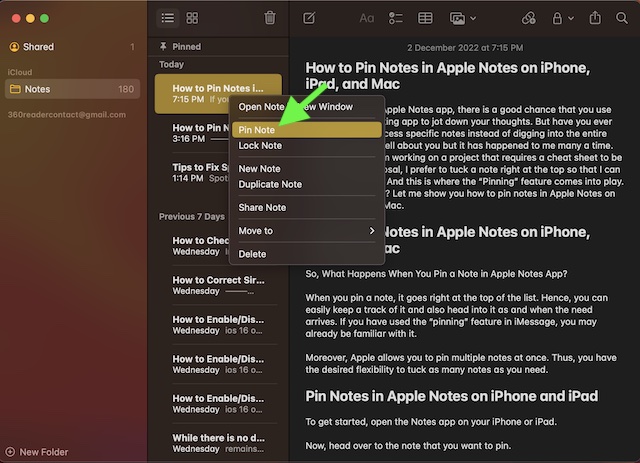
1.First off, fire up theNotes appon your Mac.
2.Now, navigate to the note that you would like to pin.
3.After that,right or control+clickon the note and choosePin Notein the menu.
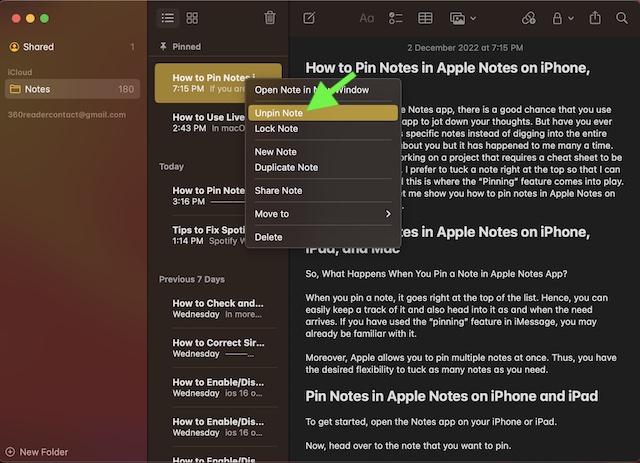
Your pinned note will now show at the top.
Signing off…
There you have it.
So, thats how the pinning feature works in the Apple Notes app.
Thanks to the addition of a plethora of neat features, the stock note-taking app has vastly improved.
