Not for nothing, its like a go-to tool for software development and testing.
What is Parallels Desktop for Mac and How Does It Work?
For a more enhanced experience, the program creates a virtual machine aka a separate environment on Mac.
Why You Should Install Windows 11 on Your Mac?
There could be all sorts of reasons why you may need to get Windows 11 on your Mac.
Below are some of the major reasons.
Parallels Vs Boot Camp: Which is Better for Installing Windows 11 on Mac?
Not to mention, the software program works with Intel-based Mac computers without any limitations.
While Parallels freemium version provides a limited free trial.
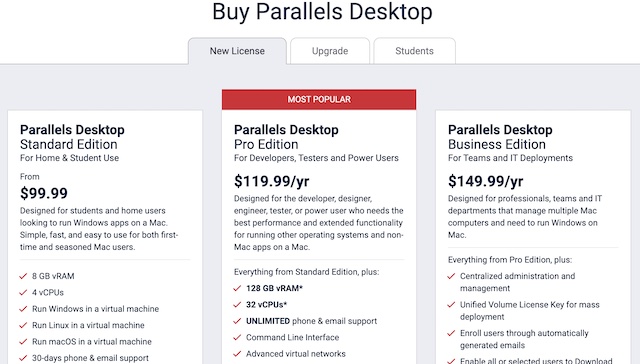
Parallels Desktopcomes in three variants.
While the standard edition is available for $99.99, the production retails at $119.99/year.
As for the business edition, it comes at a whopping price of $149.99/year.
Lets move on to the exact steps you better follow to install Windows 11 on Mac using Parallels.
1.To get started,download and install Parallels Desktop on your Mac.
Since its a Mac app, you could download it from the Mac App Store.
Besides, you’ve got the option to also choose to download it from the official website.
2.After you have installed Parallels, launch it.
3.Then after, you will be asked toenter your activation key.
If you dont have an activation, you might get a free 14-day trial.
4.Next,create a virtual machine for the Windowsoperating system.
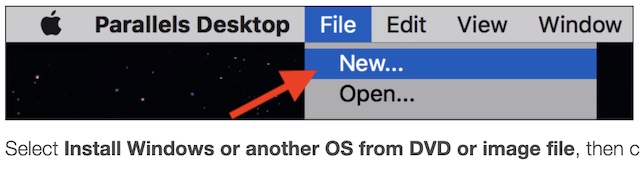
5.To do so, bring up the Parallels tool-> Fileand clickNew.
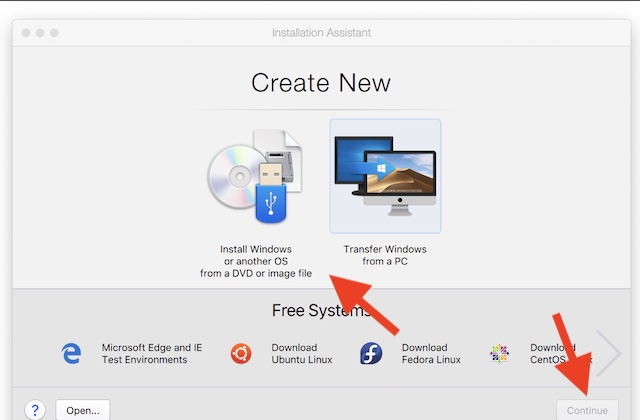
6.Next up, click theInstall Windowsor another OS from the DVD or image fileicon.
Then, clickContinueto proceed.
7.Up next, Parallels should automatically detect the installation file.
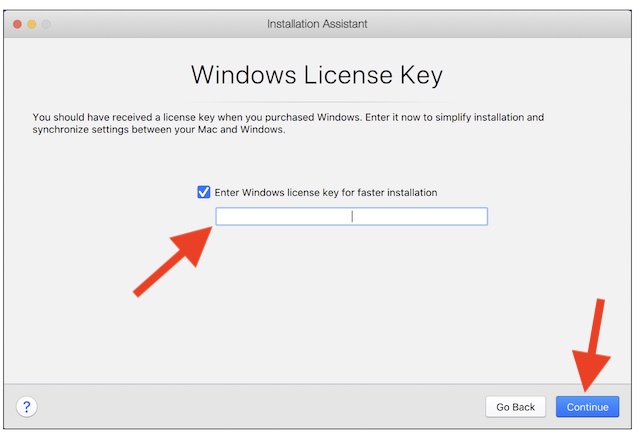
9.Now, enter the code and then hitContinue.
The product key is usually a 25-character code that consists of letters and numbers.
10.see to it to leaveExpress Installationchecked off.
Otherwise, you will need to manually install Parallels Tools later.
Moreover, Parallels also optimizes Windows to provide a more personalized experience.
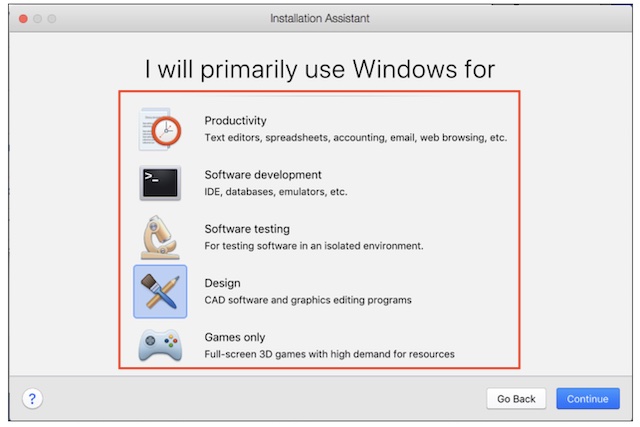
Parallels Desktop Lite is designed for things like gaming, productivity, software development, and graphic design.
As for Parallels Desktop, it comes with the added benefit of optimizing Windows for Software Testing.
11.Next, give your virtual machine a suitable name and choose where you want it to be saved.
However, you’re able to change the location.
To do so, click onCustomize settingsbefore installation and choose the preferred location.
To get it done, click onShareand then follow the instructions to share it with other Mac users.
14.When you are pleased with everything, hitContinue.
15.Next, your macOS equipment will start installing the Windows system.
Its time to go through the on-screen instructions to complete the process.
When you open Windows 11 for the first time, your Mac will automatically install Parallels Tools.
Hence, I would recommend you allow all the tools to get installed without any interruption.
You will be prompted to reboot Windows when the installation is done.
Be sure to choose the correct upgrade that supports your current Windows (whether 32 or 64-bit).
2.After that, press theParallels iconin the Mac menu bar and choose theControl Center.
3.Now, tap on the+and hit Get Windows 11 from Microsoft.
4.Next, click onContinueand select InstallWindows.
5.Now, Windows will be downloaded and installed automatically on your Mac.
6.After the installation process gets over, you should see the Installation Completeprompt.
7.When you unlock it, you will get the Microsoft EULA.
After that, clickI acceptto complete the process.
1.Head into theWindows parameters > System > Activation.
2.Now, click Troubleshoot and then hit I changed hardware on this machine recently in the prompt.
3.Next, you should probably sign in to your Microsoft account.
4.Next up, pressEnterwhen asked for the existing Windows password.
Thats pretty much it!
Windows will be successfully activated on your equipment.
To purchase a new license:
1.Head over toWindows options>System>Activation.
2.Next, click onGet a new license in the Microsoft Store app.
3.Then, clickBuyand then follow the instructions to complete the process.
As soon as the purchase is done, Windows will be automatically activated.
My Thoughts…
So, that concludes this hands-on guide about running Windows 11 on Mac with Parallels.
Without an iota of doubt, Windows and macOS are the two most popular operating systems for computers.
As to which one is better, it all comes down to your personal choice.
Well, thats my thought.
It would be nice to know your two cents as well.
Read more:How to Install Windows 11 on Mac With Boot Camp (Ultimate Guide)
