Microsoft keeps releasing new updates for Windows 11 to make it safe and stable for users.
But sometimes, the updates do the opposite of it.
Many users said their PC freezes to a specific screen while updating.

Thus, they face difficulties using their PC.
This in-depth fixes guide will sharesome easy waysto fix the Windows 11 update stuck issue.
So read ahead and learn to easily eliminate the stuck updating screen on your Windows 11 PC.

Why Does the Windows 11 Update Freeze?
2.From the left menu of theSettings app, choose theWindows Updateoption to view updates.
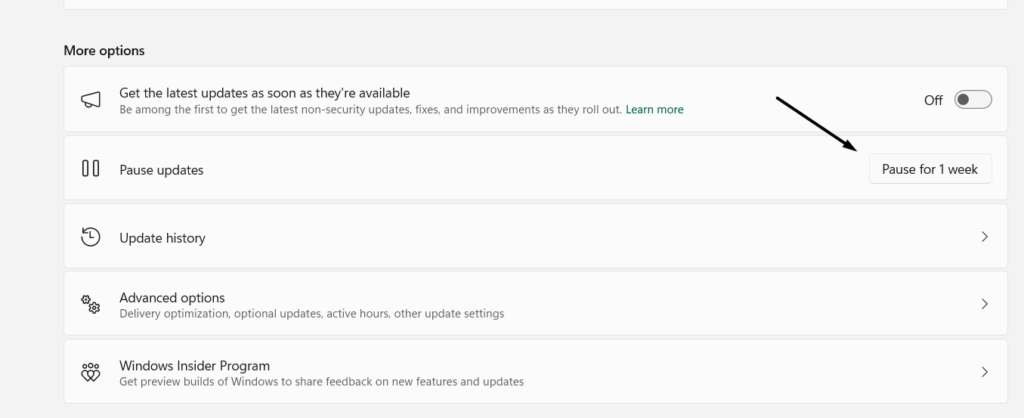
3.Under theMore optionssection, clickPause for 1 weekto pause all the updates in progress.
4.Once done,exit theSettings appand pressAlt + F4to get theShut Down Windowswindow.
5.In theShut Down Windowswindow, choose theRestartoption from the dropdown menu.
6.Press theEnter keyto power cycle your PC, and once restarted, open theSettings appagain.

7.Goto theWindows Updatesection from the left sidebar and clickResume updates.
8.Lastly, search for PC updates again and then install them to see if they now install properly.
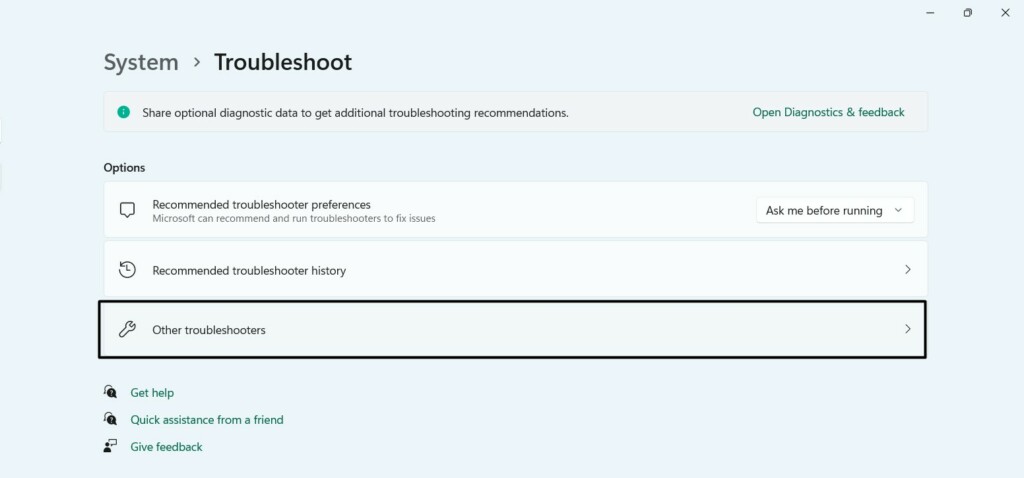
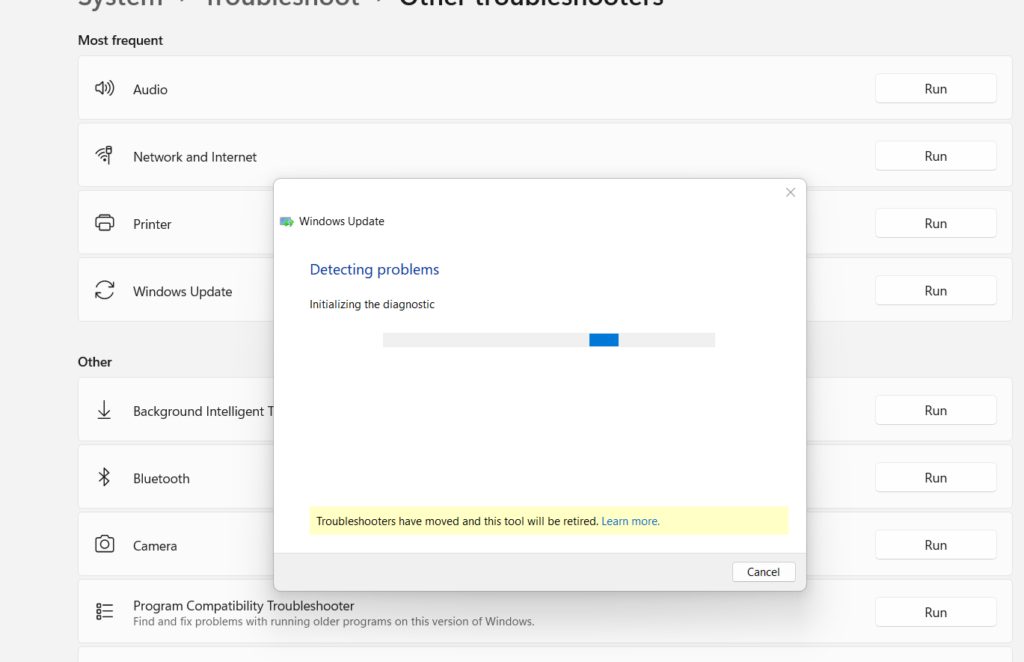
2.Choose theTroubleshootoption and then choose theOther troubleshootersoption on your screen.

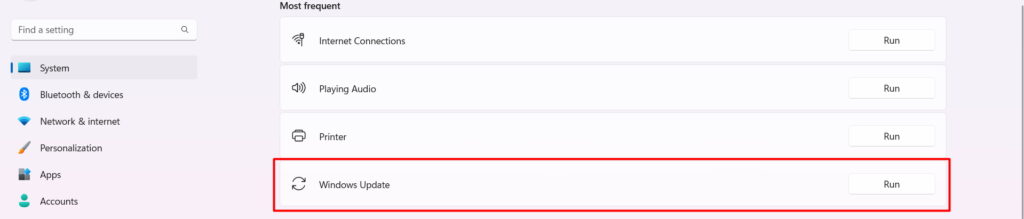
3.On the next screen, underMost frequent, click theRunbutton next toWindows Update.
4.In the end, a newWindows Updatewindow will open on your Windows PC.
4.Do the same with the second remaining Windows service and test whether the issue is fixed.
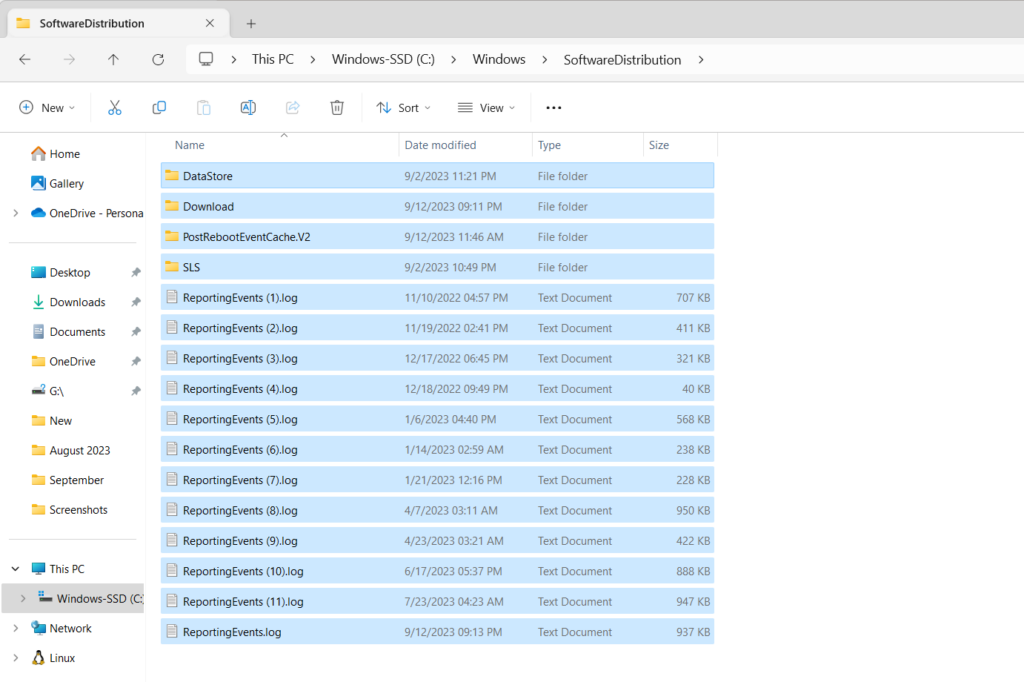
At times, the content in the folder encounters problems.
Hence, the PC doesnt update or freezes while updating.
So,rename this folderto refresh it and fix issues with it.
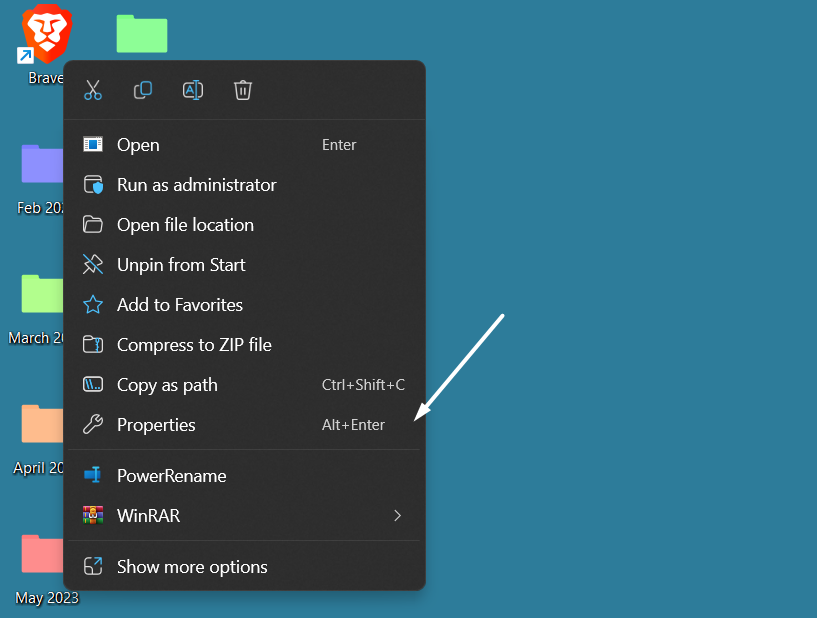
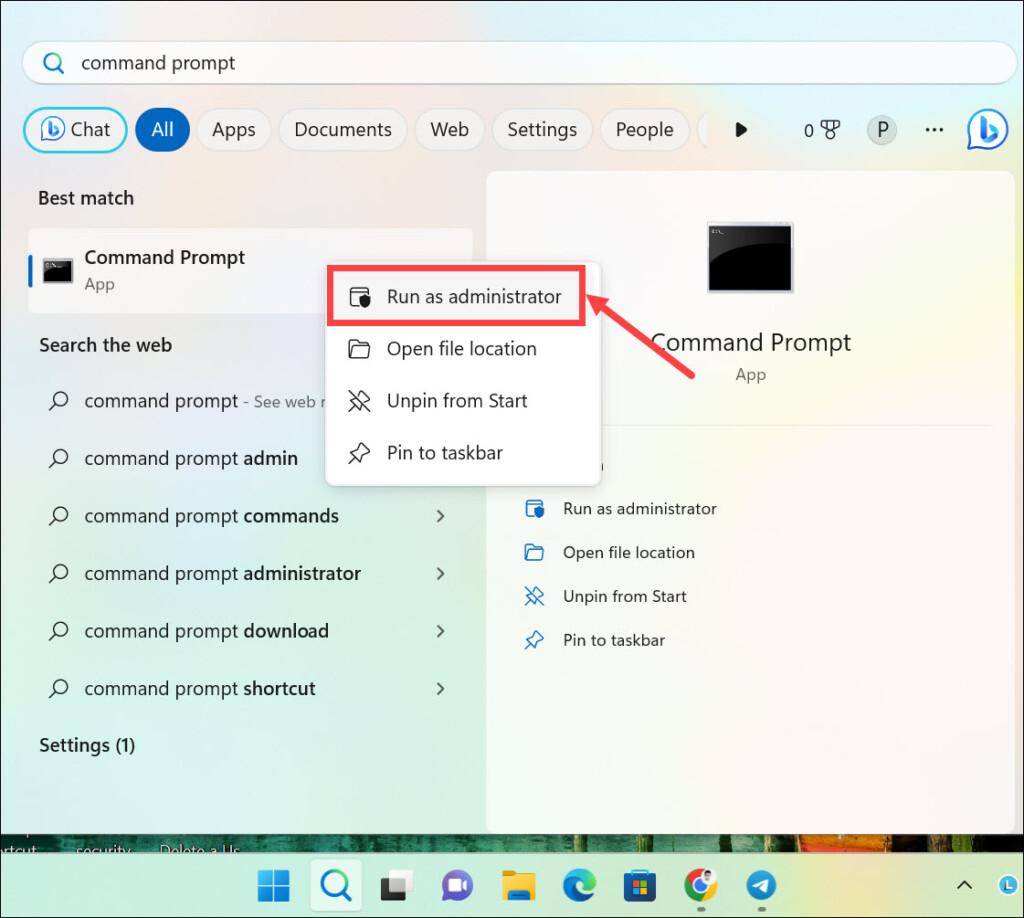
2.From the search results, in theBest matchsection, choose theRun as administratoroption.
3.Lastly, right-press any of the files and choose theDeleteoption to delete it from the PC.
Repair System Files
Sometimes, problems in Windows 11 also occur because of corrupted and missing system files.
Considering this, we suggest yourun DISM and SFC scanson your system.
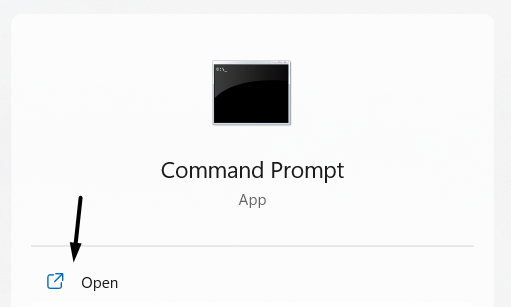
1.Using your favorite method, open theCommand Prompt utilityon your Windows 11 PC.
2.In theCommand Promptwindow, copy-paste the command mentioned below and pressEnter.

Remove Third-Party Antivirus
One reason for this issue isthird-party antivirus.
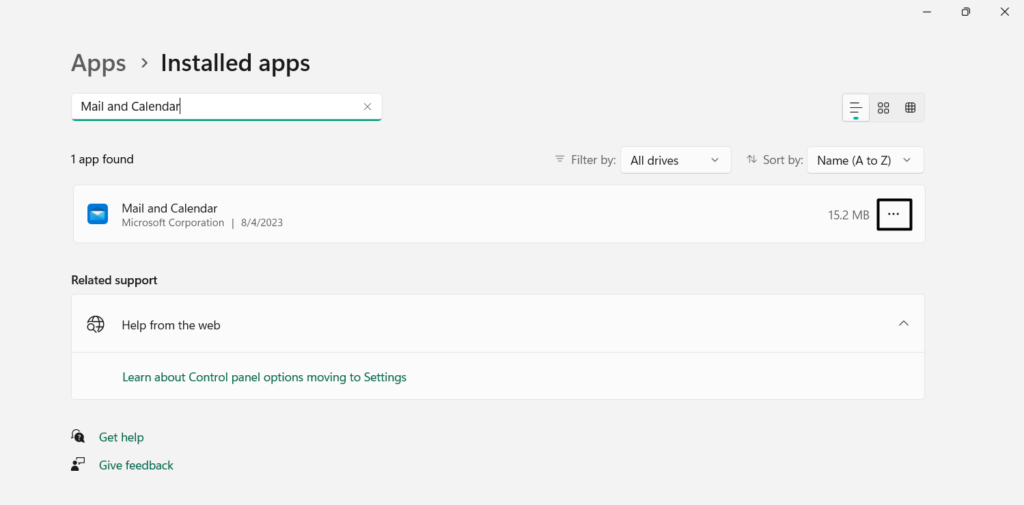
2.In theAppswindow, choose theInstalled appsoption to view all the apps installed on your PC.
3.On the next screen, look for the antivirus program, and once found, clickthree dotsnext to it.
4.From thethree dots (…)menu, choose theUninstalloption and click theUninstallbutton.
5.Once the app is uninstalled from the PC or laptop, check whether the problem is fixed now.
2.Once done, hold and press thePower buttonfor five to six seconds to force shut down it.
3.After force shutting down the PC, press thePower buttonagain to restart the PC properly.
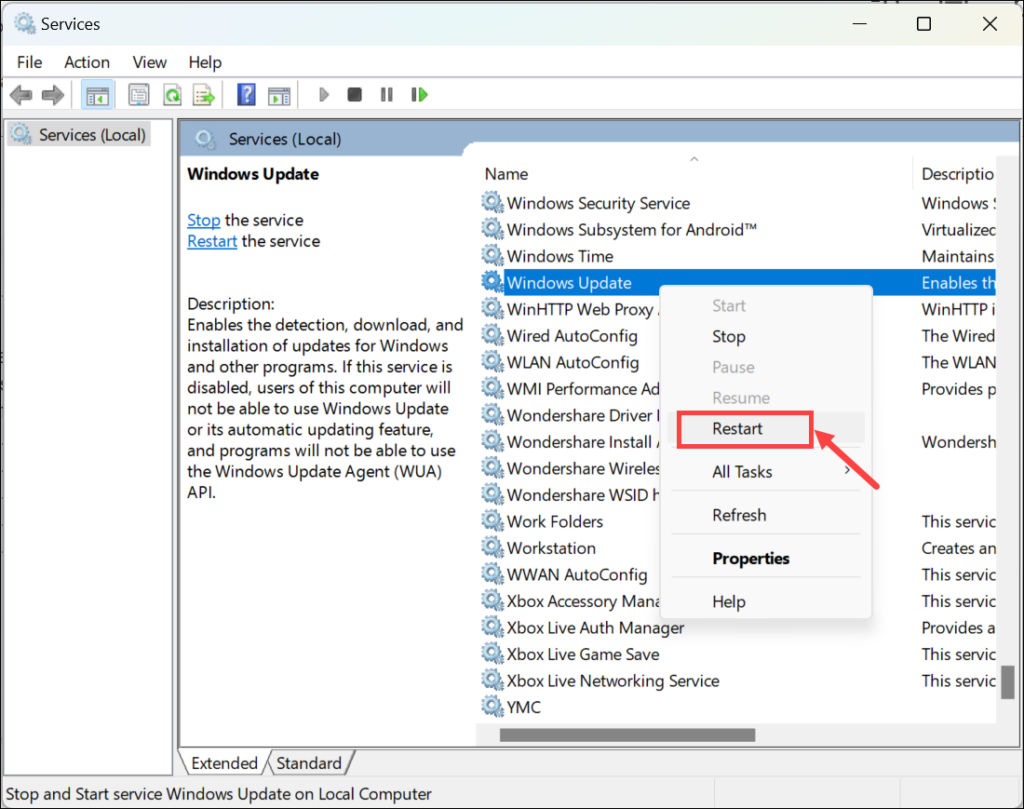
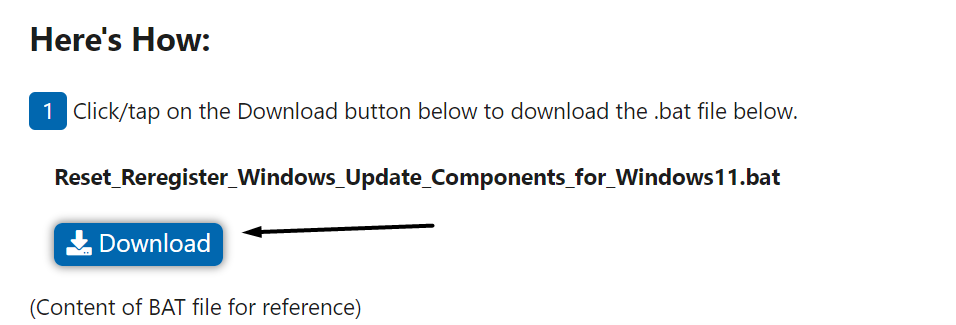
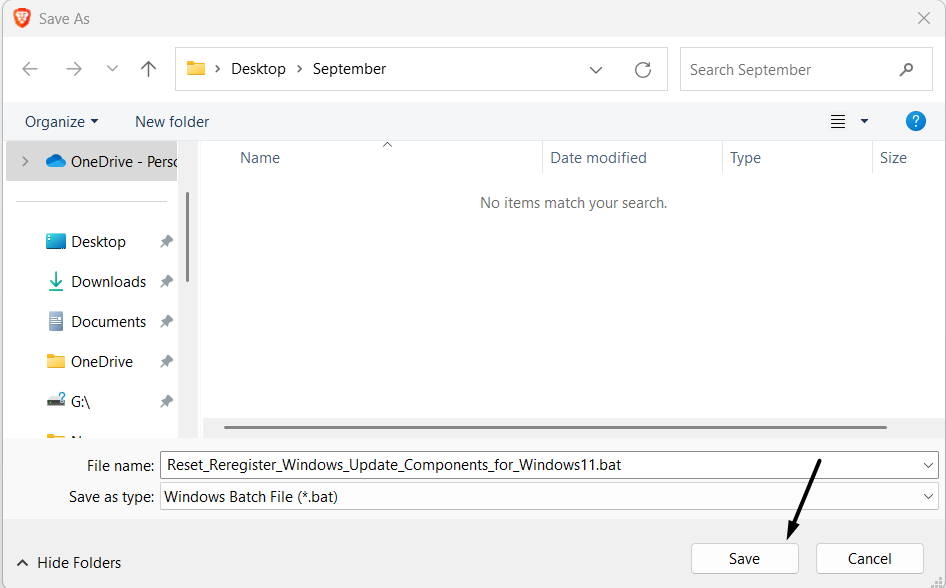
Therefore, to resolve all the problems with it,refresh themby reregistering them.
2.In theSave Asprompt, from the left, chooseDesktopand click theSaveoption to save it.
3.Once youve saved the BAT file on your desktop,go there and double-hit the BAT file.
4.In theUser Action Control (UAC)prompt, click theYesbutton to initiate the file on your PC.
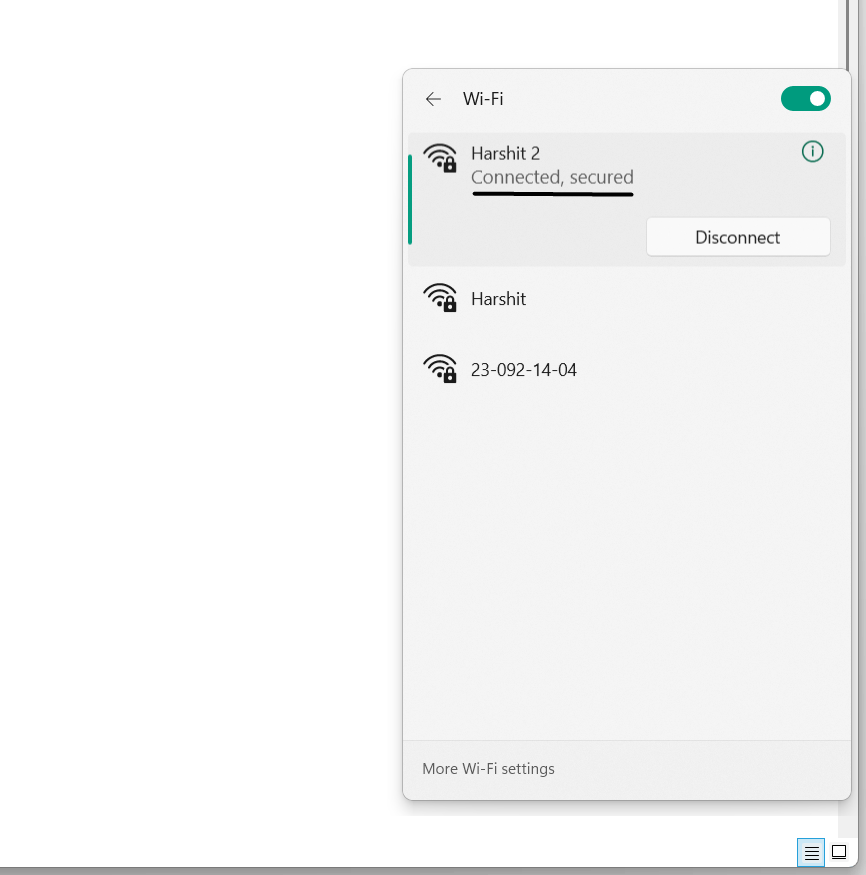
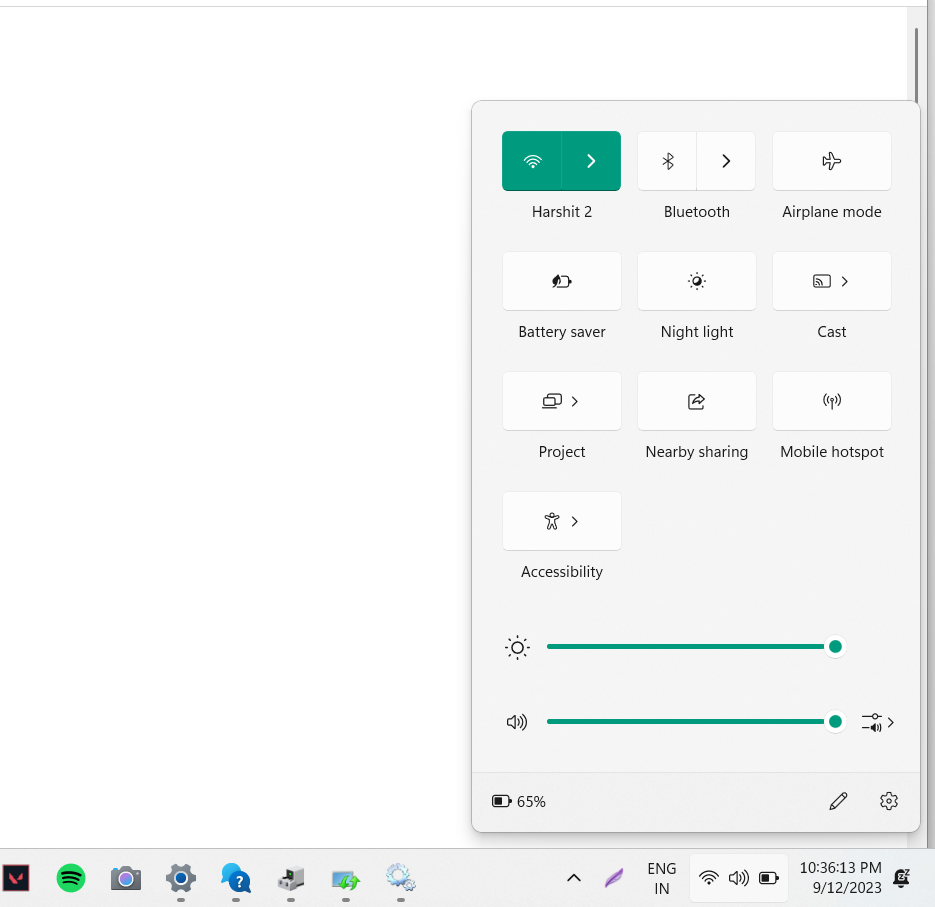
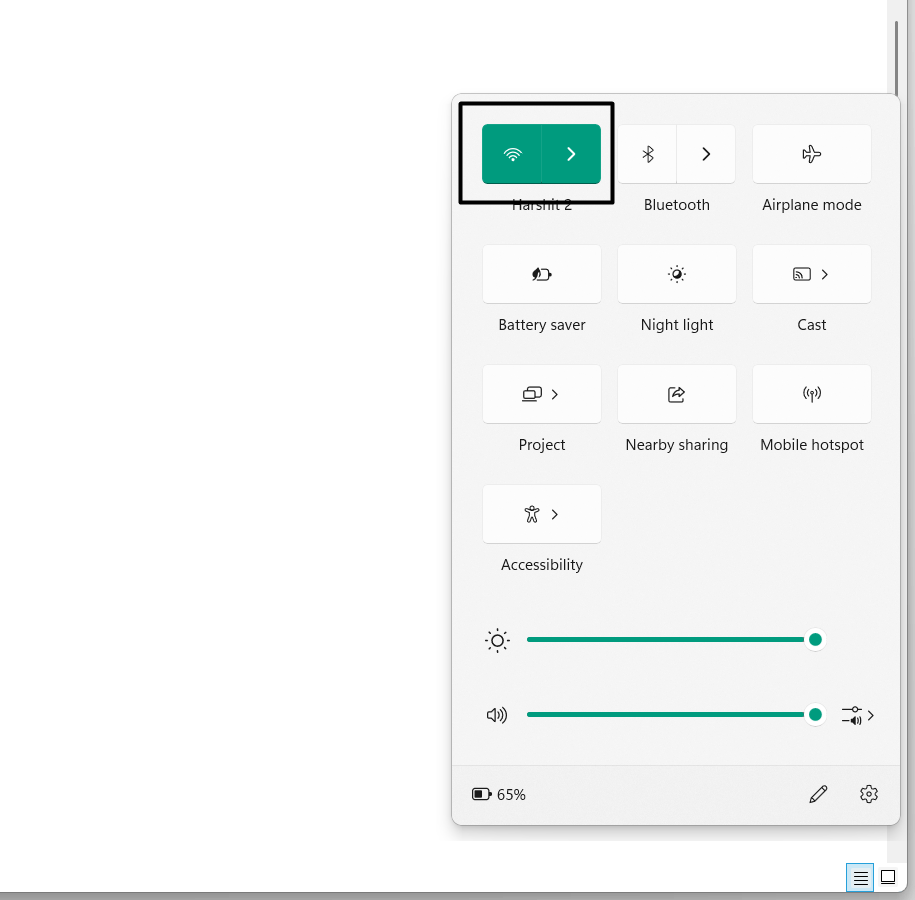
So, we suggest youensure your Windows 11 PC is connected to Wi-Fi.
2.you better see to it theWi-Fioption in the prompt is switched ON or highlighted with Blue.
3.hit the arrow next to theWi-Fioption to view all the available Wi-Fi networks near you.
4.Lastly, ensureConnected, securedis mentioned under your online grid in the prompt.

Hopefully, this will pause the Windows updates again and resolve all the issues with it.
Therefore, we suggest yousearch for those programs on your PCand either update or reinstall them.
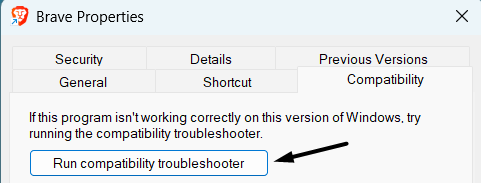
The best way to find them is using the Compatibility troubleshooter.
2.Go to theCompatibilitytab and click theRun compatibility troubleshooterbutton to start the tool.
3.On the next screen, follow the on-screen steps to find out whether the app is compatible.
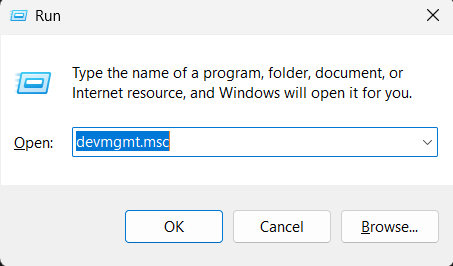
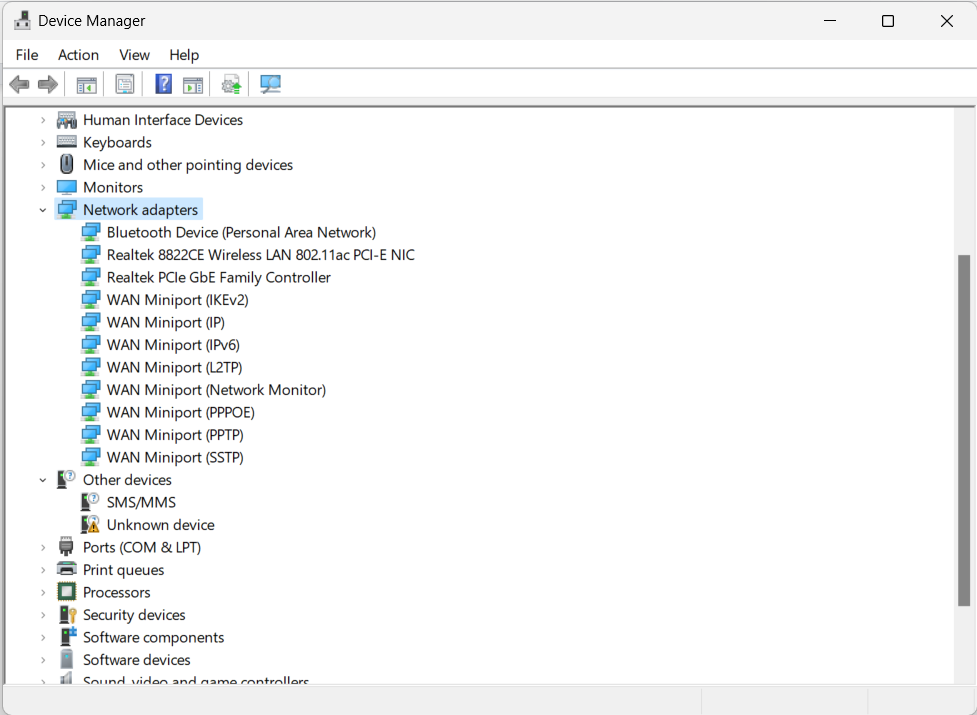
In itsOpen:text field, typedevmgmt.msc, and press theEnter key.

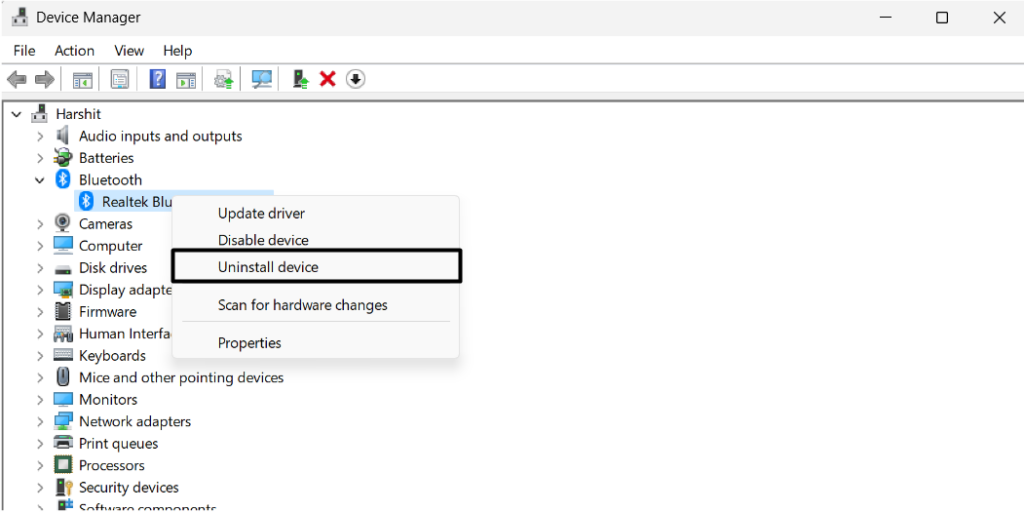
2.InDevice Manager, expand all the sections one by one and look for drivers with exclamation marks.
3.Once found, right-click it and choose theUninstall deviceoption from the contextual menu.
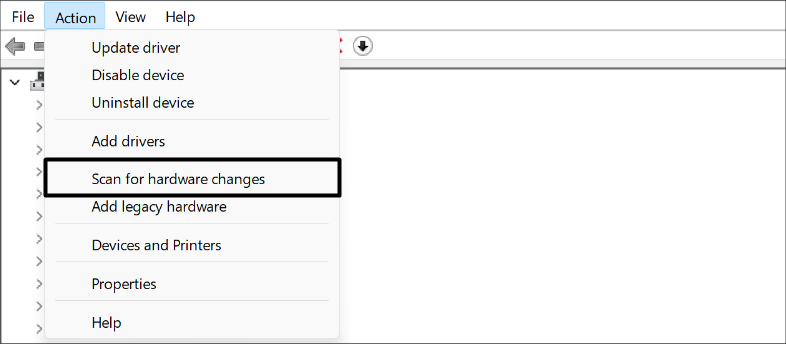
4.ClickActionin the top menu, and then chooseScan for hardware changesfrom the dropdown menu.

After doing so, the uninstalled system drivers will install again on your Windows 11 PC or laptop.
Thus,ensure your Windows 11 PC has enough spaceto load the new Windows updates.
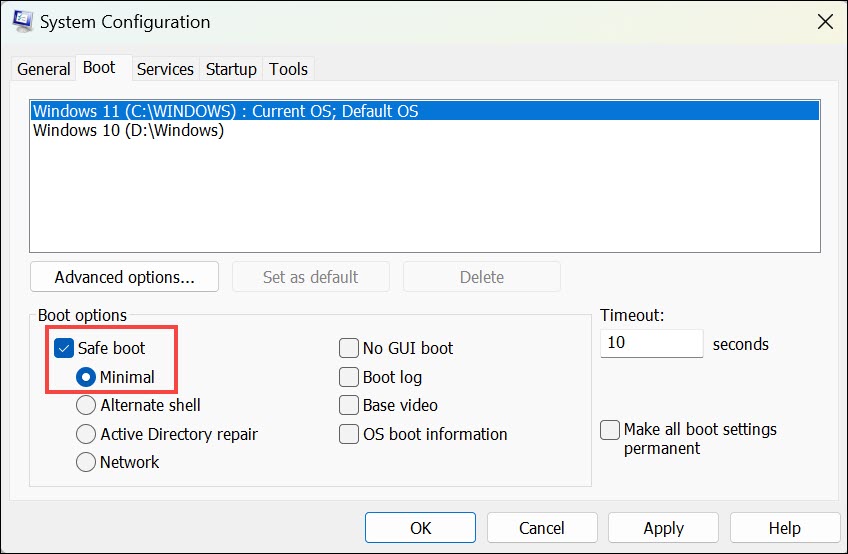
2.Choose it from the search results underBest matchto openSystem Configurationon your PC.

3.In theSystem Configurationwindow, go to theBoottab and tick theSafe modecheckbox.
4.Once done, click theOKbutton at the bottom right corner of the window to save the changes.
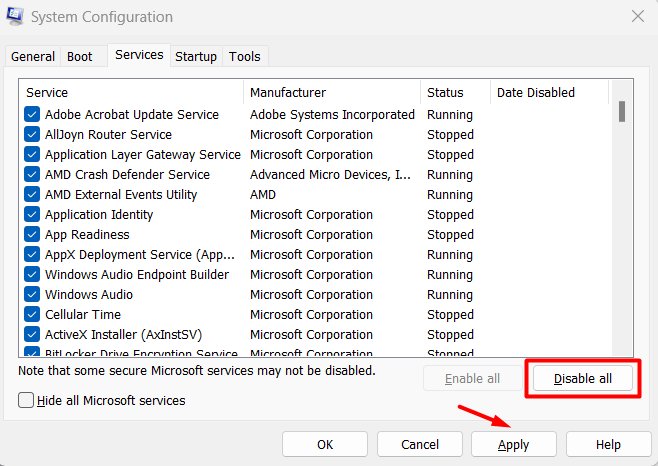
5.Go to theServicessection and check theHide all Microsoft servicescheckbox at the bottom.
6.Once done, click theDisable allbutton to end all the non-Microsoft services on your PC.
7.Go toStartup, chooseOpen Task Manager, and close all the tasks one by one.
Once done, power cycle your PC or laptop and check the updates are downloading and installing properly.

FAQs
What to Do if Windows 11 Update Is Stuck?
Why Is the Windows 11 Update Taking So Long?
How Do I Fix Windows 11 Stuck on Getting Ready?
Why Is Windows 11 Downloading Stuck at 100%?
Why Is Windows 11 Installation Stuck?
If your Windows 11 installation has stuck, then it could be possible that the hard disk is slow.
At last, we hope this guide helped you fix the Windows 11 update stuck issue.
![]()