Well, we are pleased to inform you that you have come to the right page!
In this in-depth guide, we will be discussing everything about the said BSoD error on Windows 11.
So, without any further delay, check out the following sections for all the details!

What is the VIDEO_TDR_FAILURE (nvlddmkm.sys) Error on Windows 11?
Were just collecting some error info, and then well restart for you.
After the data collection process completes, the equipment automatically restarts, and boots up normally.

After the restart, users can continue using the gadget as usual.
After gathering the fixes, we have curated a comprehensive list that you’re able to find below.
To simplify it for you, we have mentioned each of them in dedicated sections right below.

So, check them out and choose the one that you deem the most appropriate for you.
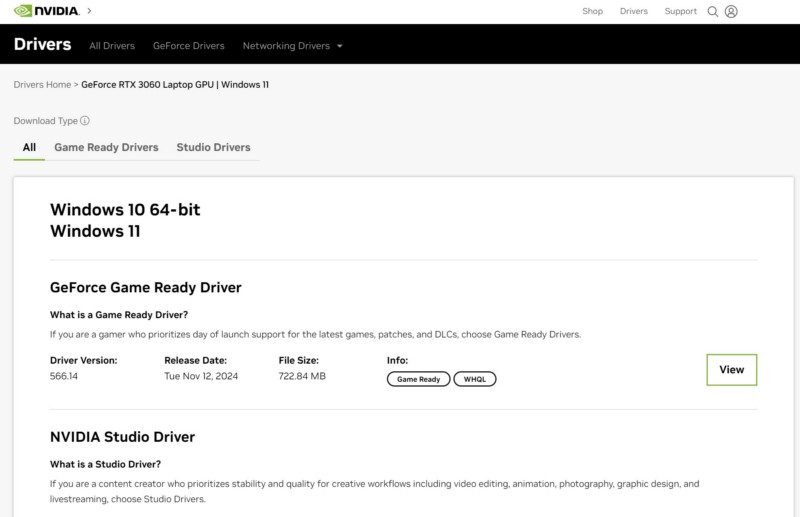
The popular graphics card manufacturers NVIDIA and AMD both have their own OEM apps.
There, you will find the latest available driver update, ready to download and install.
Once the update is available, follow the on-screen instructions to download and install it.
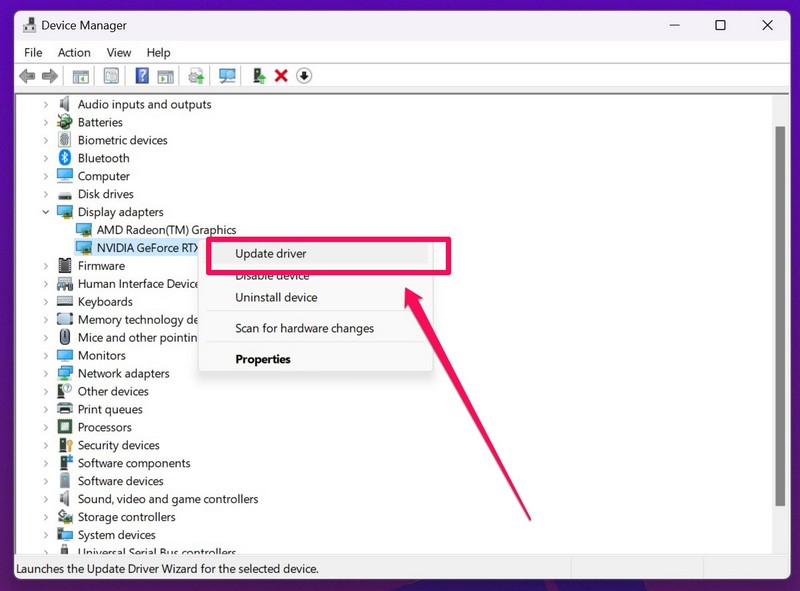
2.Select theDevice Manager optionon the pop-up list.
3.In the following gadget Manager window,grab the tiny arrownext to theDisplay Adapters sectionto expand the same.
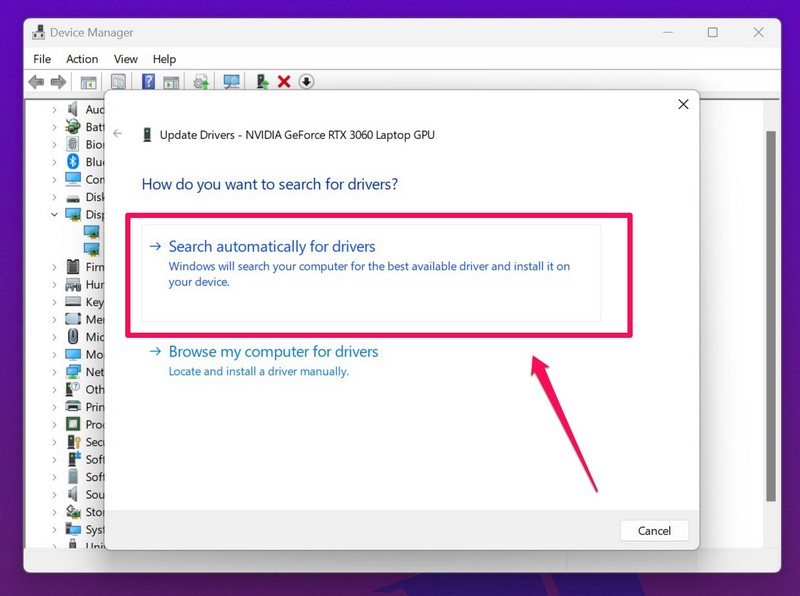
5.On the following prompt, click theSearch automatically for drivers option.
6.Wait for the Windows system to download and roll out the latest available update.
7.If you have multiple graphics cards, use the same steps toupdate the drivers for all of them.
8.After updating all the graphics drivers, end the machine Manager window, andrestart your machine.
Right-hit a graphics driverand select theUninstall machine optionon the context menu.
Confirm your actionon the following prompt.
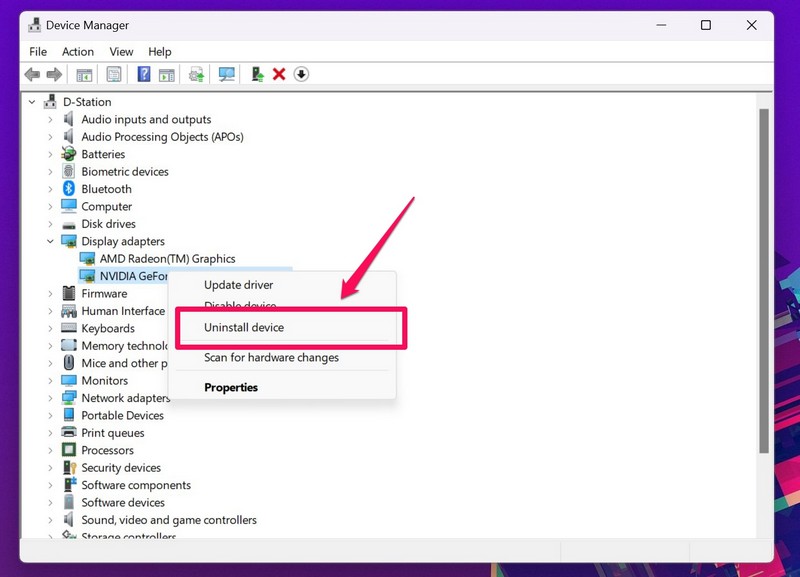
4.Wait for the driver to uninstall on your PC or laptop.
5.Do the same for all the graphics drivers, if you have more than one.
6.Once you uninstall all your graphics drivers,cycle your Windows 11 computer.
You see, new driver updates for graphics cards may sometime be incompatible for certain GPU models.
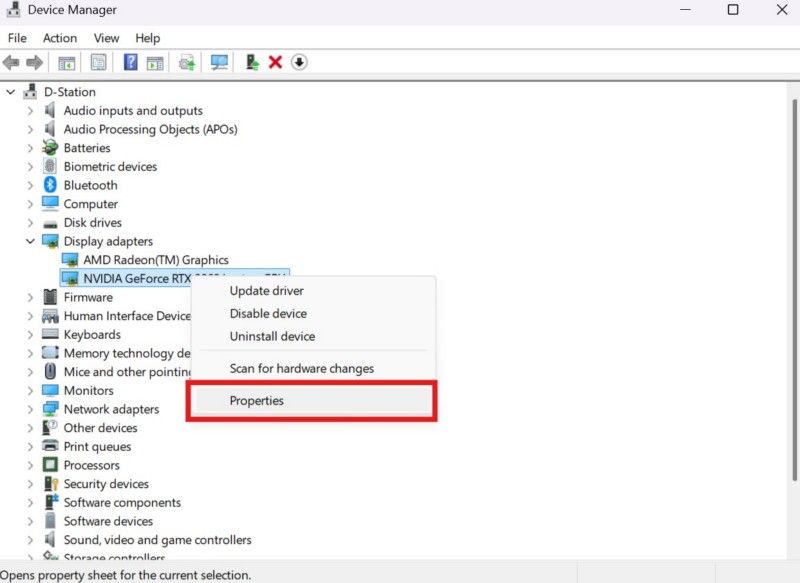
Use steps 1-3from thesecond part of Fix #1to access theDisplay adapters sectionwithin theDevice Manager windowon your gadget.
Right-choose your graphics driverand select theProperties optionon the context menu.
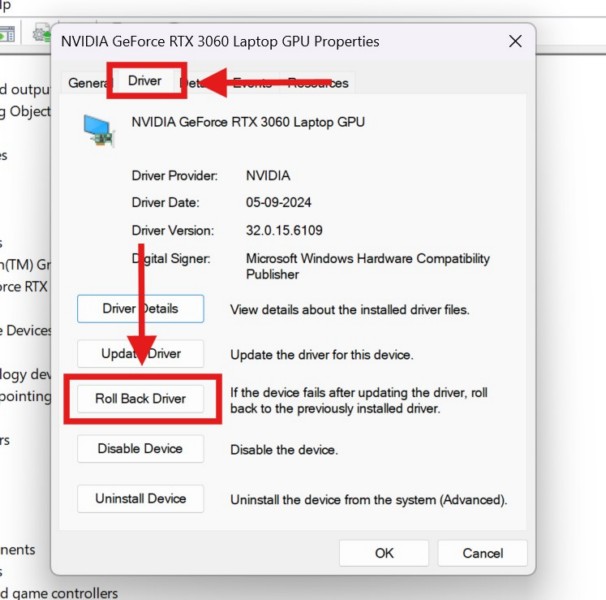
3.In the following Properties window, go to theDriver tabfrom the above tab-bar and click theRoll Back driver buttonbelow.
5.After it is completed,reboot your Windows 11 PCor laptop.
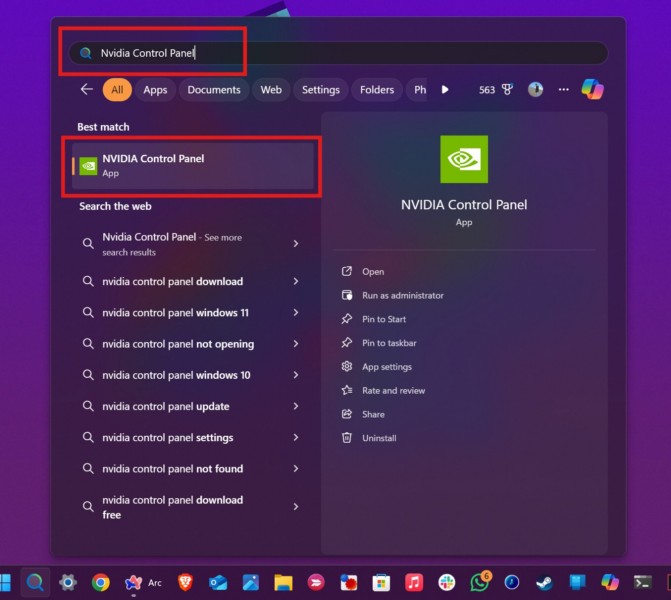
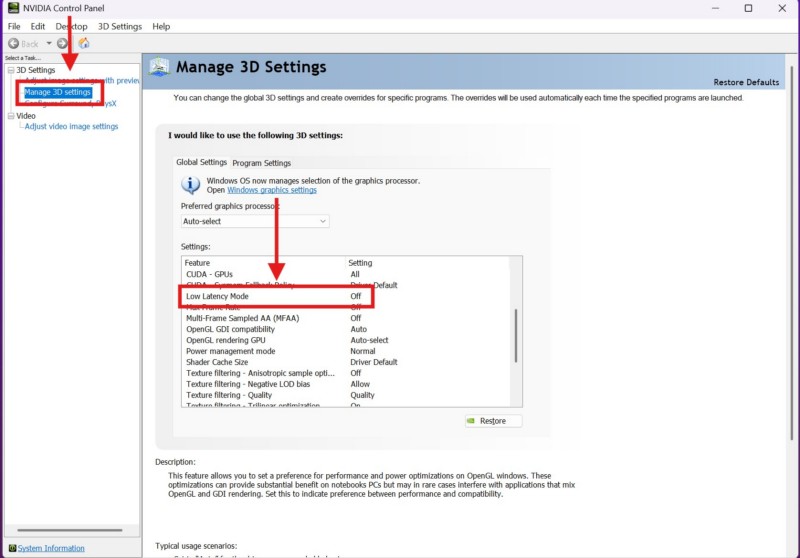
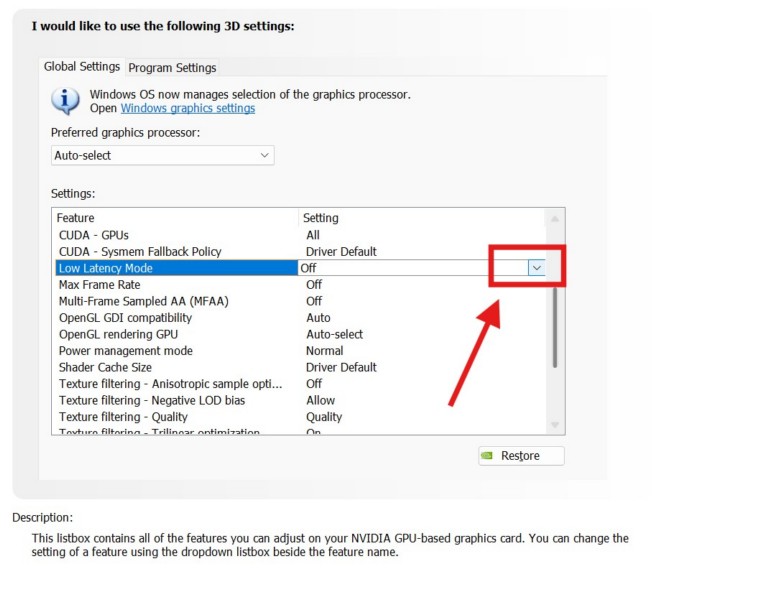
2.key in inNvidia Control Panelandclick on the same to launch the tool.
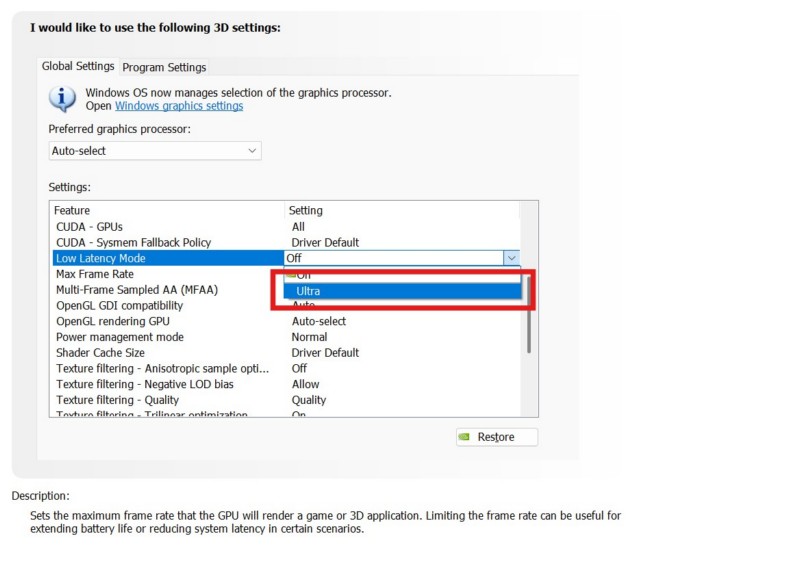
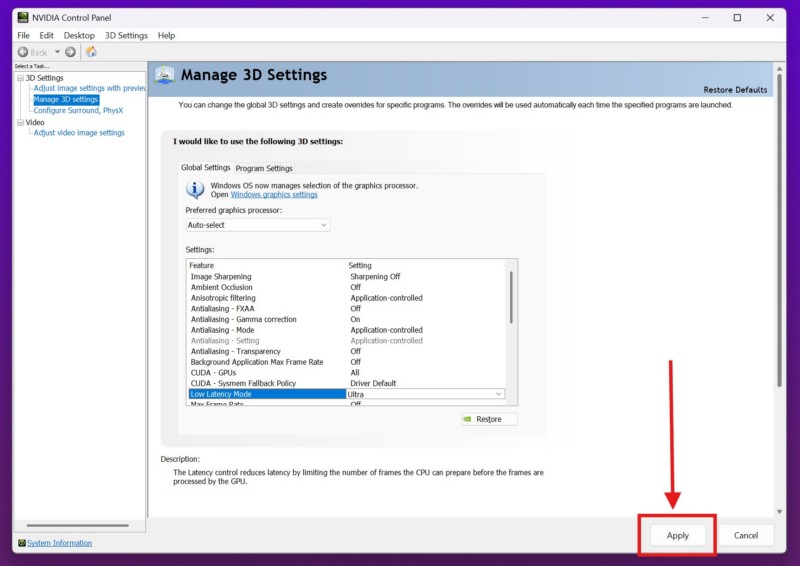
5.Here, select theOnorUltra option(whichever is available) toenable iton your gadget.
6.Finally, click theApply buttonbelow to save the change.
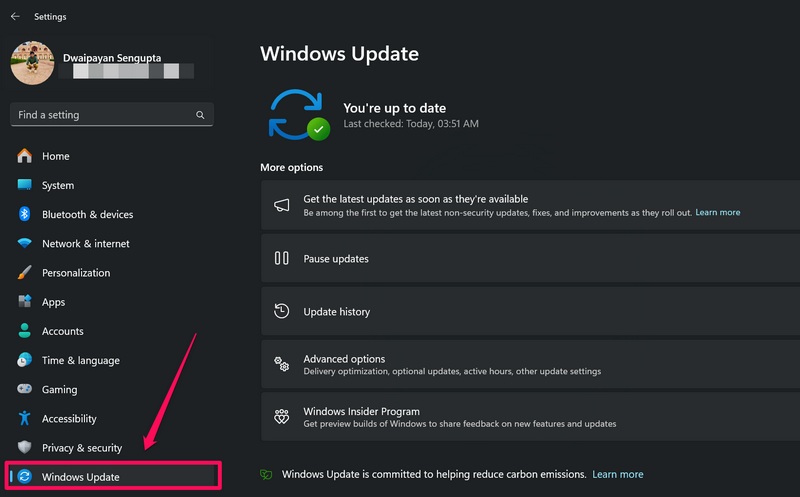
2.Go to theWindows Update tabon the left navigation bar.
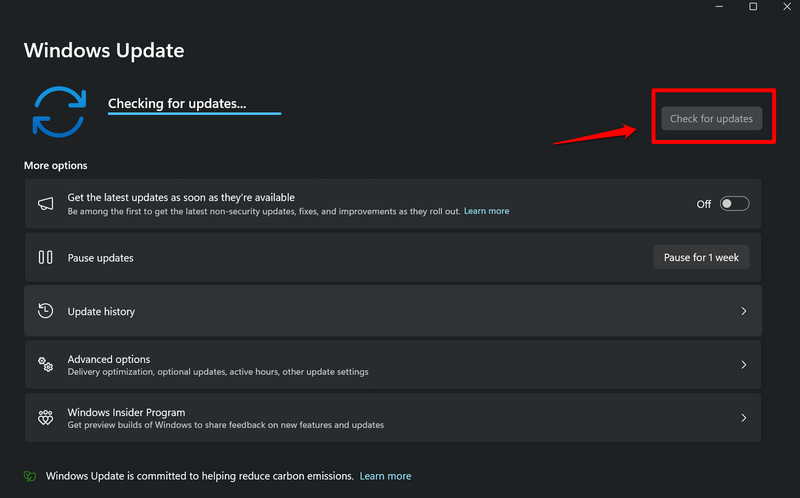
If there are any updates available, they should automatically show up on the right pane.
If they do not, click theCheck for update buttonto manually check the Microsoft servers.
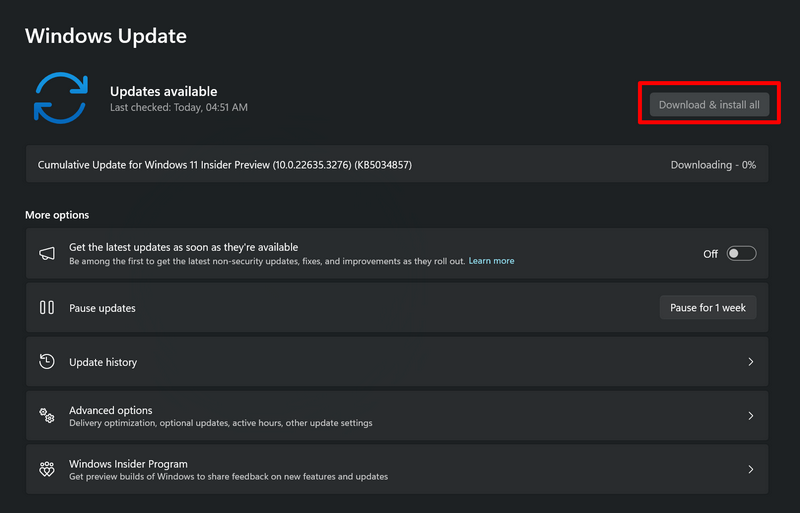
4.Once the latest Windows updates are available, they should start downloading automatically.
In case they do not, click theDownload and install all buttonabove to initiate the process.
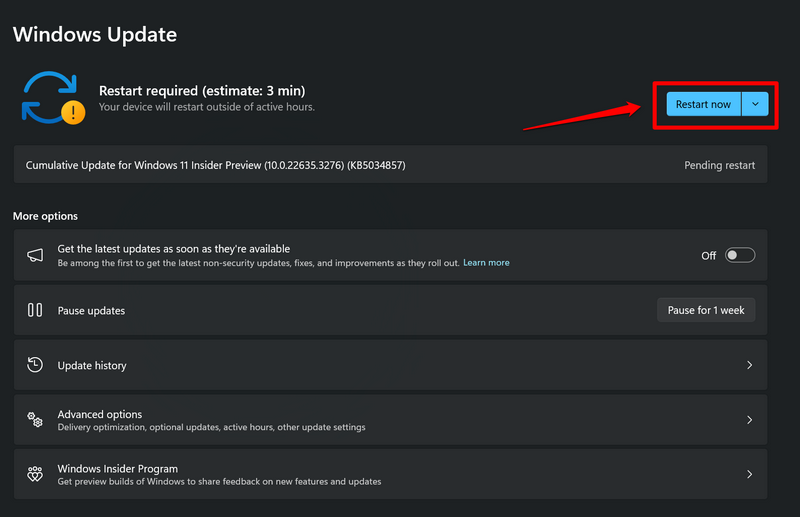
5.Wait for the updates to download on your gadget.
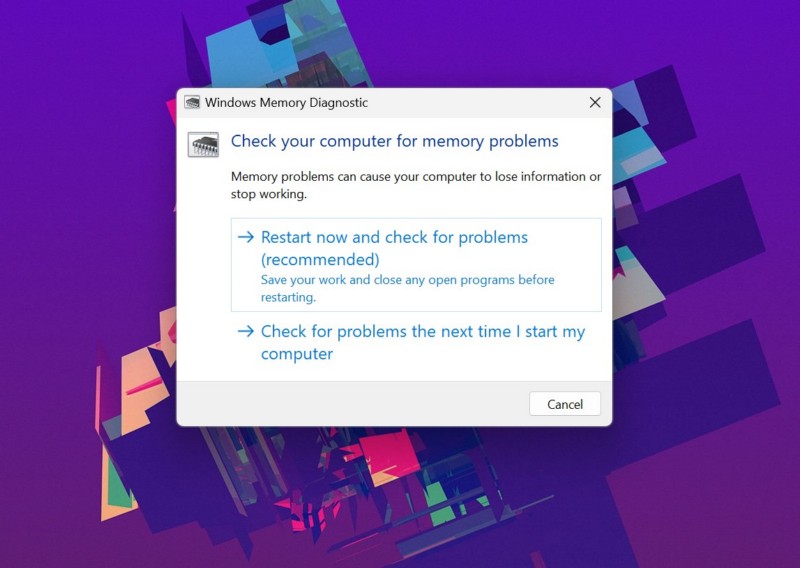
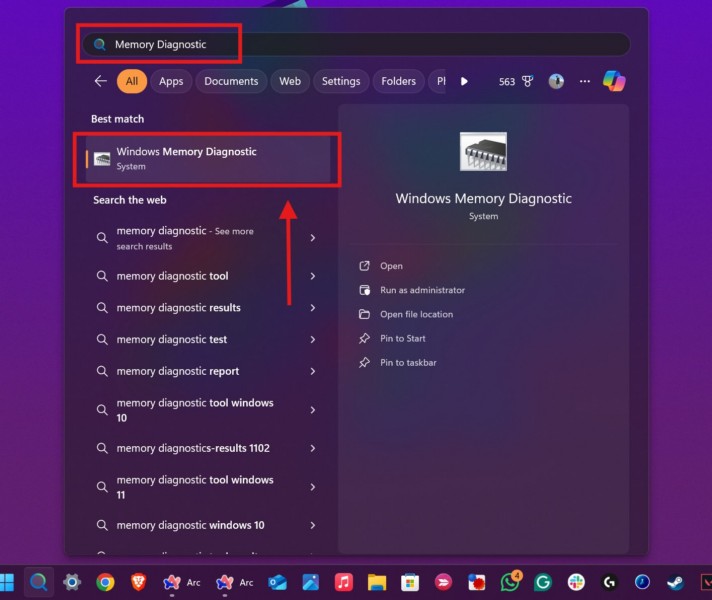
2.punch in inmemory diagnostic in the provided search box and click theWindows Memory Diagnostic toolto open it.
3.Click theRestart nowand check for problems (recommended) optionon the following prompt.
4.Wait for your Windows 11 PC or laptop to reboot.
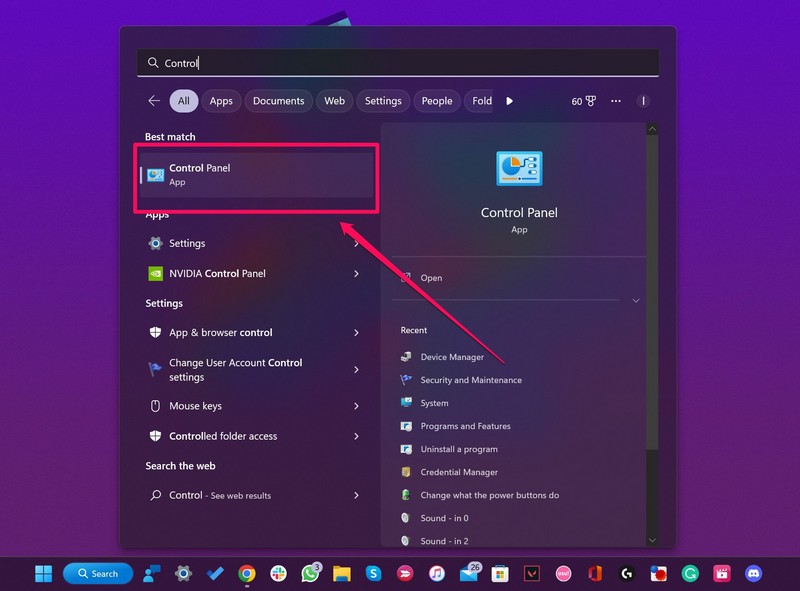
2.Find theControl Panelusing the above search box andclick on it to open.
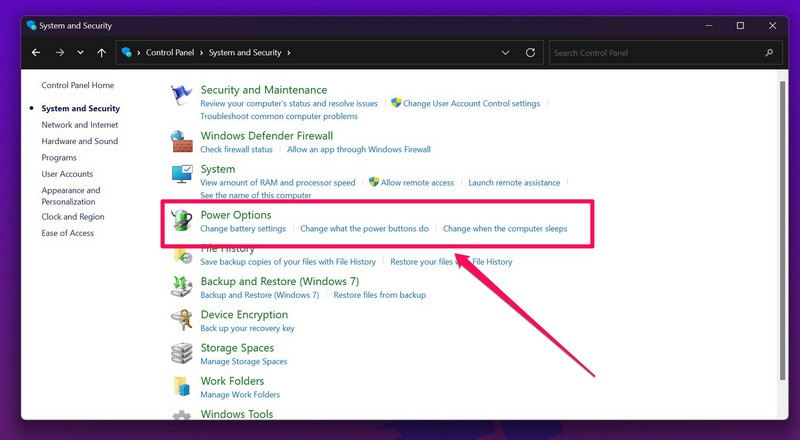
3.In the Control Panel window, Click theSystem and Security optionat the top.
4.On the following page, click theChange what the power buttons do optionunder thePower Options section.
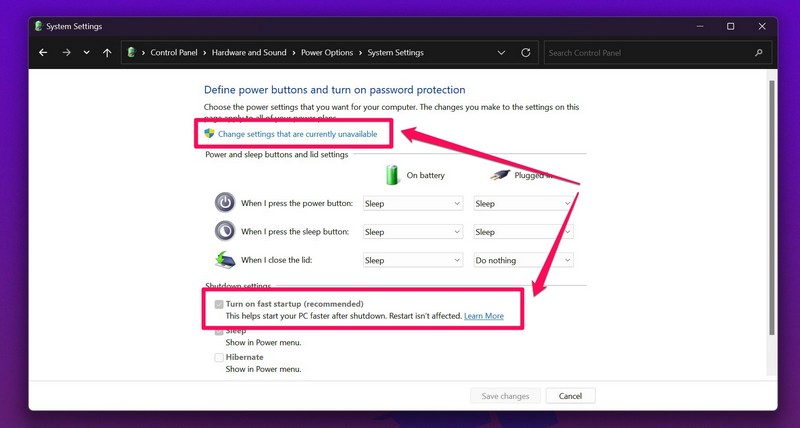
5.Here, click theChange controls that are currently unavailable button.
You must have administrative privileges to unlock the unavailable tweaks on this page.
This will turn off the said feature on your Windows 11 PC or laptop.
7.After doing so, click theSave changes buttonto save it on your machine.
After disabling the Fast Startup feature, reboot your Windows 11 computer and start using it normally.
see if you get the VIDEO_TDR_FAILURE (nvlddmkm.sys) error at any point or not.
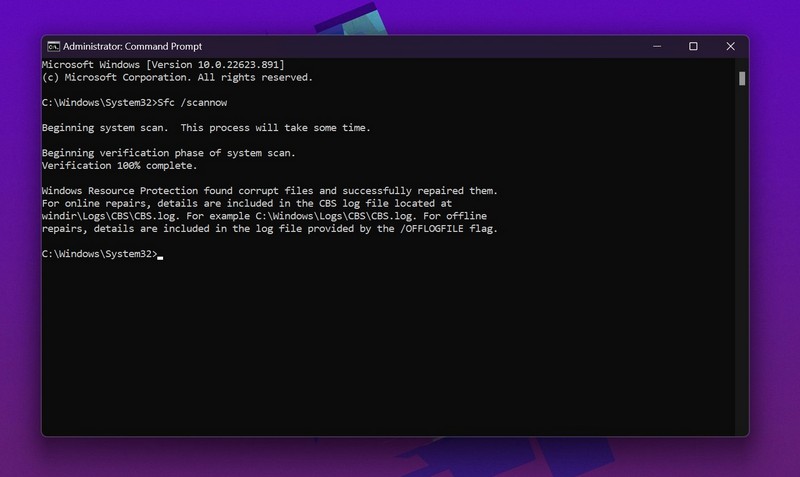
2.Click theRun as administrator buttonfor theCommand Prompt toolon the search results page.
3.ClickYeson the followingUser Account Control (UAC)prompt.
- power cycle your Windows 11 PCor laptop after completion.
3.Wait for the last DISM scan to complete.
4.reset your Windows 11 deviceafter completion.
What to do when you get the nvlddmkm.sys error on Windows 11?
The nvlddmkm.sys error usually shows up with a Blue Screen of Death (BSoD) on Windows 11.
When it triggers on a PC or laptop, a user can wait for the unit to automatically restart.
Can RAM cause the nvlddmkm.sys error on Windows 11?
Much like any other BSoD error, the nvlddmkm.sys error can be a concerning sight for Windows 11 users.