Like other voice and video calling applications, the Skype app also keeps getting new annoying issues.
For instance, it sometimes refuses to launch on the PC.
Whereas, at times, itfails to send alertsof new texts and calls.
Now, users have discovered a new issue with it.
This time users are experiencing issues with Skypes microphone.
Read ahead and fix the Skype microphone not working issue on your Windows 11 PC.
Why Is Skype Microphone Not Working in Windows 11?
At the same time, we suggest you visitSkypes DownDetector pageto check the real-time issues with Skype.
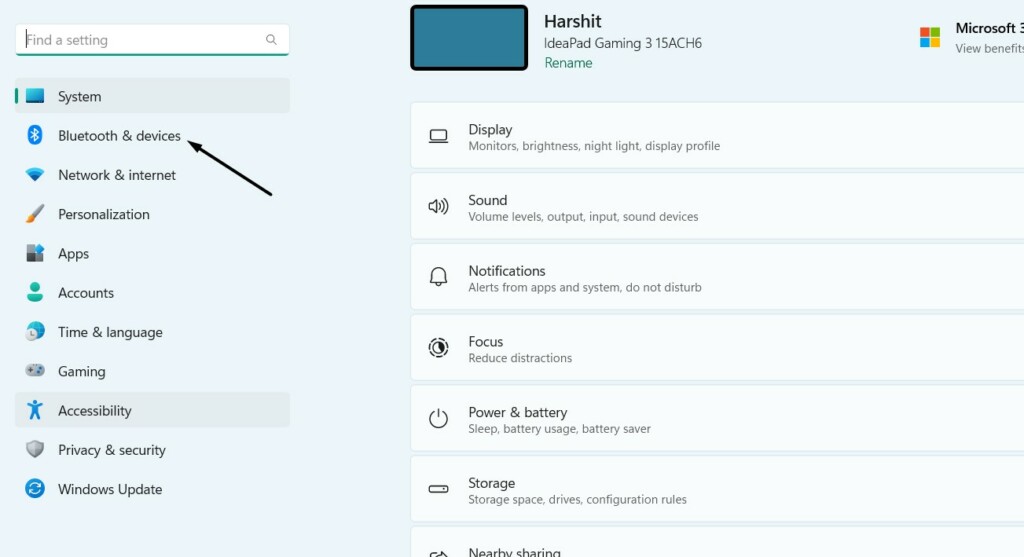
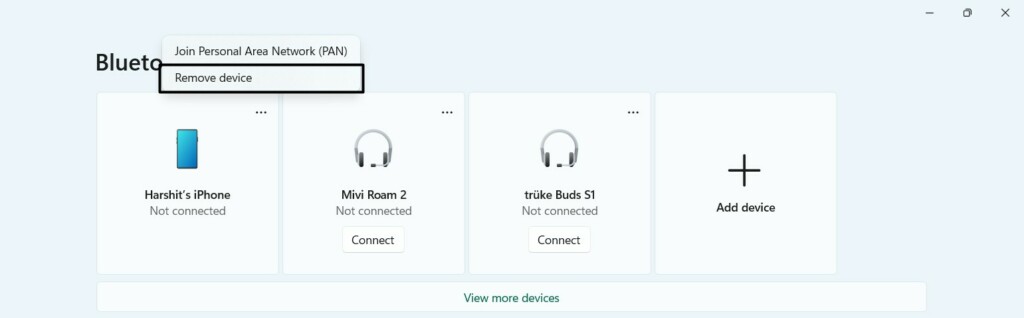
2.On the next screen, clickthree dots(…)next to your BT gadget and selectRemove devicefrom it.
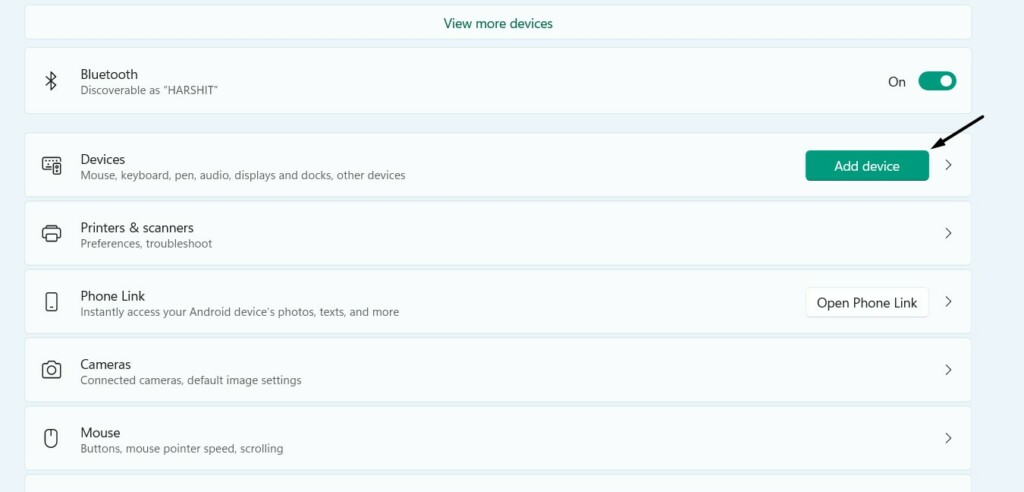
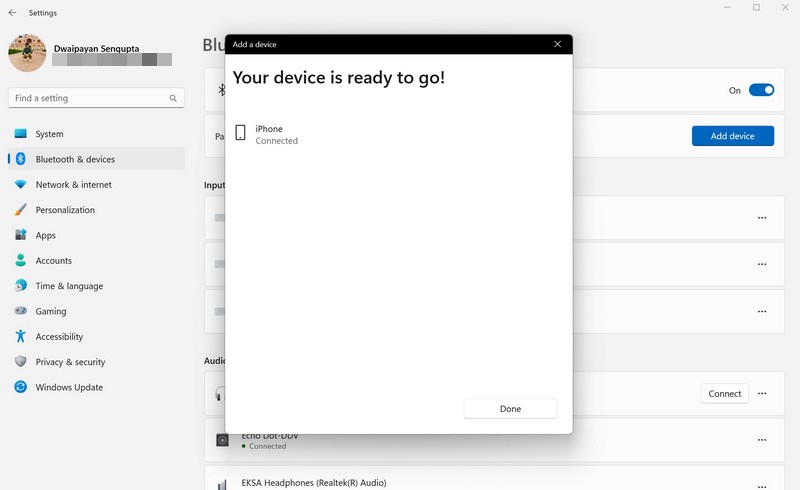
3.Once its disconnected, click theAdd devicebutton and then choose theBluetoothoption.
4.Select your Bluetooth headphones or microphone on the next screen to connect it to your PC.
5.Once done, open Skype and try making a free test call to see if the microphone is working.
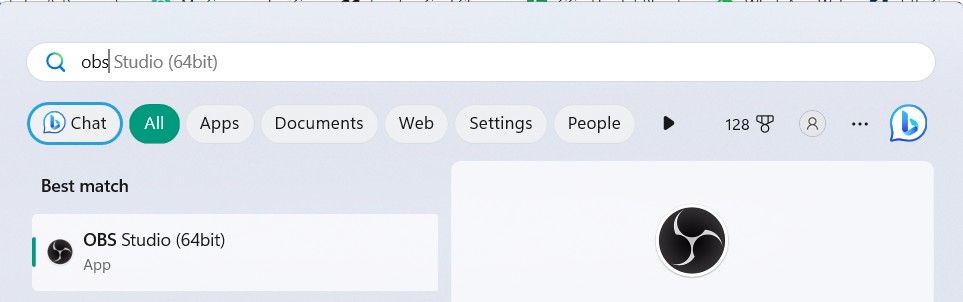
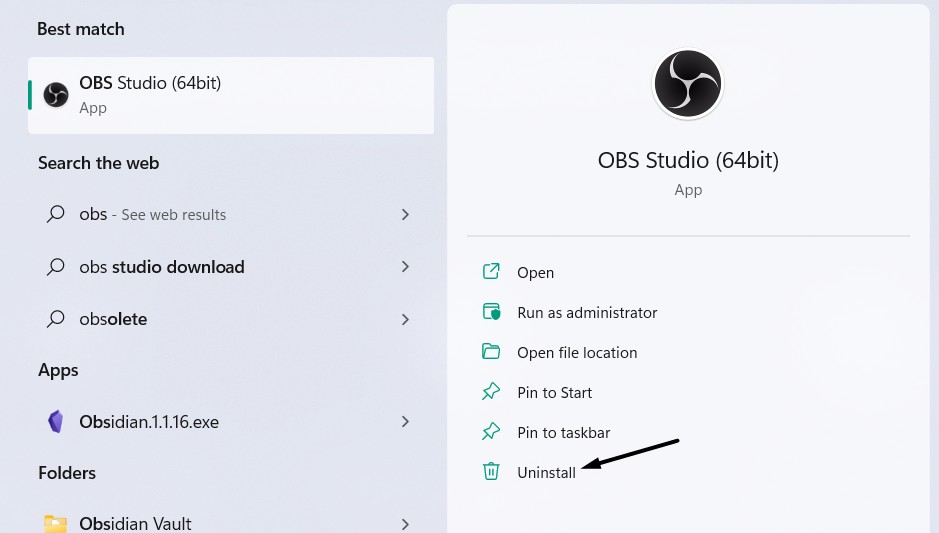
2.Click theUninstallbutton in the search results and then again clickUninstallin the next prompt.
3.Once the OBS software is uninstalled, look to see if the Skype microphone is now working again.
Ensure the Microphone is ON
Some headsets also come with a button to toggle on/off the microphone.
If your microphone also has a button to turn on/off the microphone,double-check its ON.
So try the same.
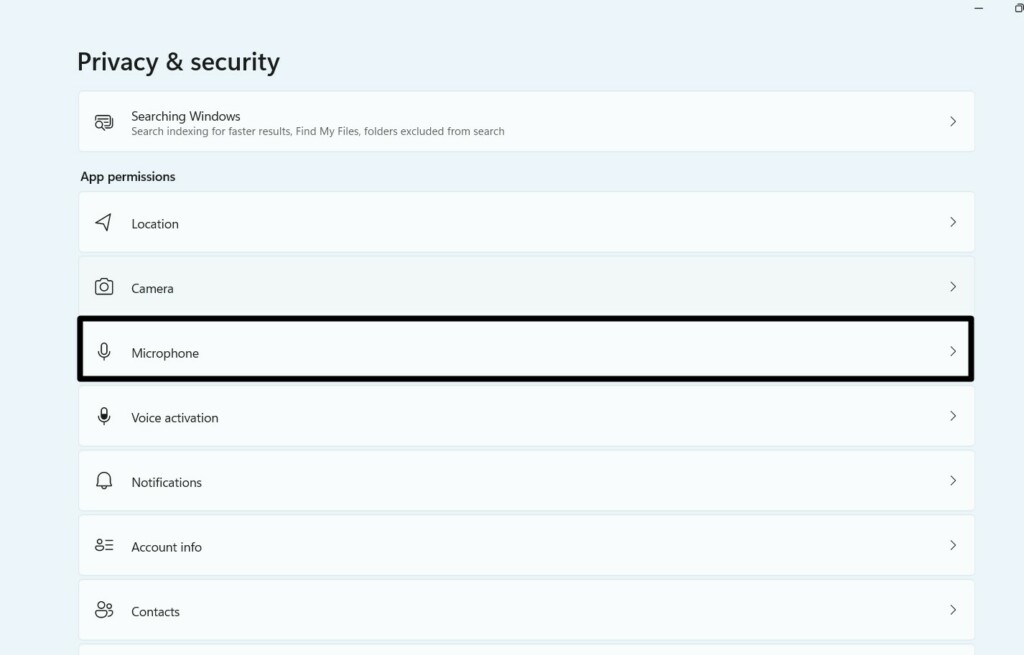
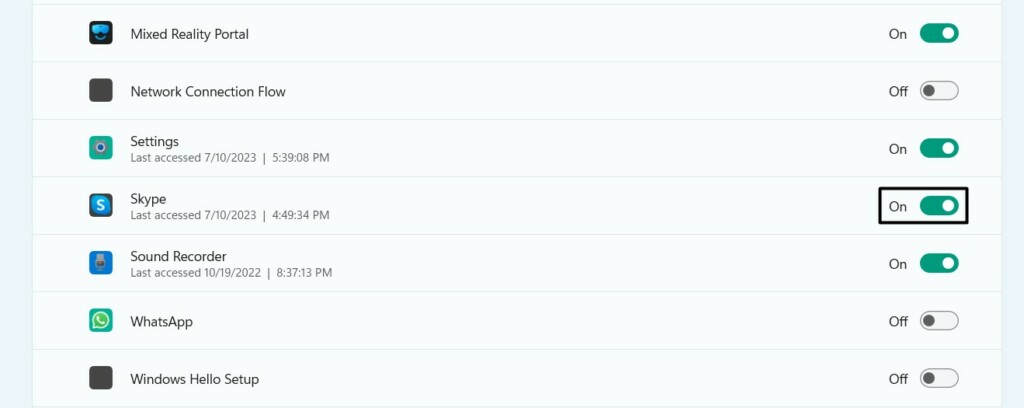
2.In thePrivacy & securitywindow, chooseMicrophonein theApp permissionssection.
3.On the next screen, ensure theMicrophone accesstoggle is enabled and look for theSkypeapp.
4.verify the toggle next toSkypeis enabled or ON, and then check the issues status.
Due to this, the Skype microphone not working issue is appearing on your Windows 11 PC or computer.
Thus, we suggest youensure that the right microphone is selected in the Skypeapp.
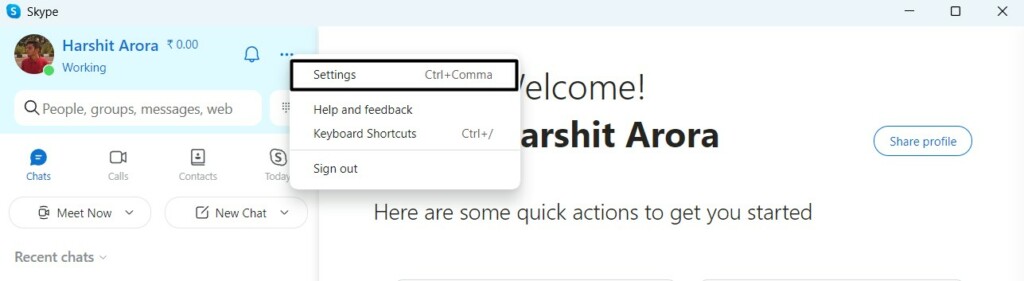
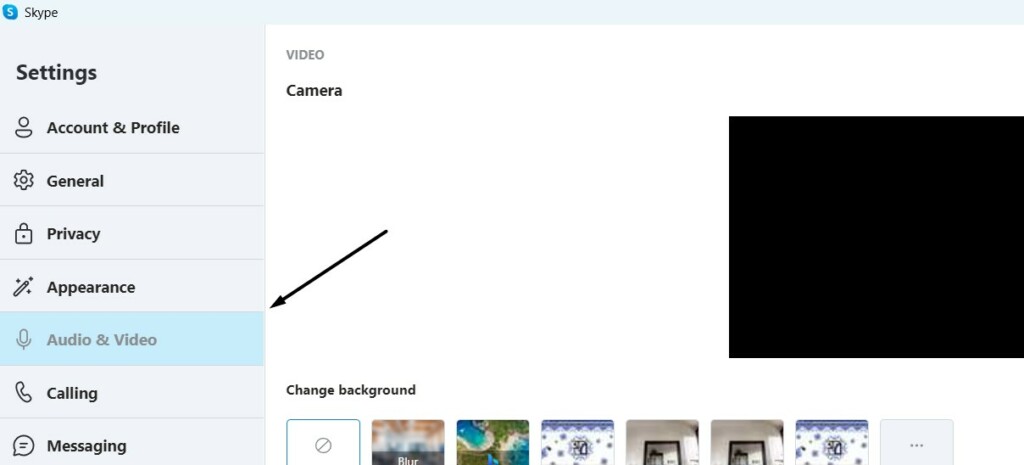
2.Select theSettingsoption from the popup menu to proceed to theSettingssection of it.
3.SelectAudio & Videofrom the left sidebar and kick off the dropdown menu next toAudio.
4.snag the audio gadget that you want to use as a microphone to capture your voice while calling.
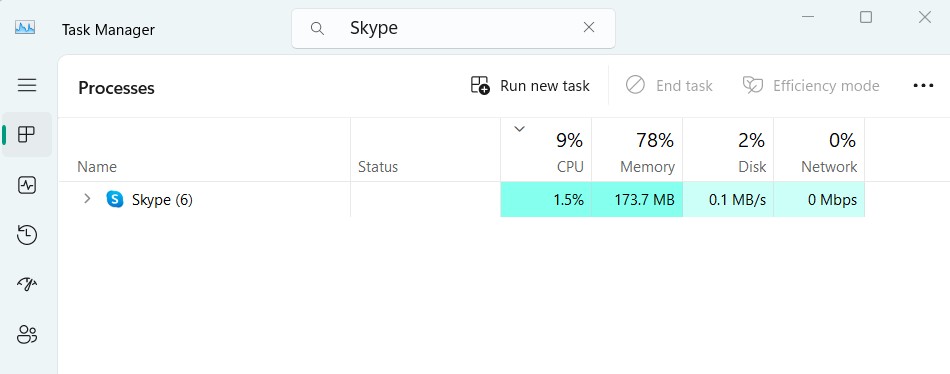
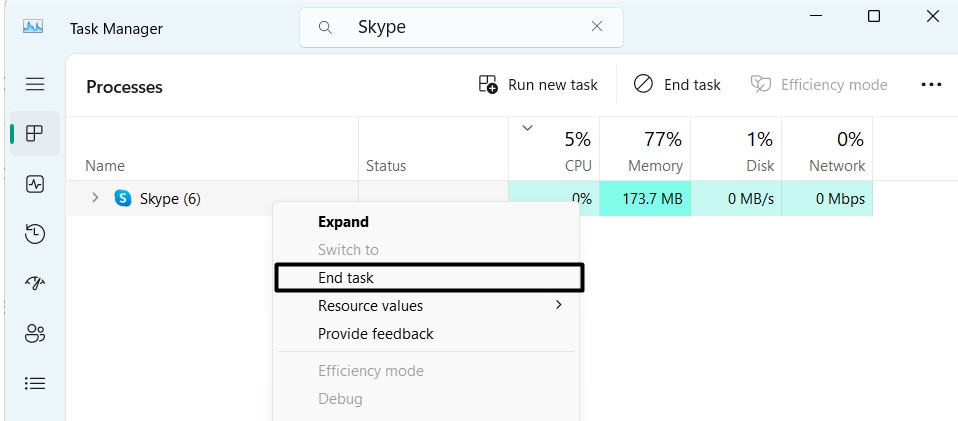
2.Search forSkypeunder theProcessessection and right-hit it to get the context menu.
3.Select theEnd taskoption from the contextual menu and re-open Skype to see if the issue is gone.

Hence, the Skype microphone wasnt working correctly.
Thus, we suggest youensure your audio equipment is enabled.
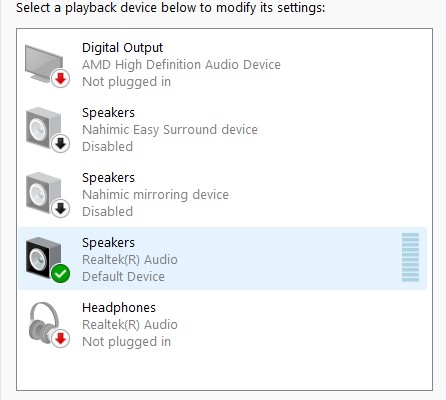
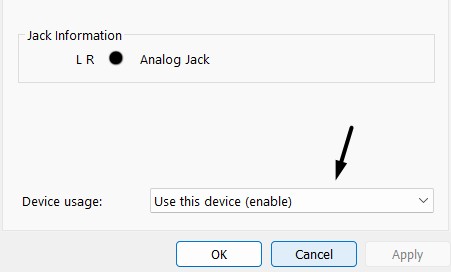
2.Go to the bottom of the next window and click theMore sound settingsoption to get a prompt.
3.In theSoundwindow, look for your audio gadget and double-click it to pop pop the properties.
4.In the end, set theDevice usage:dropdown menu toUse this gadget (enable)and clickApply.
Theres a possibility that the Windows Audio service isnt working and leading to this issue.

In that case, we suggest yourestart the Windows Audio serviceon your PC to ensure its working properly.
Try the below-mentioned steps to restart this service:
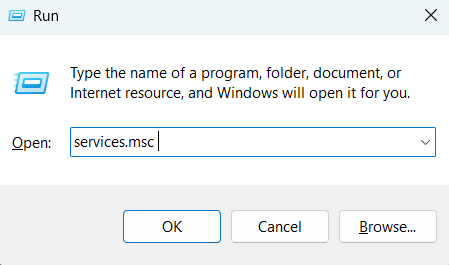
1.Open theRun utilityon your setup usingWindows + Rand typeservices.mscin it.
2.Press theEnter keyon your keyboard to open theServicesutility on your Windows PC.
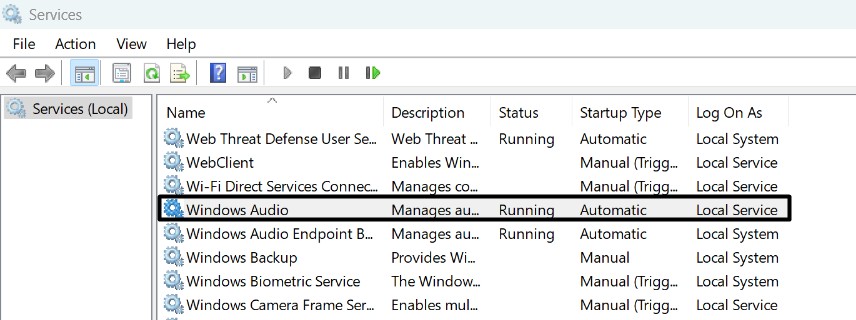
3.In theServiceswindow, look for theWindows Audioservice and double-tap on it.
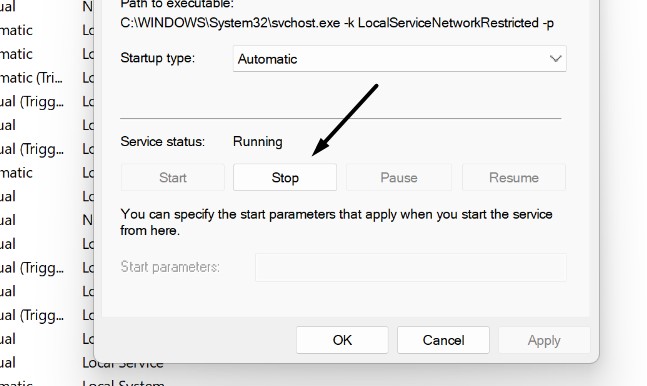
4.Click theStopbutton and then click theStartbutton to restart the selected Windows service.
Hopefully, the Skype microphone not working issue is fixed now on your Windows 11 PC or laptop.
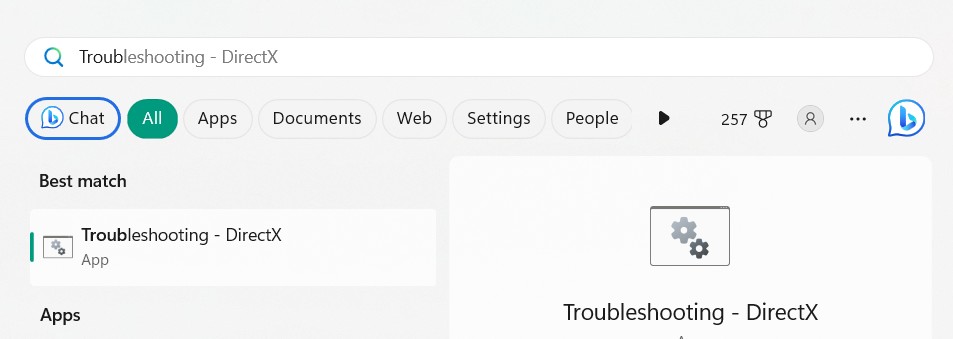
2.In the next prompt, click theYesbutton and let it look for the issues with your PC drivers.
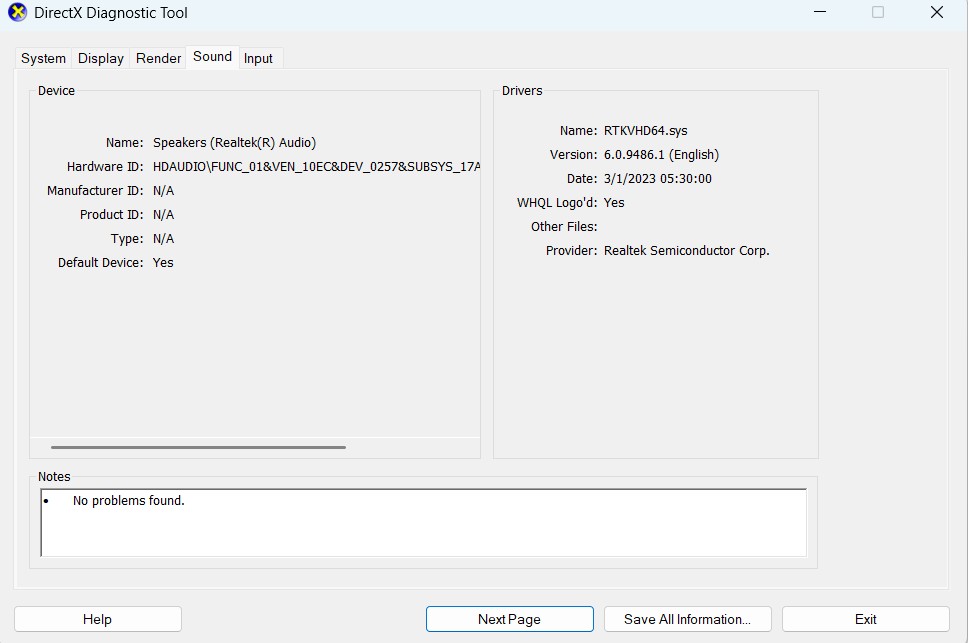
3.Once done, go to theSoundtab of theDirectX Diagnostic Toolwindow and check theNotesarea.
If theNotessection mentions some kind of issue, search for them on the internet and fix them.

You also need to also go to theAudiotab of the window and check the same there.
Update the Audio Drivers
1.Move to theSettings sectionof your Windows 11 PC and selectWindows Updatefrom the left.
2.ClickAdditional optionsand selectOptional updatesto view all the optional updates.

Hopefully, this will make the Skype microphone work.
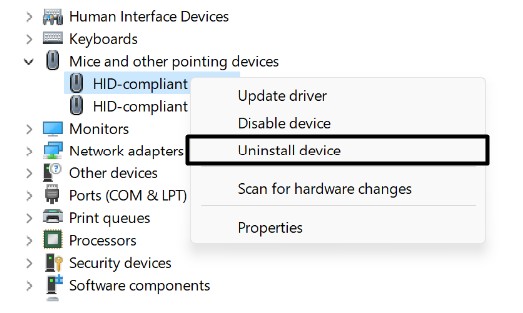
2.Right-click one of the mentioned audio drivers and selectUninstall devicefrom the context menu.
3.ClickUninstallin the next prompt to remove the selected driver from your Windows PC.
4.Click theActionoption in the top ribbon menu and chooseScan for hardware changesfrom the menu.
5.Once you do this, the previously uninstalled audio driver will reinstall on your Windows PC.
Thus, we suggest yourun the Audio troubleshooteron your PC to fix them.
So follow the below steps to run this troubleshooter:
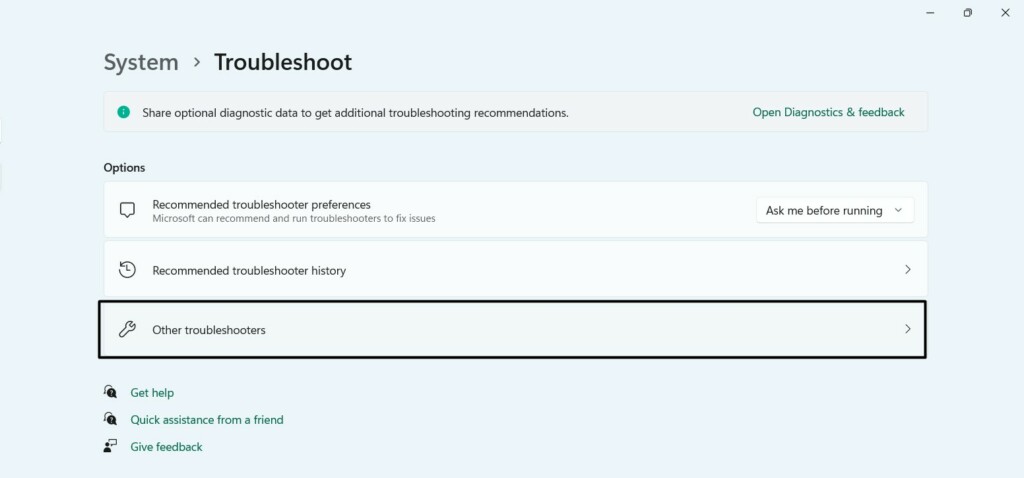
1.Open theSettings appon your Windows computer and click theTroubleshooteroption.
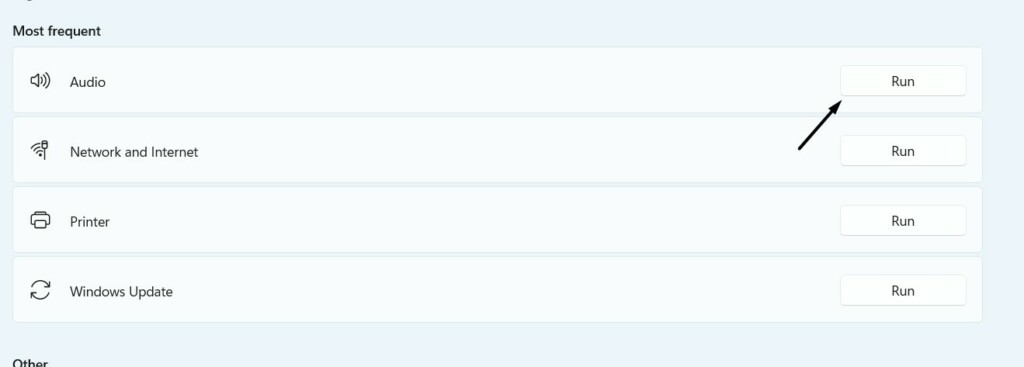
2.On the next screen, selectOther troubleshootersand look forAudiounderMost frequent.
3.Click theRunbutton next to the Audio troubleshooter to start it and click theYesbutton.

4.In the end,wait for the Audio troubleshooter to begin and resolve issues with your PCs audio.
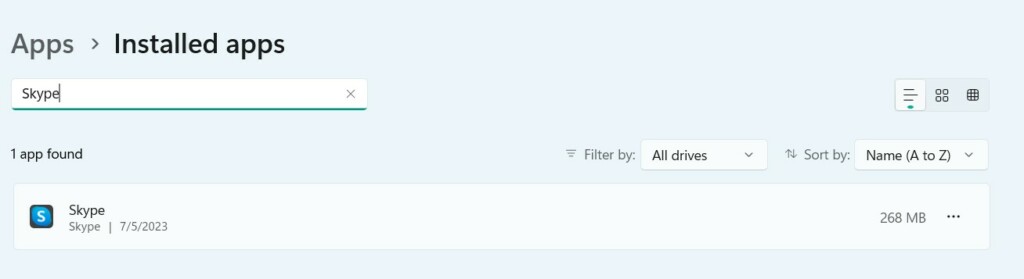
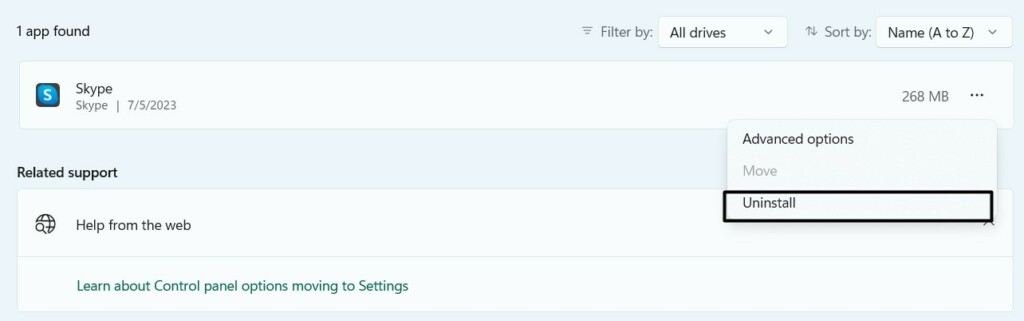
2.Click thethree dots (…)next to Skype and select theUninstalloption from the dropdown menu.
3.Click theUninstallbutton in the next prompt and wait for the app to uninstall from your PC.

4.Clickhereto download the Skype installation file and install Skype on your Windows 11 PC.
2.Click theCheck for updatesbutton at the top to command the PC to search for new updates.
3.If OS finds some new updates to install, click theDownload and install allbutton to do so.
Hopefully, theyll provide you with some working fixes to fix the issue.
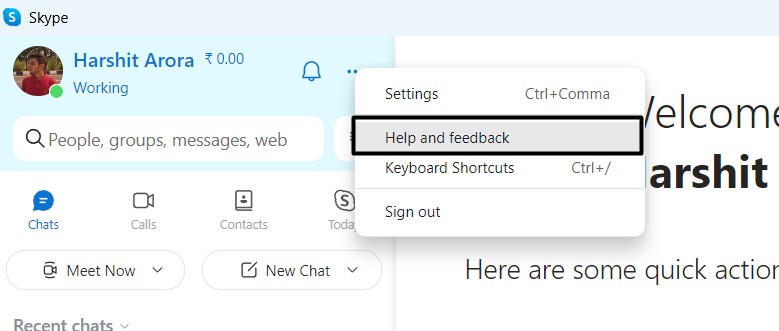
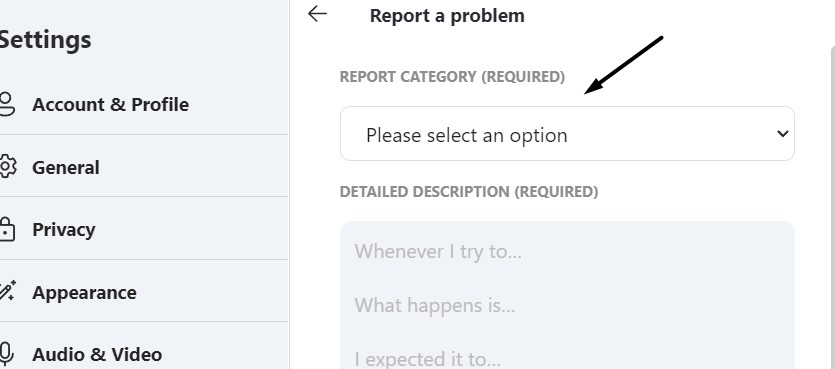
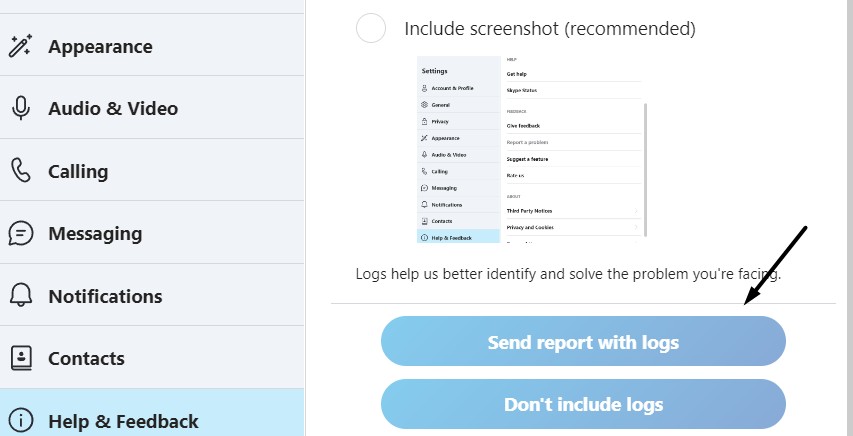
2.Select theHelp and feedbackoption from the menu and select theReport a problemoption.
3.grab the correct option from theREPORT CATEGORY (REQUIRED)dropdown menu.
4.Explain your issue in detail in theDETAILED DESCRIPTION (REQUIRED)box and go ahead.
5.Hit theSend report with logsbutton and wait for the support to revert with some fixes.
FAQs
Why Is My Microphone Not Working on Windows 11?
Why Is My Mic Not Working on Skype?
Another possible reason could be bugs and glitches in the app.
How Do I Enable My Built-in Microphone on Windows 11?
2.SelectMore sound options, right-click your current audio equipment, and choosePropertiesfrom the menu.
3.Go to theAdvancedtab and clickRestore Defaultsto reset your selected audio equipment to default.
How Do I test whether My Microphone Is Working on Skype?
2.Select theAudio & Videooption from the left sidebar and click theMake a free test calloption.
Else the other person wont be able to listen to you.
Sadly, for some users, the Skype microphone isnt working on their Windows 11 PC.
They say their mic doesnt record their sound even if its enabled.
If the same was with your Skype microphone, we hope this guide helped you fix it.
Lastly, let us know which listed workaround helped you fix the Skype microphone not working issue.