Check them out in the following sections.
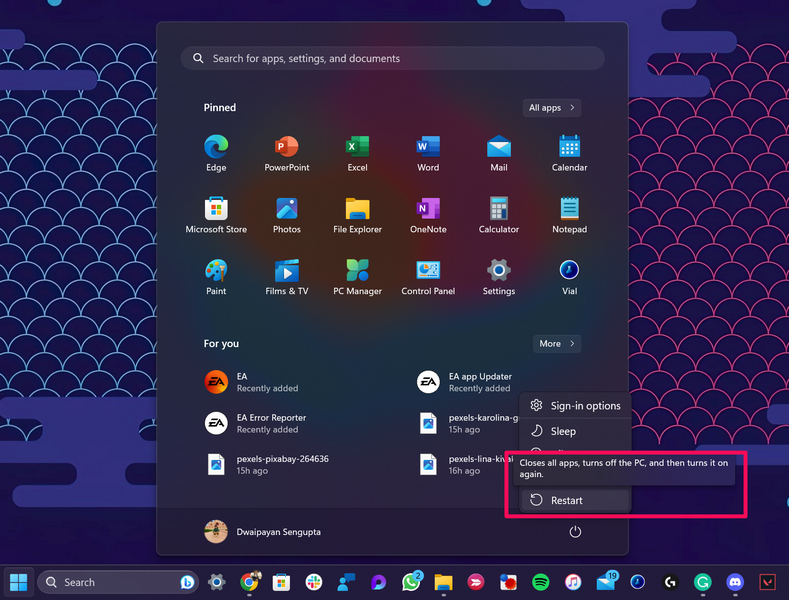
It essentially force-closes every app and background process on your Windows 11 PC or laptop.
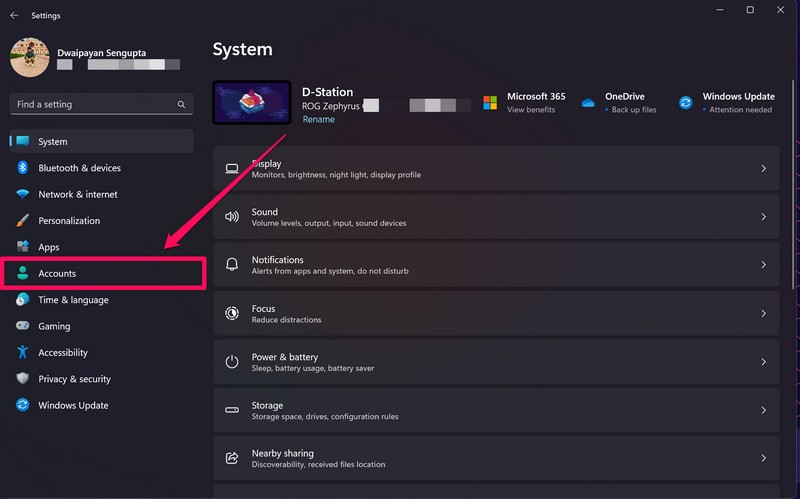
1.UseWindows + Ito launch the parameters app on your Windows 11 PC or laptop.
2.On the left navigations bar, go to theAccountstab.
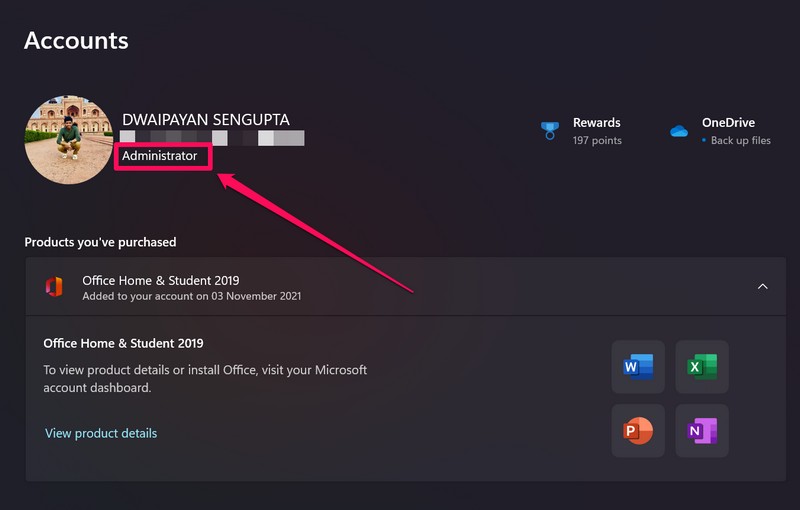
3.Here, check that you have theAdministrator tagunder your Microsoft account.
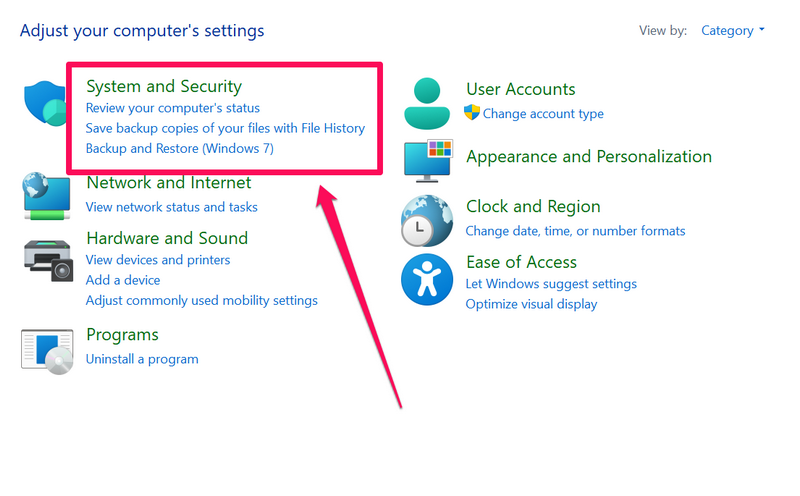
3.Next, click onSystem and Security.
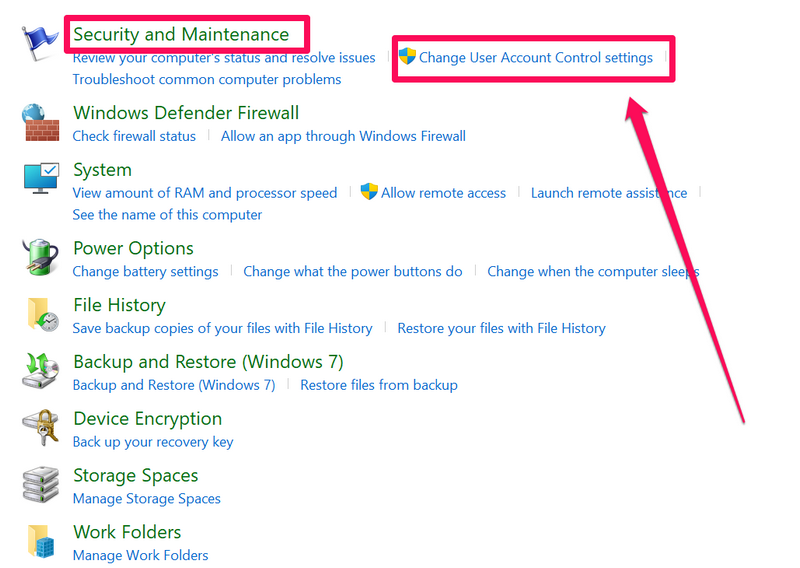
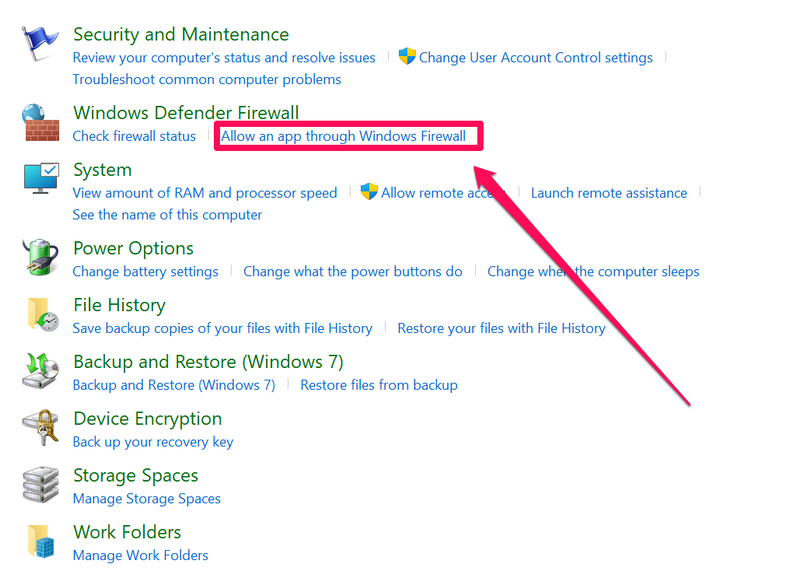
4.Under theSecurity and Maintenancesection, click theChange User Account Control Settingsoption.
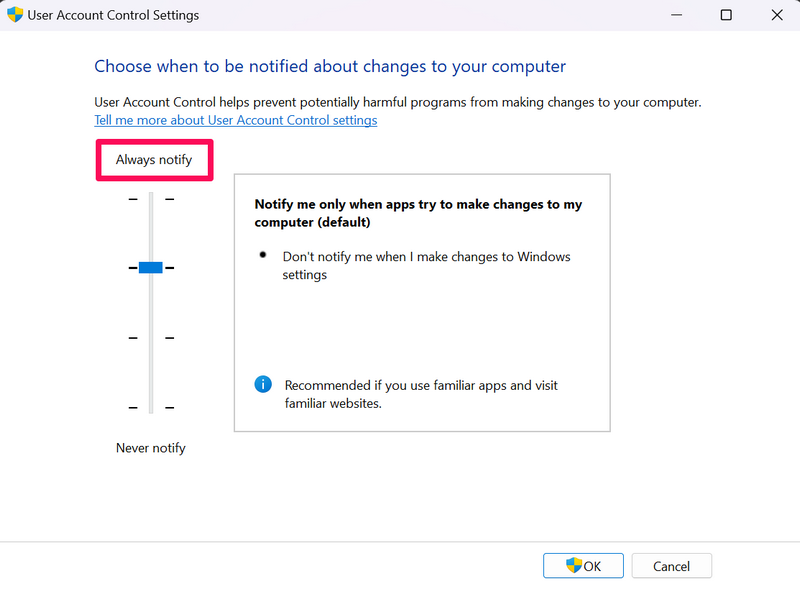
5.In the following window, verify the slider is set close toAlways notify.
It is the recommended setting for the User Account Control feature in Windows 11.
2.Go to theSystem and Securitymenu.
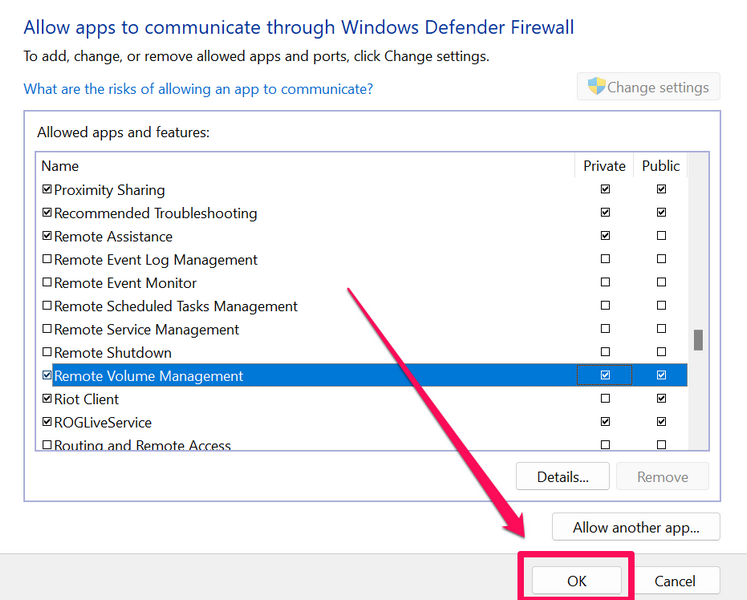
3.Under theWindows Defender Firewalloption, click theAllow an app through Windows Firewallbutton.
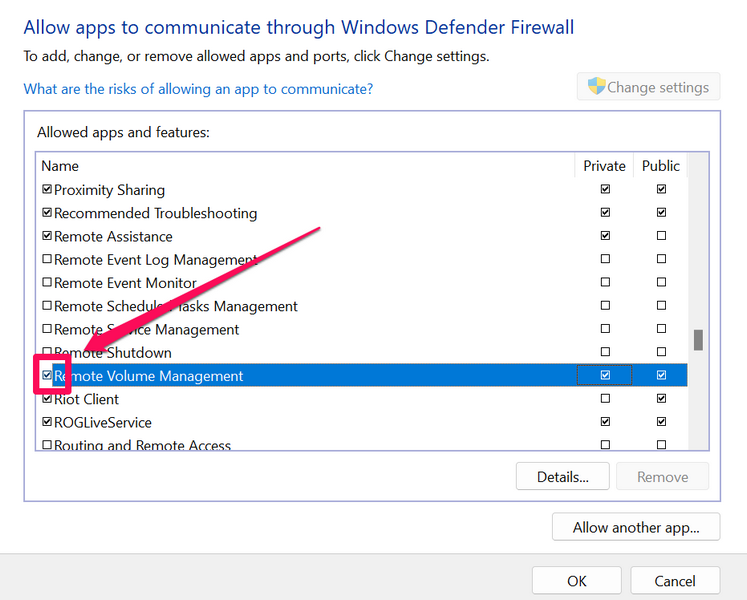
Check the box at the left side of the appor the feature you want to allow.
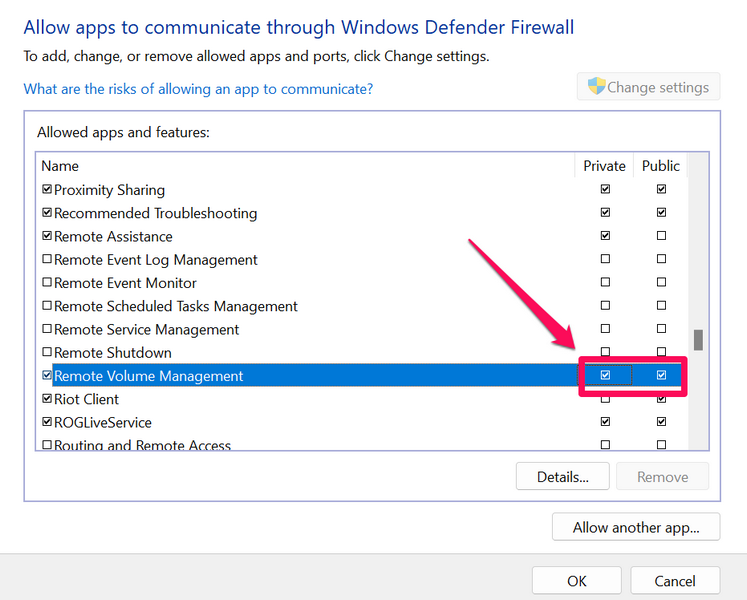
7.Also, double-check both the checkboxes forPrivateandPublicon the right side of the selected app/ feature are checked.
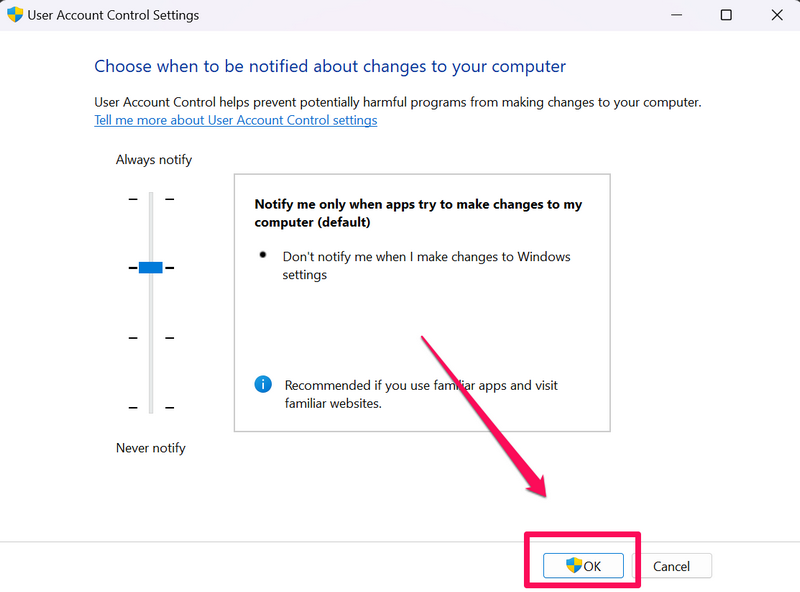
8.After making the changes, click theOKbutton below to save them on your machine.
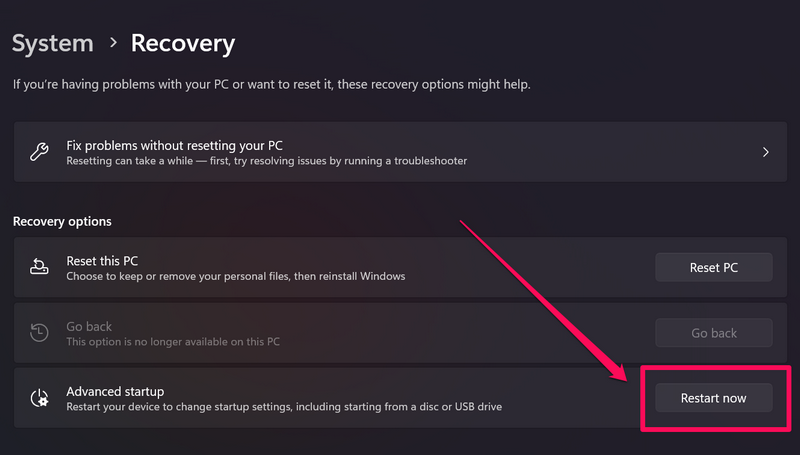
3.Here, click theRestart nowbutton beside theAdvanced Startupoption.
4.Wait for your Windows 11 PC or laptop to restart and show the Advanced Startup options.
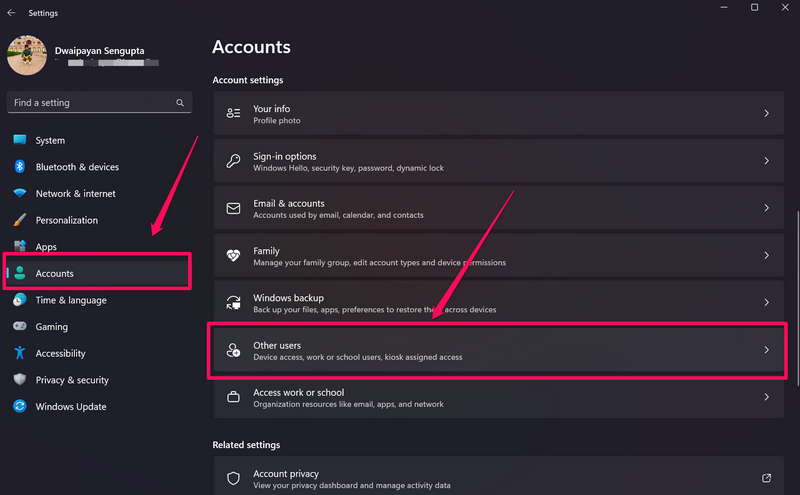
2.Go to theAccountstab on the left navigation bar and select theOther usersoption on the right pane.
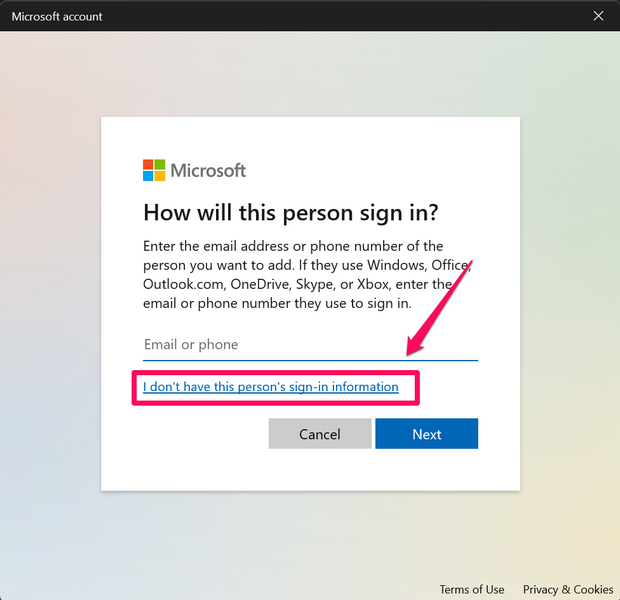
3.Next, click theAdd accountbutton beside theAdd other useroption.
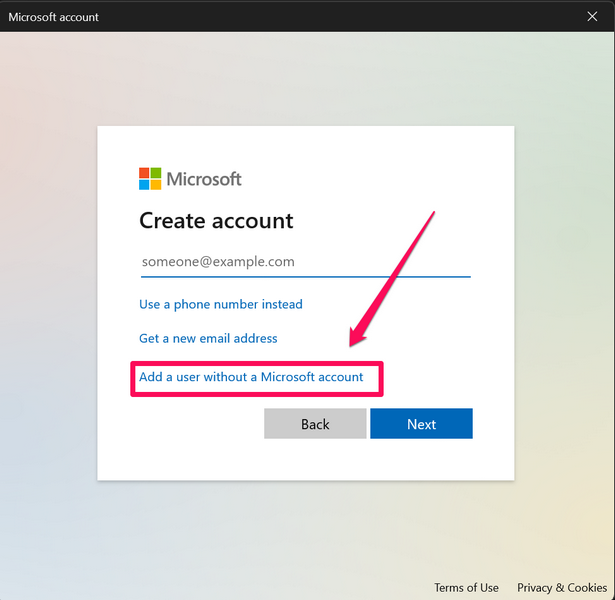
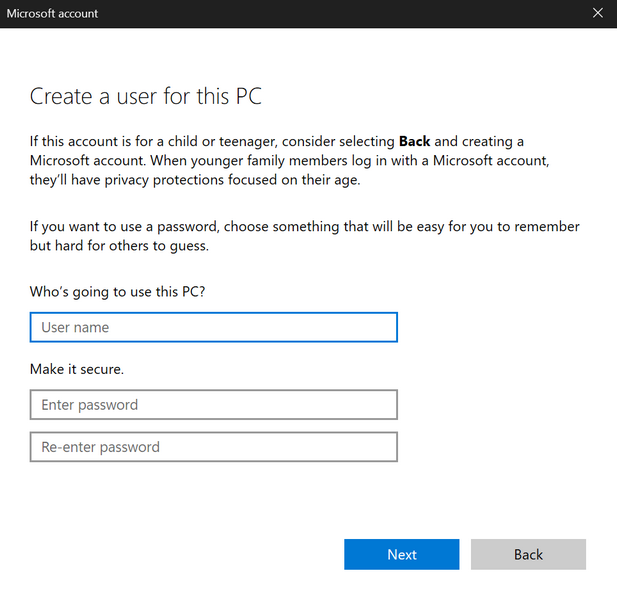
5.Next, select theAdd a user without a Microsoft accountoption.
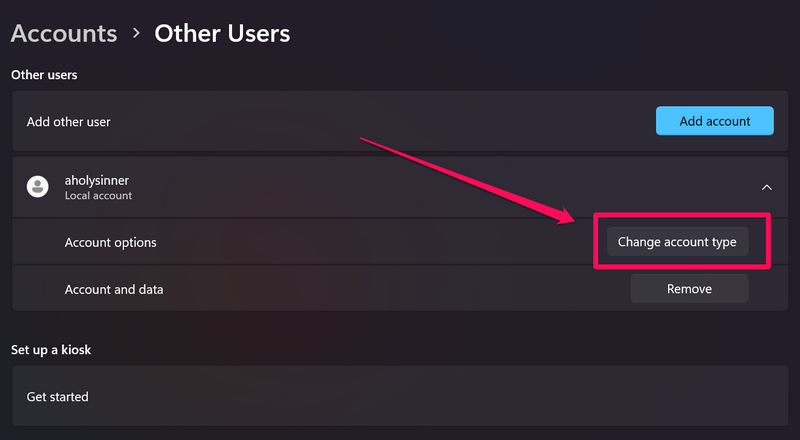
8.On the following page, set theAccount typeasAdministratorand click theOKbutton to save the change.
9.Now,reboot your Windows 11 PCor laptop and use the new account to sign into your machine.
1.UseWindows + Ito launch theSettingsapp on your Windows 11 PC or laptop.
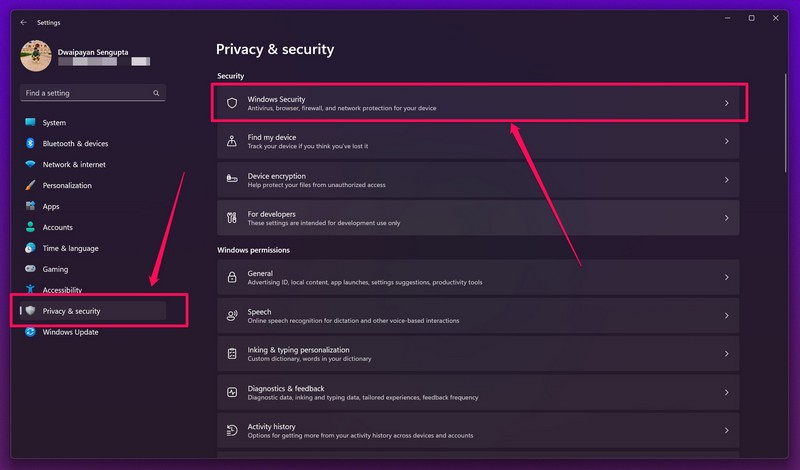
2.Go to thePrivacy & securitytab on the left nav bar and choose the Windows Security option.
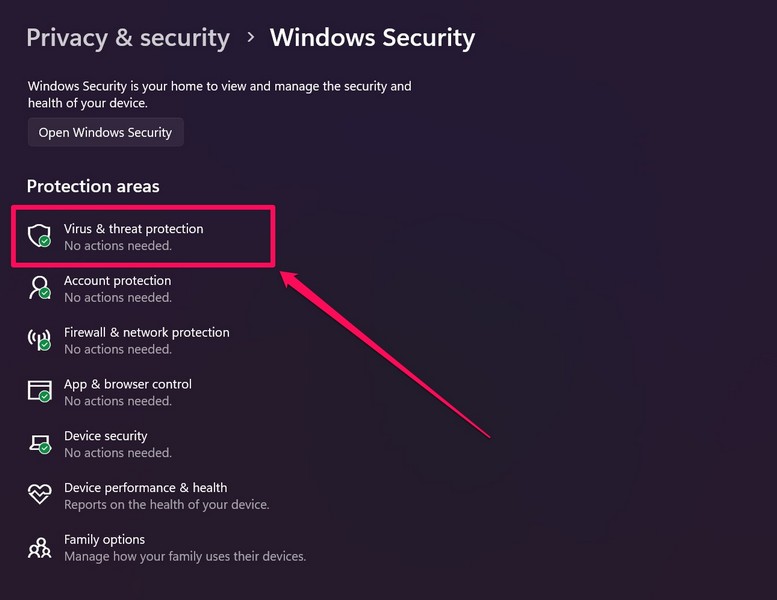
3.Next, click theVirus & threat protectionbutton.
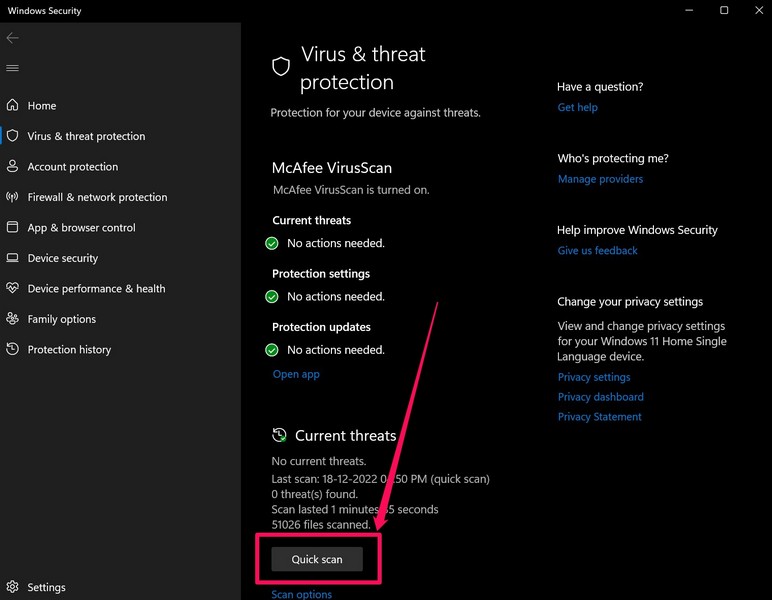
4.In the followingWindows Securitywindow, hit theQuick scanbutton to initiate the scan.
5.Wait for the scan to complete.
Remove the suggested programsor apps from your equipment, if there are any.
- power cycle your Windows 11 PCor laptop after uninstalling the said programs.
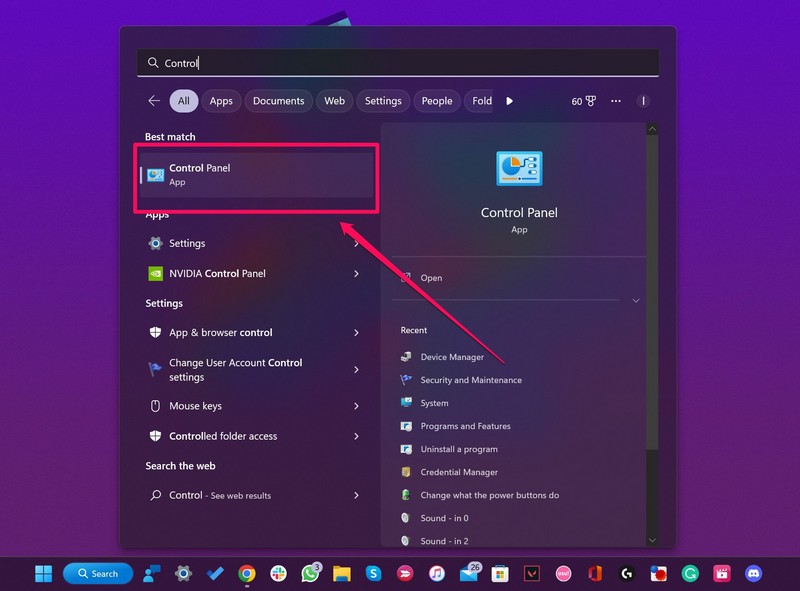
1.UseWindows + Sto open Windows search and search forcmd.
2.Click theRun as Administratorbutton for the Command Prompt tool in the search results.
3.ClickYeson the following User Account Control prompt.
6.start your Windows 11 PCor laptop.
3.Wait for the DISM scans to complete.
4.cycle your Windows 11 PCor laptop after completion.
2.Go to theWindows Updatetab on the left nav bar and click theCheck for updatesbutton on the right pane.
Note:Keep your rig connected to an active and stable internet internet during this process.
3.Wait for the latest Windows 11 updates to show up.
4.Once they appear, click theDownload and installbutton to initiate the update process.
5.Wait for the updates to download on your Windows 11 PC or laptop.
6.kickstart your deviceto install and apply the downloaded Windows 11 updates.
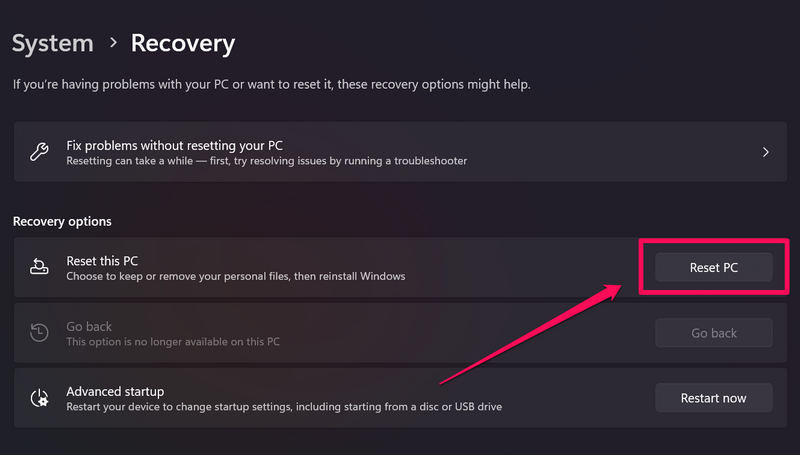
3.On the following page, click theReset PCbutton beside the Reset this PC option.
5.During the process, your PC or laptop might automatically restart multiple times.

However, we do not usually recommend resetting your PC or laptop.
So, use this fix as the last resort, and when every other fix you tried fails.
FAQs
Why cant I run a program as an administrator in Windows 11?
How to force Run as administrator for an app in Windows 11?
How to run a program as administrator without right-clicking in Windows 11?
you’re free to run a program as an administrator without right-clicking it.
This will automatically fire up the app with admin rights on your Windows 11 PC or laptop.
Wrapping Up
So yeah, there you have it!
This was all about how to fix the Run as Administrator not working issue in Windows 11.