Check them out right below!
This is because assistants and experts need to use an official Microsoft account in Windows 11 to assist others.
Using a local account will not work for Quick Assist assistants.
They just need to be running the latest Windows 11 version on their machine.
Then try launching the Quick Assist app and check whether or not the issue is fixed.
An unstable internet online grid can very well cause the Quick Assist not working issue in Windows 11.
Thankfully, Windows 11 comes with built-in repair and reset features for MS Store applications within the tweaks menu.
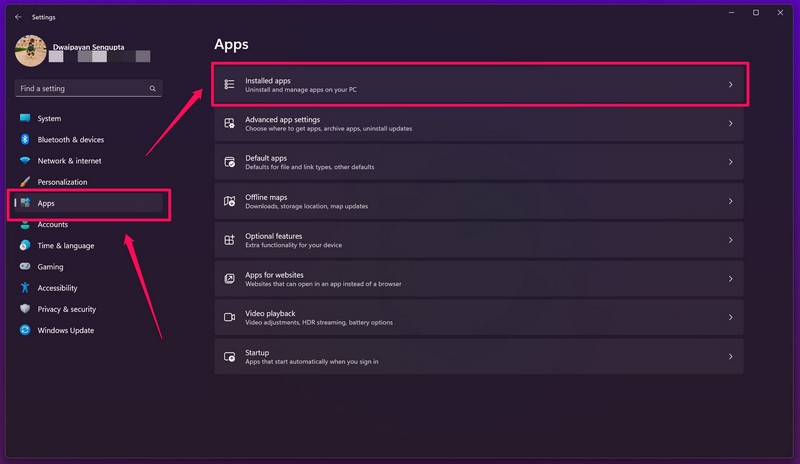
1.PressWindows + Ito launch theSettingsapp.
2.Go to theAppstab and click theInstalled appsoption.
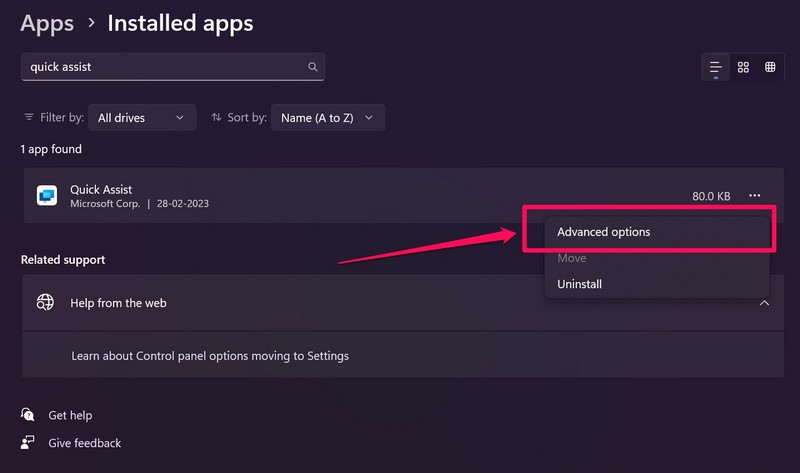
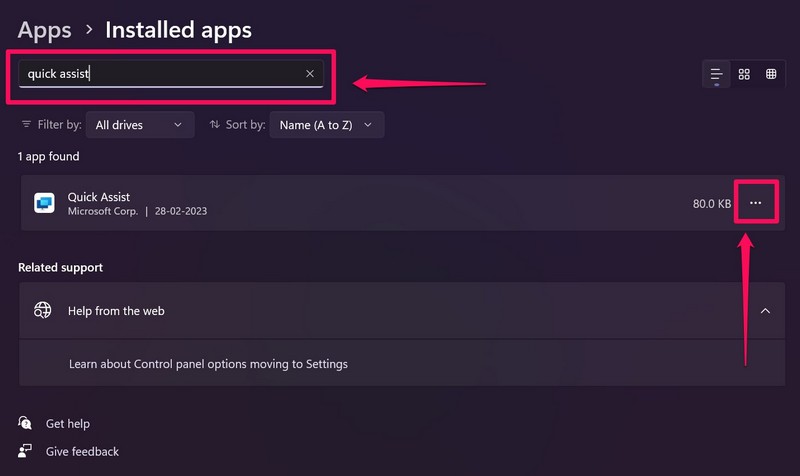
3.Use the search bar tofind Quick Assistand click thethree-dot button.
4.ClickAdvanced optionson the following drop-down menu.
5.Scroll down to the Reset section and click theRepairbutton.
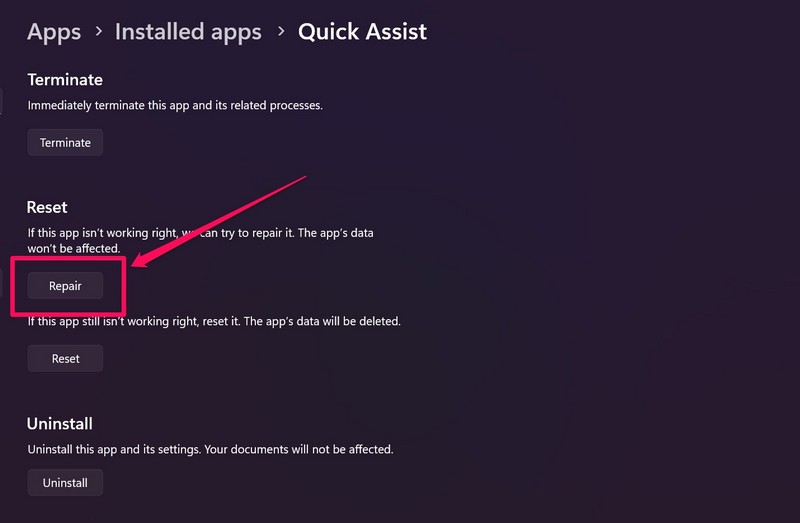
6.Wait for the Repair process to complete.
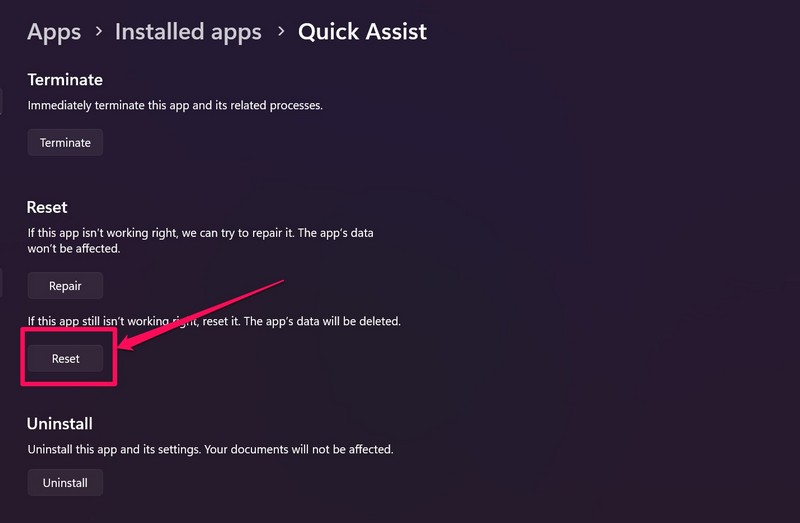
2.Scroll down to the Reset section and click theResetbutton.
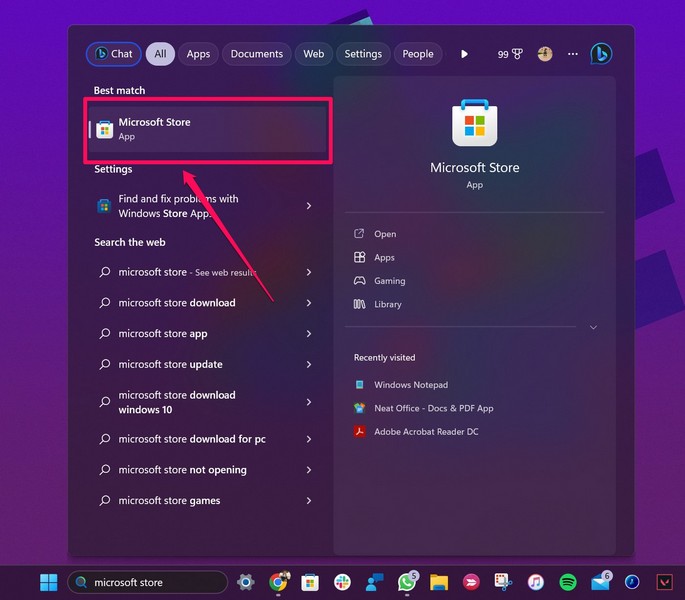
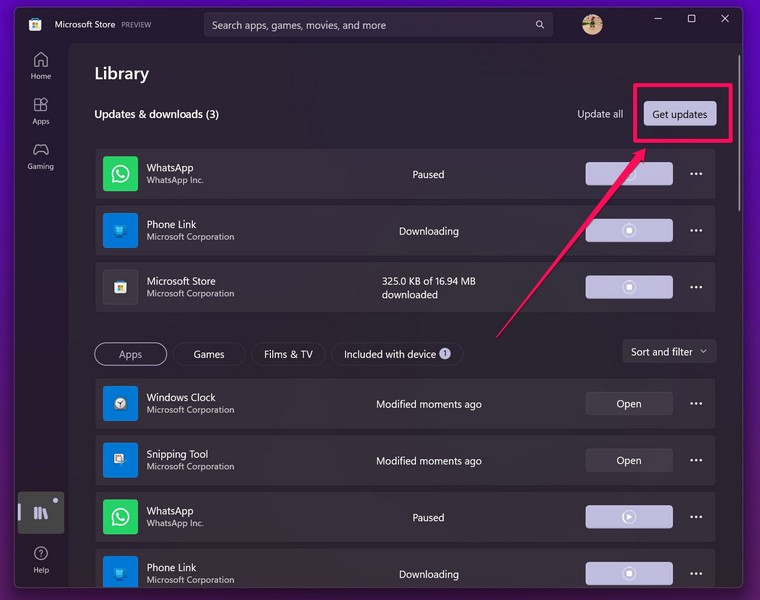
2.Open theMS Store appfrom the search results.
3.Go to theLibrarytab on the left nav bar.
4.Click theGet updatesbutton if you do not see the update for Quick Assist.
5.Once the Quick Assist update shows up, hit theGetbutton to update the app on your gear.
6.kickstart your Windows 11 PCor laptop following the update.
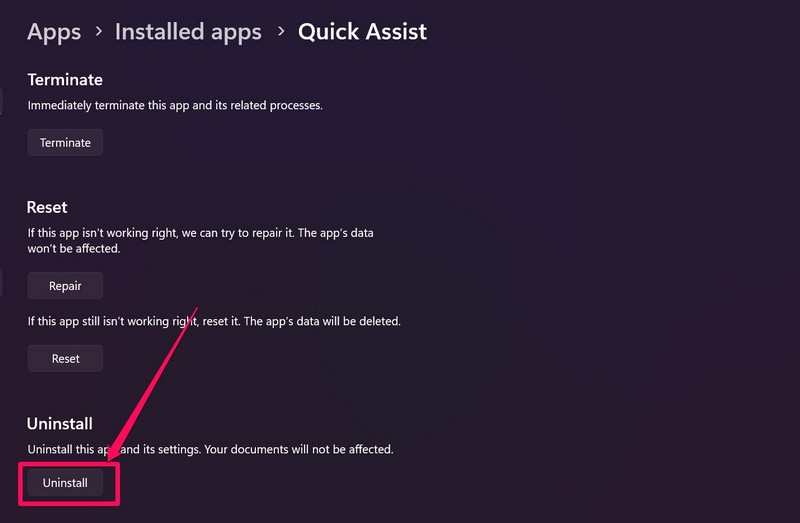
2.Scroll down to the bottom of the page and hit theUninstallbutton.
3.Confirm your actionon the following prompt.
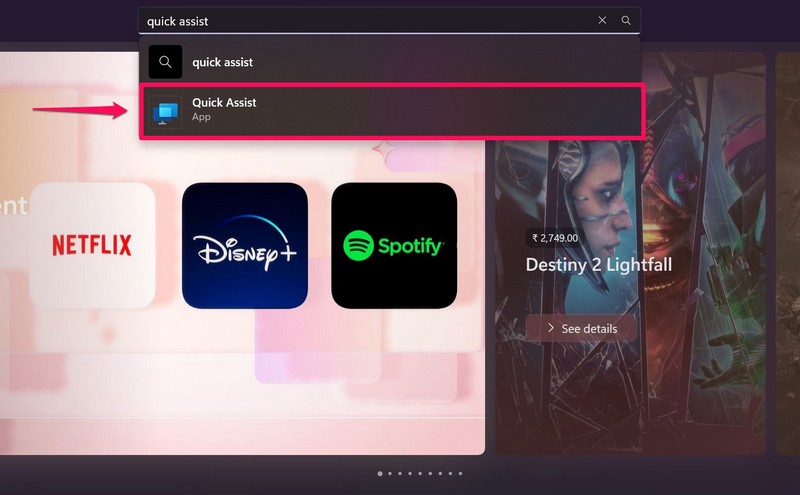
4.After the uninstallation completes, launch the Microsoft Store app using steps 1-2 ofFix #4on your unit.
5.Use the search bar above to find theQuick Assistapp.
6.Click theInstallbutton and wait for it to reinstall.
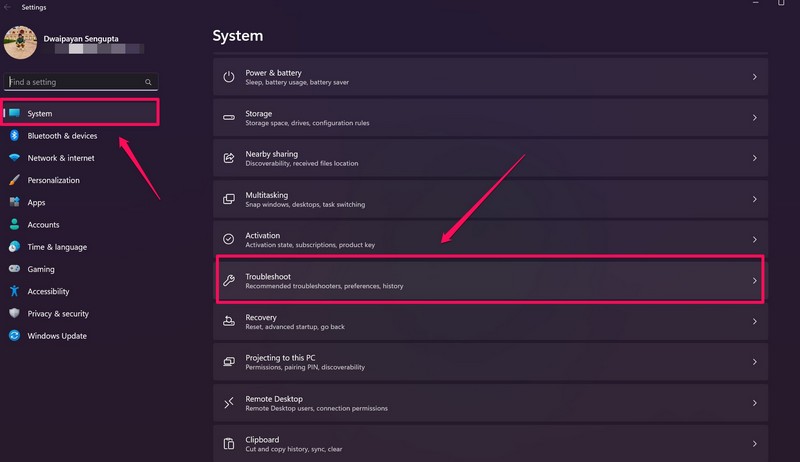
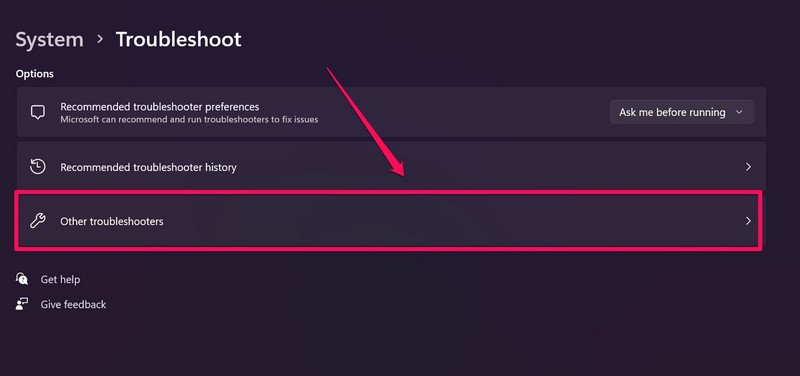
2.Under theSystemtab on the left nav bar, go to theTroubleshootmenu.
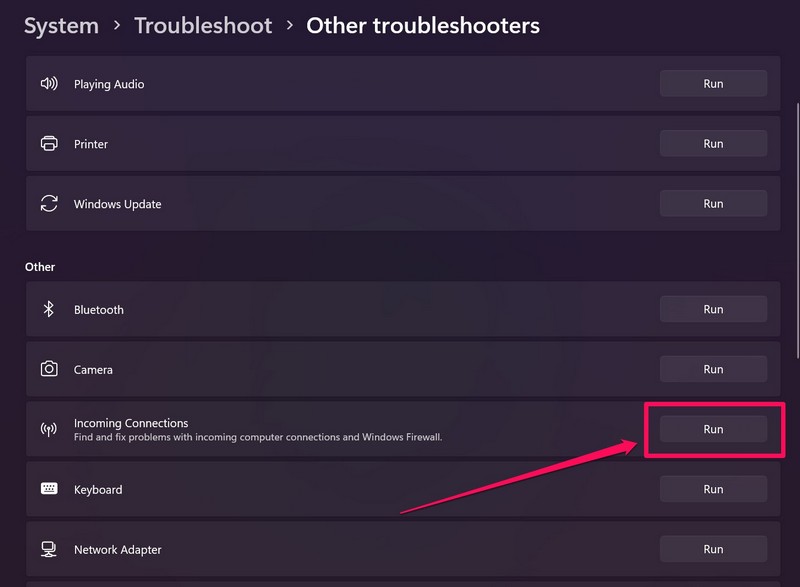
4.Find theIncoming Connectionsoption on the list and click theRunbutton beside it.
5.Wait for the troubleshooting process to complete.
6.Make the suggested changes, in case there are any.
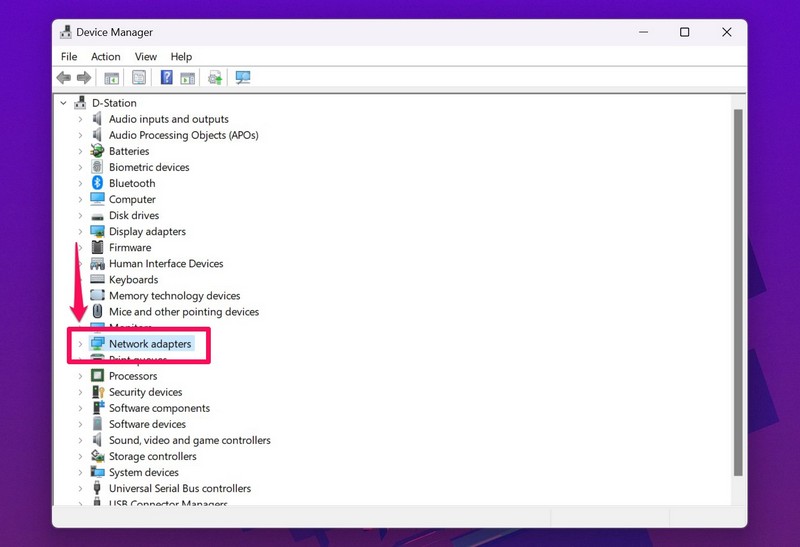
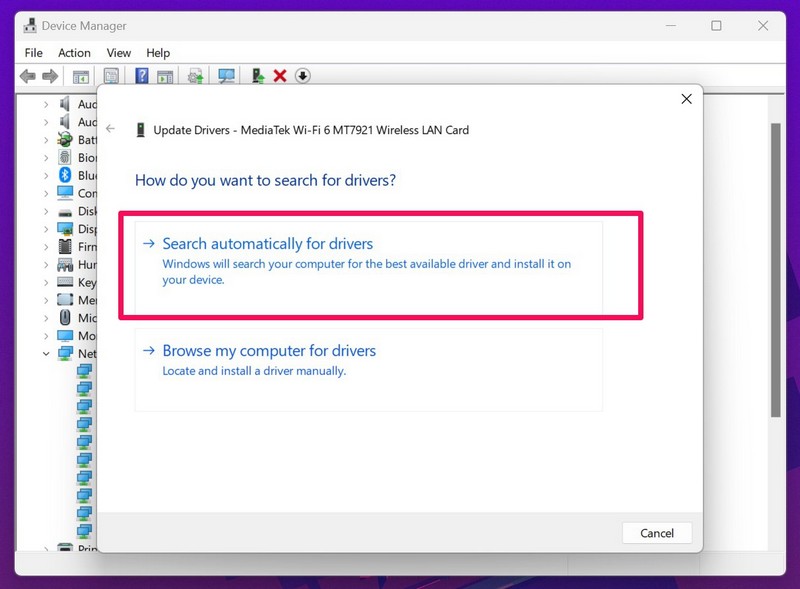
2.ClickDevice Manageron the list.
3.In unit Manager, tap the arrow beside theNetwork adaptersoption to expand it.
4.Now,right-tap on your Wi-Fi cardand hit theUpdate driveroption on the context menu.
5.ClickSearch automatically for driverson the following prompt.
6.Wait for the update to complete.
7.reset your Windows 11 PCor laptop after the update.
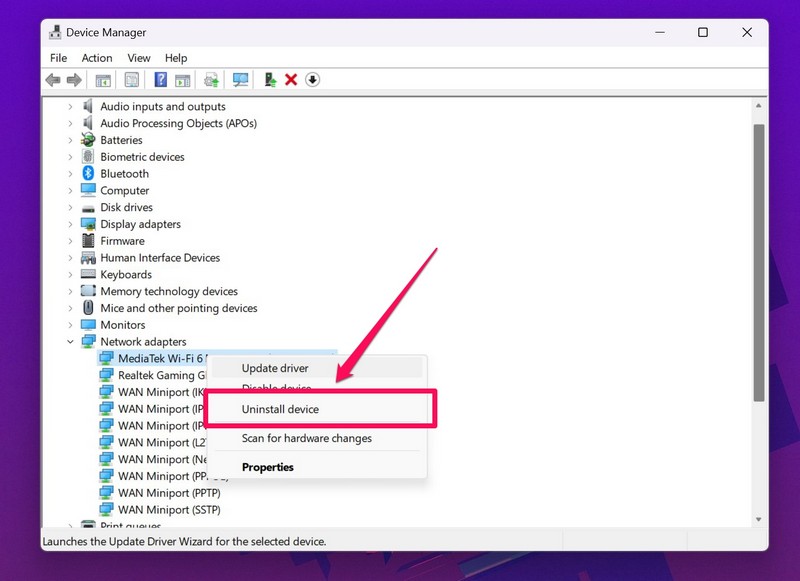
2.Expand theNetwork adaptersoption on the list.
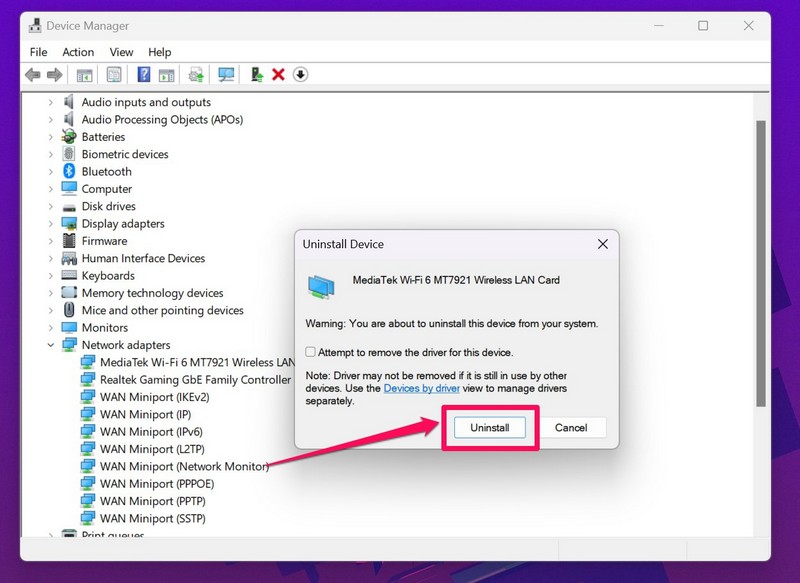
Right-choose the primary Wi-Fi driverand click theUninstall deviceoption on the context menu.
5.Wait for the uninstallation to complete.
- reboot your Windows 11 PCor laptop.
Hence, after reinstalling, do check whether the issue with Quick Assist is fixed or not.
2.In the search results, click theRun as administratorbutton for theCommand Promptprogram.
3.ClickYeson the followingUser Account Controlprompt.
These scans check the disk images in Windows and fix system-level issues.

3.Wait for all three scans to complete.
4.reset your Windows 11 PCor laptop.
Note:Your machine should be connected to an active internet connection during this process.
4.Wait for the update to complete.
5.power cycle your Windows 11 PCor laptop after completion.
FAQs
What is Quick Assist in Windows 11?

It allows the assistants to take full control over recipients devices virtually to fix the system or other issues.
How to use Quick Assist in Windows 11?
Can I open multiple Quick Assist sessions in Windows 11?
If you are an assistant, you’re free to open multiple Quick Assist sessions in Windows 11.