As a result, you face difficulties quickly opening the recent files on your PC.
Sadly, many users are facing the same issue on their PC.
So, read ahead and learn to resolve problems with the Quick access function.

Why Is Quick Access Not Working in Windows 11?
There could be several reasons for the non-working Quick access in File Explorer.
2.Press theEnter keyto kickstart your Windows 11 PC and fix Quick access not working in Windows 11.
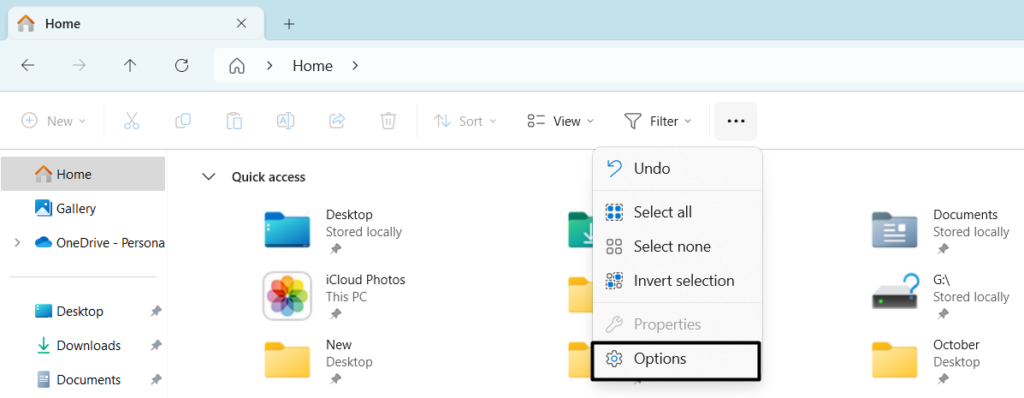
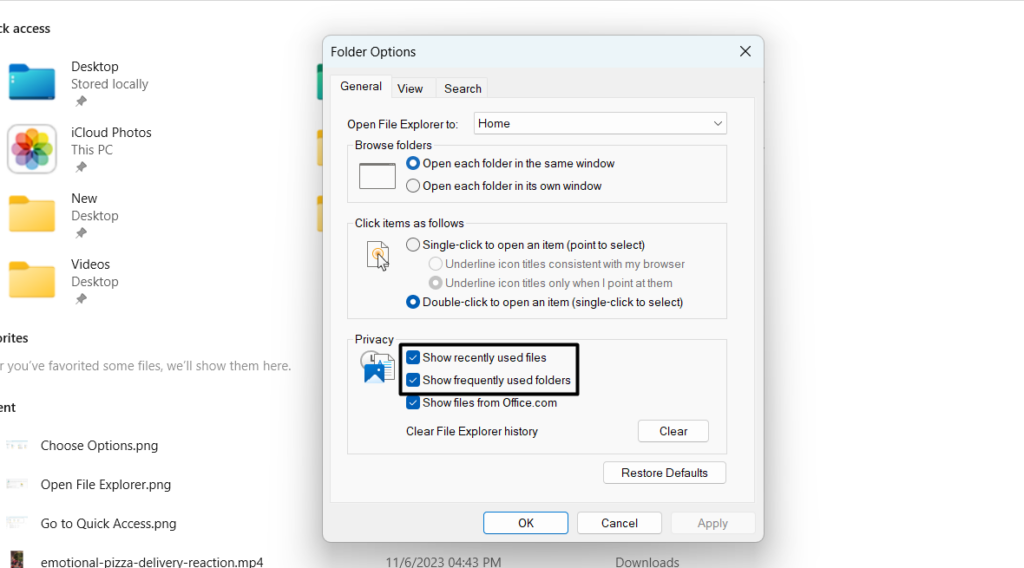
2.From thethree dots (…)dropdown, selectOptionsand proceed to theGeneraltab of it.
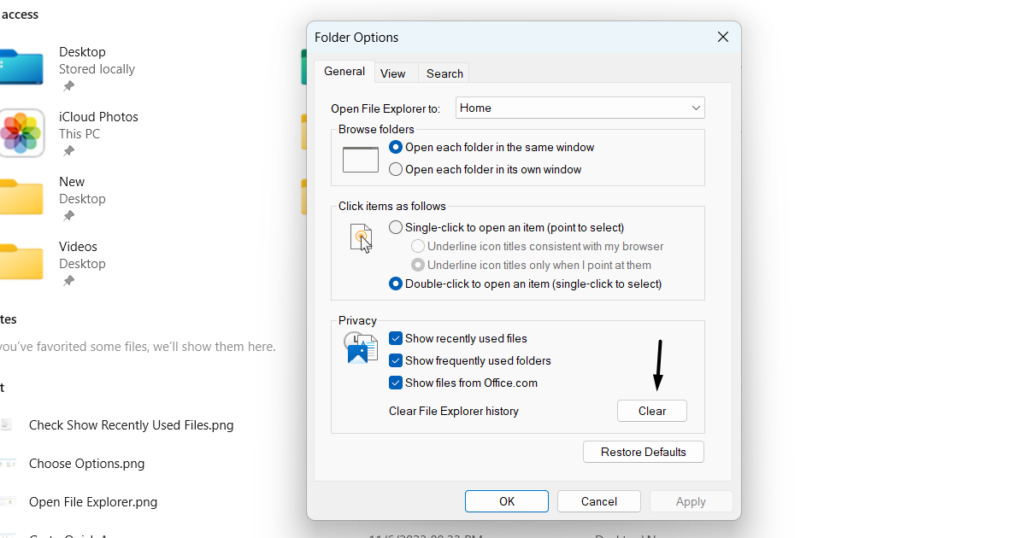
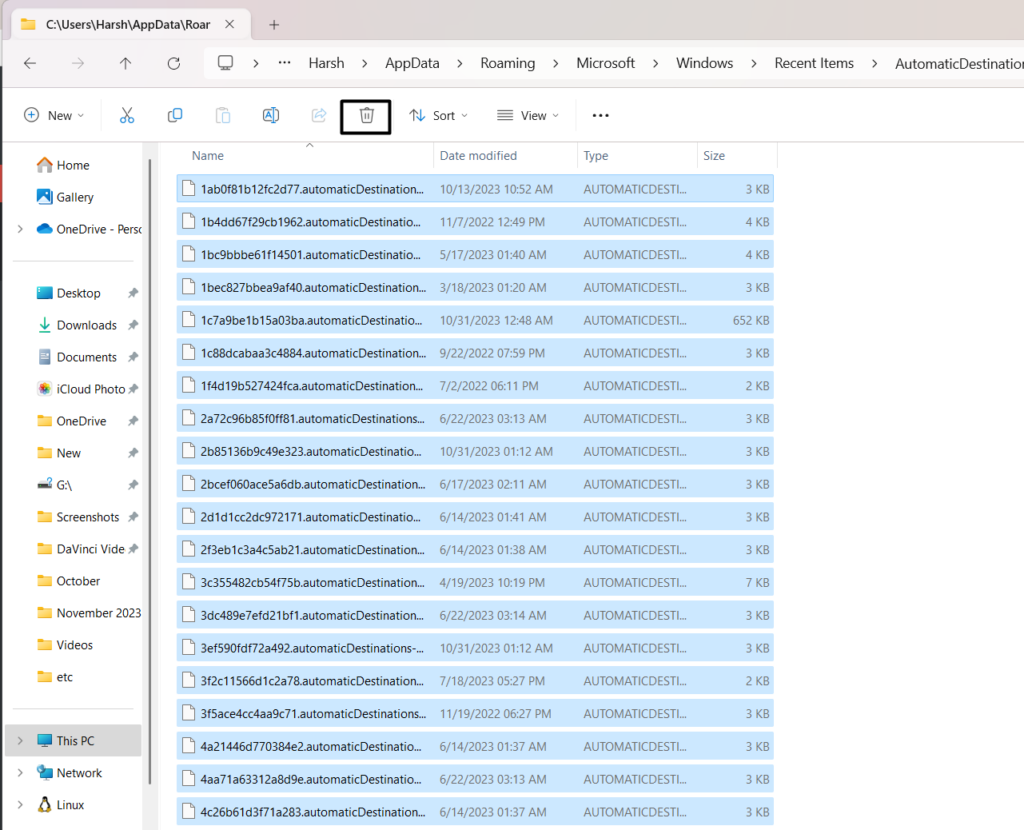
3.In theGeneraltab, clickClearnext to theClear File Explorerhistorytext to scrub the data.
4.Once done, exitFile Explorerand then reopen it to verify if Quick access is working now.
Thus, we suggest yourun DISM and SFC scanson your PC and verify if they fix the issue.
The DISM scan will repair the corrupted Windows image.
Update Windows 11
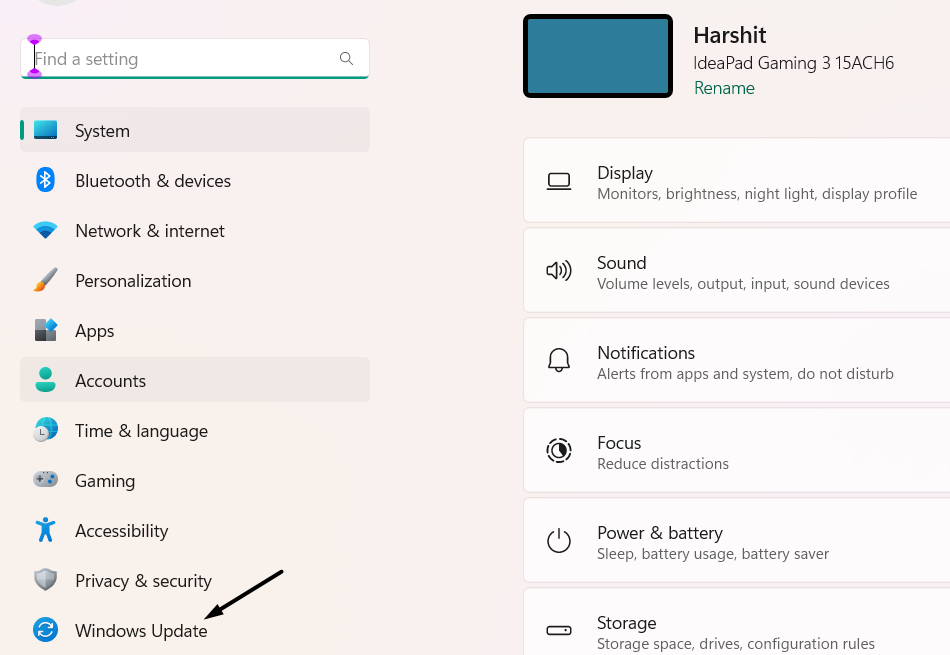
1.Launch theSettings appon your PC, and from the left pane, chooseWindows Update.
2.On theWindows Updatescreen, choose theCheck for updatesbutton to find new updates.
3.If you see any new Windows 11 updates to install on the PC, clickDownload & installto do so.
In case there are multiple updates to install, choose theDownload & installalloption.
Due to this, we suggest youensure its enabled in the File Explorerapp.
So,check that that this option is enabledin parameters.
So try the same and look to see if it works.

To correct them all, simplyrestore all the prefs back to the defaultstate.
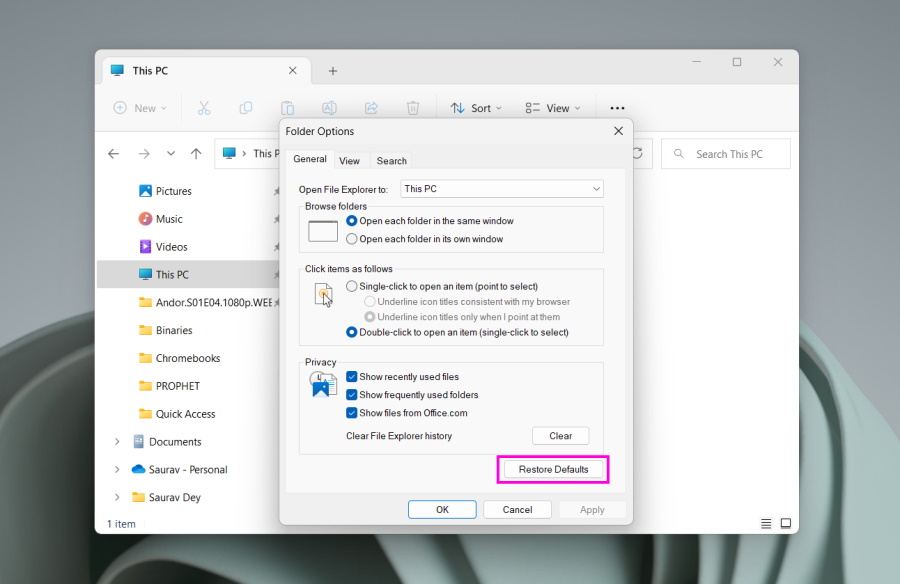
3.In theGeneraltab, clickRestore Defaultsto reset the File Explorers prefs back to default.
4.Click theOKbutton to apply the change and then reboot your PC to test whether the issue is fixed.

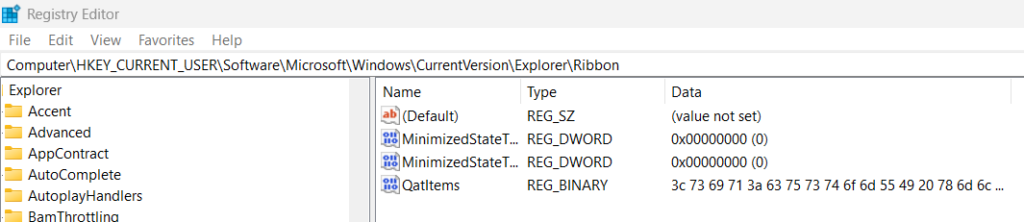
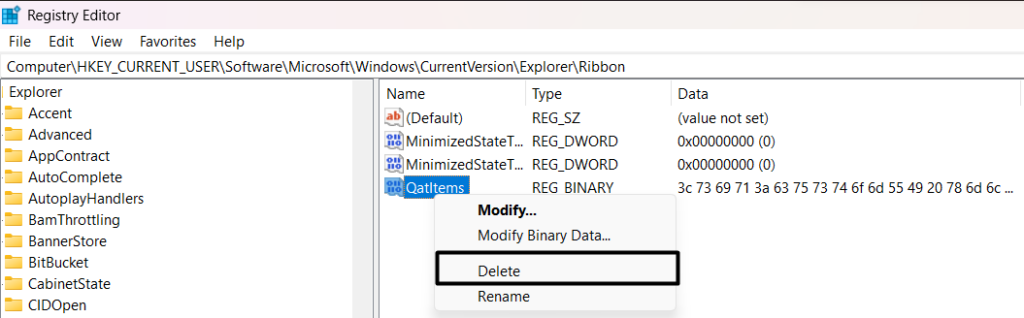
Reset Windows Quick Access
3.On the right pane, right-click theQatItemskey and choose theDeleteoption from the menu.
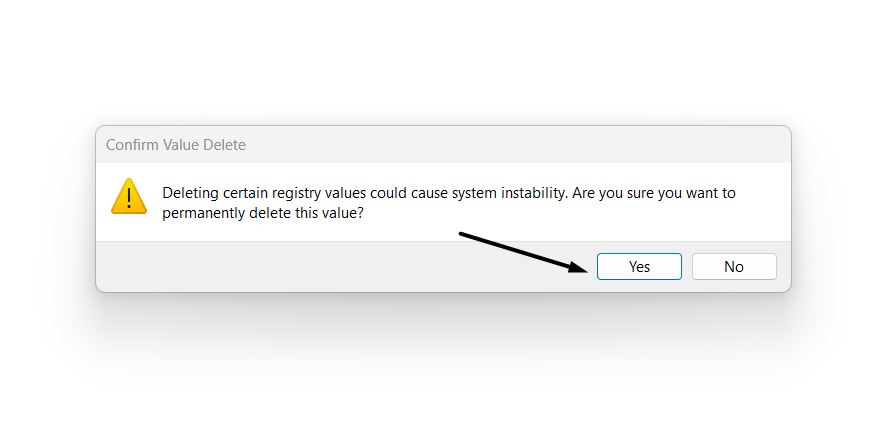
4.In theConfirm Value Deleteprompt, chooseYesto delete the particular registry key from your PC.
5.kickstart your Windows 11 PC and find out if the Quick access section is working now on your PC.
2.Right-click it and choosePin to Quickaccessfrom the right-click menu to pin it to Quick access.
3.Lastly, chooseHomefrom the left-side pane of the window and look to see if the item is there.
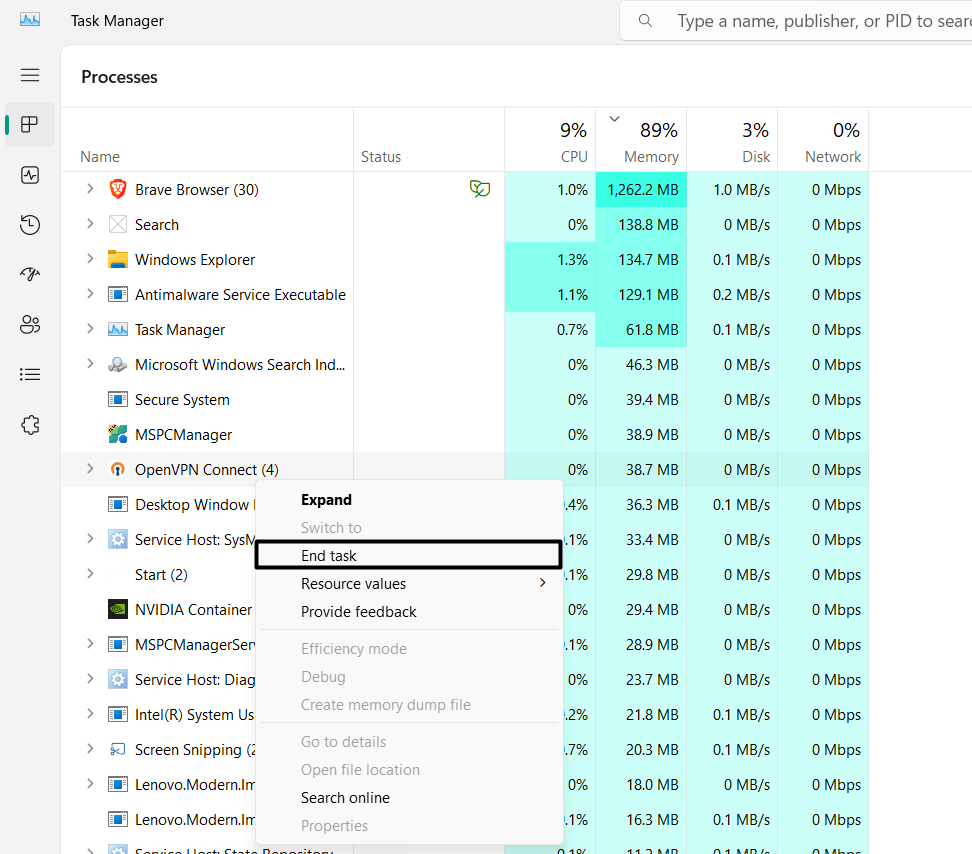
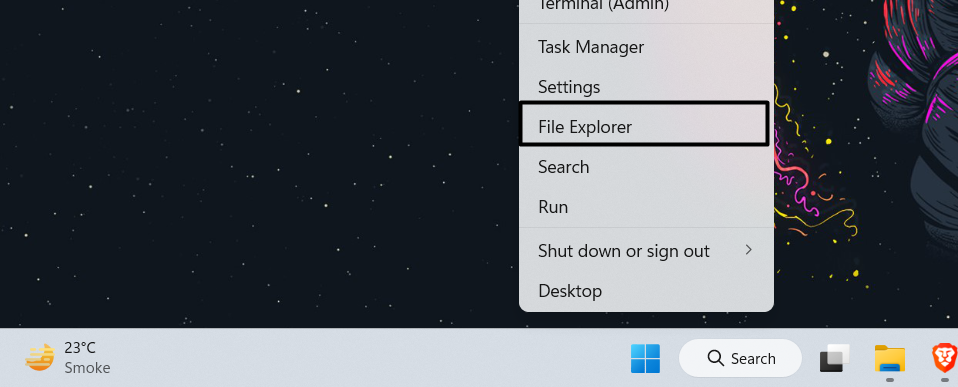
2.Right-clickFile Explorerand, then, from the contextual menu, choose theEnd taskoption.
3.Once the File Explorer task is ended, open theFile Explorer appand see the problems status.
Enable Additional Navigation Pane Options
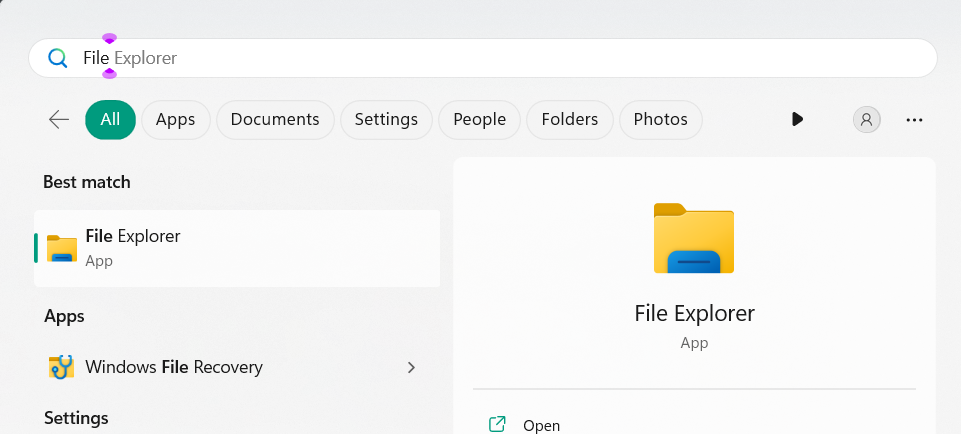
1.Open theFile Explorer programon your Windows 11 PC by hitting theWindows + Eshortcut.
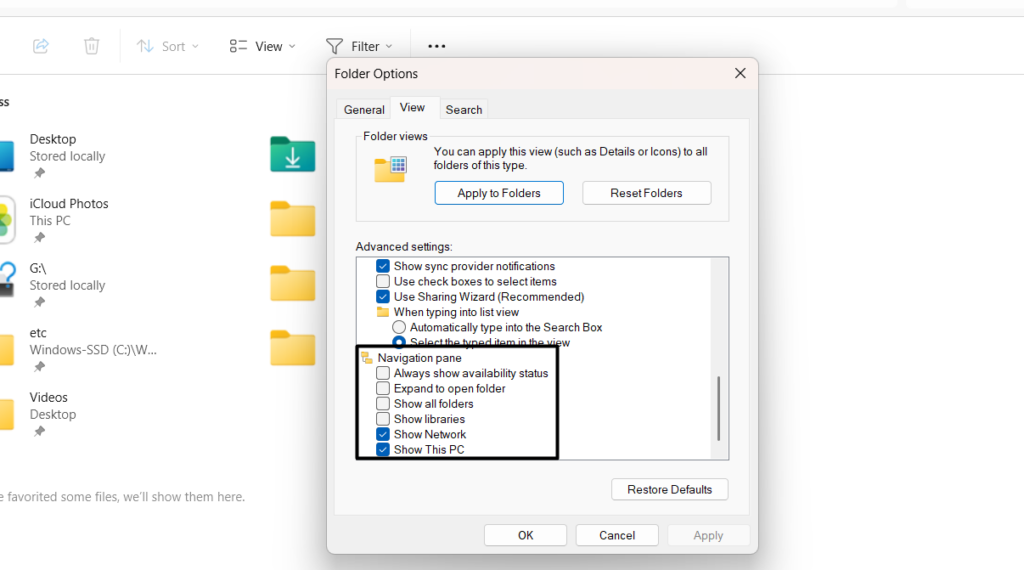
2.In theFile Explorerwindow, click thethree dots (…)at the top and chooseOptionsfrom the menu.
3.In the next window, go to theViewtab and then proceed to theAdvanced settingssection of it.
4.UnderNavigation, check all the checkboxes, and then click theOKbutton to save all the changes.
Doing so will fix the issues with Quick access without affecting the data.
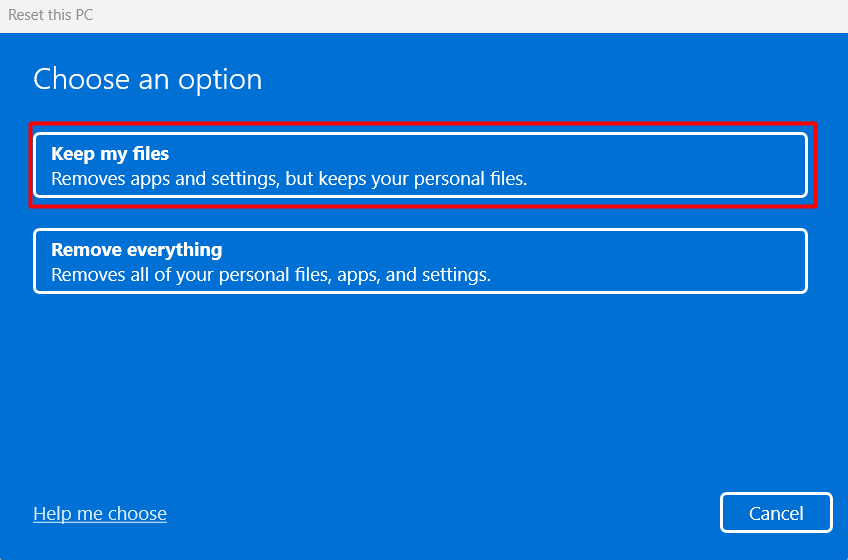
2.In theRecoverywindow, choose theReset PCbutton next to theReset this PCtext to proceed ahead.
4.Once done, answer the next set of questions accordingly to continue resetting your Windows 11 PC.
FAQs
How Do I Fix Quick Access Not Working?

If File Explorers Quick access isnt working properly,reset your Windows 11 PC or laptop.
In case this doesnt eliminate the issue, ensure the Quick access function is enabled on your PC.
What Happened to Quick Access in Windows 11?
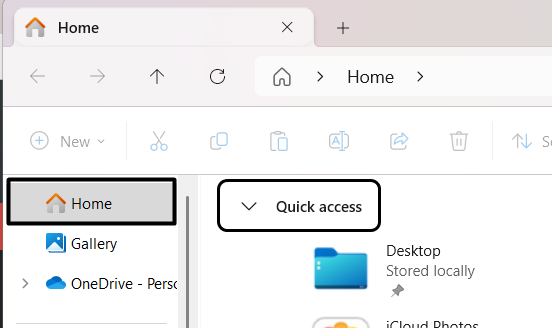
In Windows 11, Microsoft has removed theQuick accessoption from the left navigation menu of File Explorer.
To access it, you’re gonna wanna click onHomeon the left and expandQuick access.
How Do I Clear and Reset Quick Access in Windows 11?
How Do I Enable Quick Access on Windows 11?
But sometimes, it fails to do its primary work properly.
For instance, it gets missing or doesnt show all the most used files.
Luckily, this issue can easily be fixed in Windows 11.