No doubt, its a great feature as it makes things easier.
However, sometimes, it makes things a bit difficult by not working properly.
Here in this guide, well sharesome quick and easy fixesto fix Printer sharing not working in Windows 11.
So, without any further ado, proceed ahead and easily fix this issue.
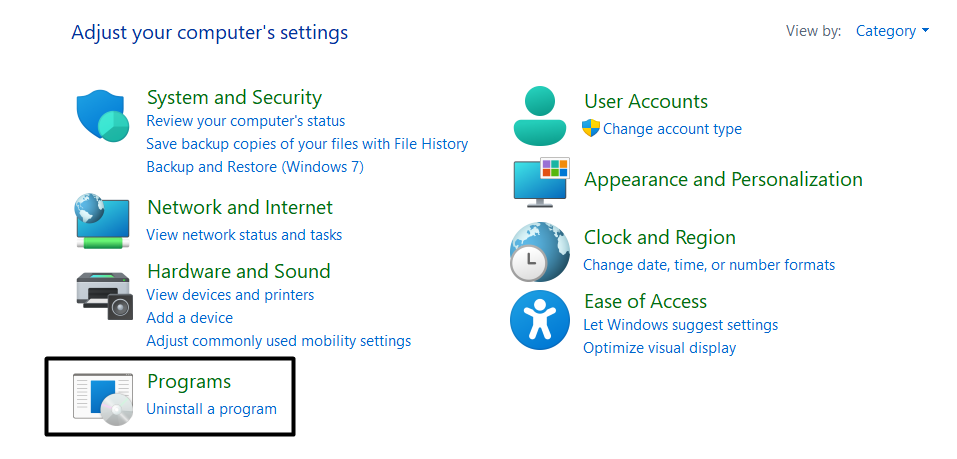
Why Is Printer Sharing Not Working in Windows 11?
Several reasons could cause the Printer Sharing not working issue on your Windows 11 PC.
So, apply all of them and check what makes Printer Sharing work again:
1. you could confirm the same in your printers instructions guide and then try other fixes.
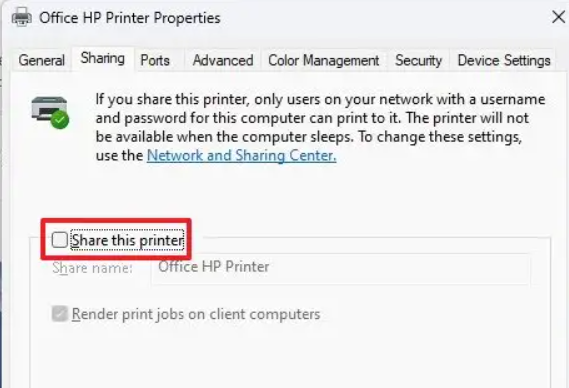
Considering this, we suggest youmake sure that printer sharing is enabled for it.
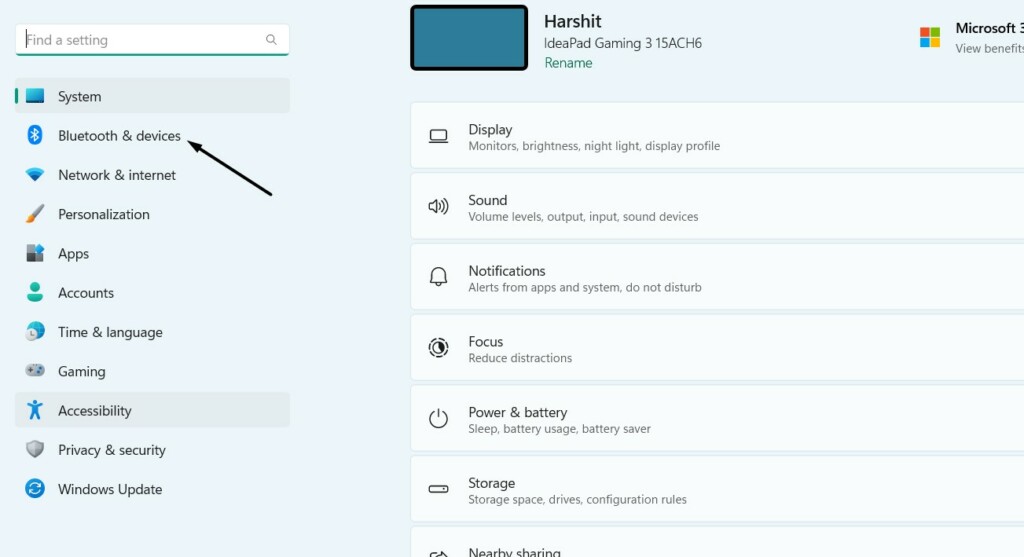
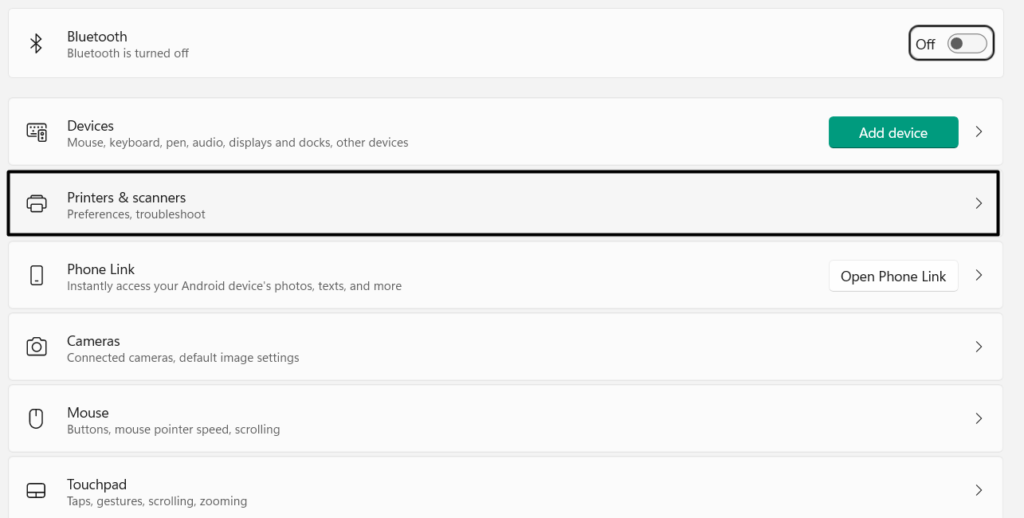
2.In theBluetooth & deviceswindow, choose thePrinters & scannersoption to move ahead.
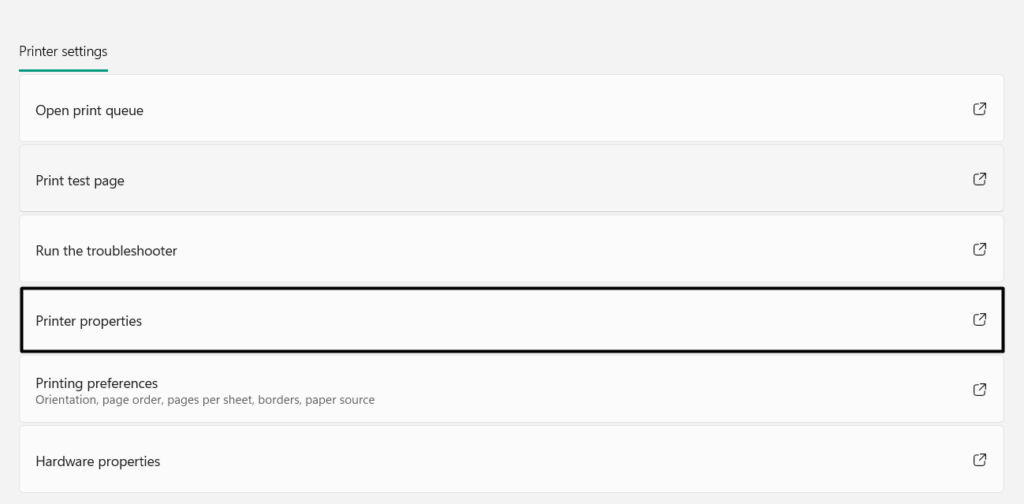
3.Choose your printer, and underPrinter options, simply select thePrinter Propertiesoption.
4.In the new window, proceed to theSharingtab and tick theShare this printercheckbox.
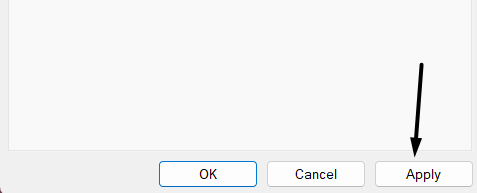
5.Click theApplybutton and then theOKbutton to save the change and end the window.
So do the same and verify if it fixes the Printer Sharing not working issue.
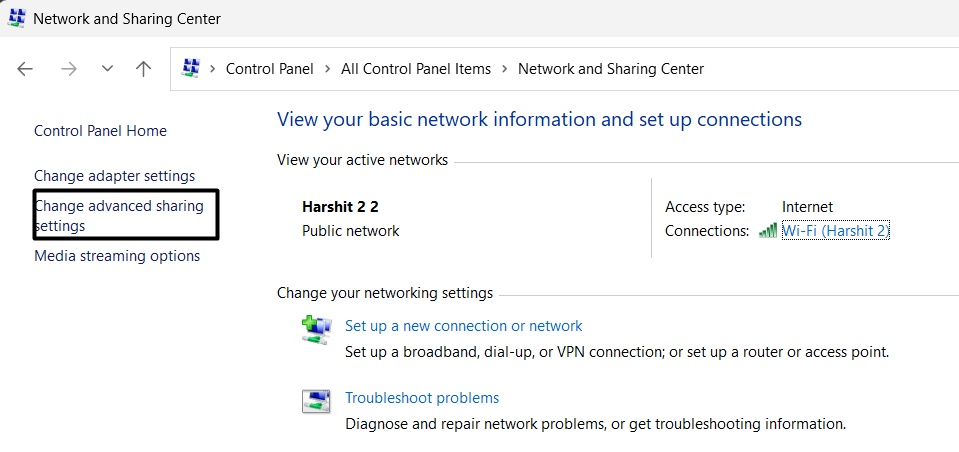
2.ChooseNetwork and Sharing Centerand then selectChange advanced sharing tweaks.
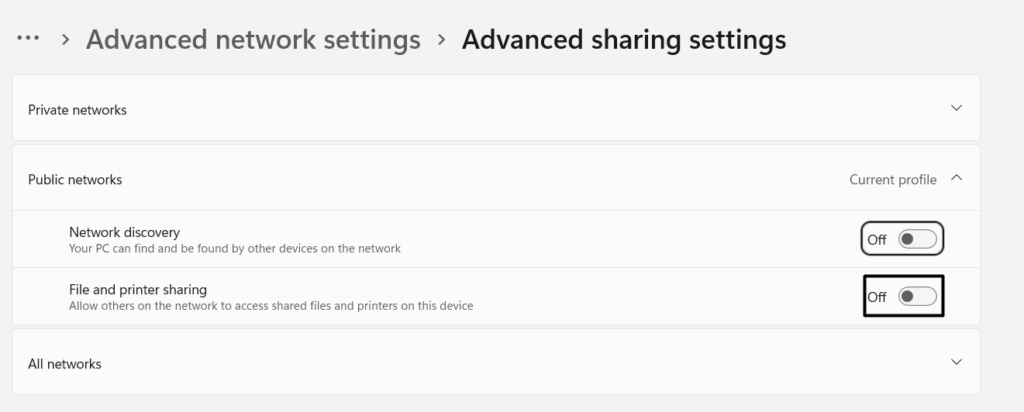
3.In theAdvanced sharing settingswindow, underPublic internet, enableFile & printer sharing.
4.In the end, close theSettingsapp, and hopefully, Printer Sharing must be working properly.
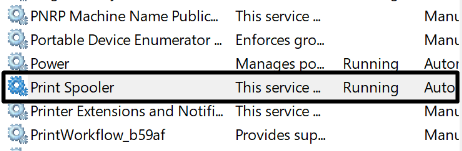
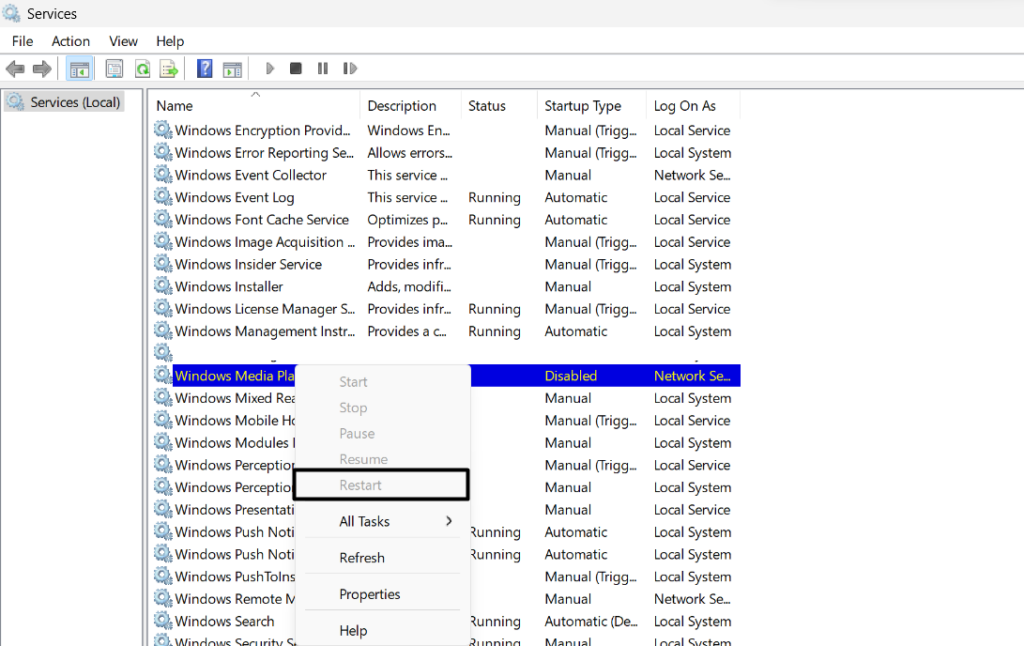
In that case,restart the Printer Spooler serviceto fix issues with it.
2.Right-go for the Windows service, and then choose theRestartoption from it to restart it.
3.Lastly, exit theServiceswindow, and then see if the Printer Sharing works properly now.
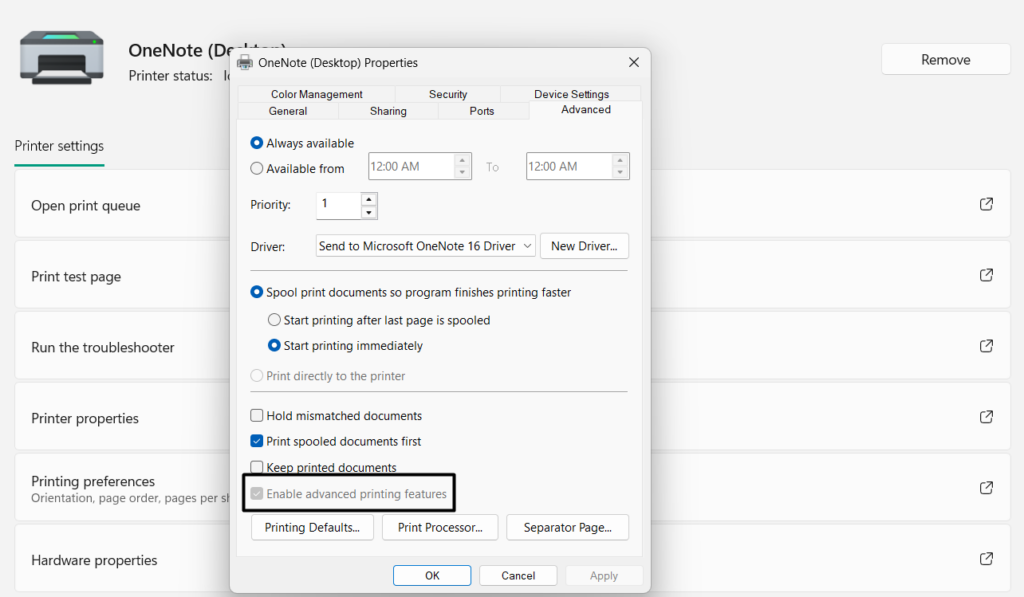
Disable Printer Driver Isolation
It could be possible that the Printer Driver Isolation is enabled on your Windows PC.
As a result, the Printer Sharing functionality isnt functioning properly on your Windows 11 PC or laptop.
In that case, we suggest youensure that Printer Driver Isolation is disabledon your PC.
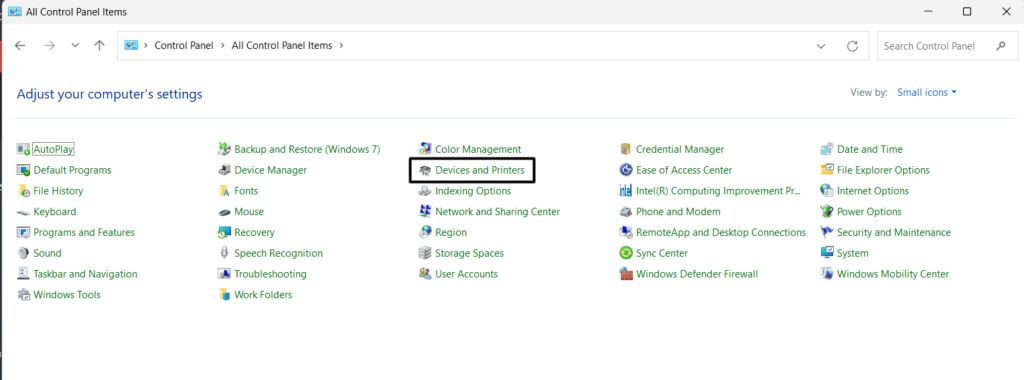
2.In theDevices and Printerswindow, right-hit the shared printer and selectPrinter properties.
3.Move to theAdvancedtab and uncheck theEnable advanced printingfeaturesoption.
4.In the end, click theApplybutton and thenOKto save the changes and exit the window.
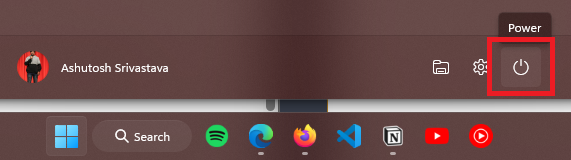
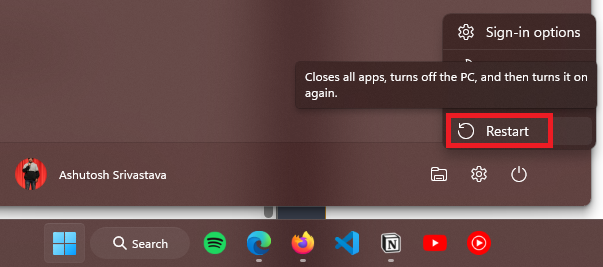
Doing so will resolve all the temporary issues with it.
2.From thePowerdropdown menu, choose theRestartoption to reset your Windows 11 PC.
3.Once your box is rebooted, check whether the Printer Sharing is working now on it.
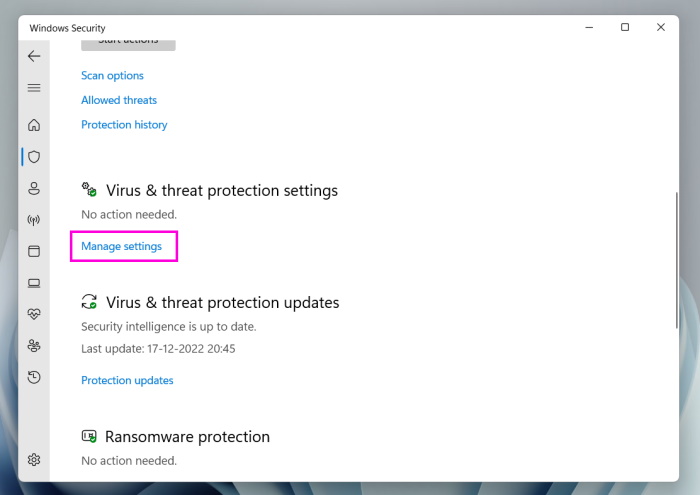
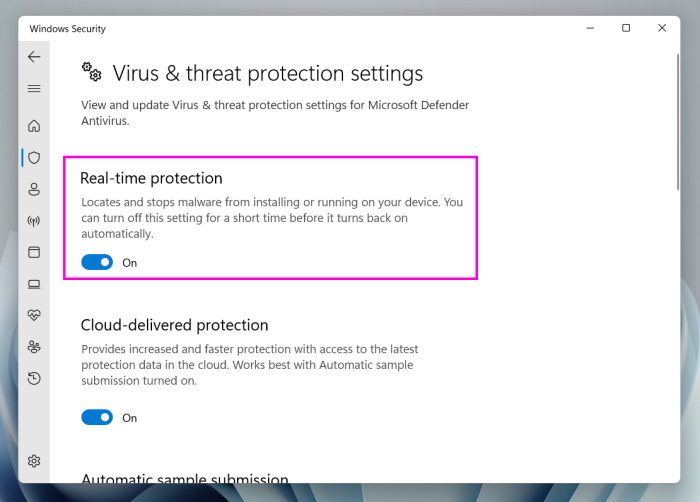
To test whether its the same, considerturning it offon your Windows 11 PC or laptop.
2.Once done, kill the switch underReal-time protectionto kill the built-in antivirus.
3.After disabling the antivirus utility, confirm if the Printer Sharing function is working well now.
Below are the steps to do so:
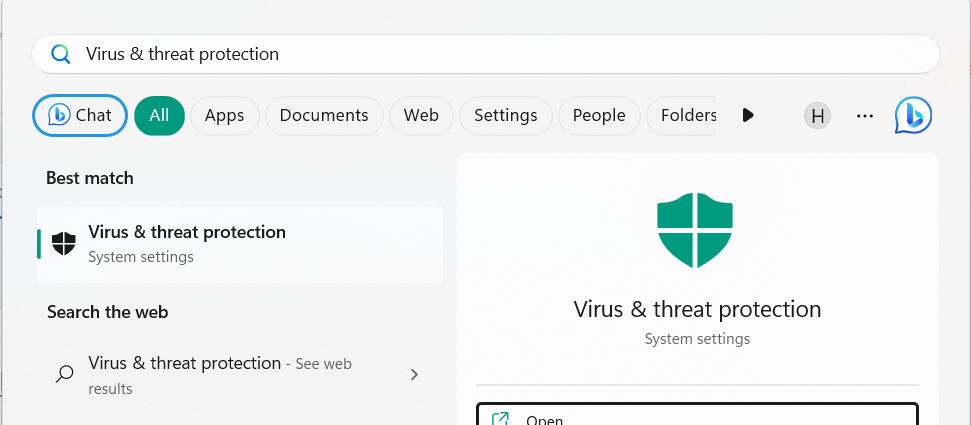
1.Open theVirus & threat protectionappand chooseFirewall & connection protectionfrom the left.
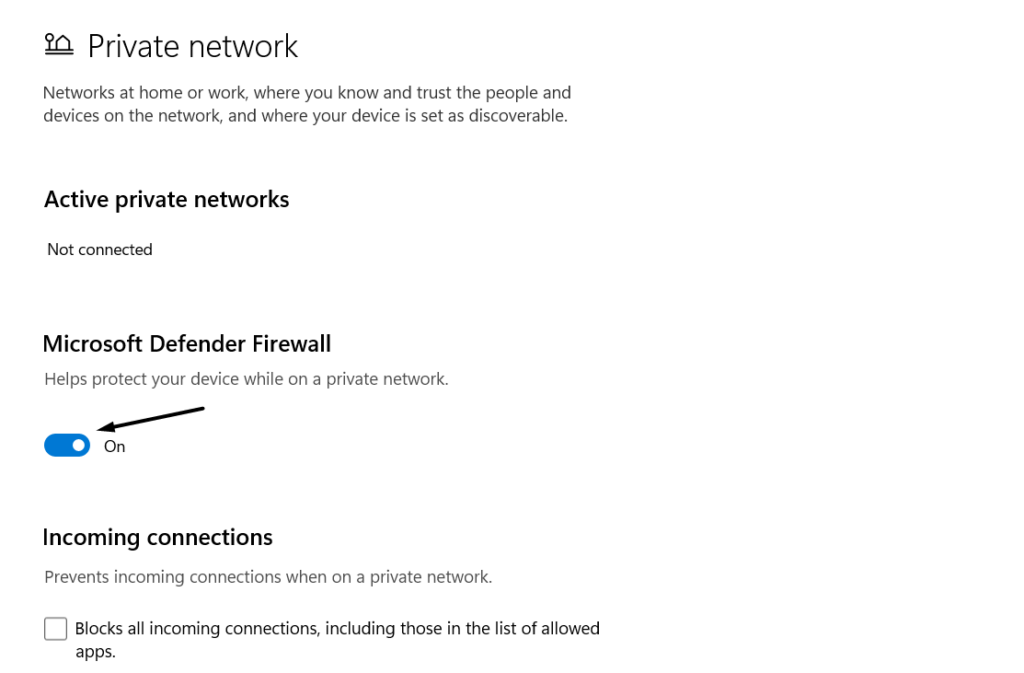
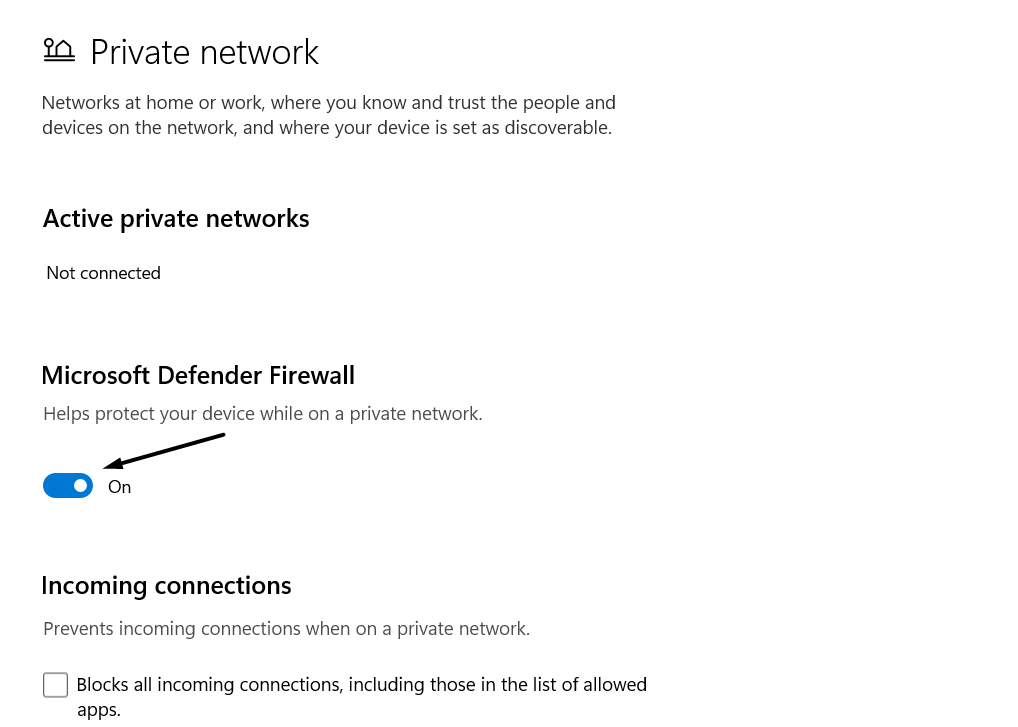
2.Choose thePrivate networkoption and then simply switch off the toggle on the next screen.
3.Once done, proceed back to the previous screen and select thePublic networkoption.
4.On the next screen, underMicrosoft Defender Firewall, turn off the toggle to disable it.
5.Exit theWindows Securityprogram, and then check whether the Printer Sharing is working.
Doing so will see to it that the firewall isnt stopping it from working properly.
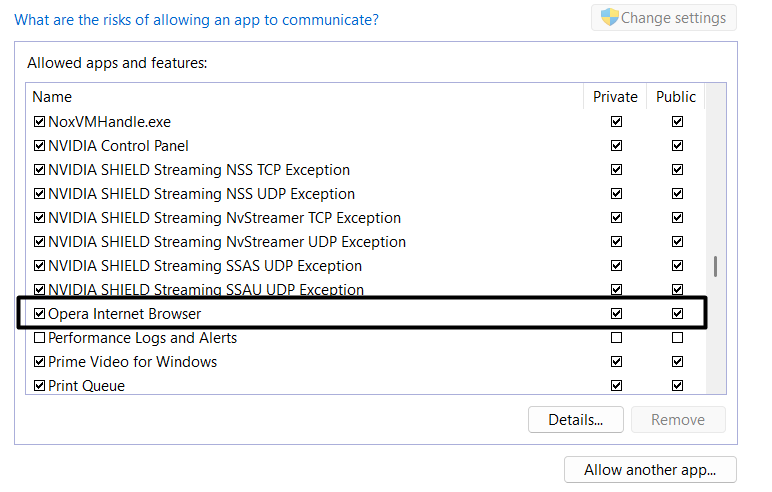
3.Once done, search for theFile and Printer Sharingoption and tick the checkboxes next to it.
4.In the end, tap on theOKbutton to save the change and then exit the opened window.
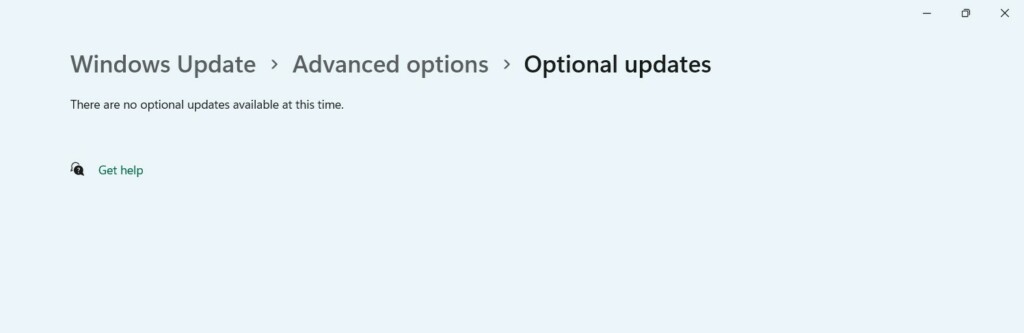
2.In theWindows Updatewindow, clickAdvanced optionsand thenOptional updates.
Otherwise, clickDownload & installto install all updates one by one.
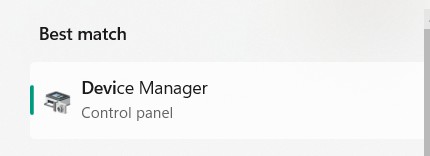
2.Choose theDevice Manager appfrom the given search results in theBest matchsection.
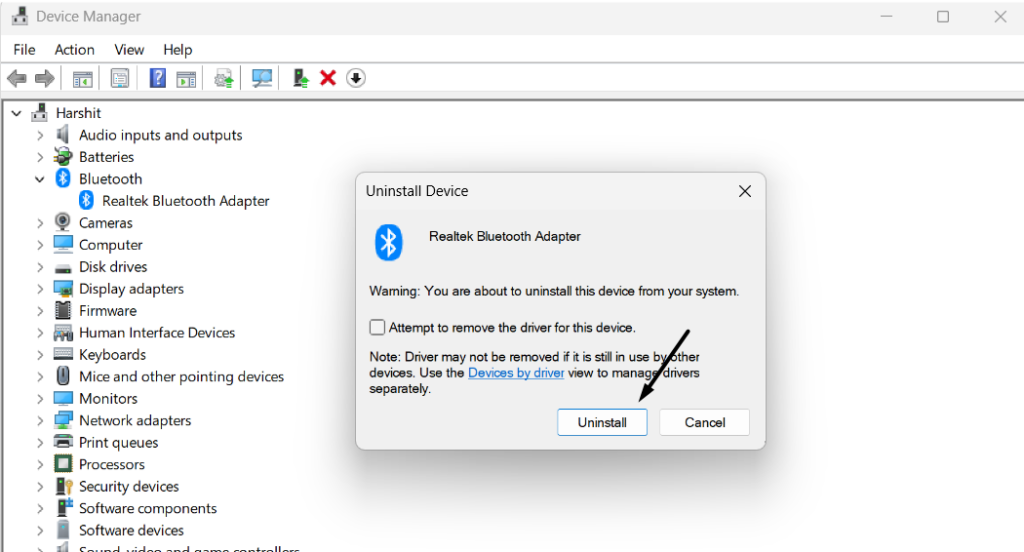
3.In theDevice Managerwindow, expand thePrint queuessection by clicking the arrow next to it.
4.UnderPrint queues, right-click your current printer adapter and chooseUninstall machine.
5.In the new prompt, click theUninstallbutton to finally remove the driver from your system.
6.After removing the printer driver from your Windows 11 PC,restart the PCto reinstall it.
Once done, check whether the Printer Sharing not working issue is fixed now on your PC.
Doing so will resolve all the temporary issues and, most likely, address the issue.
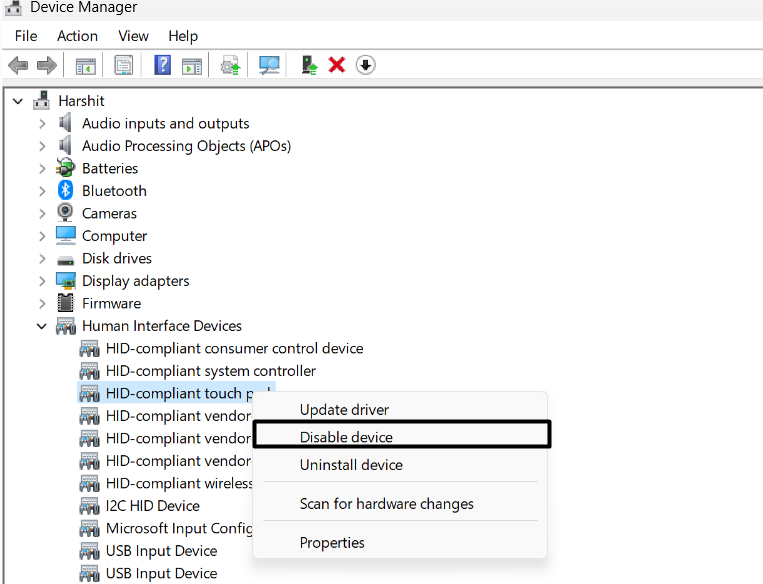
2.kick off the contextual menu for the printer driver and select theDisable deviceoption from it.
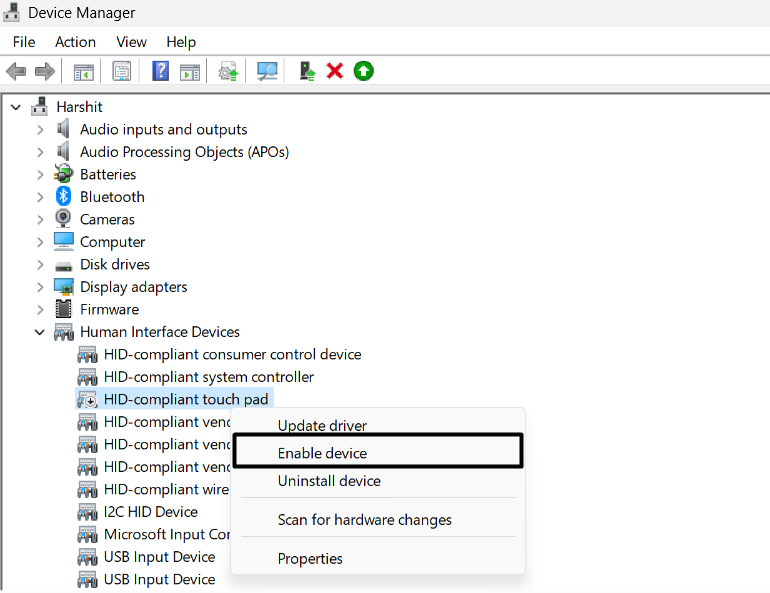
3.Once youve disabled the printer equipment, right-click it and choose theEnable deviceoption.
4.Reinstate your Windows 11 PC or laptop and find out if Printer Sharing is working fine now.
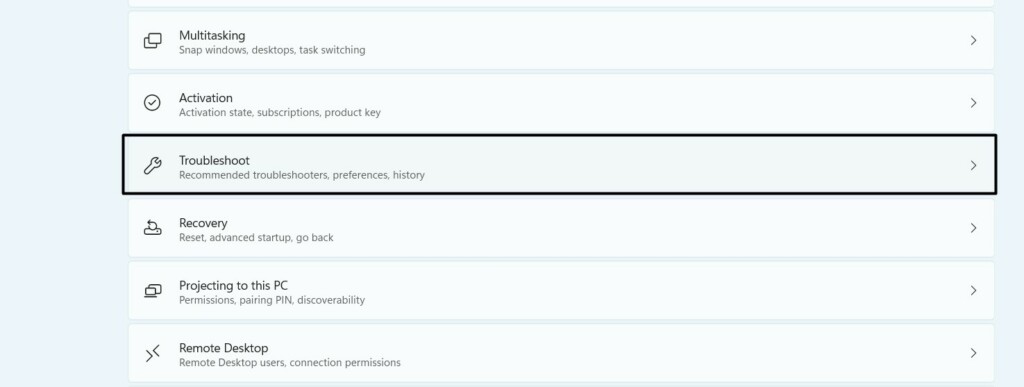
So considerrunning the Printer troubleshooteron your Windows 11 PC and see if it fixes the issue.
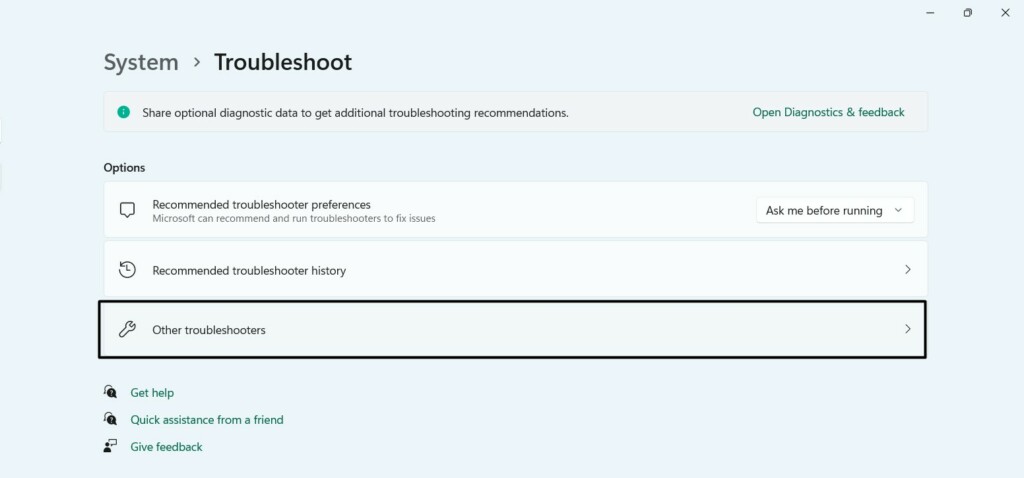
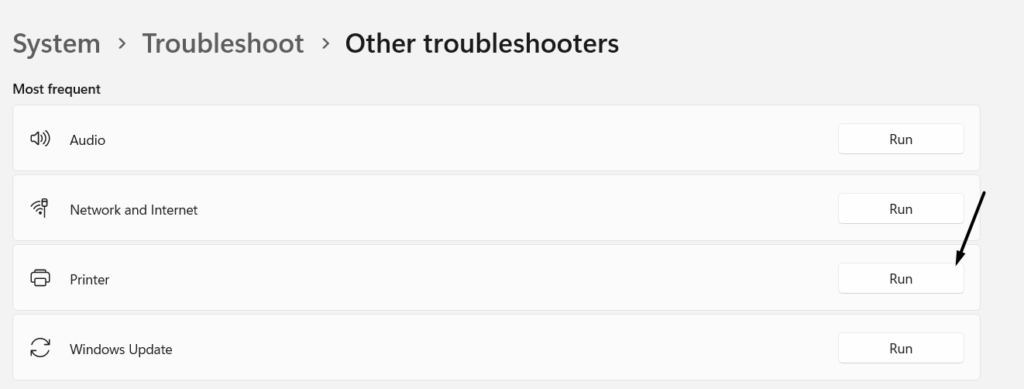
2.In theTroubleshootwindow, chooseOther troubleshootersand search forPrinterunderMost frequent.
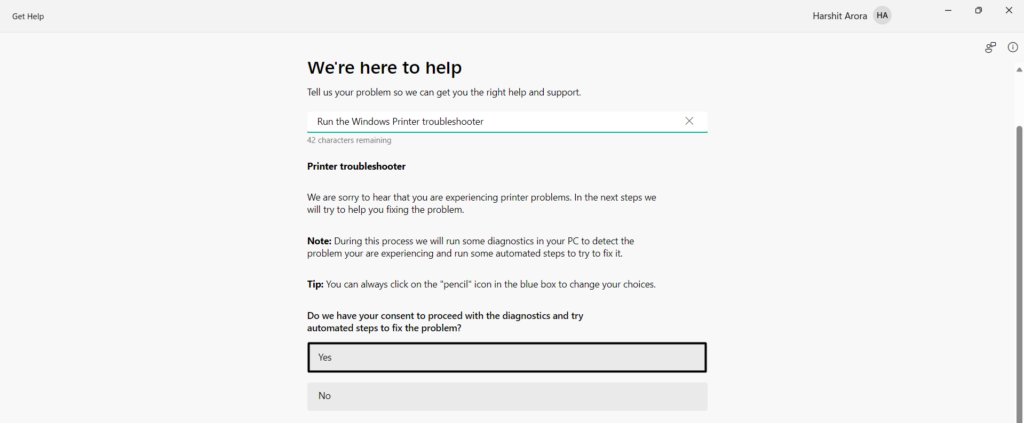
3.Click theRunbutton next toPrinterand then chooseYesto start the troubleshooting process.

4.Once done, apply or try the workarounds to fix Printer Sharing not working in Windows 11.
2.On the next screen, choose theCheck for updatesbutton to find new Windows updates.
3.Once done, click theDownload & install allbutton to install all Windows updates at once.
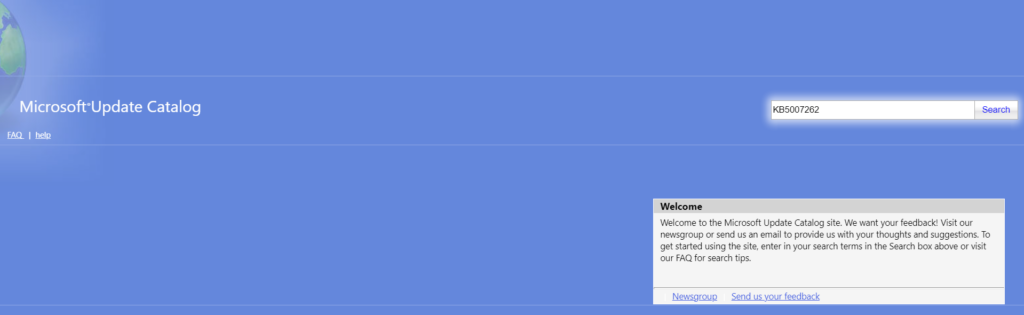
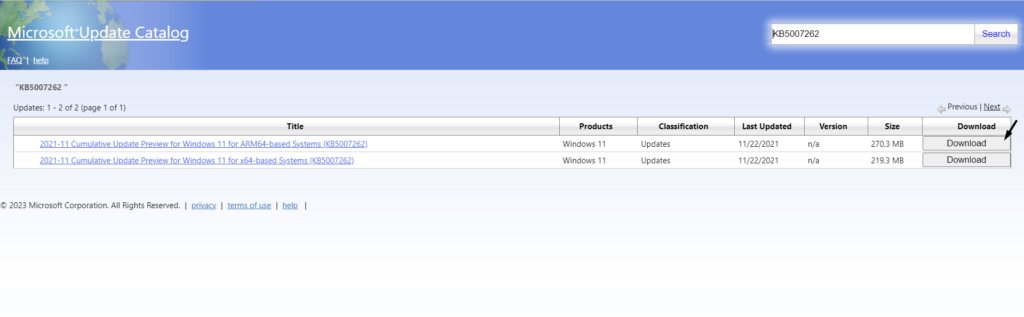
2.Once youre there, copy-pasteKB5007262into the search box and hitEnterto search for the update.
3.Once done, click theDownloadbutton next to the update for your operating system version.
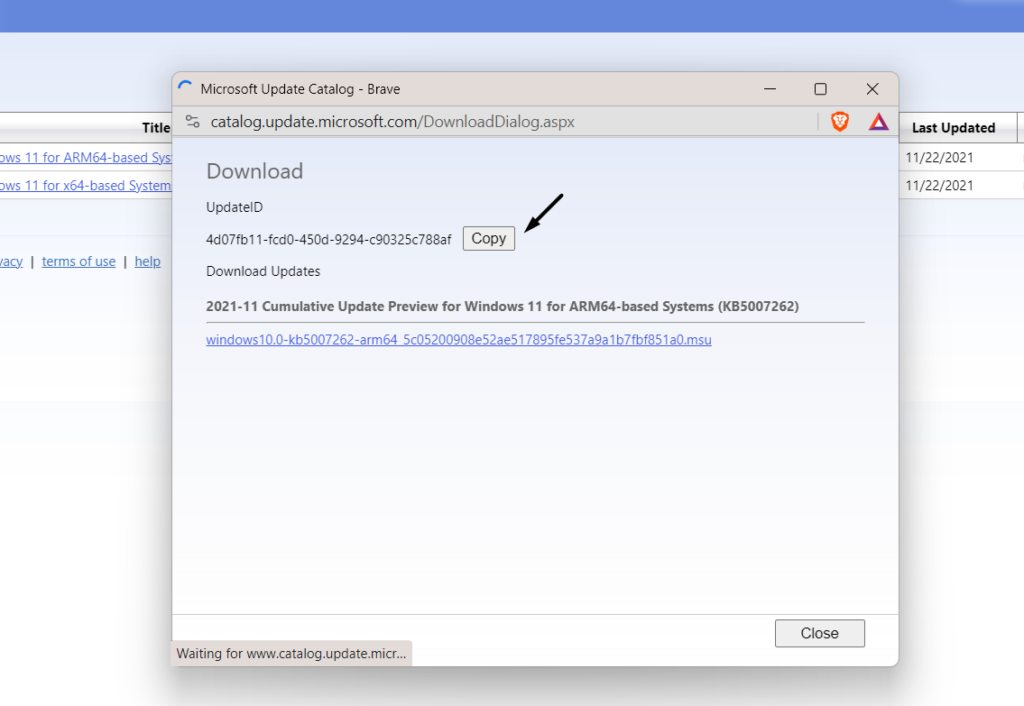
4.In the new window, copy theUpdateIDin your clipboard by clicking theCopybutton next to it.

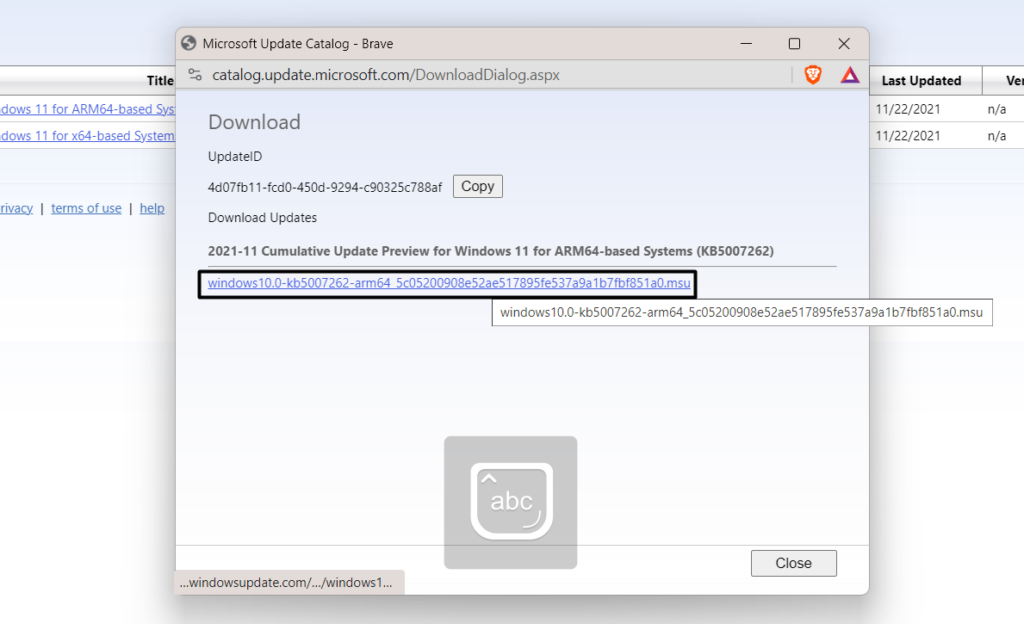
5.Once done, smack the link in the same window and smack the Save button to download the file.
6.After downloading the update, open it and follow the on-screen steps to install it on your PC.
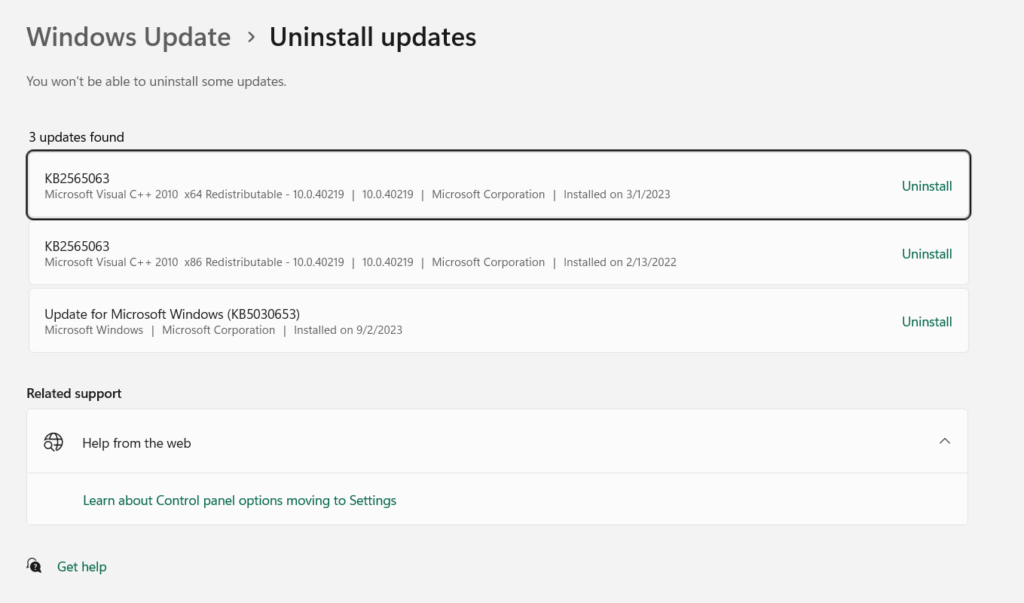
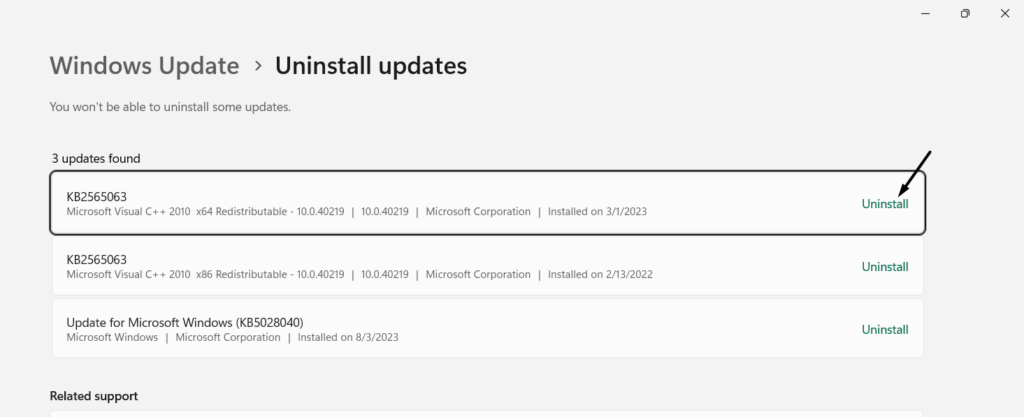
If thats the same with you, we suggest youuninstall itfrom your Windows 11 PC.

2.UnderPrograms and Features, click onView installed updatesto view all the updates.
3.In theInstalled updateswindow, look for the update that you think started causing this issue.
4.Once found, click onUninstallnext to the conflicting update you want to remove from the PC.
5.Lastly, wait for the update to get uninstalled from your PC and then check the issues status.
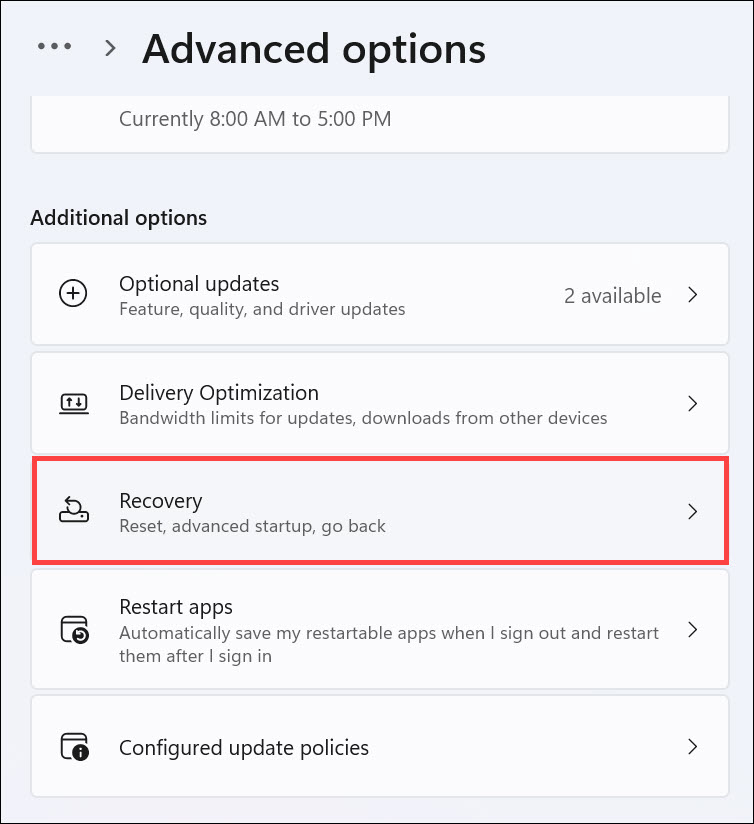
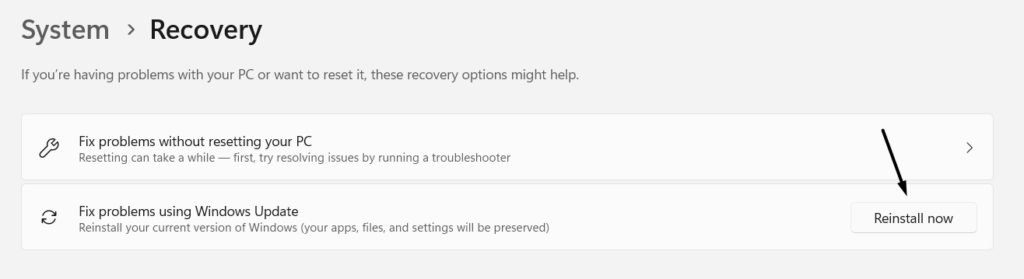
2.In theRecoverywindow, click theReinstall nowbutton to open a new window on your PC.
FAQs
How Do I Enable File Printer Sharing on Windows 11?

Does Windows 11 Support Printer Sharing?
Yes, the latest Windows 11 supports the Printer Sharing functionality, which is indeed great.
How Do I Fix Windows 11 Cannot Connect to Shared Printer Registry?

If this doesnt fix the issue, enable File and Printer sharing.
Why Is My Printer Not Working With Windows 11?
If the printer isnt working with your Windows 11 PC, consider restarting the Printer Spooler service.
you’re free to also consider re-connecting the printer to your PC to fix this issue.
What Printer Is Compatible With Windows 11?
The best part is that nowadays, almost all printers are compatible with the latest Windows 11.

Final Words
Like other features, the Printer Sharing functionality also sometimes faces issues in working.
If that was the case with you, we hope this troubleshooting guide helped you get rid of it.