Windows 11 has a built-in Automatic Repair tool that automatically finds and fixes the issues with the systems startup.
No doubt, its indeed a great feature.
But for some Windows users, its causing a nerve-wrenching issue.
Due to this, they arent able to use their computers.
Why Does Your Windows 11 PC Keep Showing Preparing Automatic Repair Message?
There could be several different reasons for this issue.
you’re free to try all the solutions mentioned below and get rid of the issue.
So, lets try the first solution.
Due to this, they are conflicting with your Windows system and causing this irritating issue.
For some users, hard rebooting the computer has fixed the issue in seconds.
2.Now, wait for at least five to ten seconds to let the system shut down.
Once done, unplug your systems power cable from the electric power socket or CPU.
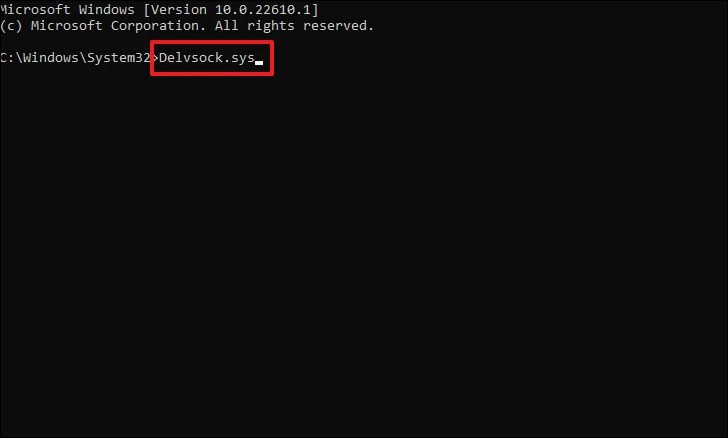
In that case, you shouldremove the problematic filesfrom your system.
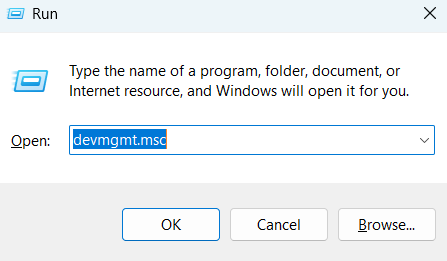
To do this, you must boot your system into the Windows Recovery Environment (WinRE).
2.Now, restart the system and continue doing the same steps until it enters the Windows Recovery Environment.
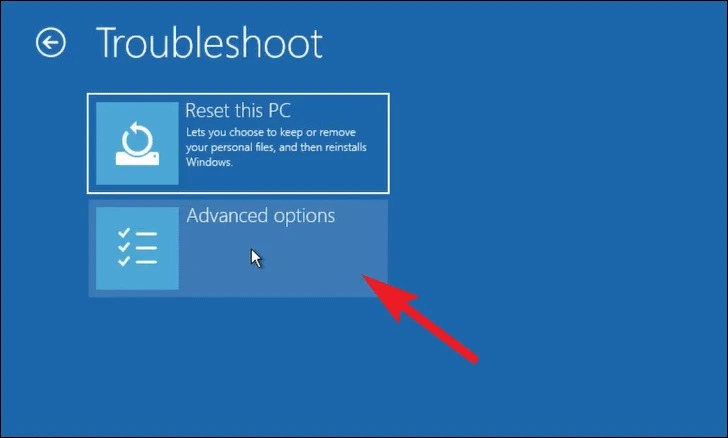
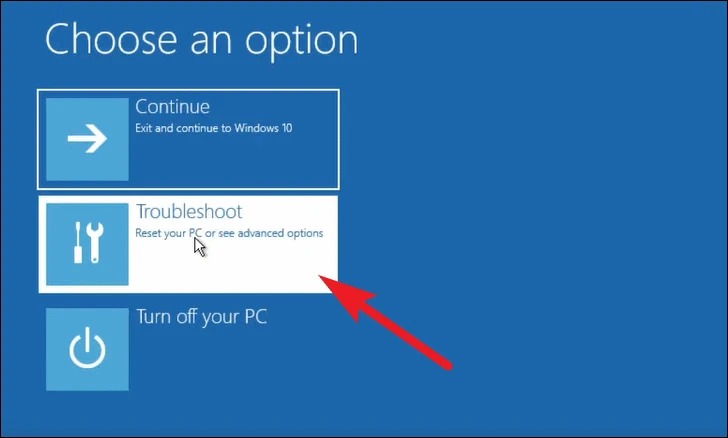
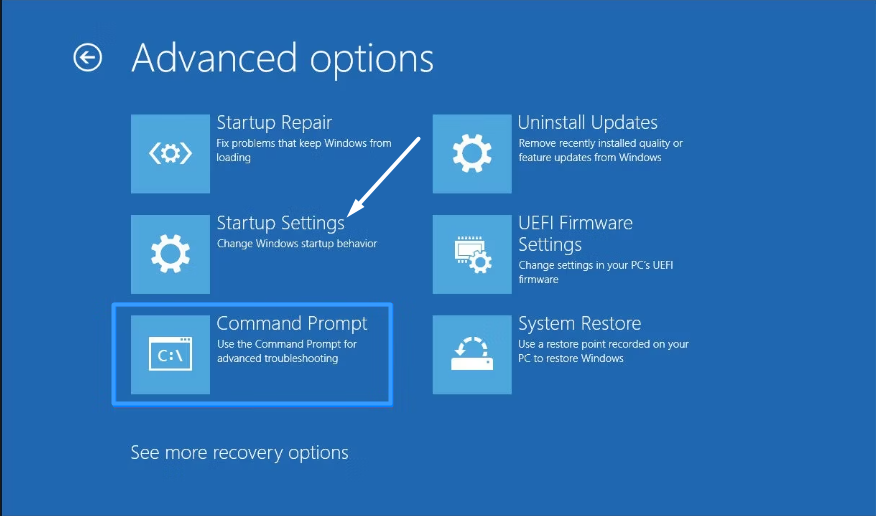
3.Once the PC enters boot mode, select theTroubleshootoption from theChoose an optionwindow and then select theAdvanced optionsoption.
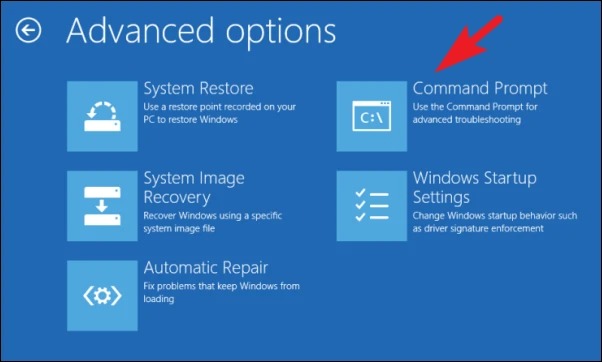
4.After that, select theCommand Promptoption from theAdvanced optionswindow and let theCommand Promptopen.
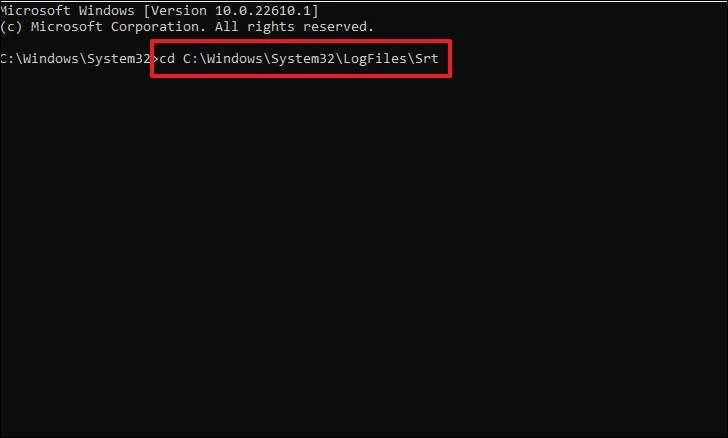
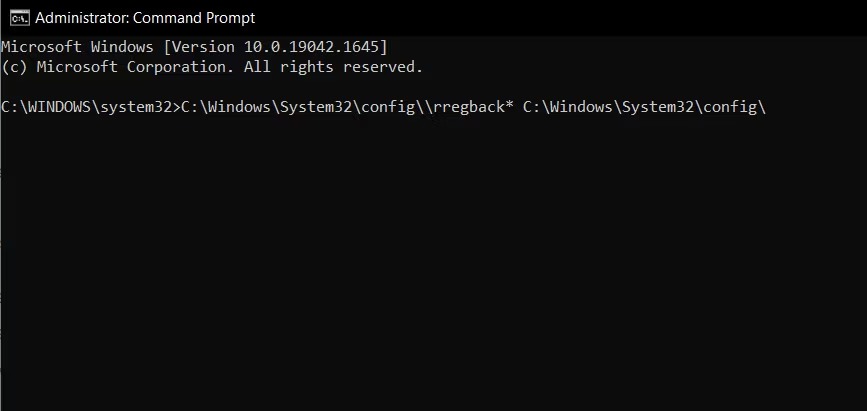
5.Once the Command Prompt is opened, copy-paste the below command into it and pressEnterto execute it.
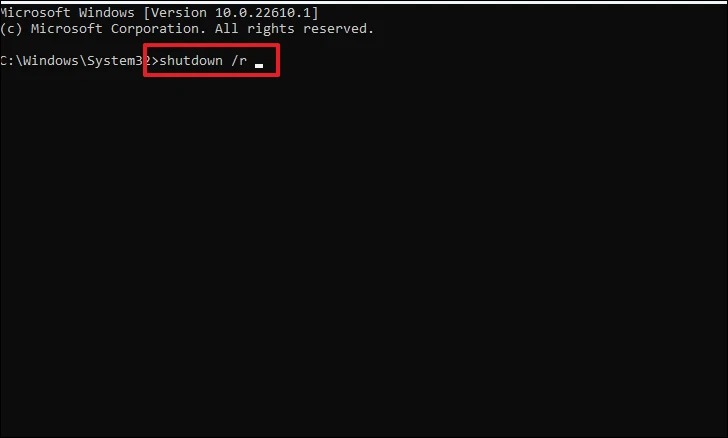
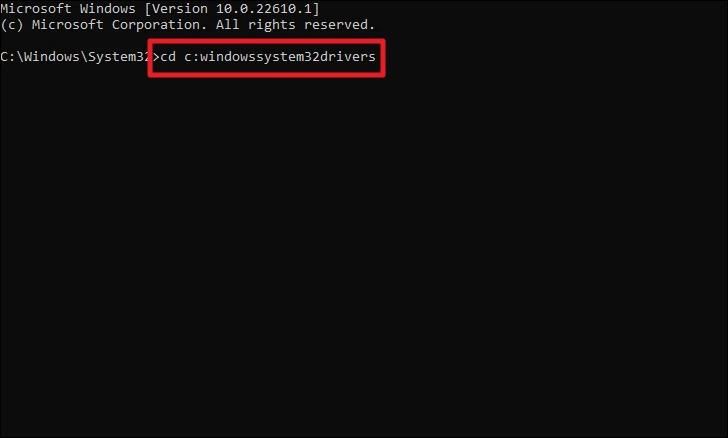
6.Next, copy-paste the below-mentioned command in the same Command Prompt window and hit theEnterkey.
7.Then, execute the mentioned command and pressEnterto delete the problematic files from your system.
Youve now commanded your setup to restart.
Once the system restarts, move ahead and check the issues status.
Disable Automatic Repair Tool
If the issue is still there, then trydisabling the Automatic Repair toolon your system.
2.Once entered, navigate to theSee advanced repair options > Troubleshoot > Advanced optionssection.
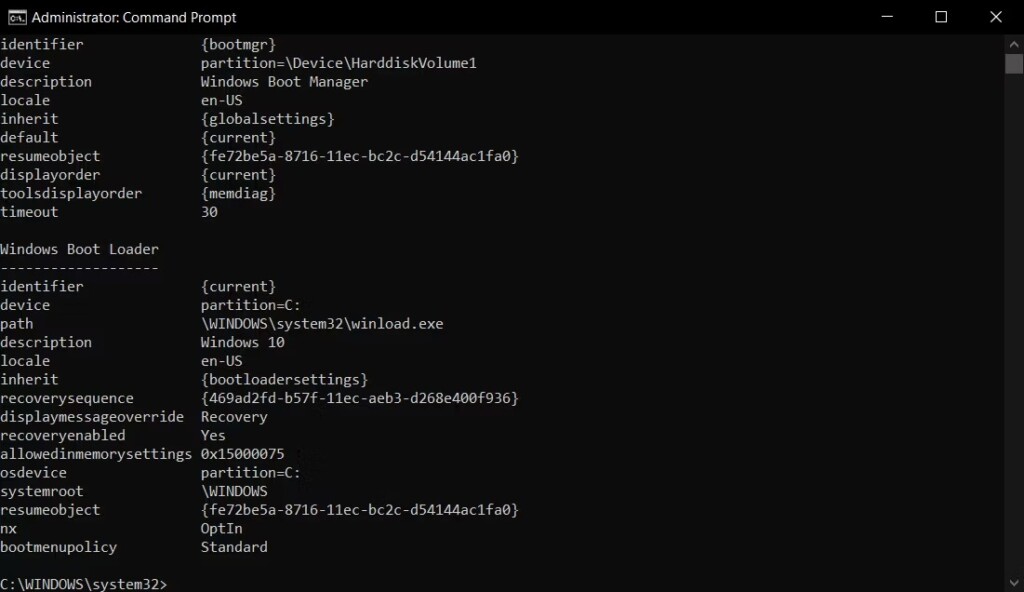
4.After executing the above command, search for theidentifierandrecoveryenabledvalues in the console.
5.If yes, move ahead and copy-paste the following command in the Command Prompt window and press theEnterkey.
After doing so, start your PC by closing CMD and check whether the issue is fixed.
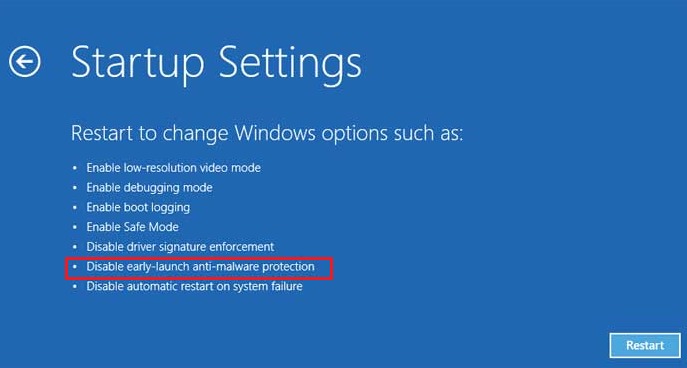
1.First, select theTroubleshootoption from theChoose an optionscreen and then selectAdvanced options.
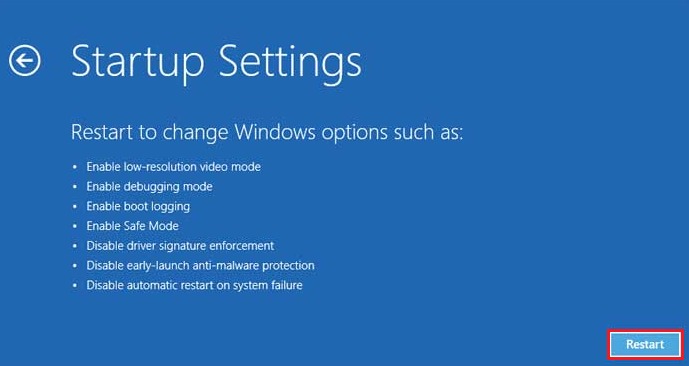
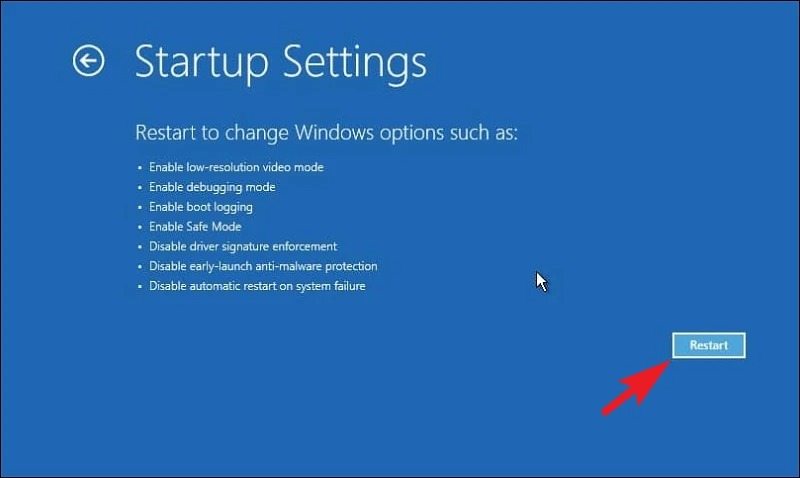
2.Now, selectStartup Settingsto get the option to shut down the Early Launch Anti-malware (ELAM) program.
3.Then, press theF8 keyon your keyboard to select theDisable early-launch anti-malware protectionoption.
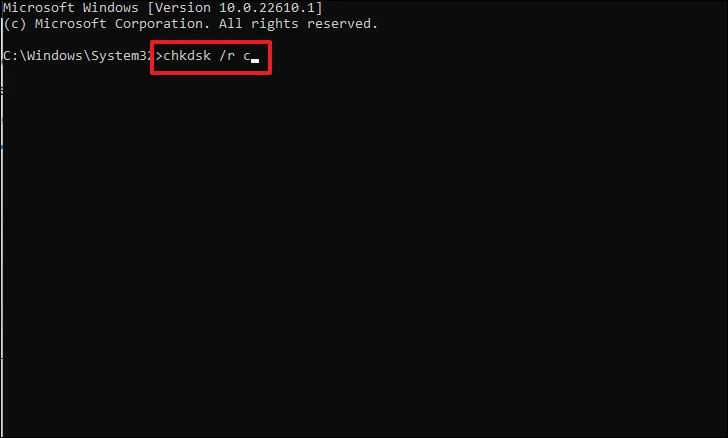
They also recommendedrunning the CHKDSK scanto scan and repair errors in your hard drive.
Again, you gotta boot into the Windows Recovery Environment to initiate the CHKDSK scan.
2.Subsequently, select theAdvanced optionsoption on theTroubleshootscreen and selectCommand Prompt.
5.After doing so, exit the Command Prompt and reboot your Windows computer to check the issues status.
Restore Windows Registry
As we stated above, corrupted registry files can also cause this issue.
3.Itll now ask you to overwrite files.
for overwrite files, you gotta typeAllin the console.
Once everything is done, reboot your Windows 11 PC and check whether the issue is fixed.
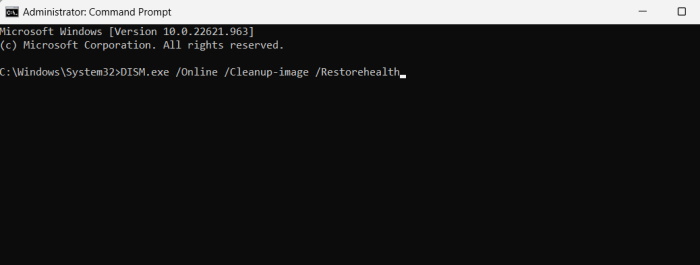
DISM scan will service your systems Windows images.
2.Subsequently, click onStartup Settingsand then selectEnable Safe Modeoption by pressing theF4key on your keyboard.
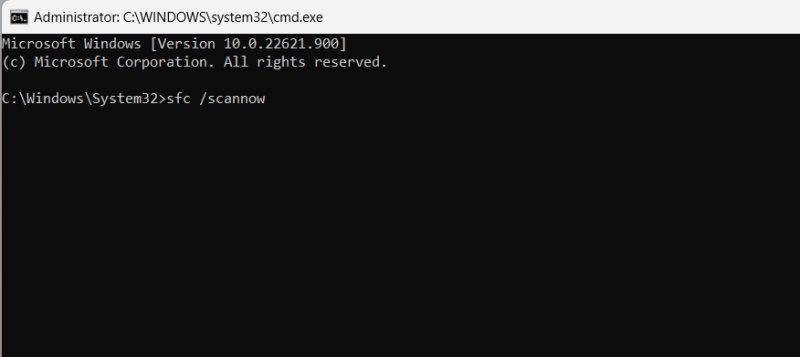
Now, wait for the SFC scan to complete.
After completing the screen, exit the Safe mode and check whether the issue is fixed.
Due to this, we recommend yourun the system into Safe mode.
2.Click onAdvanced optionsand then select theStartup Settingsoption to get the option to boot into Safe mode.
3.Next, select theEnable Safe Modeoption on the next window by clicking theF4key on your keyboard and then clickRestart.
4.At last, wait for the system to enter Safe mode and check whether its working fine.
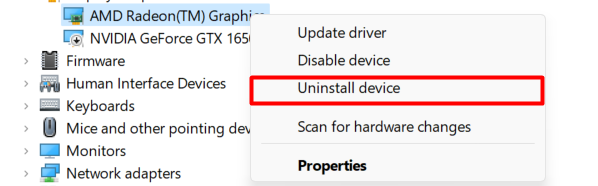
To check whether the issue is with your graphic driver, we recommend youreinstall them.
you should probably put in your system into Safe mode to do this.
To enter Safe mode, followFix9fromStep 1toStep 2.
2.After opening theDevice manager, expand theDisplay adapterssection and right-tap on your graphic driver.
3.Now, select theUninstall deviceoption from the popup menu to remove the graphic driver from your Windows 11 PC.
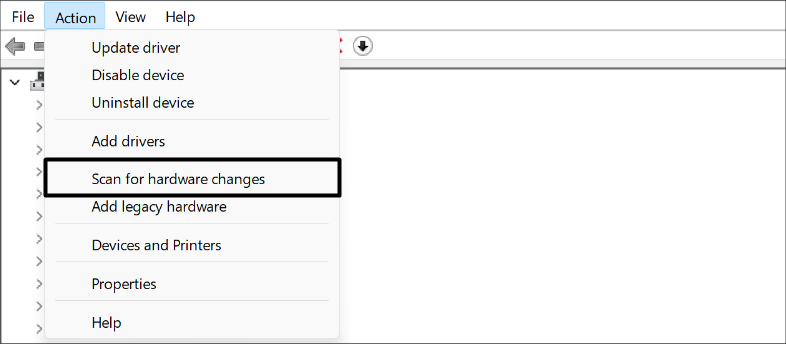
4.After removing the selected driver, click onActionin the top menu and then selectScan for hardware changesfrom the menu.
Youll now notice that the selected graphic driver has been successfully installed again on your equipment.
This will reverse all the incorrect changes and fix the issue.

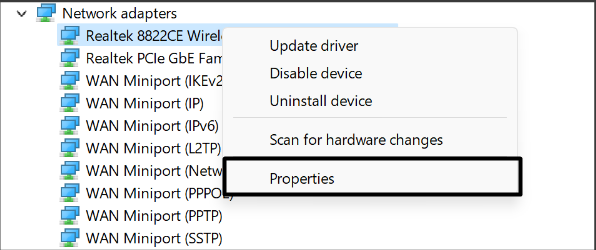
2.Now, expand theDisplay adapterssection in theDevice managerand right-press the graphic driver to bring up the menu.
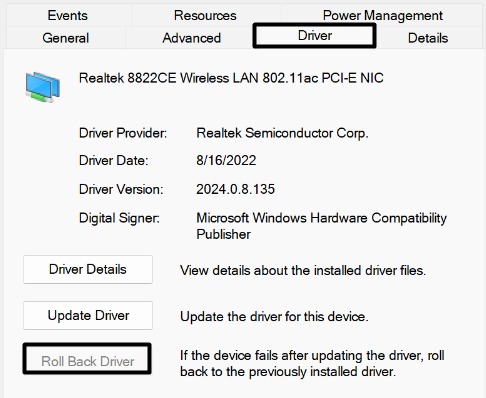
3.Next, select thePropertiesoption from the context menu to delete the graphic driver from your Windows system.
4.Finally, click onRoll Back Driverin thePropertieswindow to revert the selected graphic driver to the previous version.
After doing so, reset your PC and check whether the issue is fixed.
Hopefully, the issue must be fixed now.
12. revamp your PC
One of Microsofts Advisors advised affected users to update their Windows 11 PC.
This is because it could be possible that your latest Windows version has some bugs leading to this issue.
2.Next, trigger the below command in the console and pressEnterto add the Windows Update module to your gadget.
3.Once done, execute the following commands individually in the elevated console to install new Windows updates.

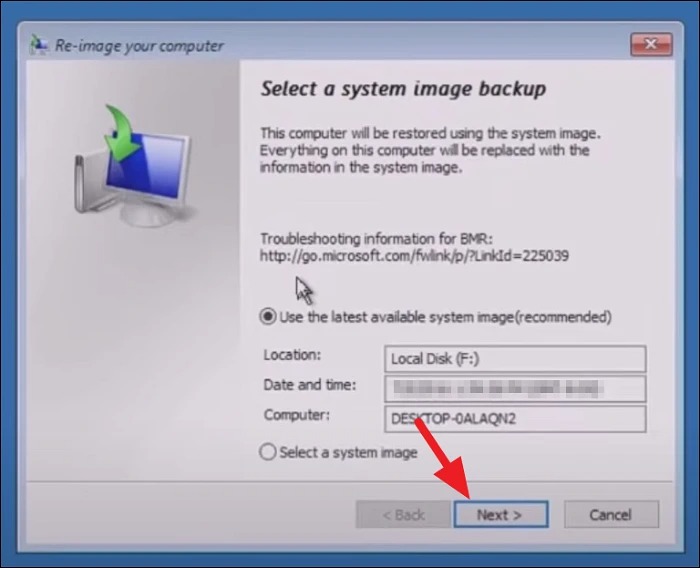
In that case, we recommend yourestore your Windows systemusing the System Image Recovery function.
This will revert your system to the latest available restore point.
2.Next, tap on theSystem Image Recoverytile in theAdvanced optionsscreen and then select your user account.
3.Now, it’s crucial that you key in your PCs login password and tap on theContinuebutton to continue.
4.After that, selectUse the latest available system image(recommended)on theRe-image your computerprompt and hit theNextbutton.
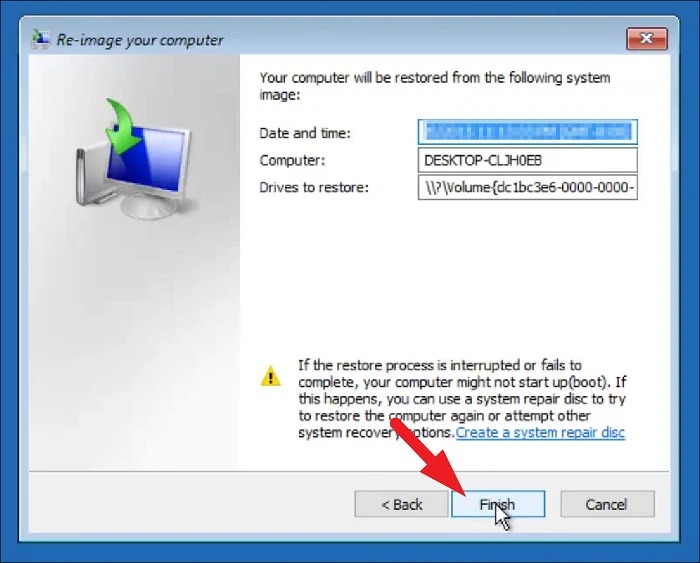
5.Then, select theNextoption on theChoose additional restore optionsand then press theFinishbutton to move ahead.
Youll now see that the restoration process has been started.
Once the process completes, youll see a popup with theRestartoption.
choose theRestartbutton to start your Windows 11 PC to check whether the issue is fixed.

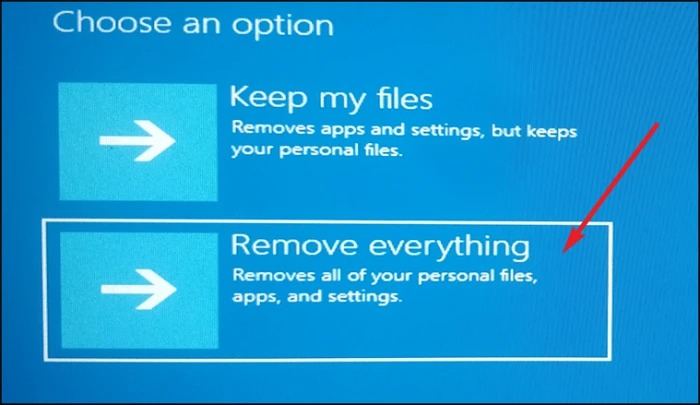
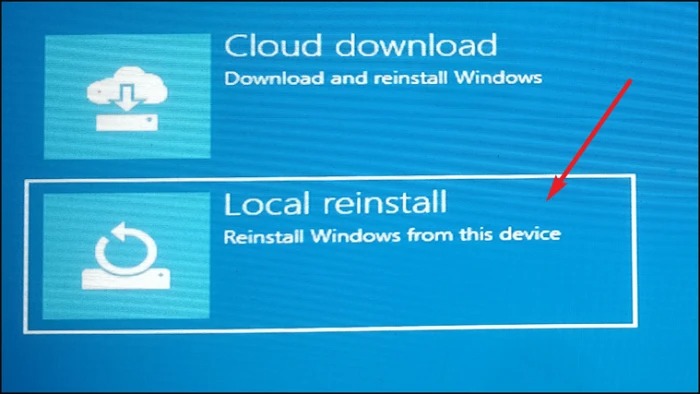
This will completely clean your system and revert all the tweaks to default.
Doing so will most likely fix the problem.
However, this may not be a useful solution for some users.

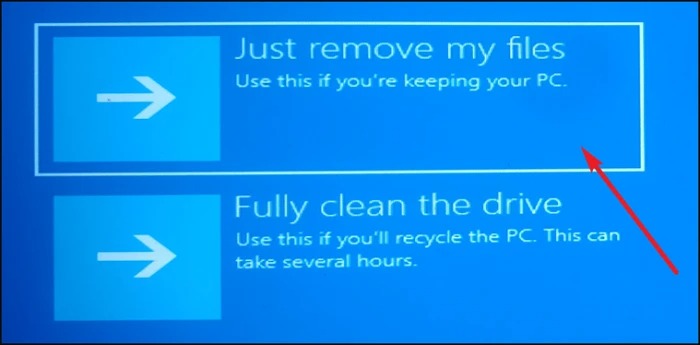
5.At last, the system will take some time to get things ready.
Once everything is ready, select theResetoption to start resetting your PC.
We hope you dont have to face the Preparing Automatic Repair loop issue again after factory resetting the PC.
FAQs
How Do I Fix Blue Screen Loop in Windows 11?
Keeping this in mind, we recommend yourun the CHKDSK commandin the Command Prompt.
How Long Does Windows 11 Automatic Repair Take?
The scanning time varies with the number and severity of issues the particular equipment has.
Why Does Windows 11 Keep Restarting Loop?
How Do I Do a Full Repair of Windows 11?
There are several ways to fully repair a Windows 11 PC.
But the most effective method is toexecute the DISM and SFC scans.
The DISM scan will service your systems malfunctioned Windows images and fix them.
How To Enter Automatic Repair Windows 11 From Boot?
2.Next, move to theTroubleshoot > Advanced Optionssection and then click onAutomatic/Startup Repair.
3.Itll now ask you to select your user account and enter the password to continue.
Once you enter the required details, the Automatic Repair will start automatically.
Youve to wait for it to identify the problem on your system and fix it.
Final Words
No doubt, the Automatic Repair functionality in Windows 11 is such a helpful addition.
But this has become a huge problem for some Windows 11 users.
