Thus, lets first troubleshoot existing services that might be interfering with Nvidias driver updates.
Use the steps we include below to help you disable Windows Defender on your PC.
1.bring up the Start menu on your PC using the Windows key.
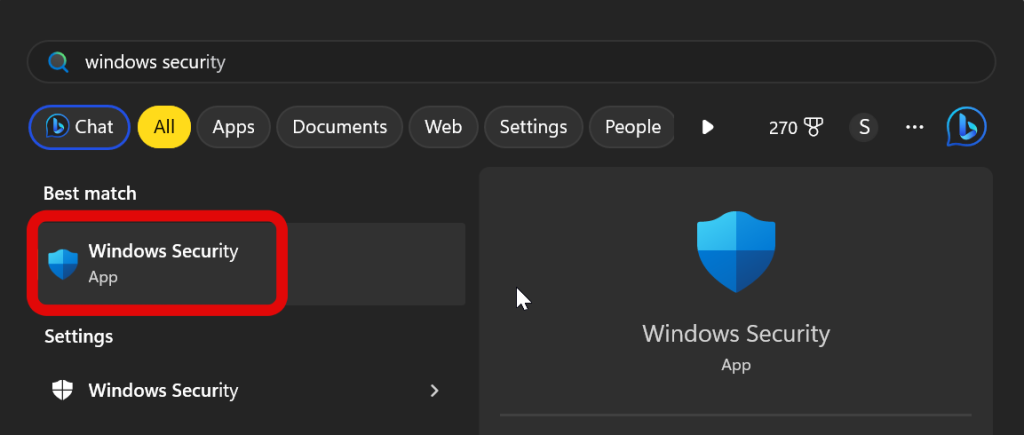
2.Now, bang out inWindows Security.
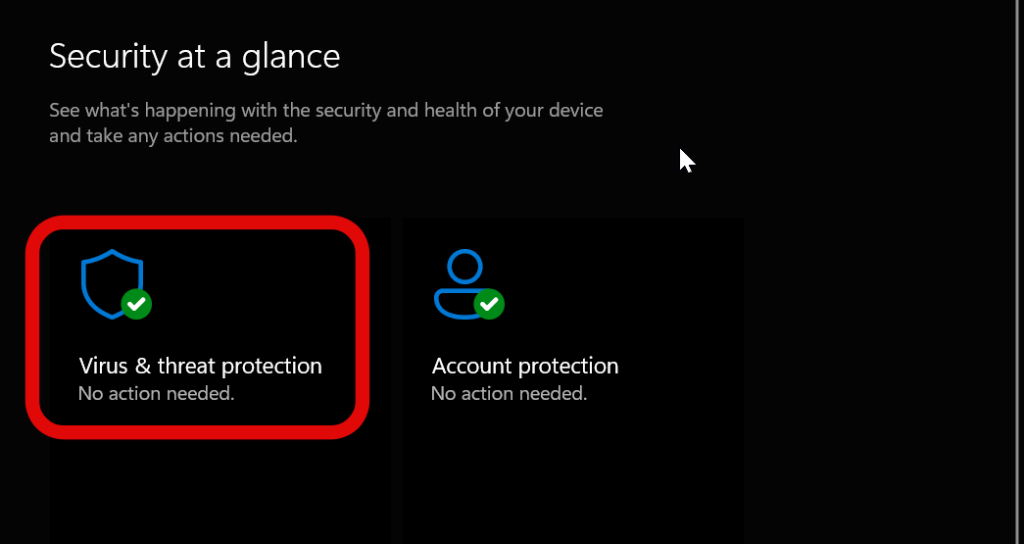
3.Now click onVirus & threat protection.
you might press this underSecurity at a glanceor from the left sidebar on your screen.
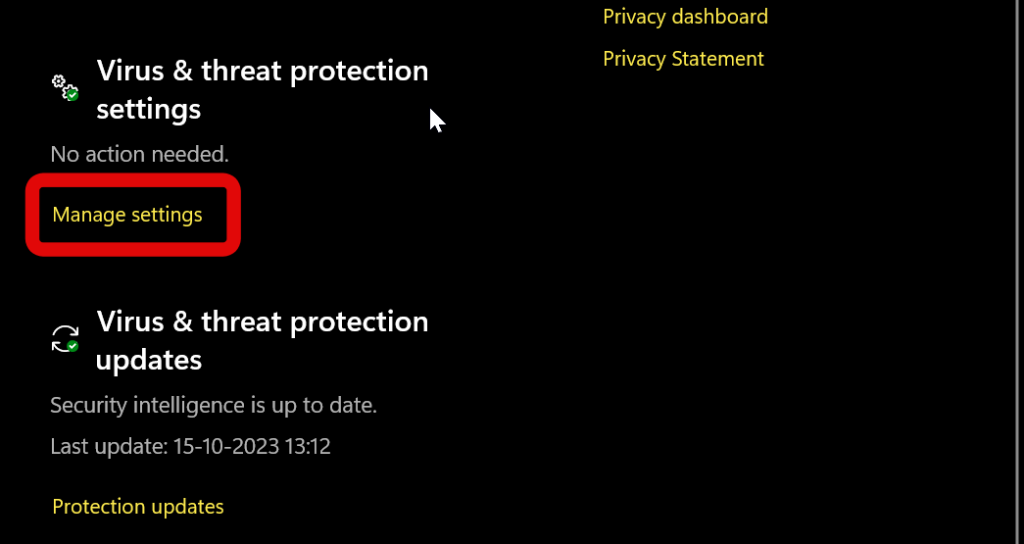
4.Click onManage settingsunder Virus & threat protection options on your screen.
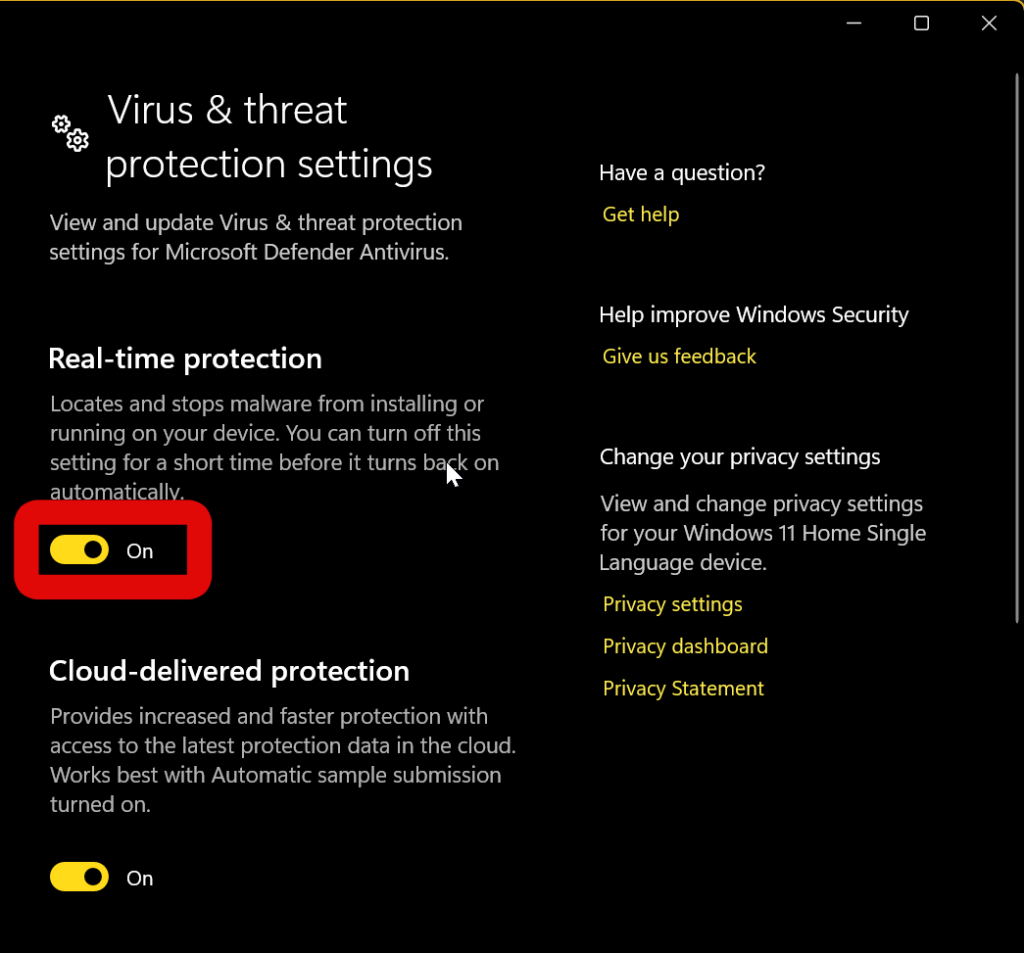
5.hit the toggle for the following items on your screen to turn them off.
You will be asked to confirm your selection each time by the User Account Control or UAC.
ClickYesto confirm your choice each time you are prompted by UAC on your Windows 11 PC.
This can happen due to various reasons, including administrator access, organization restrictions, and more.
So, I now recommend you check for Nvidia driver updates using Windows Update.
Use these steps I have included below to help you patch your drivers through Windows Update.
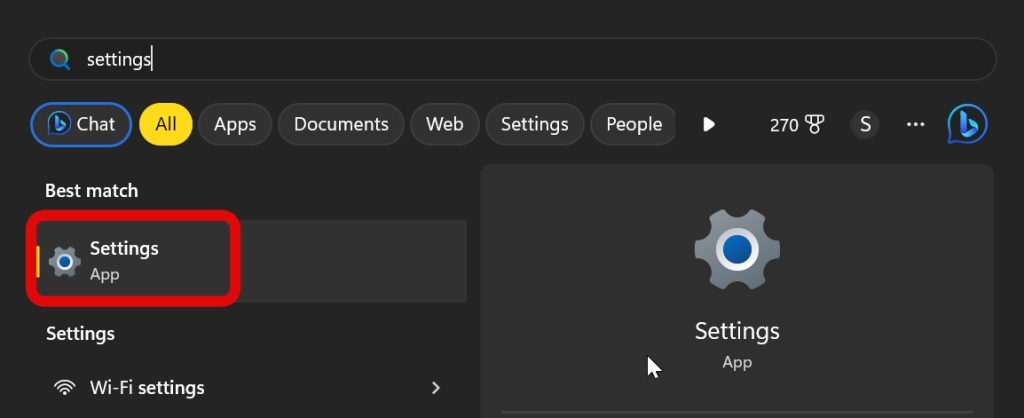
1.Open theSettingsapp on your PC by launching the Start menu and searching for the same.
When the app appears in your search results, hit it to open your PC parameters.

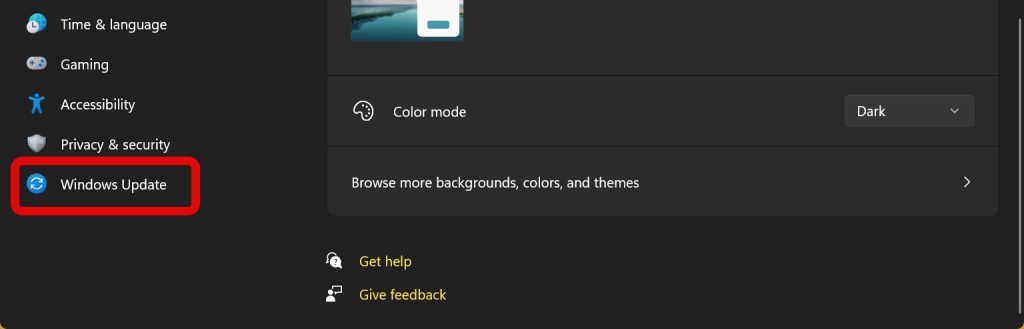
2.Now click onWindows Updatein the left sidebar on your screen.
3.ClickCheck for updates, which should be in the top right corner of your screen.
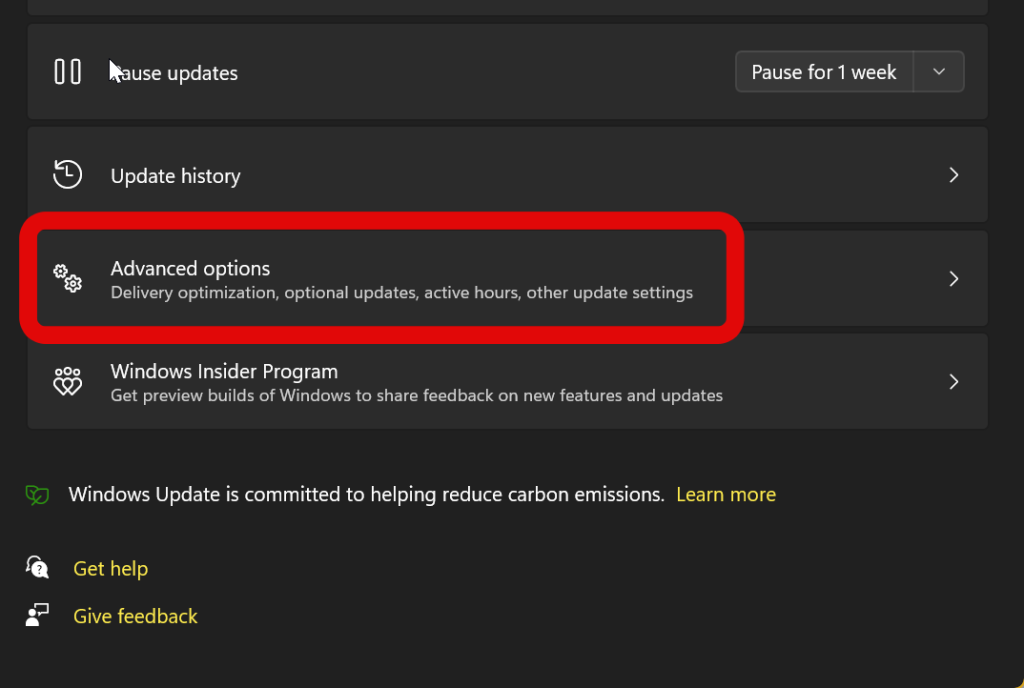
5.However, if no update shows up for your GPU in this section, then click onAdvanced optionsunderMore options.
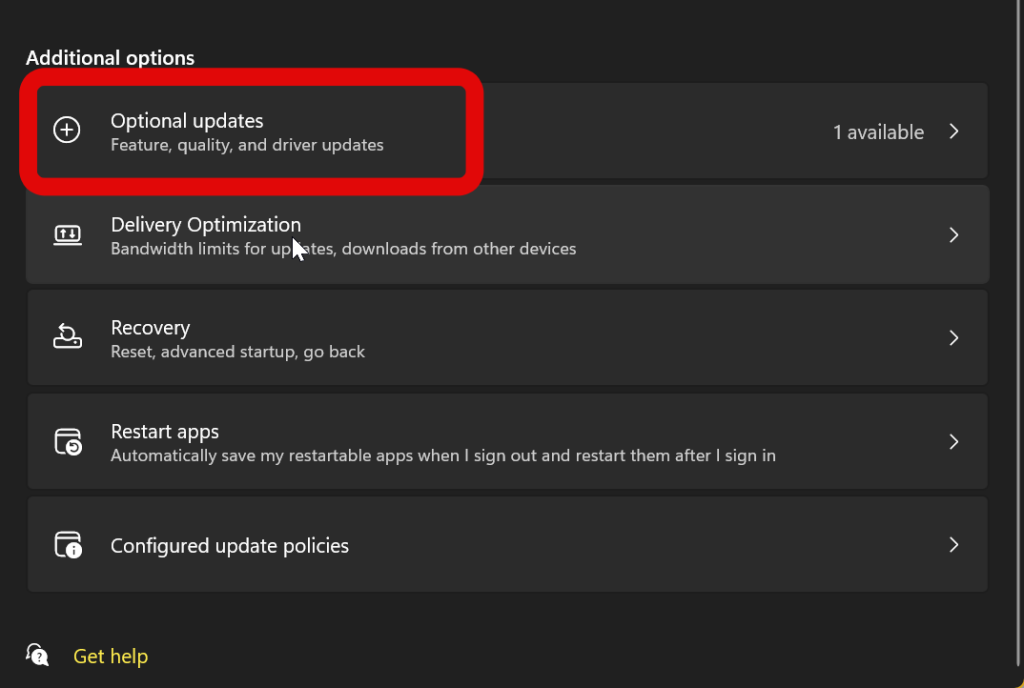
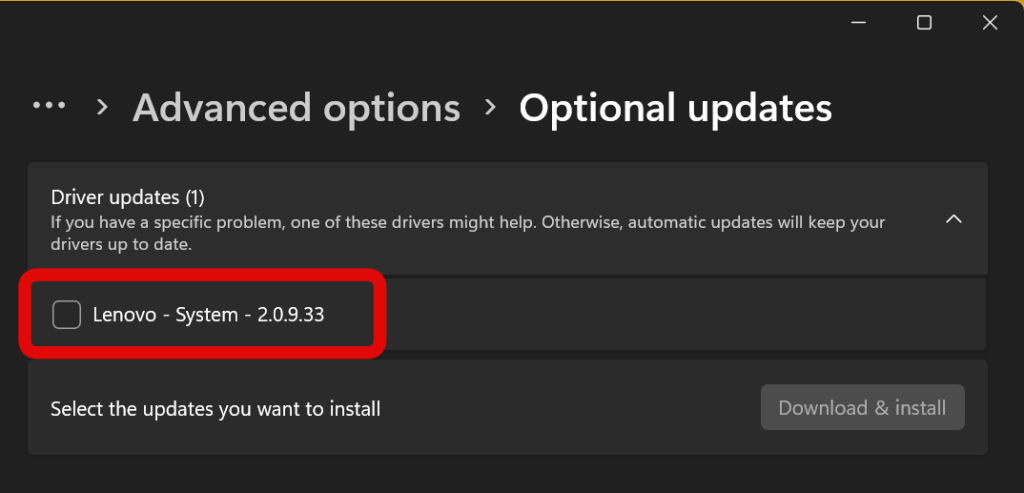
6.Next, click onOptional updates, which will show up underAdditional Options.
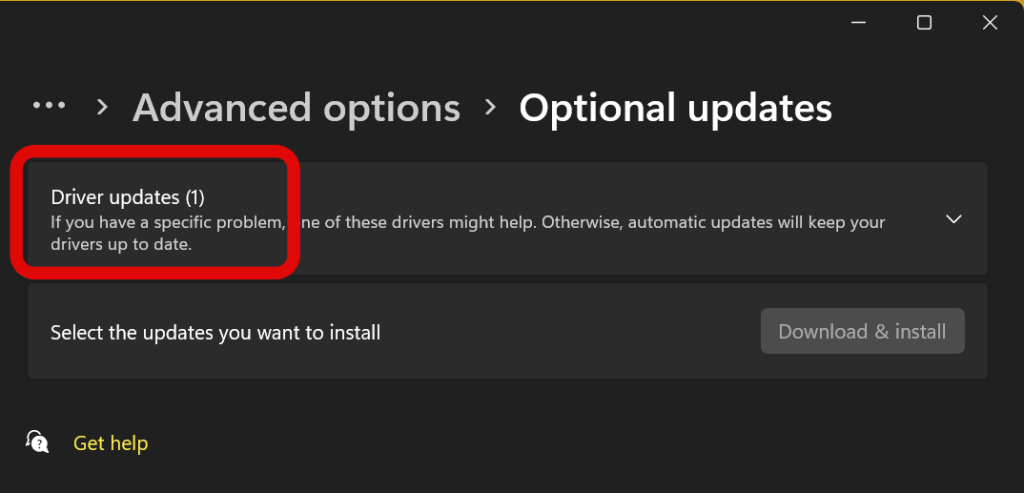
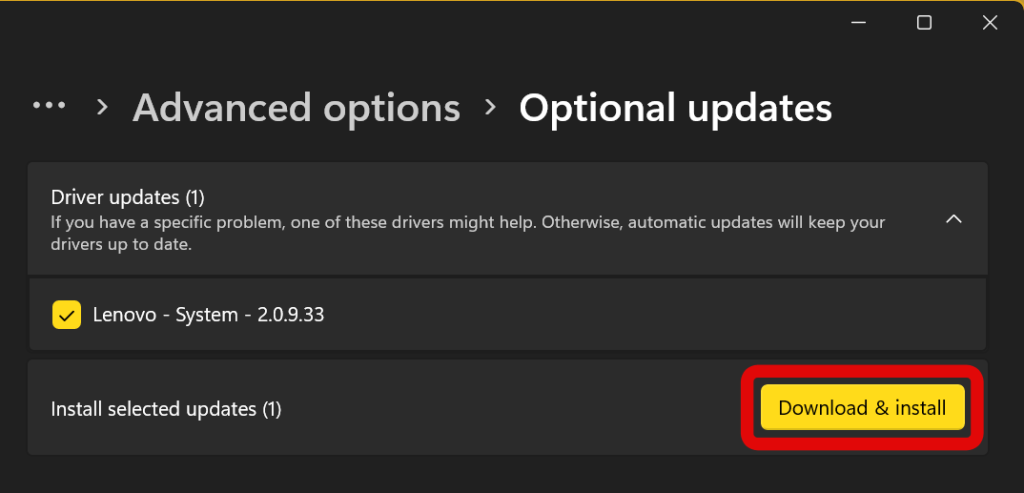
tap on the checkbox beside the driver update to select it.
The selected driver update will now be downloaded and installed on your PC.

Your PC will likely update and restart itself once the driver has been installed.
you might check your GPU model using the Nvidia Control Panel or by using the rig manager.
Use the steps I have included below to help you find out your GPU model using the equipment manager.
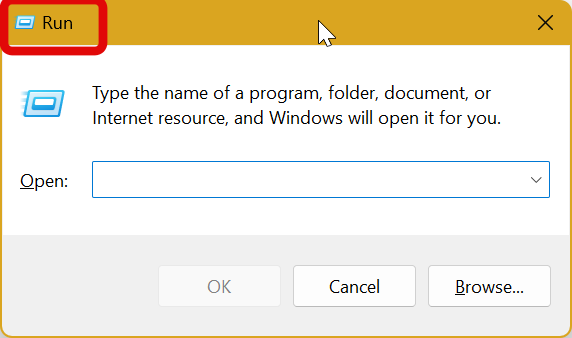
1.kick off the Run app on your PC.
it’s possible for you to do so by pressingWindows + Ron your keyboard.
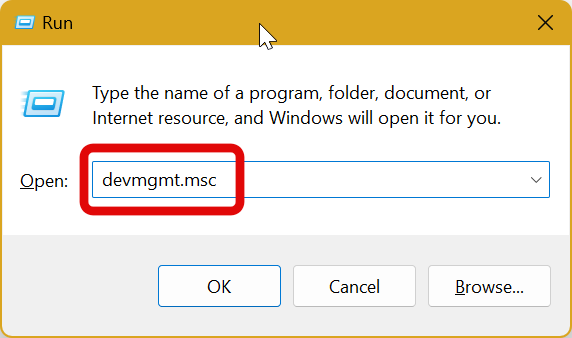
2.Once the Run app is open, punch in indevmgmt.mscand pressEnteron your keyboard.
you’re free to also click onOKif you prefer.
3.The gear manager will now open on your PC.
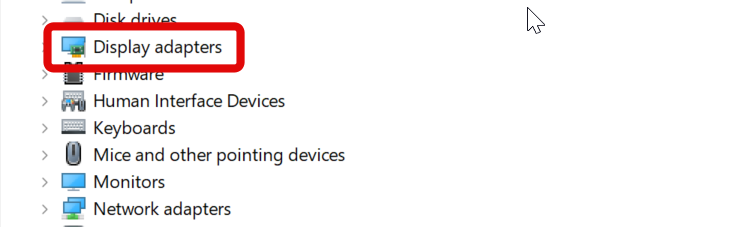
Double-click onDisplay adaptersto view all the GPUs installed on your PC.
This will include your integrated and dedicated GPU, which will be your Nvidia GPU.
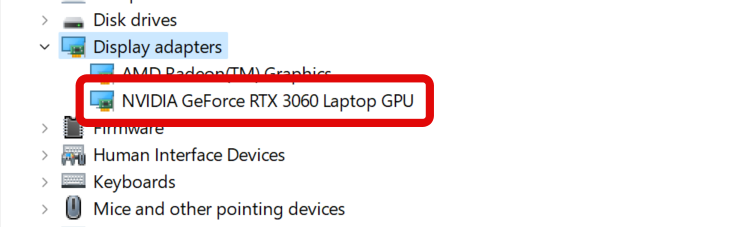
4.Your Nvidia GPU will now show up underDisplay adapters.
Note down its model so you might download the relevant drivers for your GPU.
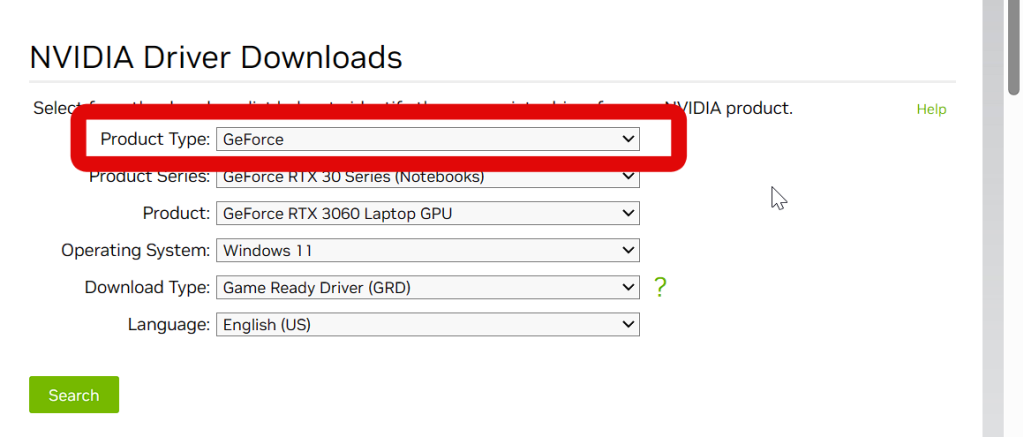
5.Next, visit the website linked below to download the relevant Nvidia GPU drivers on your PC.
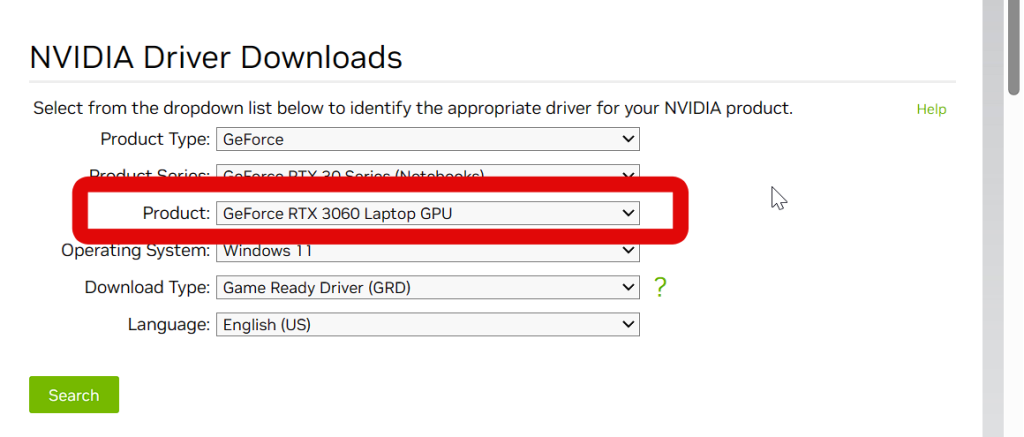
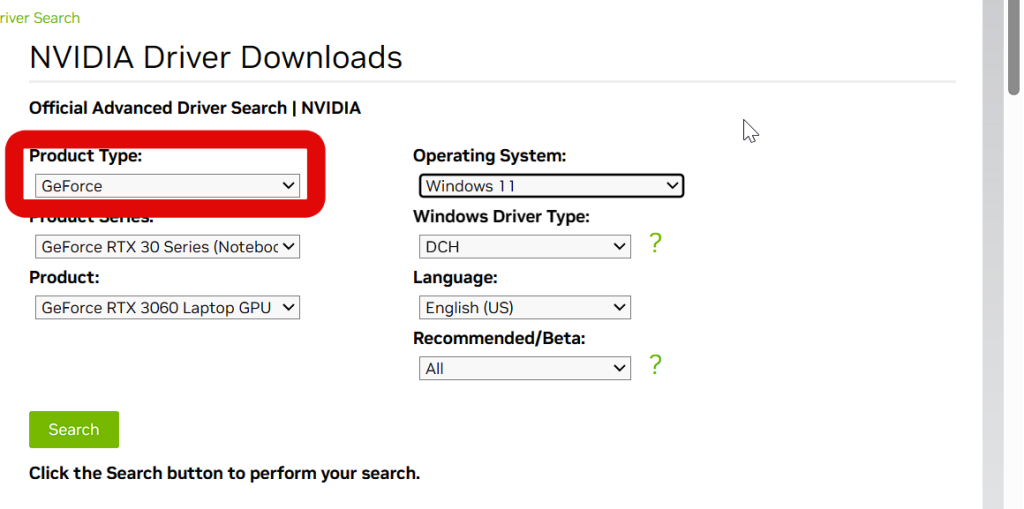
6.Now smack the drop-down menu forProduct Typeand selectGeForce.
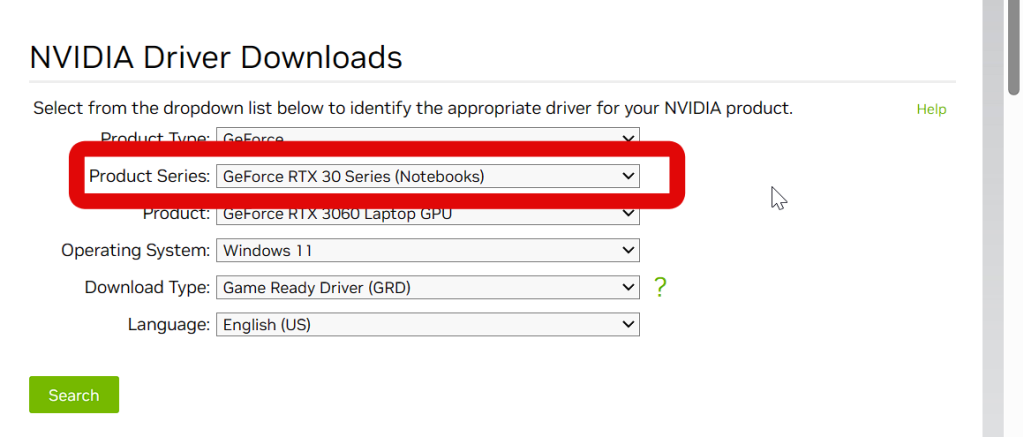
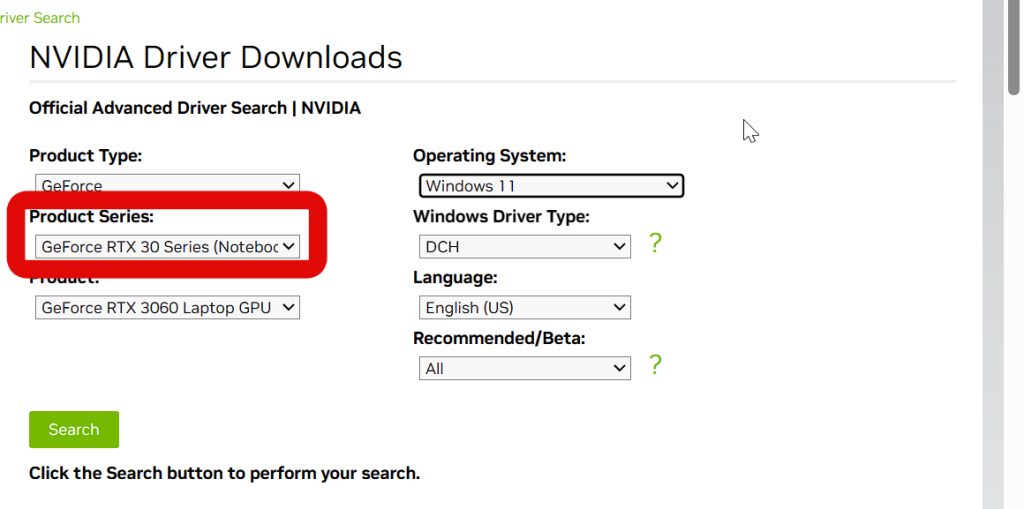
7.Next, choose the drop-down menu for Product Series and choose the series of Nvidia GPUs you own.
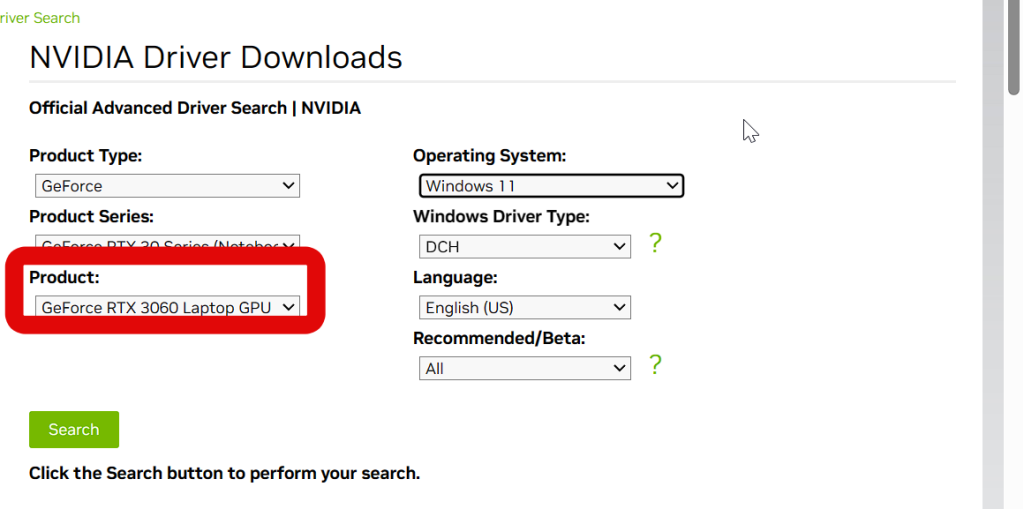
8.Similarly, use the next drop-down menu to select your GPU.
Ensure you choose the correct GPU depending on whether you have the laptop or desktop model.
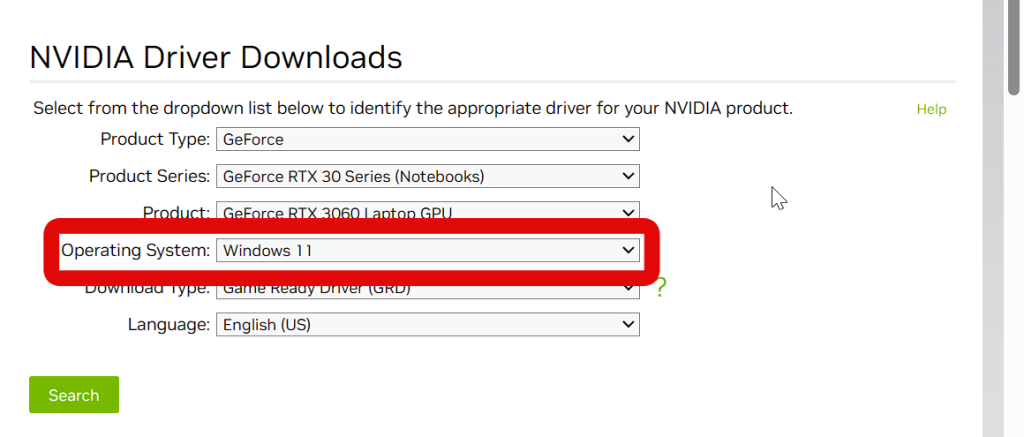
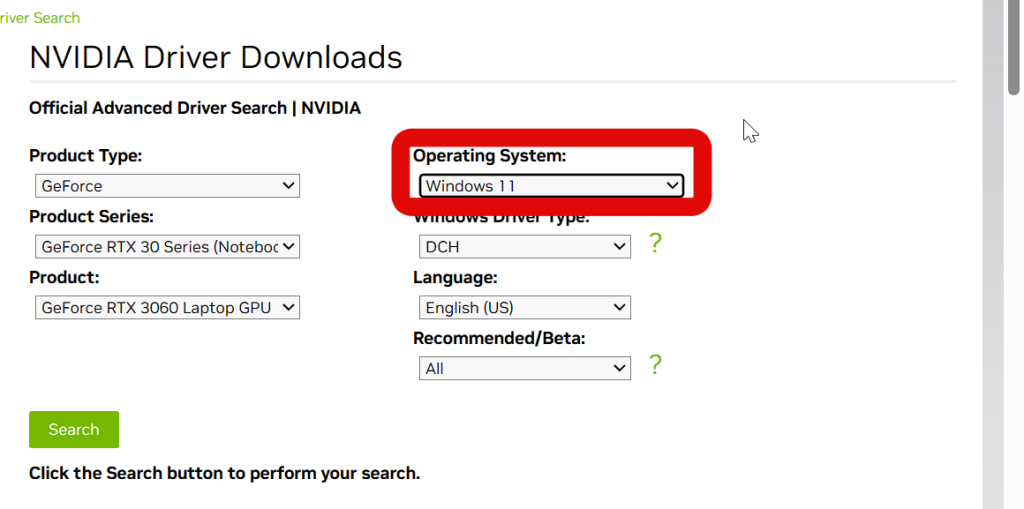
9.tap the drop-down menu for Operating System and select Windows 11.
10.Now clickDownload Typeand pick the version for your driver that you wish to download.
In that case, you should download the Studio Driver (SD) for your Nvidia GPU.
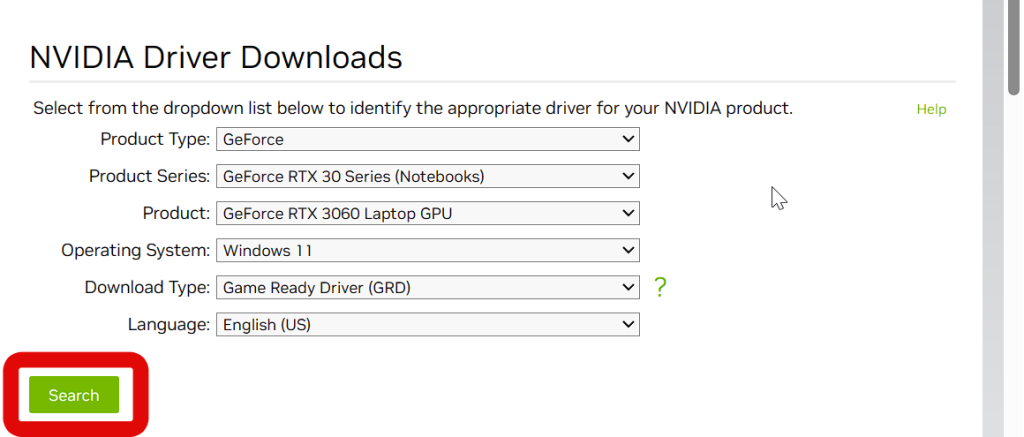
11.ClickSearchonce you have entered all the relevant information.
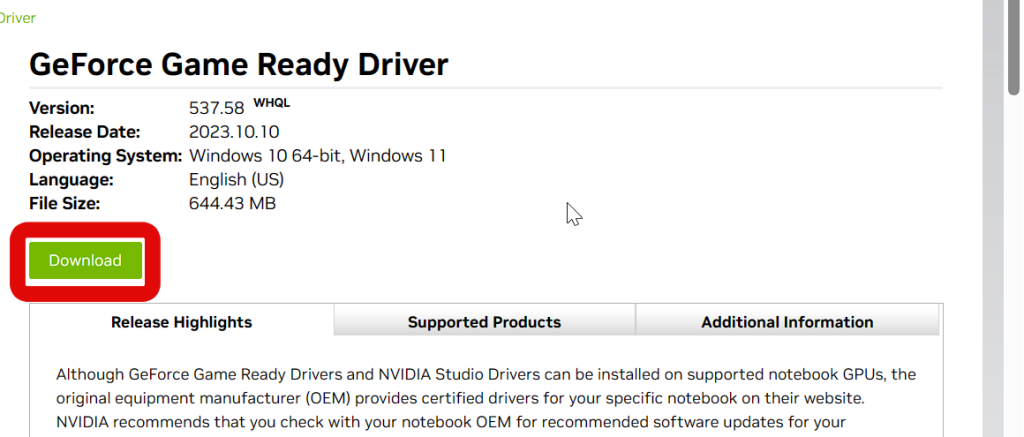
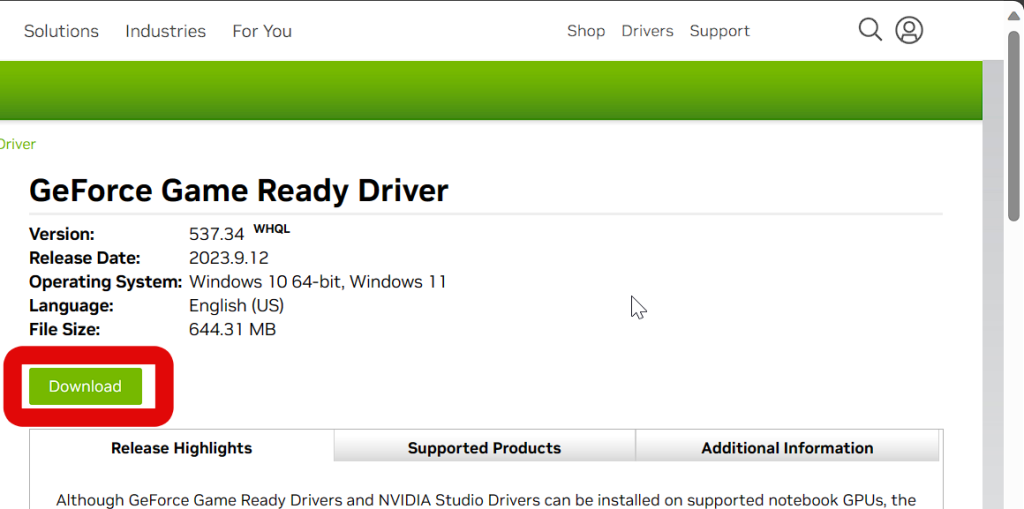
12.The relevant driver for your GPU will now show up on your screen.
ClickDownloadto download the drivers on your PC.
Once the drivers have been downloaded, double-click and launch the setup.
you’re able to then follow the on-screen instructions to drop in the correct drivers on your PC.
This can usually happen if you dont have administrator access or have driver installation protected behind administrator access.
To implement the drivers as an administrator, simply right-tap the setup file and selectRun as administrator.
It could be that your IT admin has placed similar restrictions on your work-issued PC.
So, I now recommend you try installing an older Nvidia GeForce driver for your GPU.
Such updates are issued by Nvidia without any release notes.
1.Use the link below to fire up the Nvidia Advance driver search in your web client.
Once the page is open, poke the drop-down menu for Product punch in and selectGeForce.
2.Now hit the drop-down menu for Product Series and select your GPUs series.
3.Like the same as above, poke the drop-down menu for Product and select your GPU.
Ensure you go for the correct GPU, whether you have a laptop or a desktop.
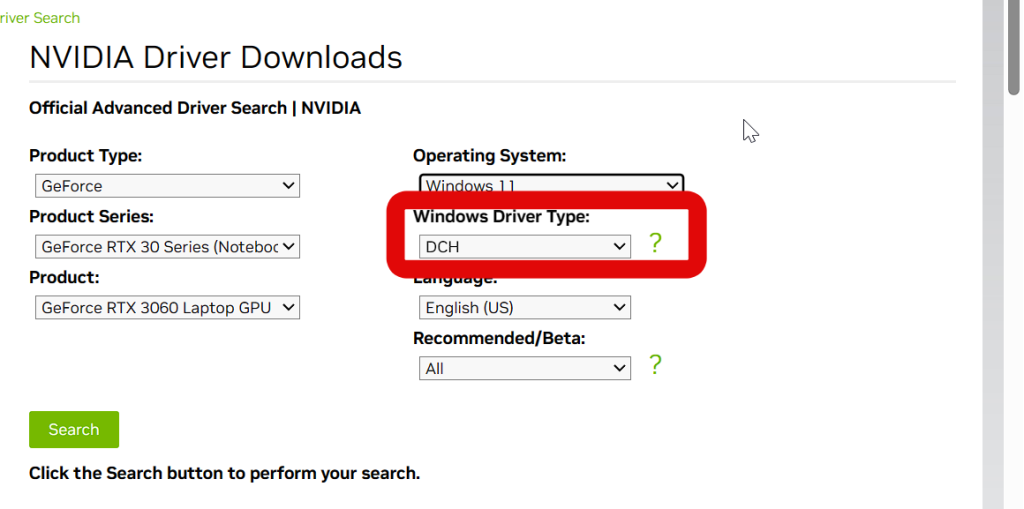
4.Next, smack the drop-down menu for Operating System and select Windows 11.
5.tap the drop-down menu for Windows Driver pop in and select Standard.
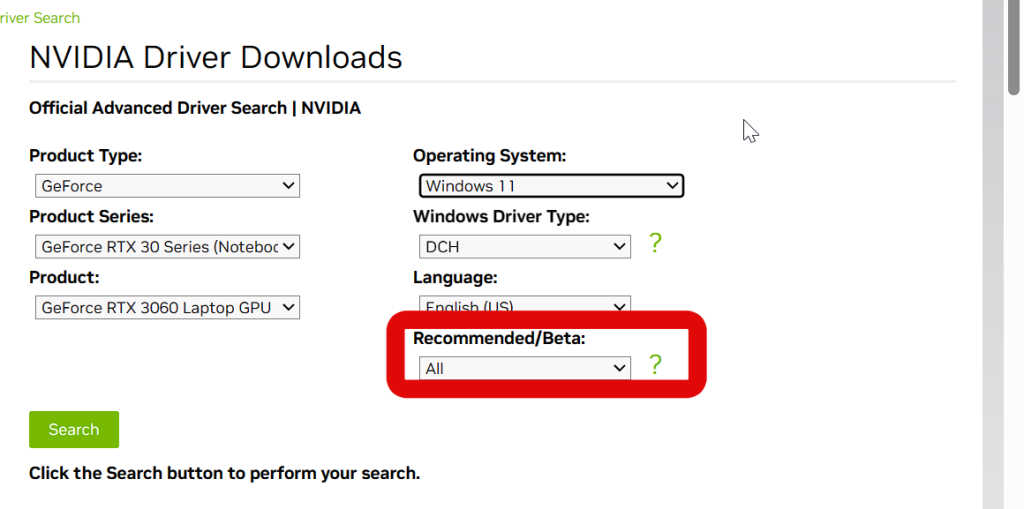
6.Lastly, nudge the drop-down menu forRecommended/Betaand selectRecommended/Certified.
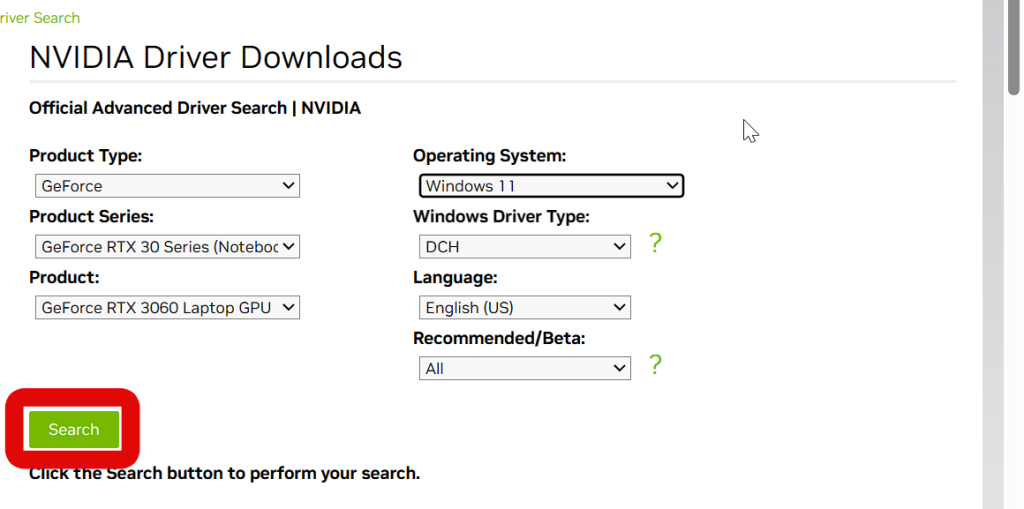
7.Now click onSearch, which should be in the bottom left corner.
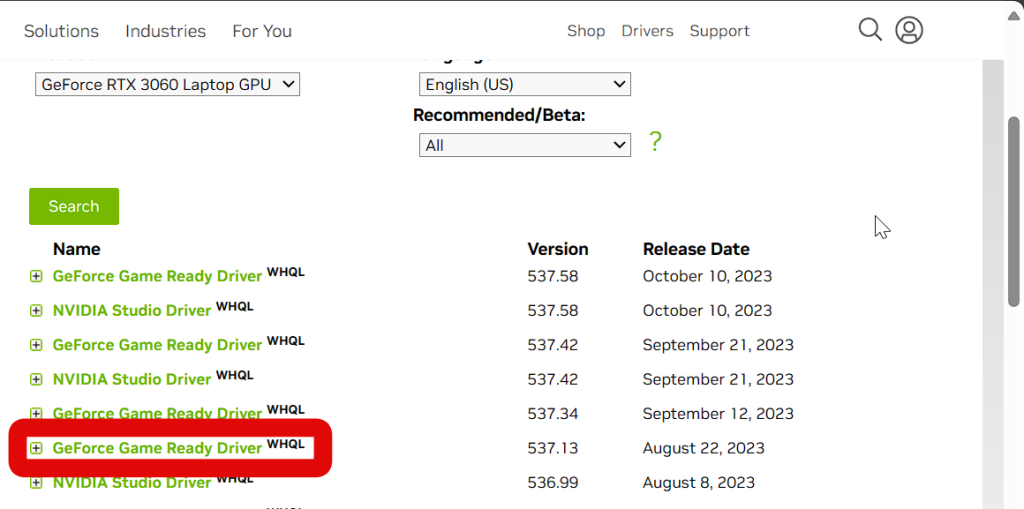
8.You will now be shown all the available drivers for your GPU.
select an older driver to download it to your PC.
9.Now click onDownloadto download the drivers.

Once the setup has been downloaded, double-click and launch it on your PC.
Now follow the on-screen instructions to implement the old drivers on your PC.
In this case, it’s possible for you to continue with the fixes I have listed below.
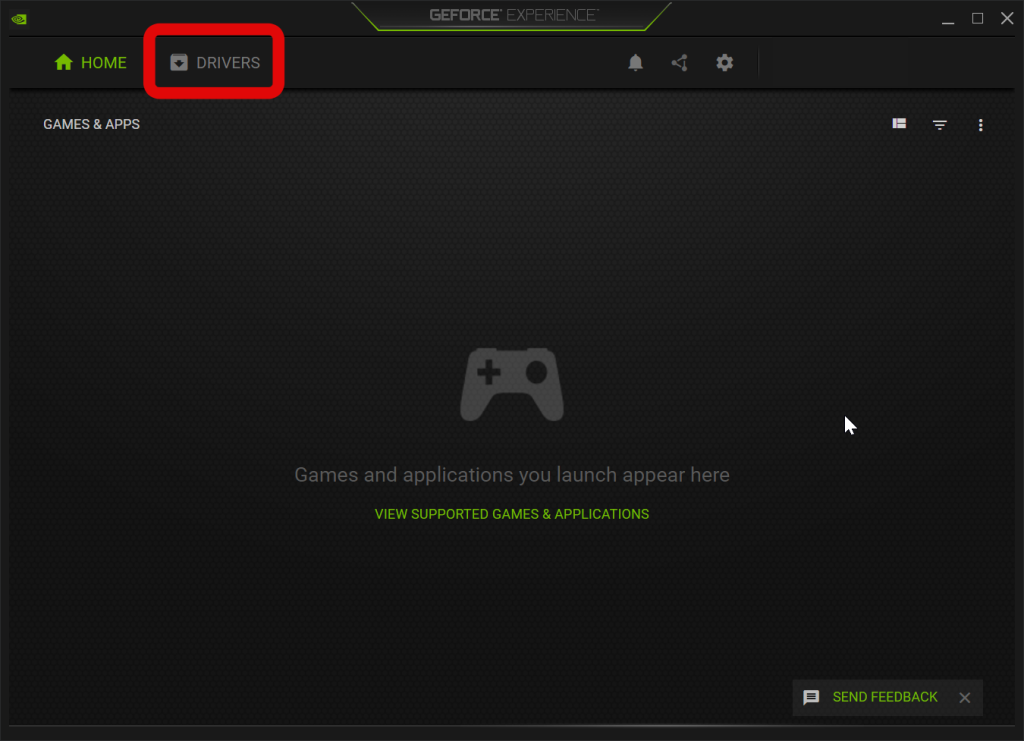
2.Click onDriversat the top beside Home.
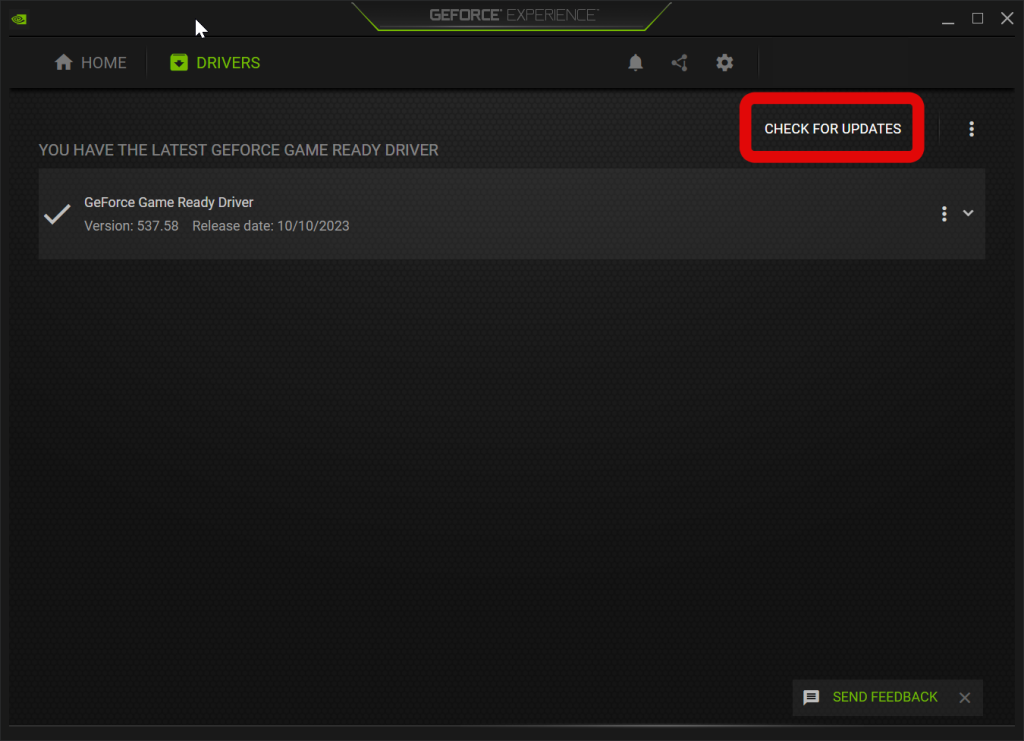
3.Now click onCHECK FOR UPDATESin the top right corner.
4.The latest driver update will now show up under it.
6.The driver will now be downloaded and installed on your PC.
This can happen over time if your GPU is seated without a support plate.
It can also occur if you have recently moved or transferred your PC.
So, I now recommend you open your desktop and remove your GPU carefully.
you might then clean the PCIe slot as well as the pins on your GPU just to be safe.
Once done, properly seat your GPU and then turn on your PC.
it’s possible for you to then try installing the latest drivers for your Nvidia GPU.
It could be that the GeForce experience is still interfering with the manual installation of drivers on your PC.
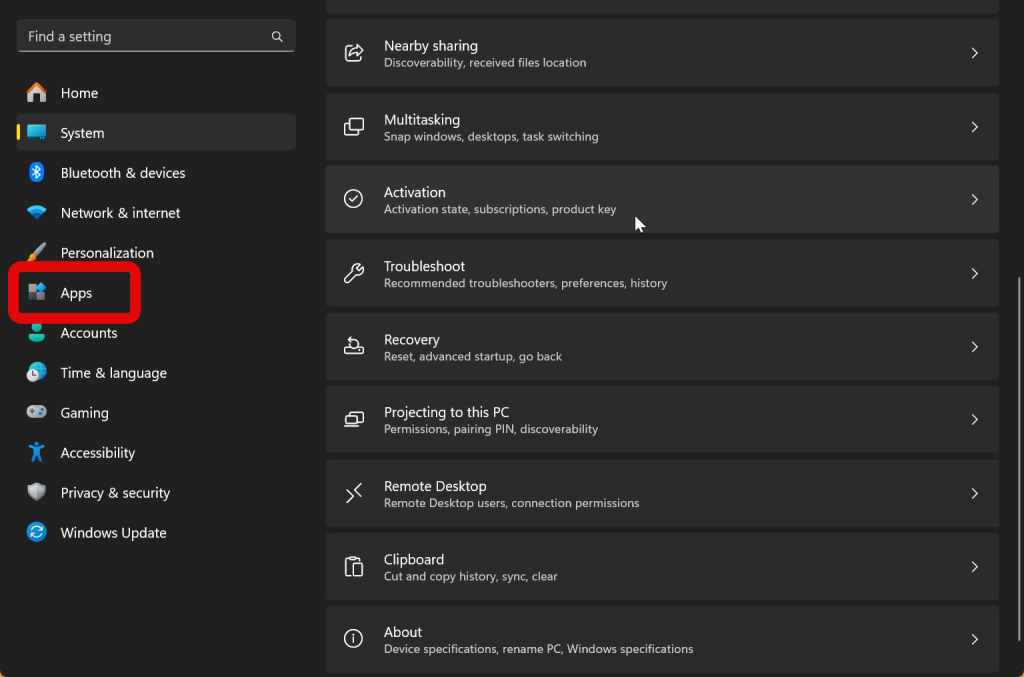
1.Open theSettingsapp on your PC.
you’ve got the option to also use theWindows + Ikeyboard shortcut to fire up the parameters app.
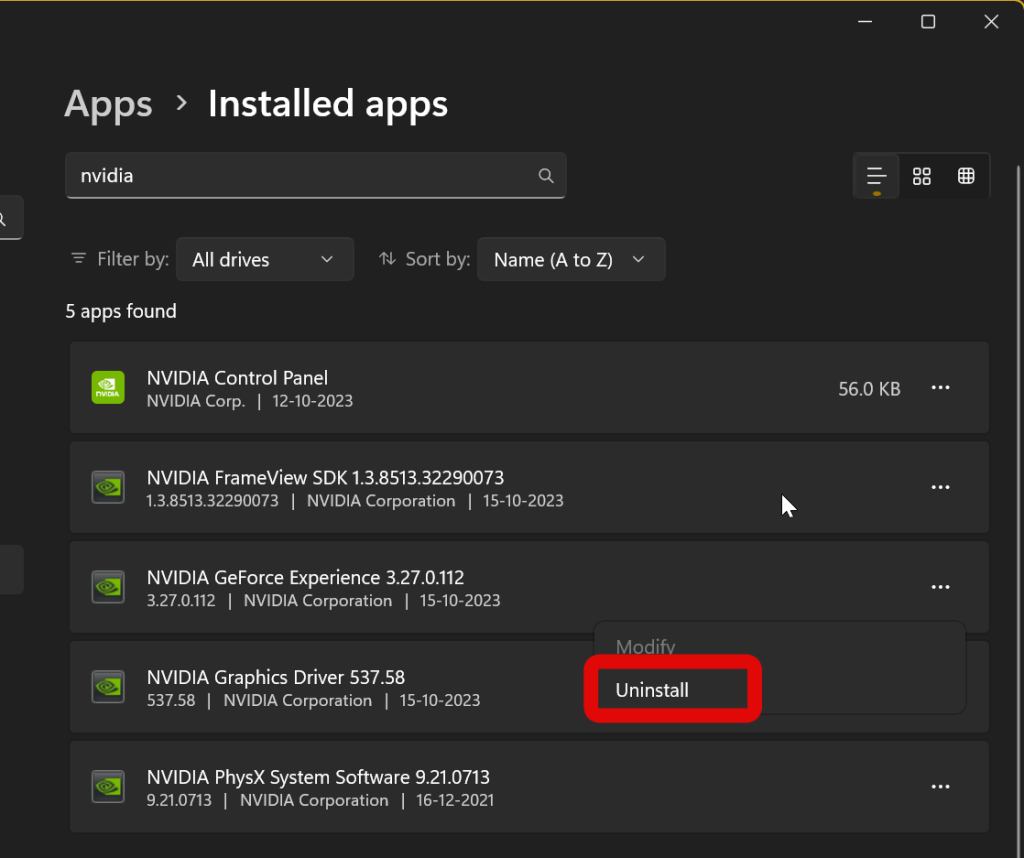
2.Once the app is open, click onAppsin the left sidebar.
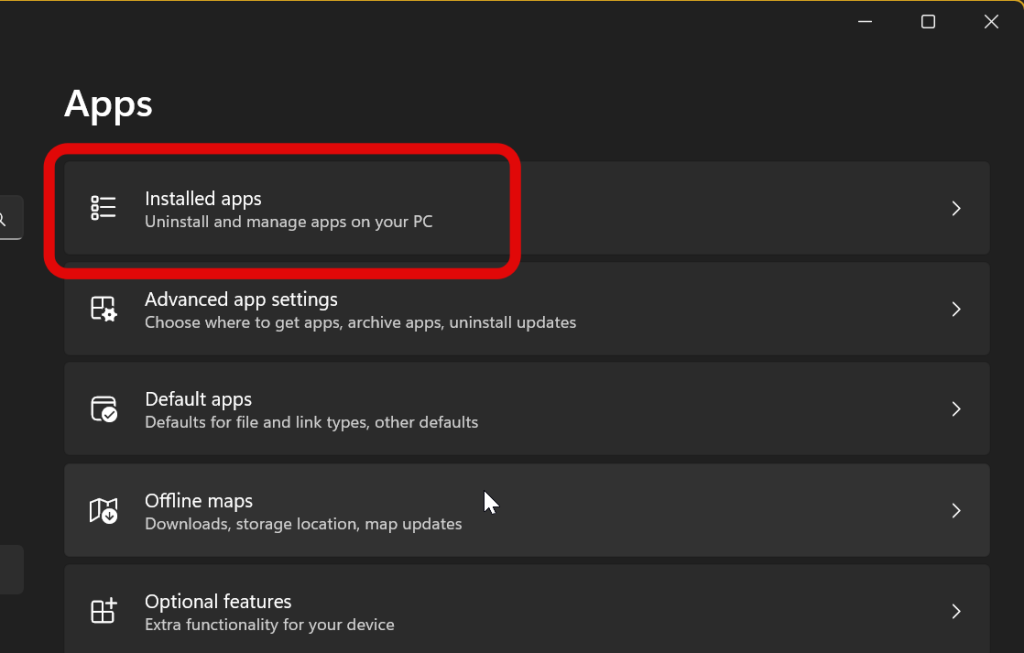
3.Now click onInstalled apps.
This will allow you to view all the installed apps on your PC.
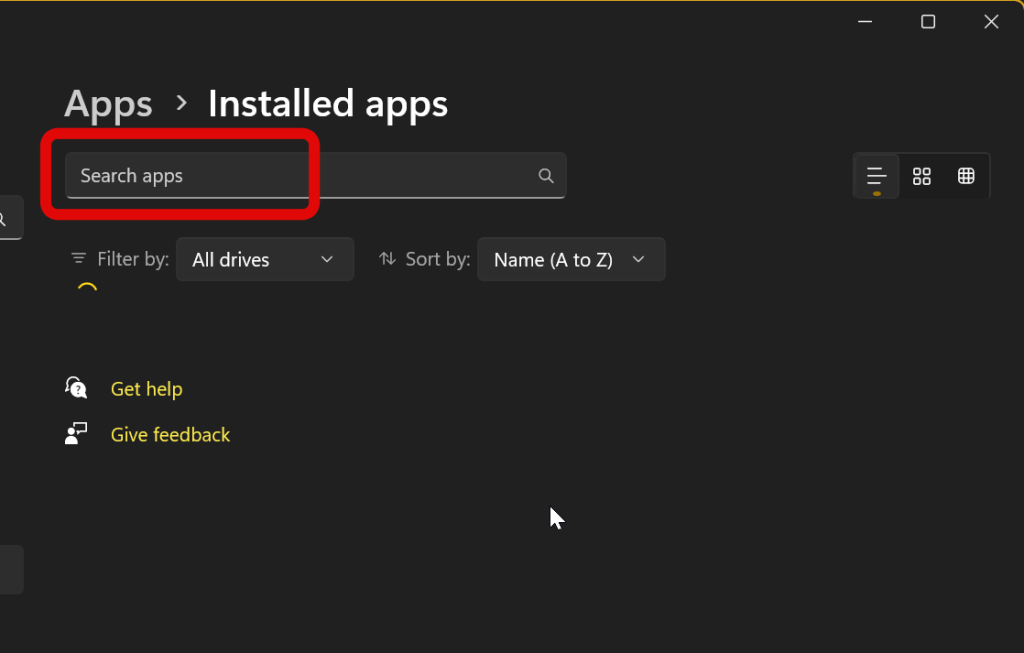
5.Now search for GeForce experience.
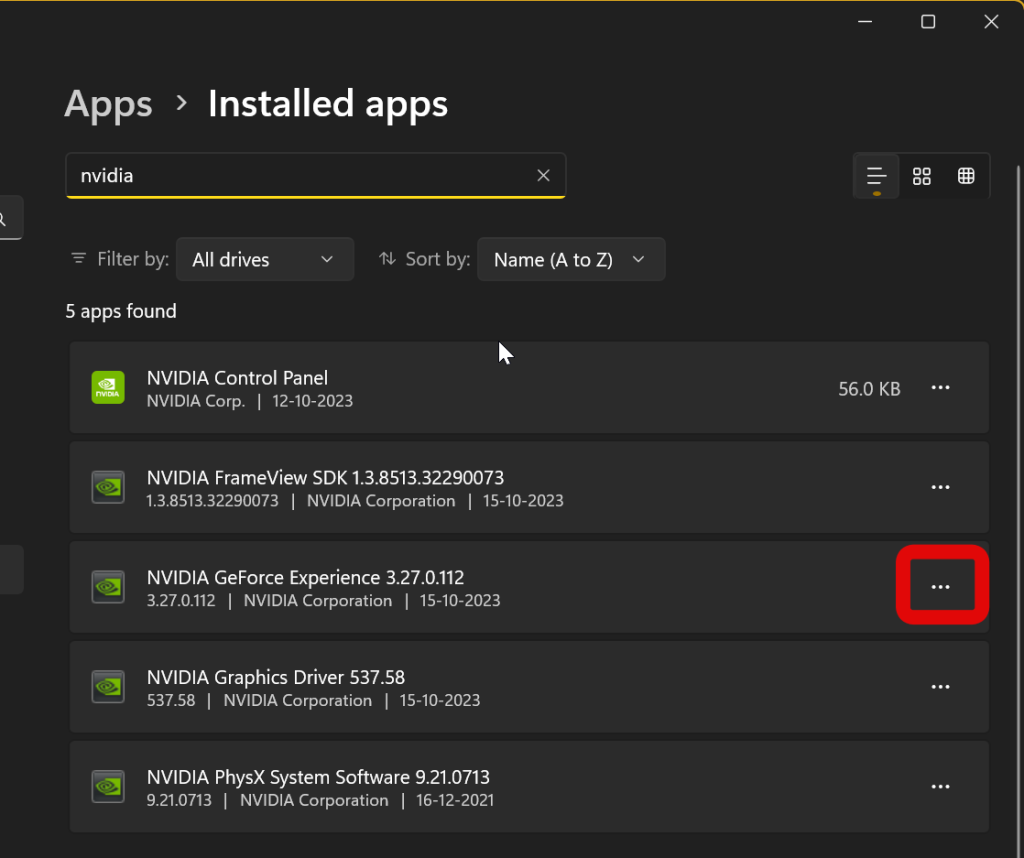
6.tap the ellipsis icon beside the app once it shows up on your screen.
8.ClickUninstallagain to confirm your choice.
Now follow the on-screen instructions to uninstall the GeForce experience using its dedicated setup.
Once uninstalled, you’re free to try installing the latest drivers manually again on your PC.
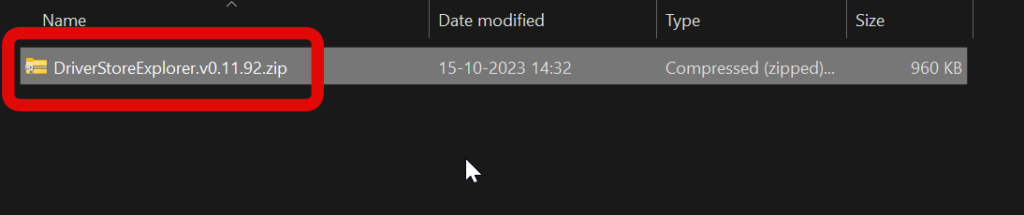
Once there, click and download the latest release for Driver Store Explorer.
2.Once the archive is downloaded on your PC, extract it using your preferred utility.
If you dont have an archive, click and pick the file.
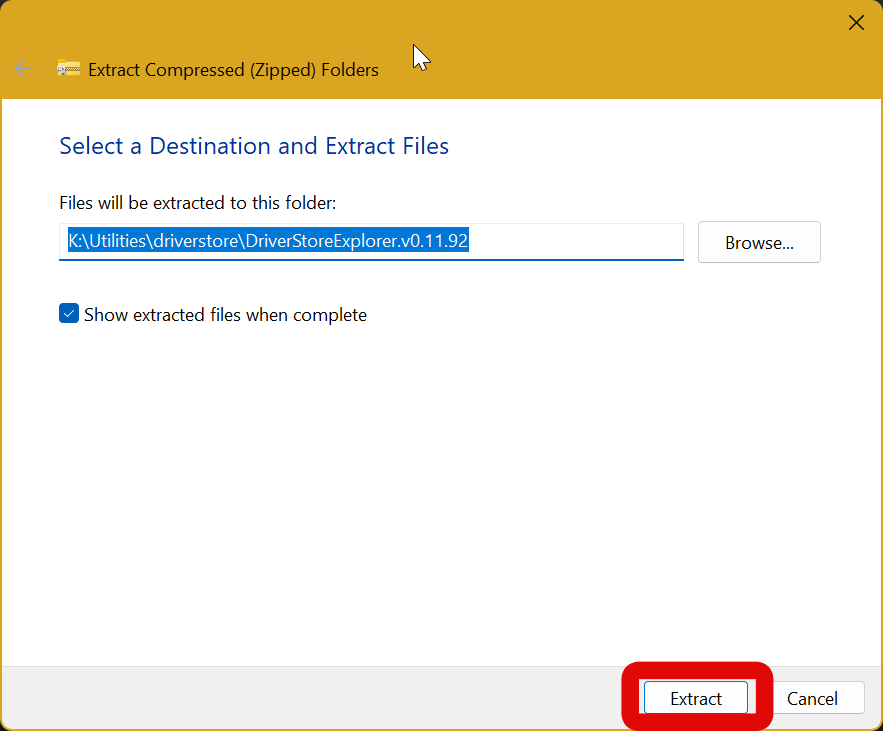
3.Click onExtract Allin the ribbon menu at the top.
4.Now click onExtractto extract the archive in the same location with the same folder name.
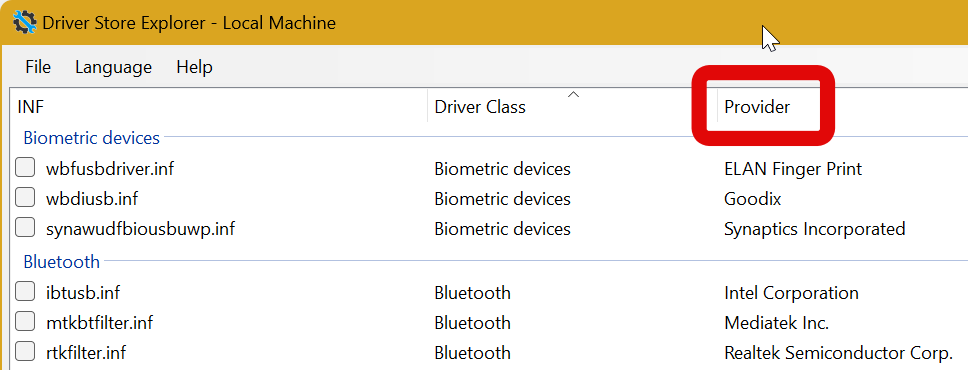
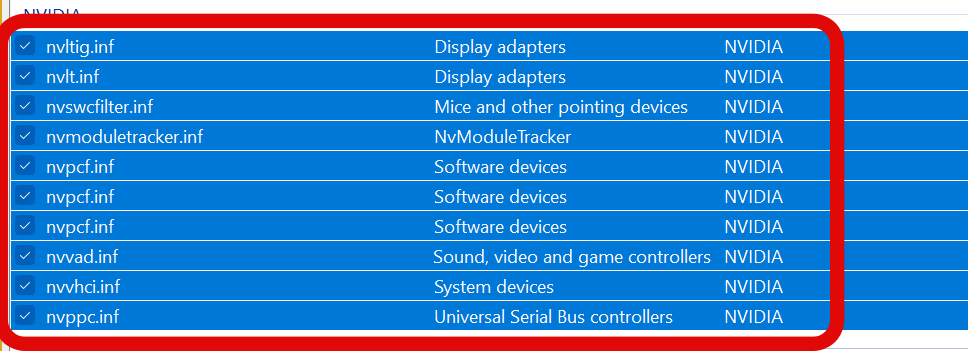
6.choose theProvidercolumn at the top.
This will sort all driver providers by their names in alphabetical order ascendingly.
7.Check the box beside all drivers provided by Nvidia.
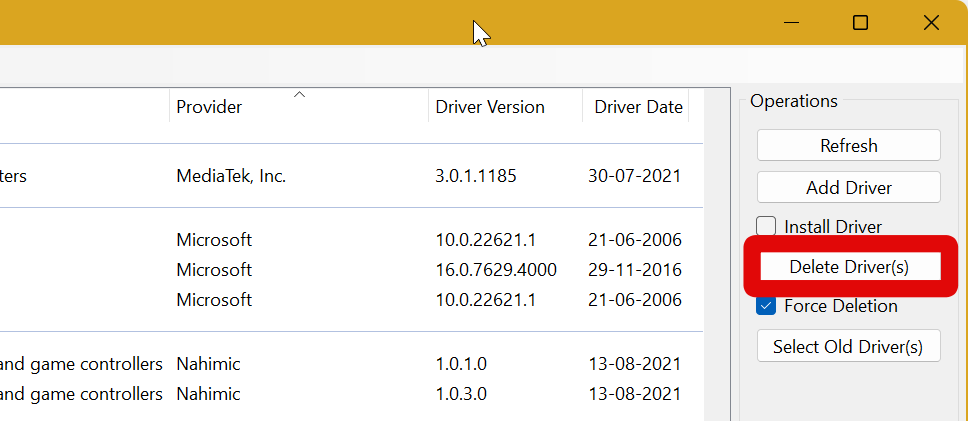
8.Now check the box for Force Deletion on your right underDelete Driver(s).
9.Click onDelete Driver(s)when youre done.
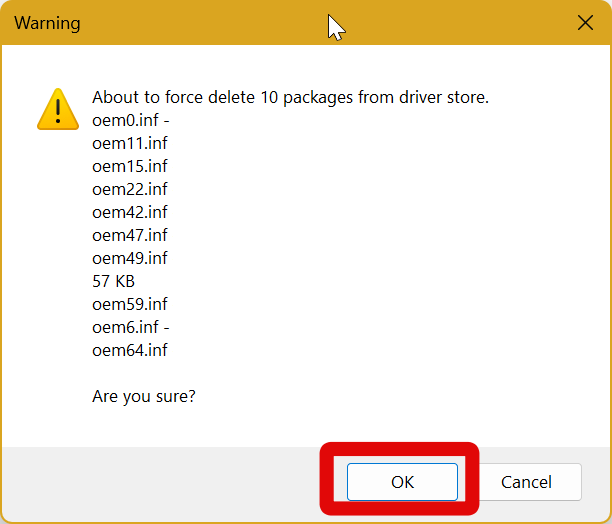
10.Click onOKwhen you are prompted to confirm your choice.
The drivers will now be deleted from your PC.
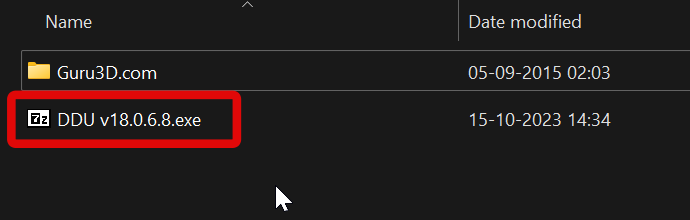
1.bring up the link below to visit the DDU website in your default internet tool.
Now hit a mirror to download the software to your PC.
2.Save the archive in a preferred location and initiate the same once it has been downloaded.
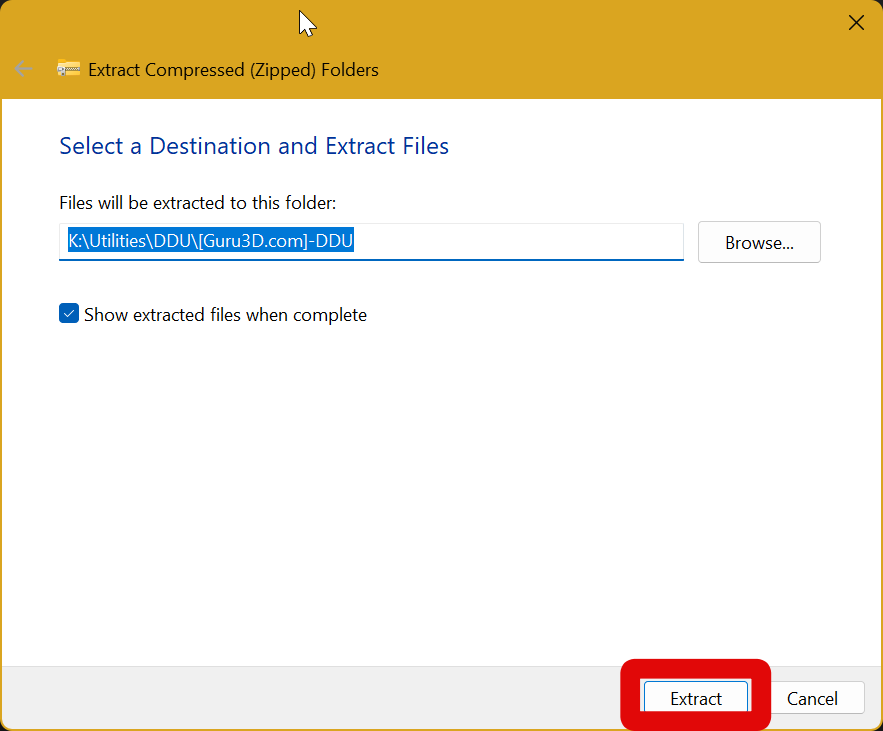
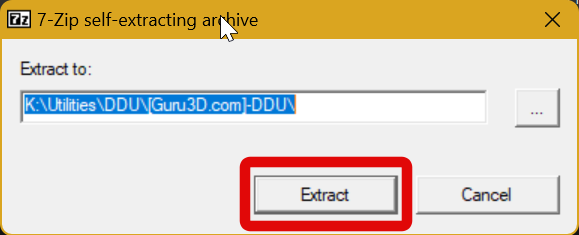
Click and grab the archive, and then punch Extract All at the top, in the ribbon menu.
This will extract the archive in the same location.
The extracted folder will automatically open once the process has been completed.
4.You will now be prompted to extract the 7ZIP archive.
tap on Extract to confirm your choice.
5.Double-click and initiate the extracted folder in the same location.
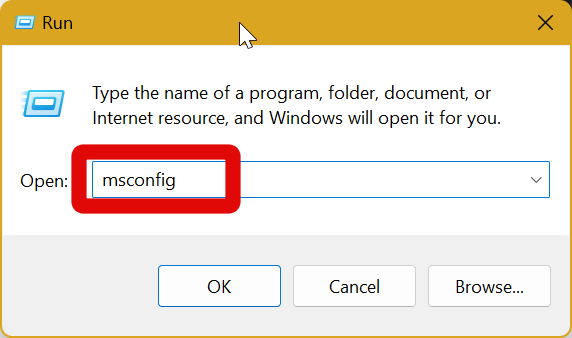
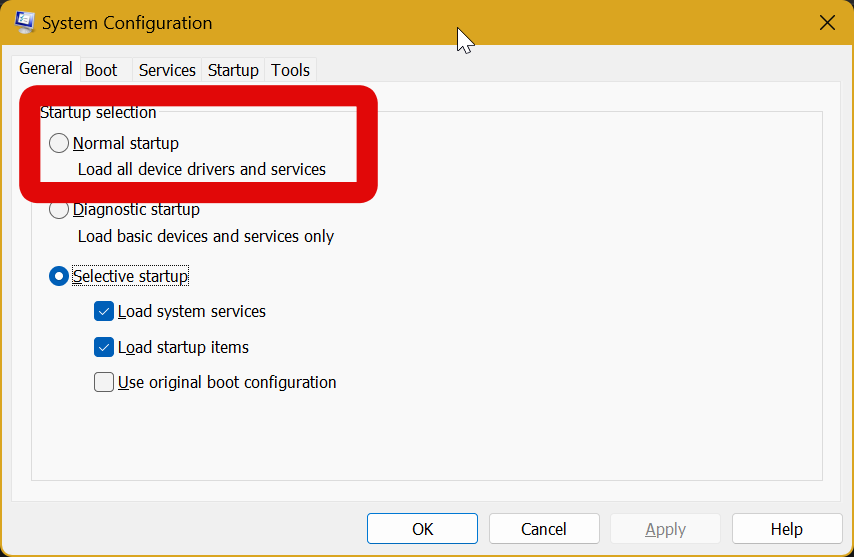
6.We now need to boot to safe mode.
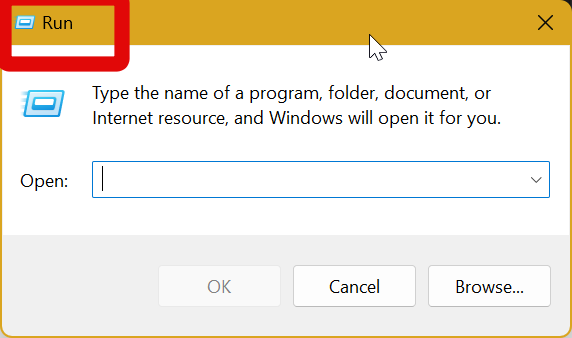
So close everything and press Windows + R on your keyboard to launch Run.
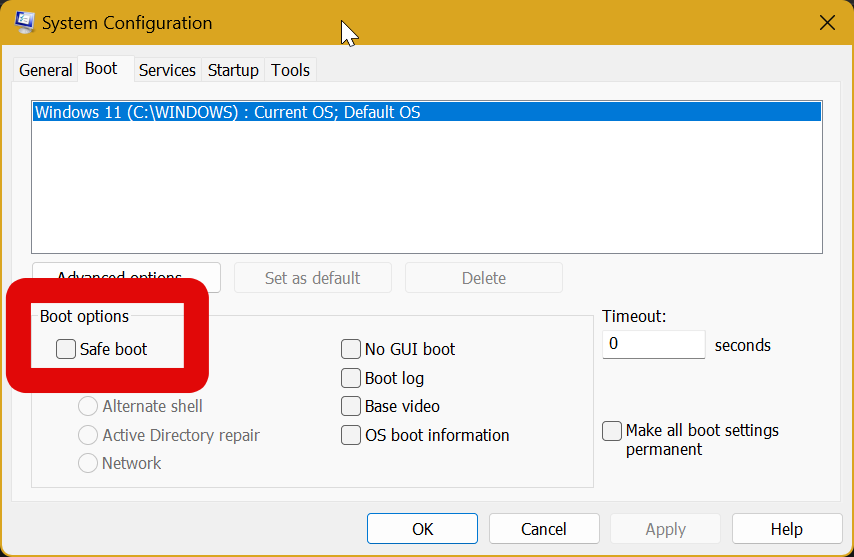
7.pop in in msconfig and press Enter or click onOK.
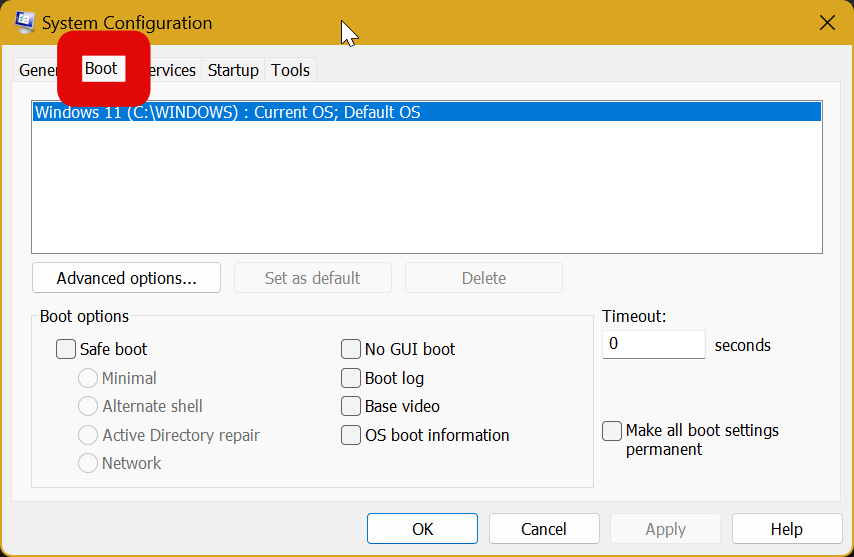
8.choose the Boot tab at the top of the window.
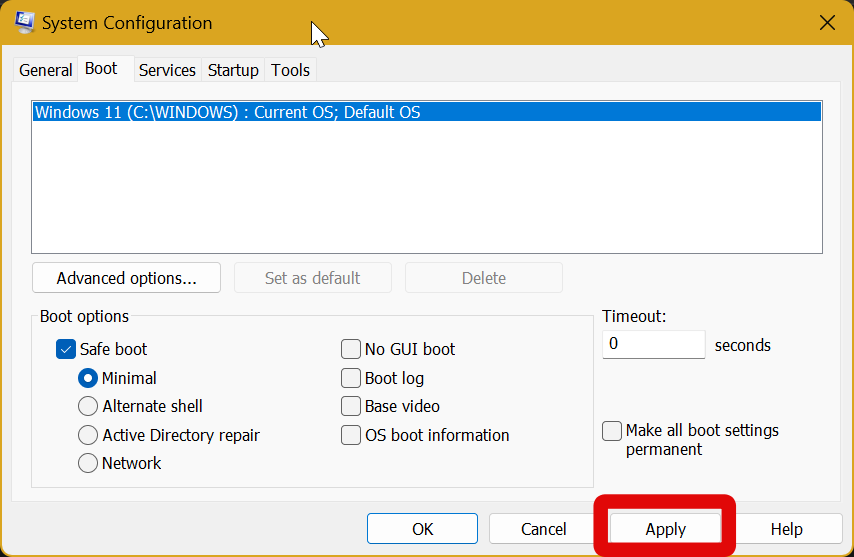
9.Check the box for Safe Boot under Boot options at the bottom.
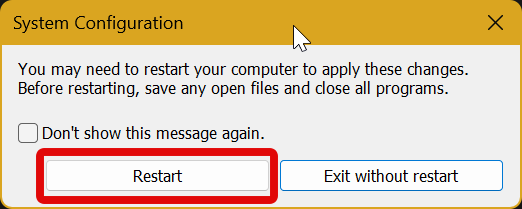
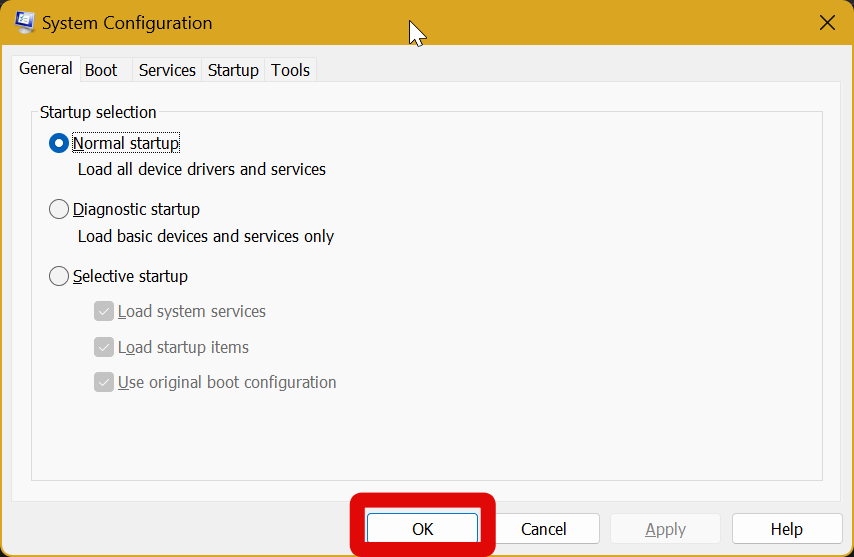
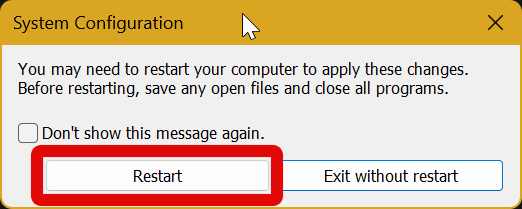
12.choose Restart to boot your PC into safe mode.
13.When your PC restarts, you should be in Safe mode.
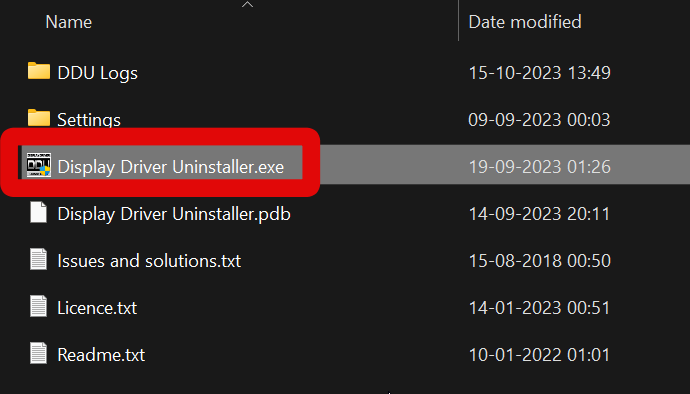
Now head to the directory where we extracted DDU and double choose Display Driver Uninstaller.exe.
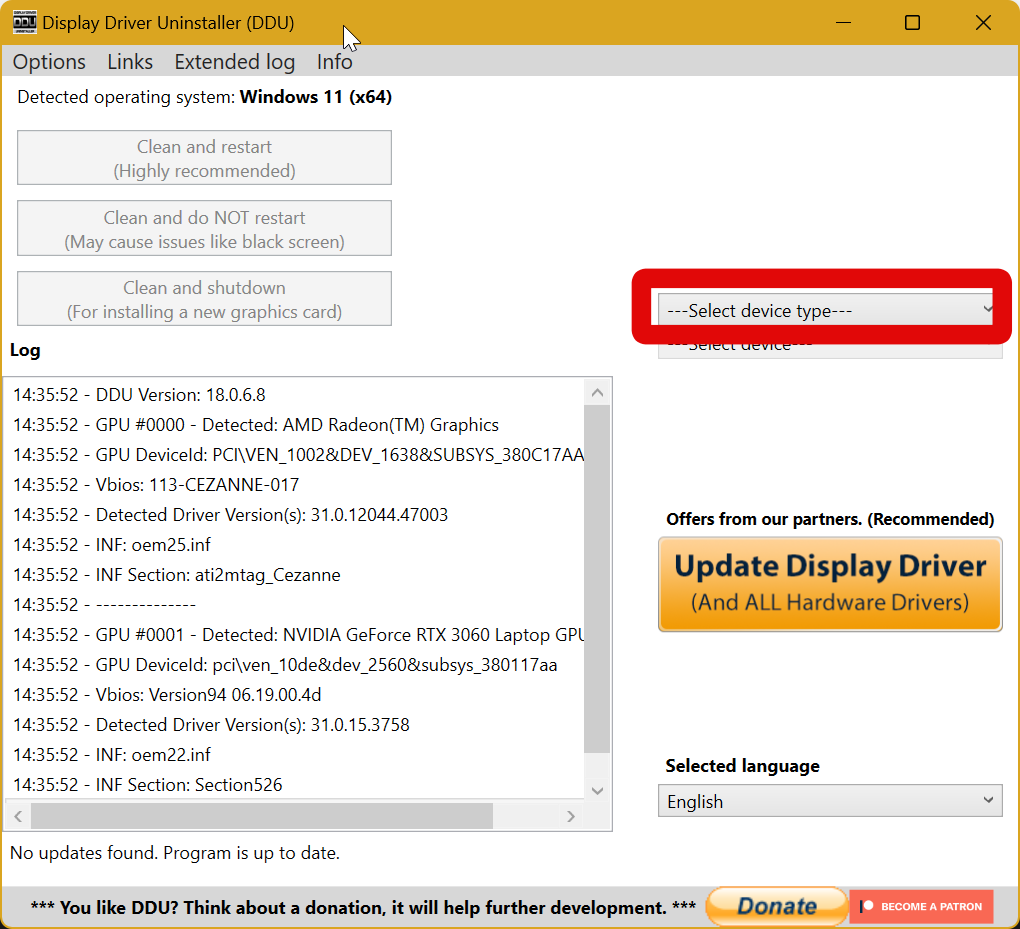
14.hit the drop-down menu on your right side for Select machine throw in on your right.
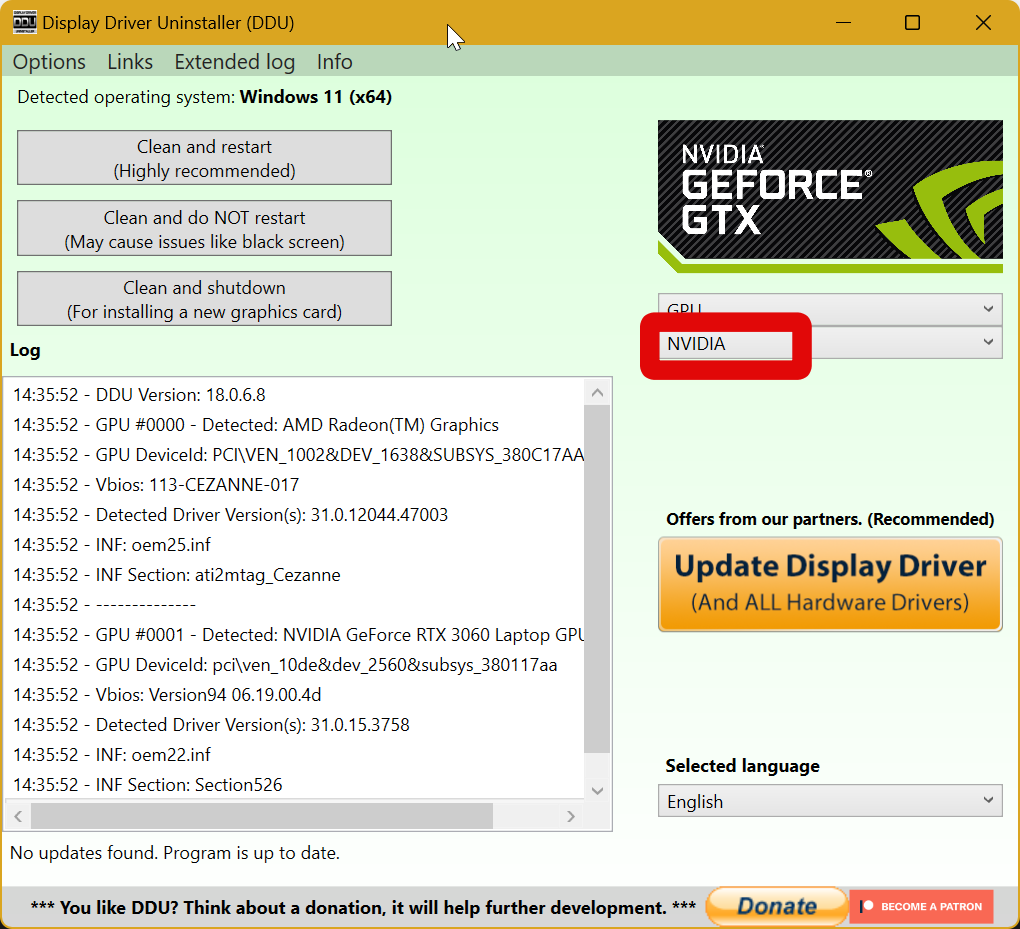
16.tap the next drop-down menu and select NVIDIA.
17.Now click onCleanand restart on your left at the top.
24.Your PC will now restart and boot normally.
Contact Nvidia
I now recommend you get in touch with the Nvidia support team.
I hope this post helped you easily tune up your Nvidia GPU drivers without any issues.