Yes, its scary, and sadly, many users are going through the same.
If youre one of those users, fret not, as we know how to make it work again.
In this guide, well tell youhow to fix microphone not working in Windows 11.

So read ahead and know how to get rid of this issue with ease.
Why Is the Microphone Not Working in Windows 11?
There could be several reasons for the non-functioning of the microphone in Windows 11.
So, confirm that the app youre facing microphone-related issues with is allowed to use it.
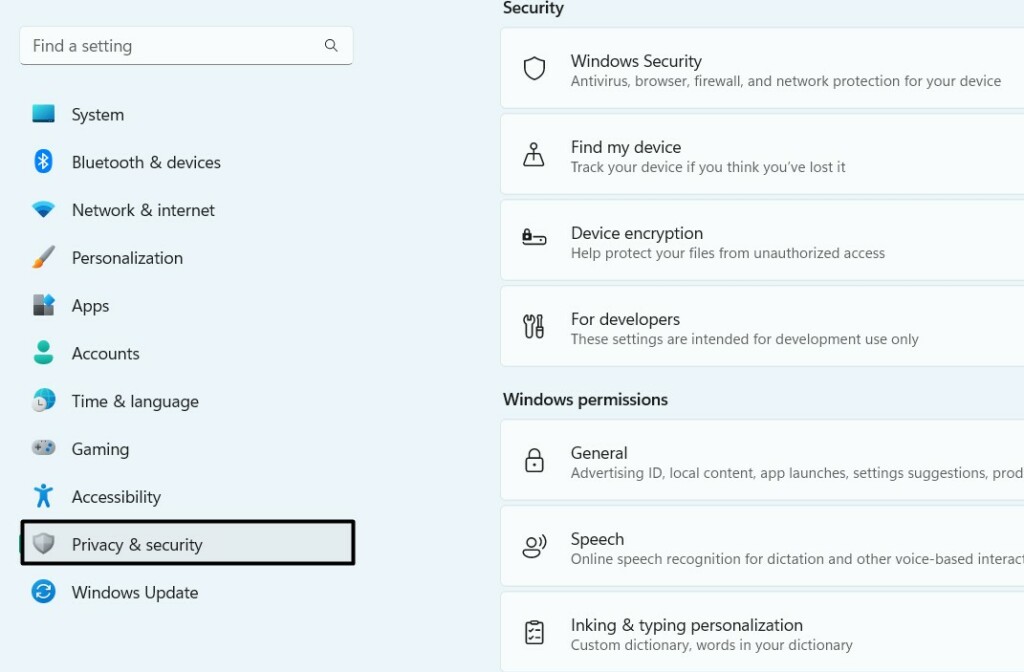
2.Choose thePrivacy & securityoption from the left and go to theApp permissionssection.
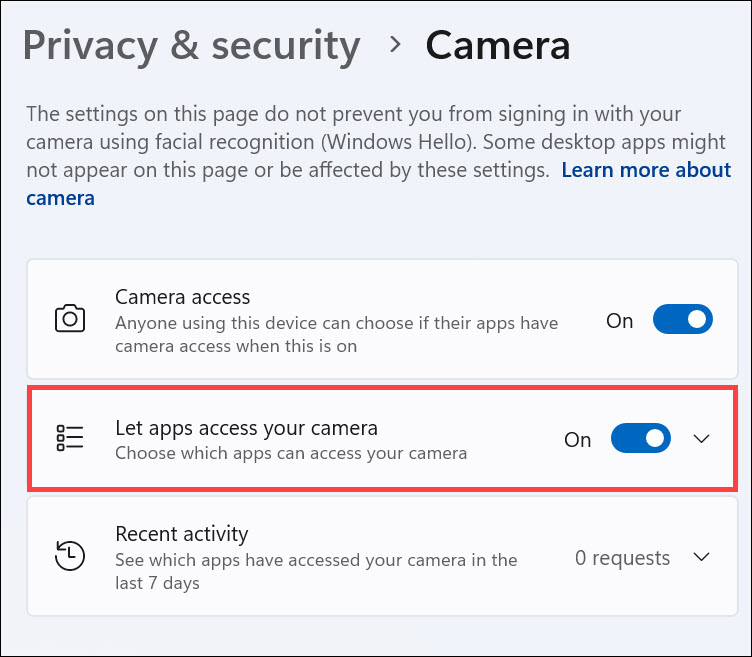
3.UnderApp permissions, selectMicrophoneand ensure theMicrophone accesstoggle is ON.

4.Find the app underLet apps access your microphoneand ensure the toggle next to it is ON.
5.power cycle your PC and look to see if the microphone not working issue in Windows 11 is fixed.
Once enabled, see if the microphone now records the audio.
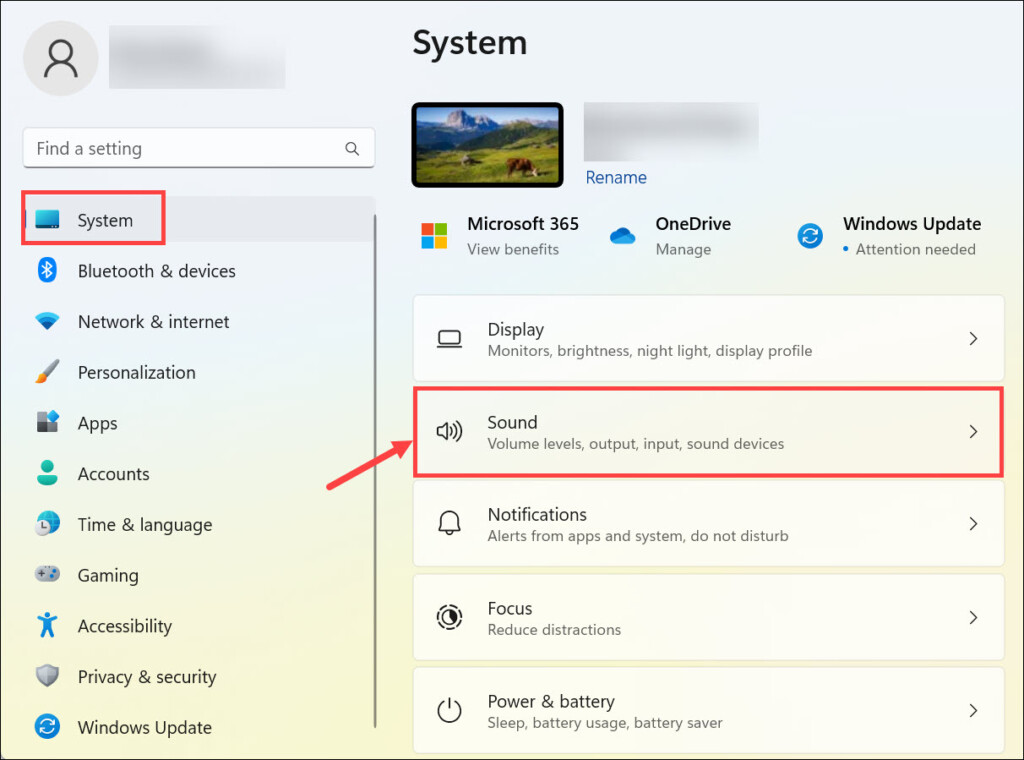
2.UnderAdvanced, selectMore sound settingsin theSoundwindow to open a new window.
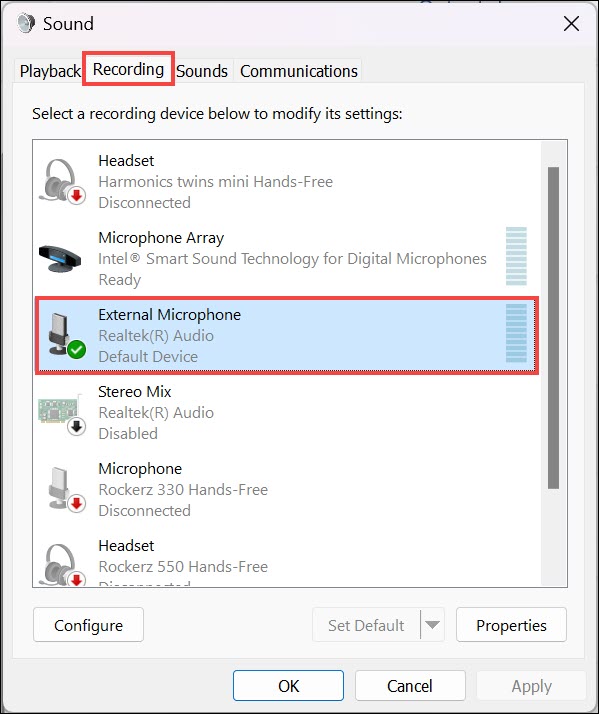
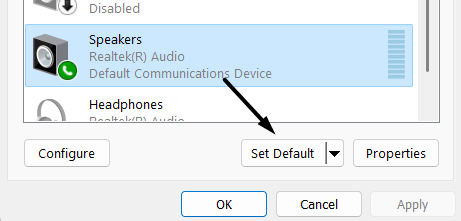
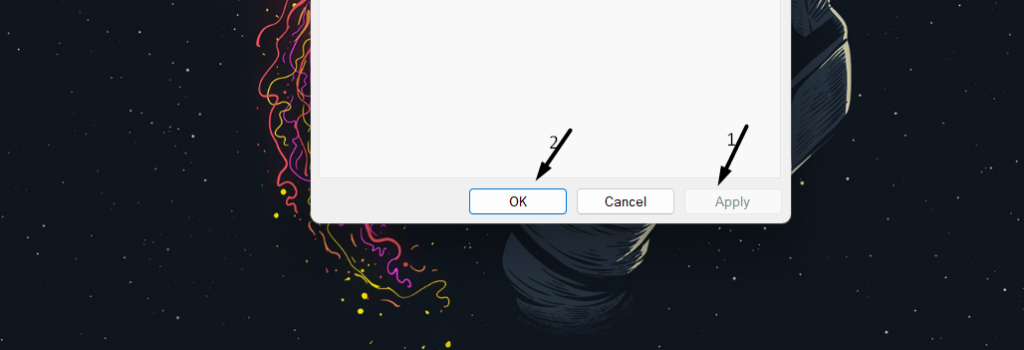
3.In theSoundwindow, go to theRecordingtab, choose your mic, and then clickSet default gadget.
4.Lastly, click theApplybutton to apply the changes andOKto kill the opened window.
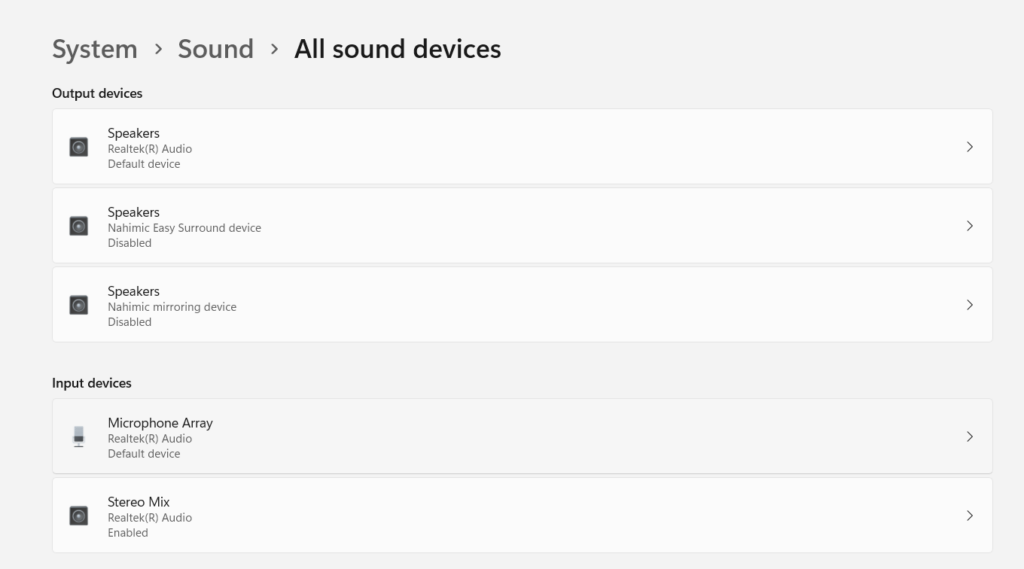
2.In theSoundwindow, underInput, find your current microphone and choose it to open its window.
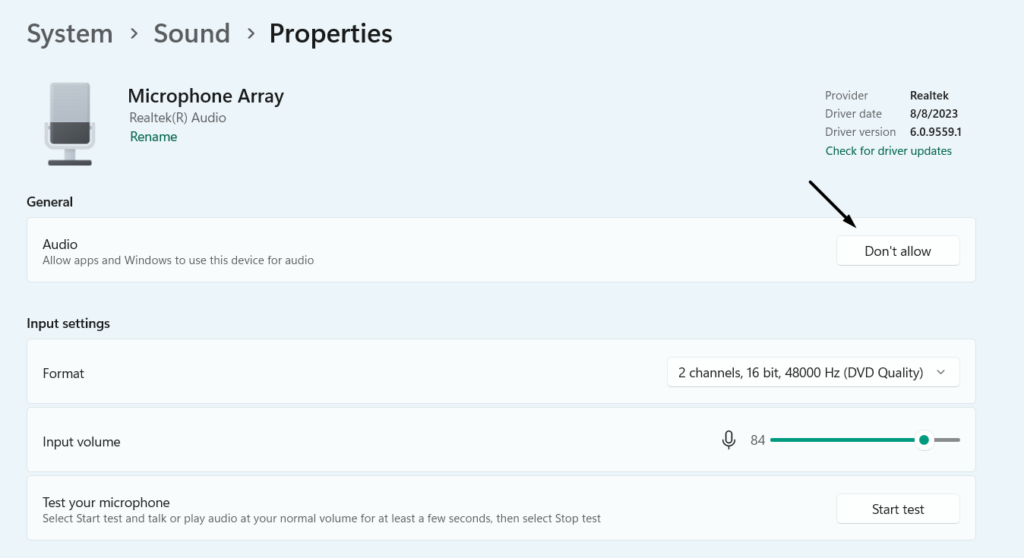
3.In the next window, ensure theAllow apps and Windows to use this gear for audiois allowed.
4.Reboot your Windows 11 computer and confirm the microphone not working issues status.

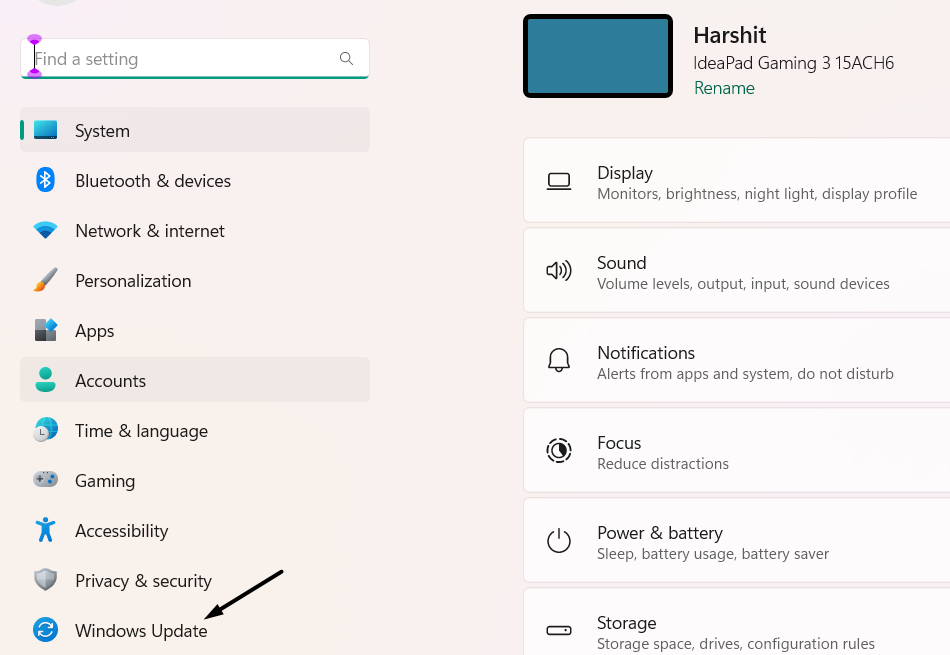
Install Any Pending Windows Updates
1.In theSettings app, choose theWindows Updateoption from the left and clickCheck for updates.
2.If you see the new updates to install on the PC, clickDownload & install allto install them.
In case you only want to install a particular update, simply clickDownload & install.
3.After incorporating all the updates, check whether the microphone machine works well now.
Doing this will help you figure out if the problem is with the microphone or in the system.
So try the same to know the cause of the issue and also the solutions to fix it.
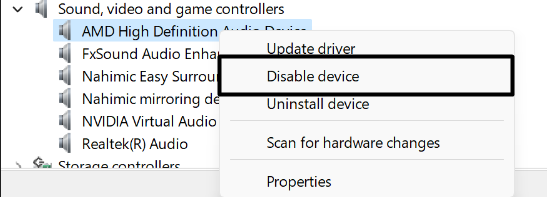
2.UnderAudio inputs and outputs drivers, choose the microphone, and clickDisable gadget.
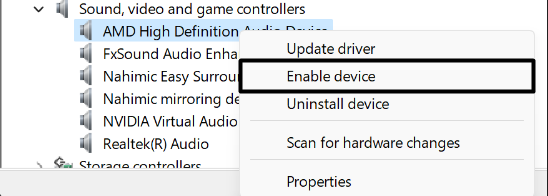
3.In the end, right-nudge the same driver and select theEnable deviceoption to re-enable it.
you’ve got the option to easily do it in the gear Manager app on your setup.
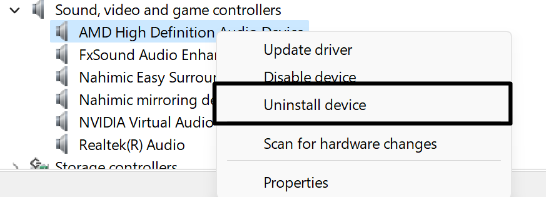
2.Right-click your microphone, and from the context menu, choose theUninstall deviceoption.
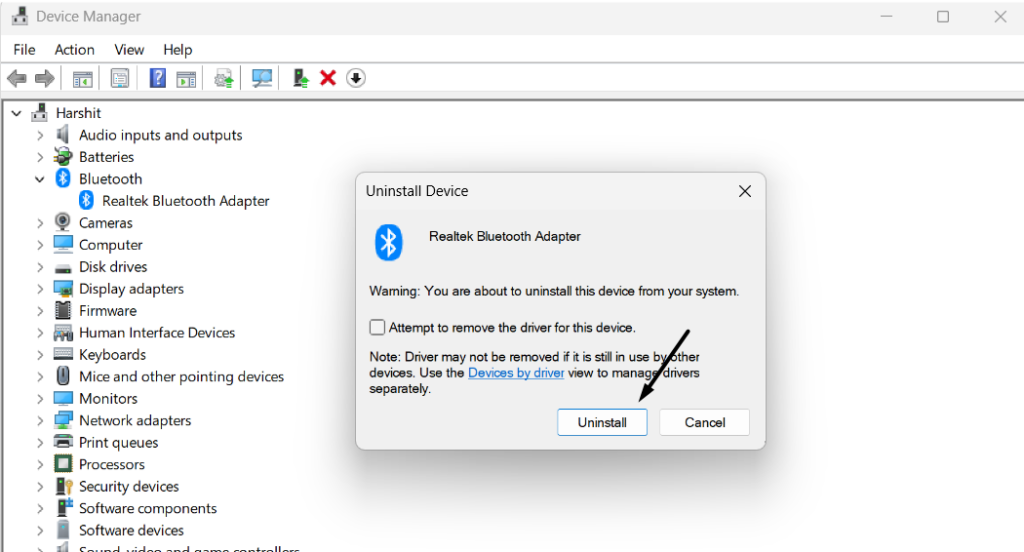
3.In the new prompt, chooseUninstallto remove the adapter from your Windows 11 PC.
4.Lastly, exit theDevice Manager appand kickstart your PC to reinstall the audio and input driver.
They also mentioned thatremoving itresolved the problem.
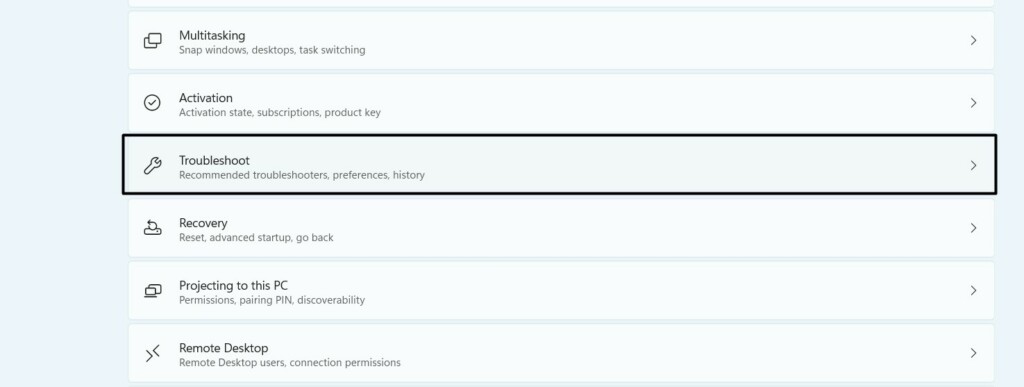
So considerrunning iton your Windows PC and test whether it finds this microphone issue.
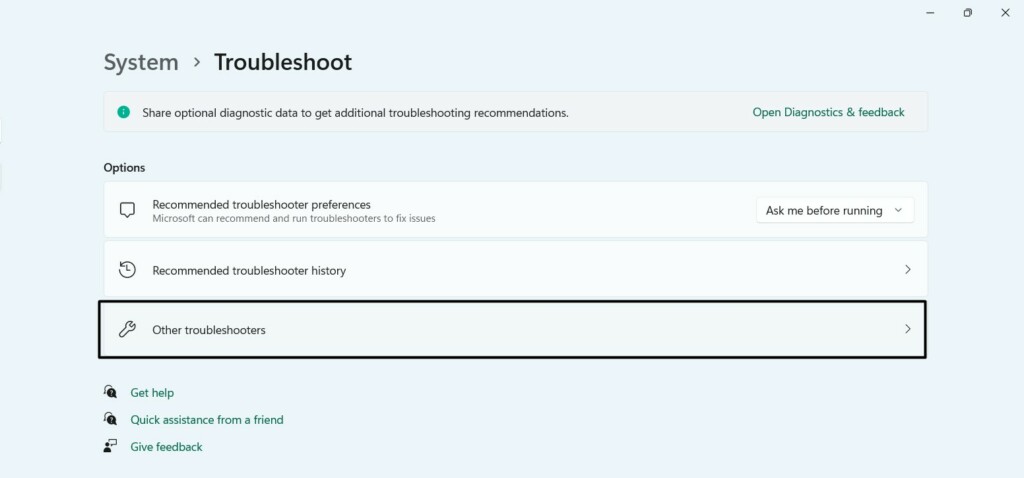
2.In theTroubleshootsection, choose theOther troubleshootersoption and go toMost frequent.
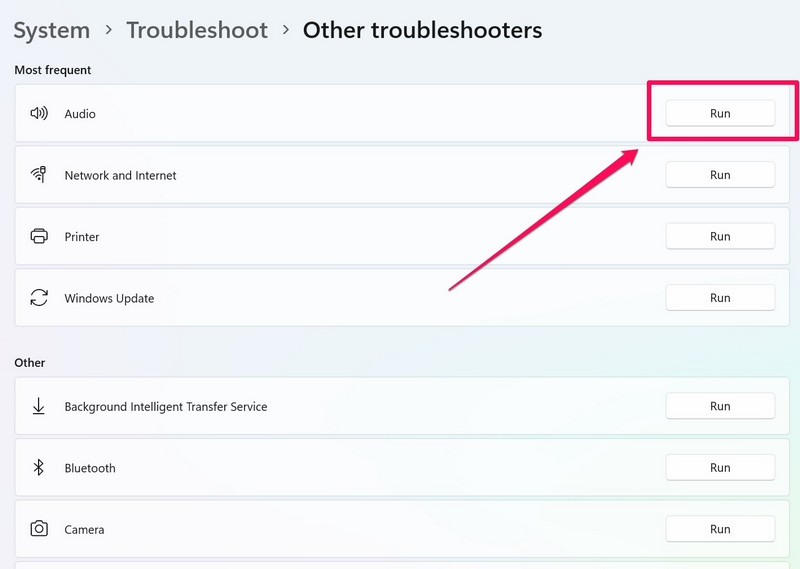
3.UnderMost frequent, look forAudio, and choose theRunbutton next to execute the audio tool.
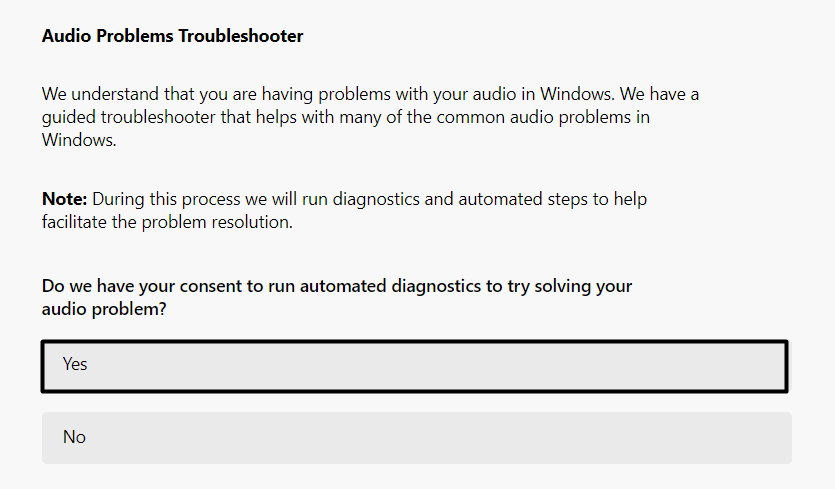
4.In theGet Helpwindow, choose theYesoption to let the PC start an automated audio troubleshooter.
5.Answer the Did you hear the sound (beep) that played during the scan?

question as per your experience.
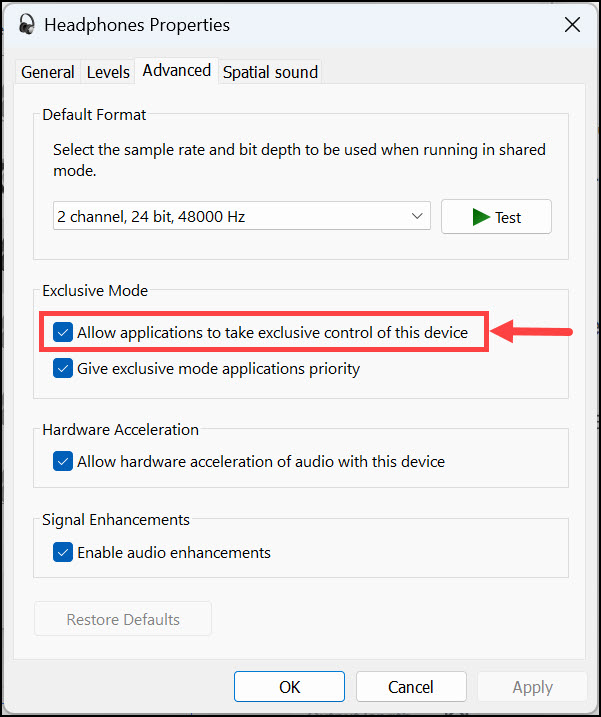
So, you gotta disable it and test whether the microphone works.
2.In theSoundwindow, underAdvanced, choose theMore sound settingsoption to open a new window.
3.In theSoundwindow, go to theRecordingtab and right-click your microphone to get a popup menu.
4.From the context menu, chooseProperties, and underExclusive Mode, untick the first checkbox.
5.Click theApplybutton and thenOKto apply the change and resolve this current issue.
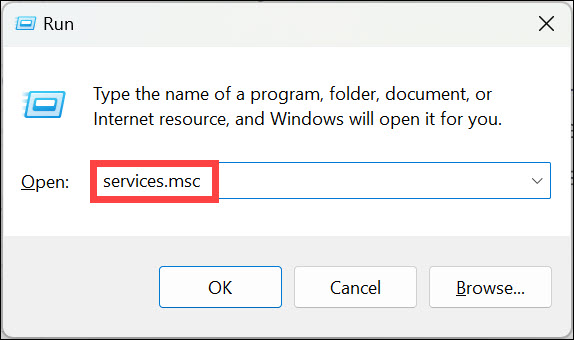
Considering this, we suggest yourestart itand check whether doing so fixes the issue.
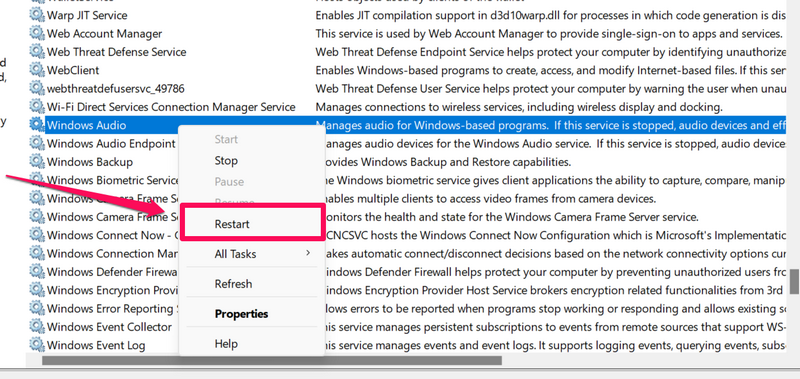
2.In theServiceswindow, findWindows Audio Service, right-click it, and select theRestartoption from it.
3.Once Windows Audio Service is reinstated, restart the computer and see if the issue is fixed.
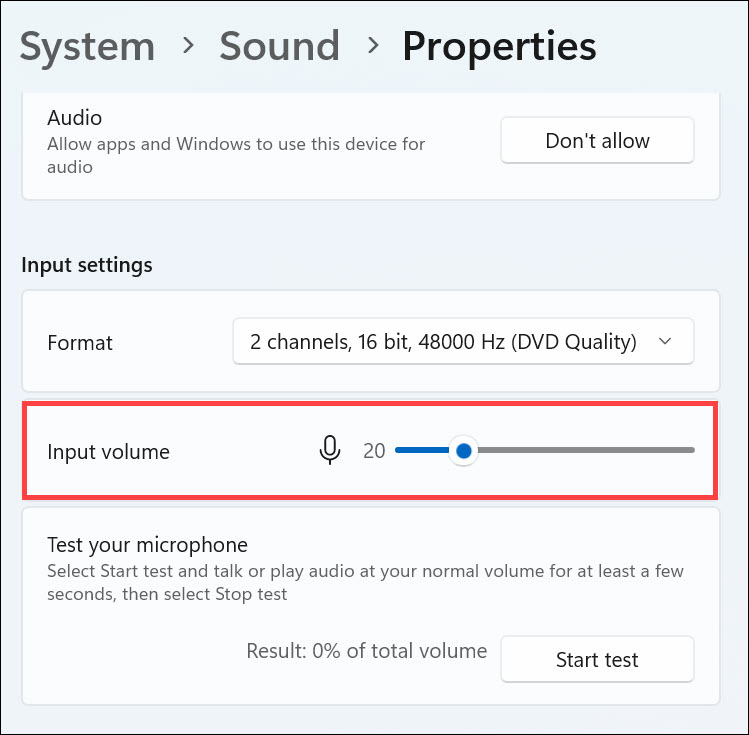
2.In theSoundwindow,underInput,use the slider to adjust thedefault audio input equipment.
This will fix all microphone problems in Windows 11 with ease.
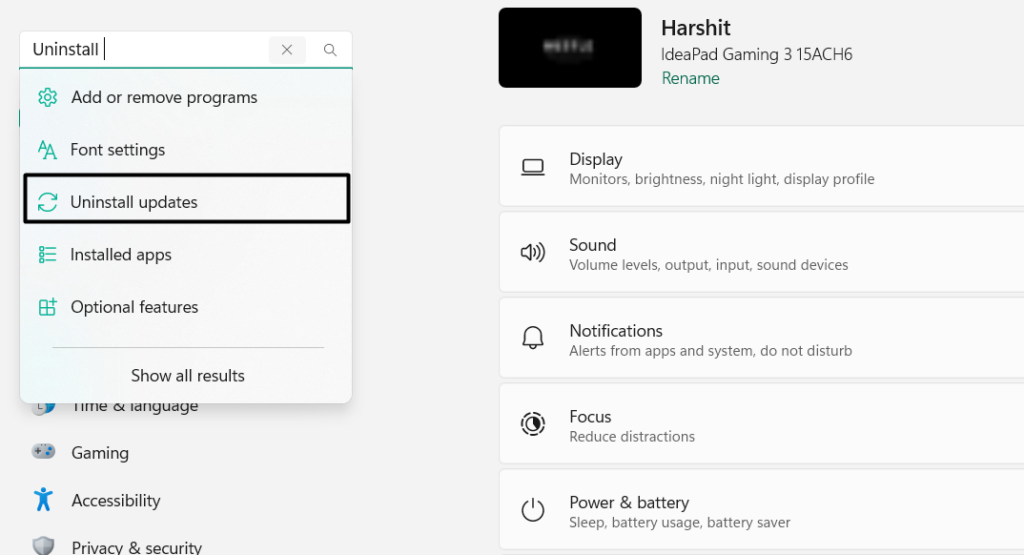
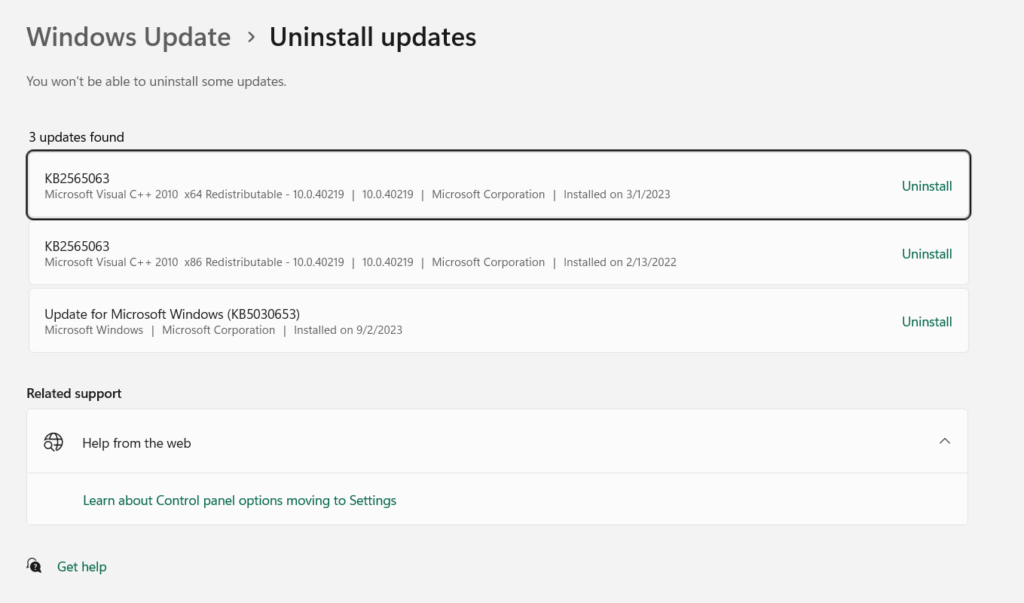
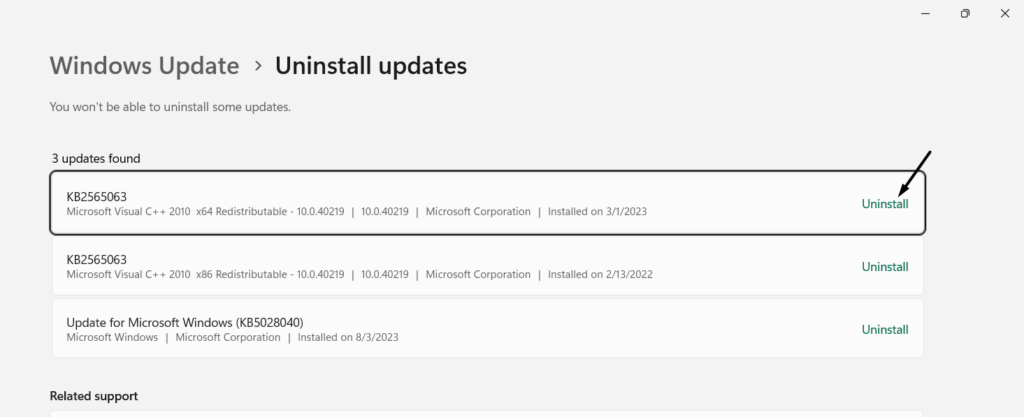
2.In the next window, search for the conflicting Windows update and click theUninstallbutton next to it.
3.Click theUninstallbutton in the next prompt to uninstall the particular update from your PC.
4.After uninstalling the Windows update, restart the PC and check whether the mic not working is fixed now.
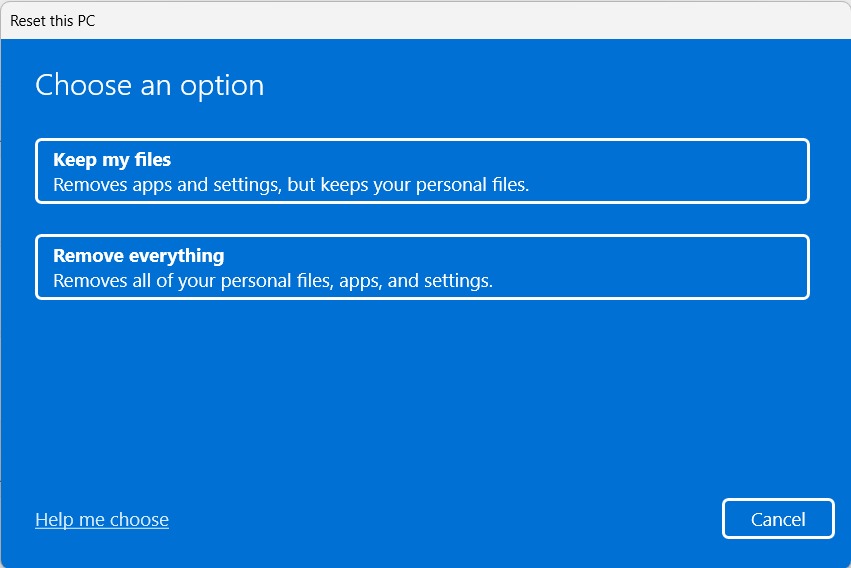
2.In theChoose an optionprompt, select theKeep my filesoption, and then choose the Local reinstall option.
FAQs
Why Is My PC Mic Not Working?
Why Is My Microphone Not Picking Up My Voice?
How Do I Enable External Microphone in Windows 11?
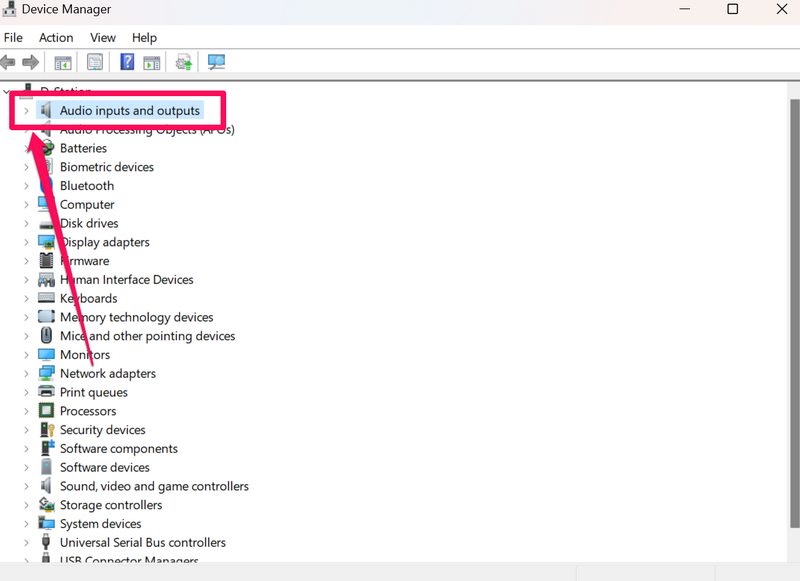
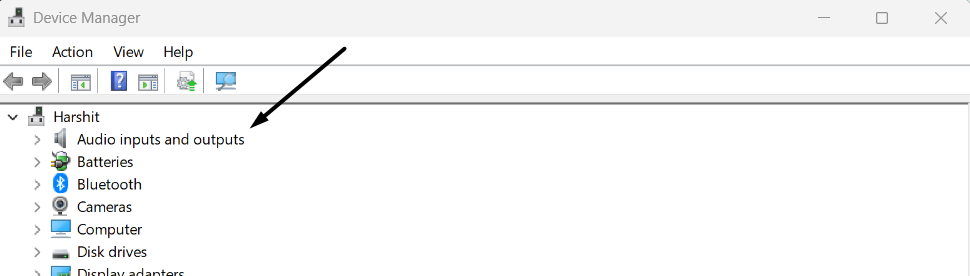
1.Open theDevice Manager utilityand expand theAudio input and outputs driverssection.
2.UnderAudio inputs and outputs driverssearch for your external microphone, and right-click its driver.
3.From the right-click menu, chooseEnable deviceto initiate the microphone driver on the PC.
How Do I Fix My Microphone Sensitivity in Windows 11?
Luckily, in this troubleshooting guide, we sharedsome fixesto fix microphone not working in Windows 11.