All Windows PCs come with a Memory Integrity feature, which safeguards the system from malicious code attacks.
But some users are currently facing issues with it.
As a result, their Windows 11 PC is vulnerable to malicious code attacks.
Why Is the Memory Integrity Option Grayed Out in Windows 11?
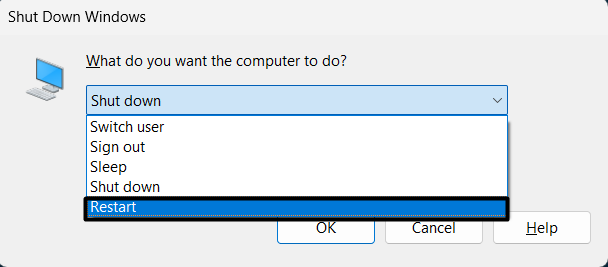
So, power cycle your Windows 11 PC and test whether it fixes the issue.
Your PC will now restart, and hopefully, the issue will get fixed.
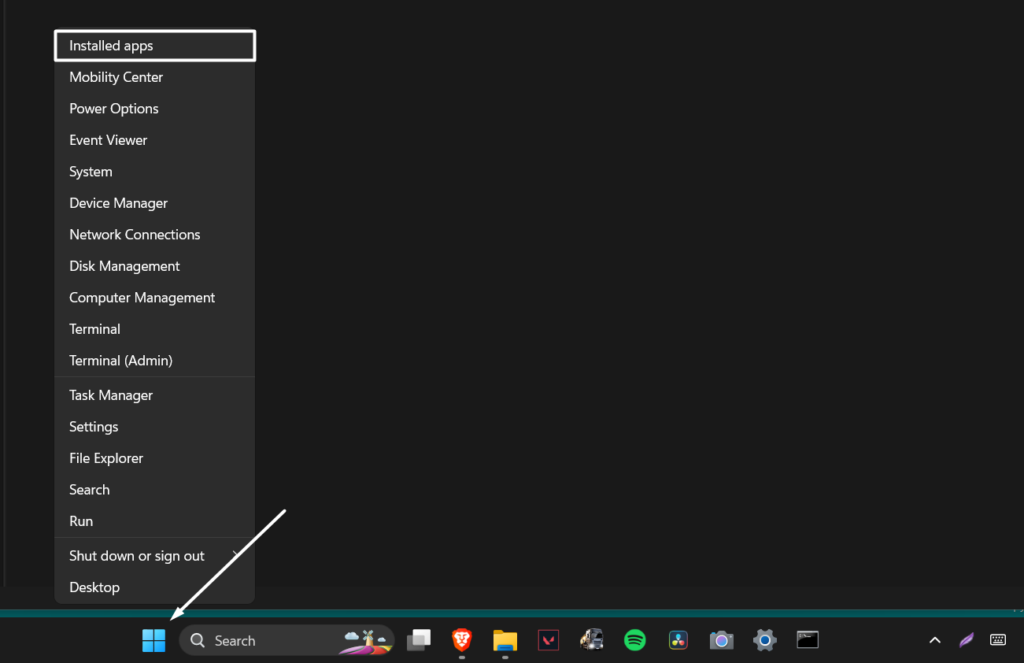
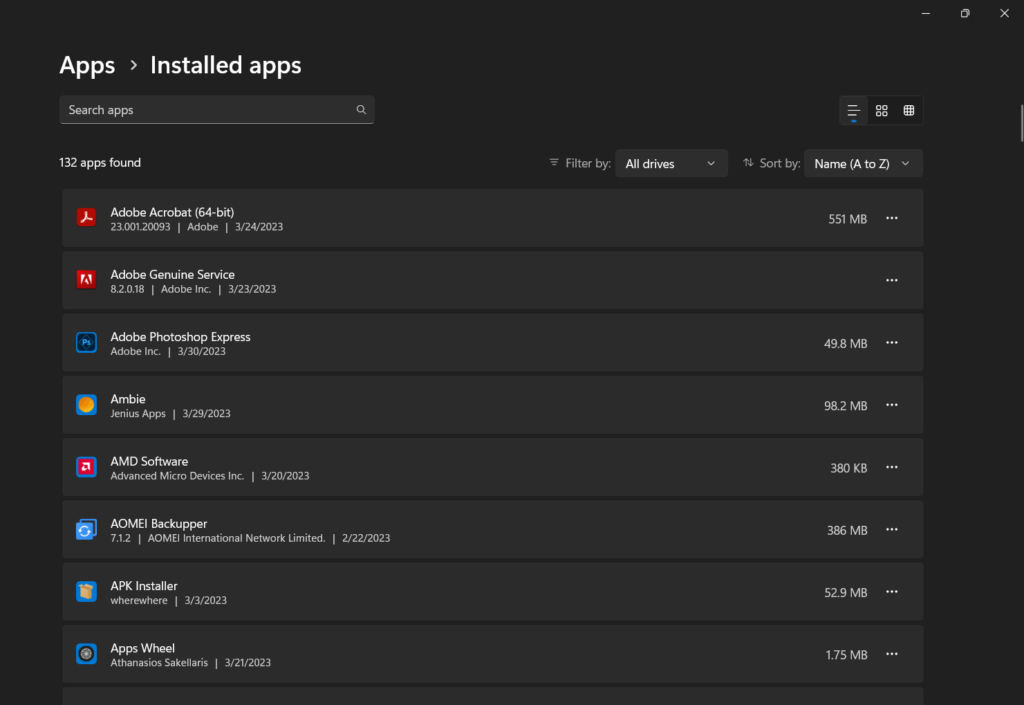
2.Search for that particular program in theInstalled appssection that originated this issue with Memory Integrity.
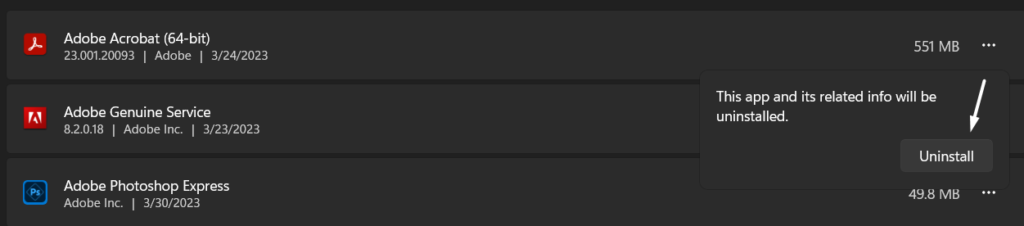
3.Once found, select thethree dots (…)next to the program and selectUninstallfrom the dropdown.
4.press theUninstallbutton on the prompt to remove the program and its data from the system.
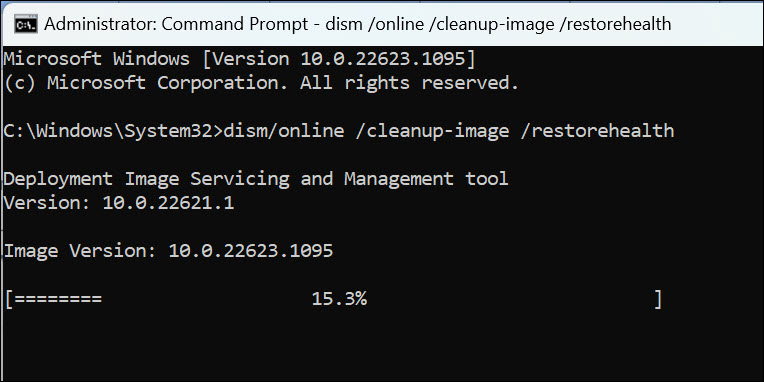
The DISM will repair the systems Windows image.
2.Once the console is opened, copy-paste the below-listed command into it and press theEnterkey.
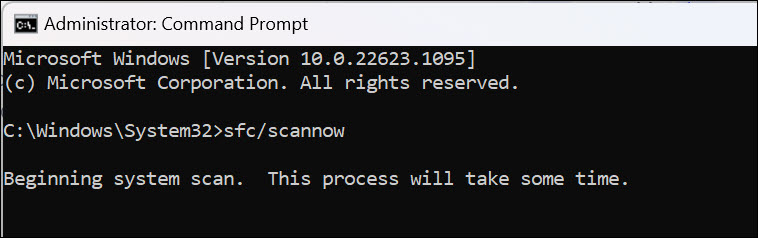
3.After the completion of the DISM scan, execute the below command to start the SFC scan.
Hopefully, running the DISM and SFC scans eliminate the Memory integrity is offerror on your system.
We arent saying it; people have reported it.
Due to this, we suggest youremove itfrom your unit.
2.Once the gear Manager is opened, search for the driver you recently installed.
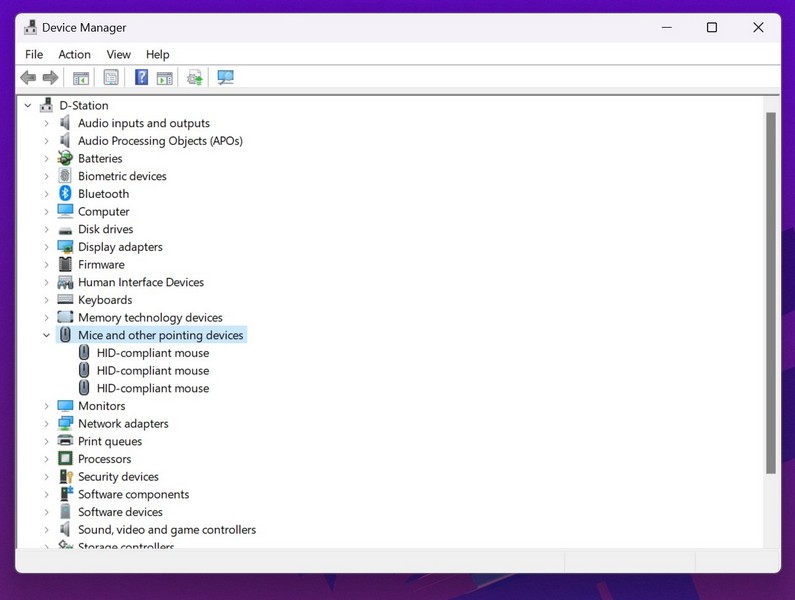
For instance, if you installed a mouse driver, search for it in theMice and other pointing devicessection.
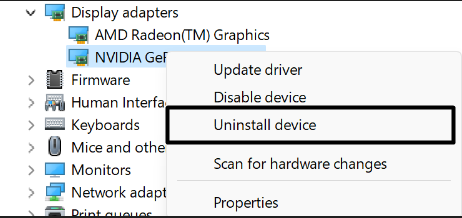
3.Lastly, right-hit the third-party driver you want to remove and then selectUninstalldevice.
Update All Incompatible Drivers
Another possible workaround to fix the Memory integrity is offerror is toupdate the incompatible drivers.
There is a possibility that updating incompatible drivers might fix the issues.
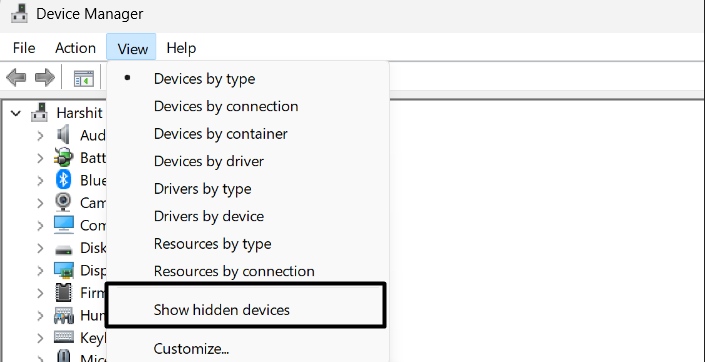
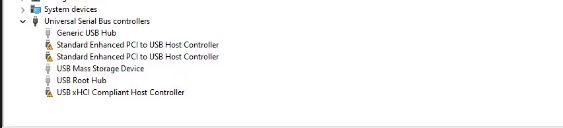
2.SelectShow hidden devicesfrom the dropdown menu to view all the hidden Windows drivers.
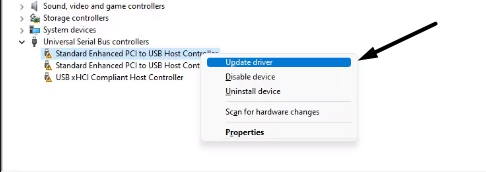
3.Expand all the sections and search for the drivers with a yellow triangle and an exclamation mark.
4.Once found, right-tap on it, and select theUpdate driveroption from the right-click menu.
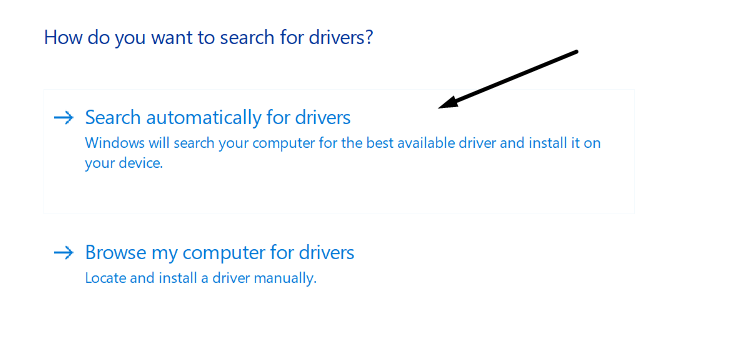
5.Select theSearch automatically for driversoption onHow do you want to search for drivers?prompt.
6.Now, wait for the OS to search for updated drivers and install them.
Once done, check the issues status.
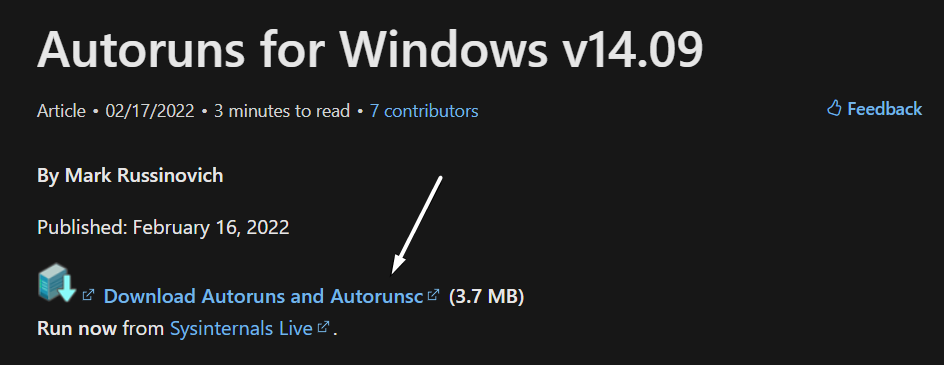
2.Once the Autoruns.zip file is downloaded on your system, install it like you usually install other zip files.
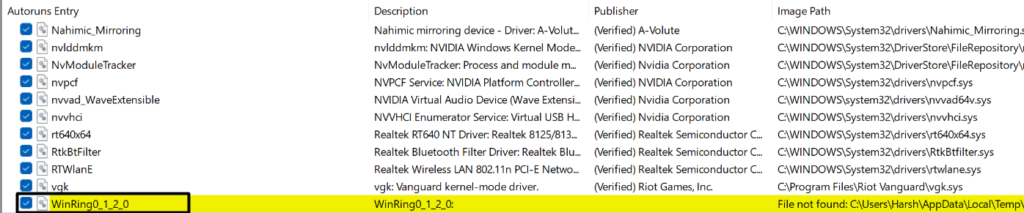
3.Open Autoruns utility on your Windows 11 PC with admin rights and navigate to theDriverssection.
4.Search for the drivers highlighted with yellow anduntick the boxes next to them to disable them.
5.Once done, right-press the same highlighted drivers and, this time, select theDeleteoption from it.
6.Lastly, reboot your Windows system to automatically roll out the latest version of the recently uninstalled driver.
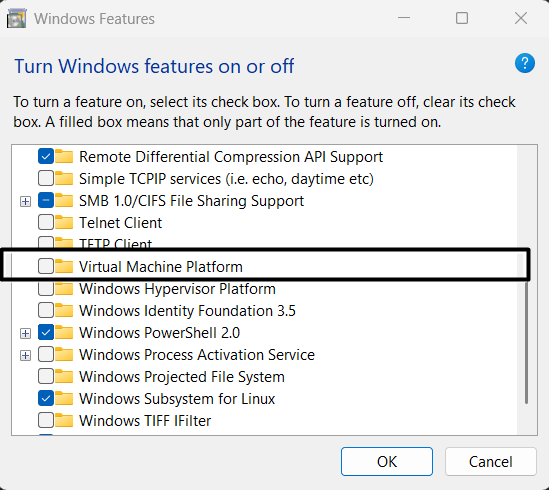
Enable Virtual Machine Platform on Your PC
1.Press theWindows + Ikeyboard shortcut to open theSettings appand head to theAppssection.
2.Click onOptional featuresand then click onMore Windows featuresin theRelated settingssection.
3.Search fortheVirtual Machine Platformoption on theTurn Windows features on or offprompt.
4.Lastly, check the box against theVirtual Machine Platformoption and clickOKto save the changes.
5.Once done, reboot your Windows 11 PC and try re-enabling the Memory Integrity feature.
In that case, its possible that Hardware Virtualization isnt enabled on your Windows 11 PC.
Considering this, we suggest you double-check thatHardware Virtualizationis enabledon your PC.
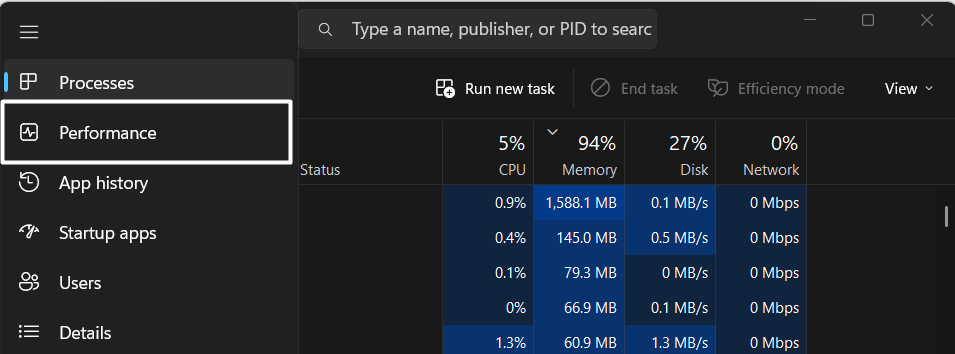
2.hit three vertical lines at the top left corner of the tab and selectPerformancefrom it.
3.Lastly,click onCPUin thePerformancetab and see if theEnabledis written againstVirtualization.
If Hardware Virtualization is already enabled, try other workarounds.
If not, we suggest you switch on the Hardware Virtualization function from your systems BIOS.
This is because it could be possible that the TPM tweaks are incorrect and causing this issue.
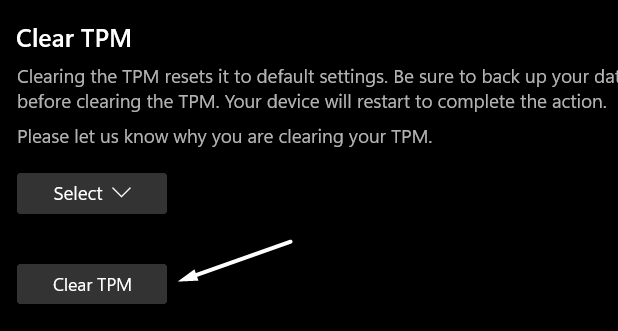
2.In theDevice securitysection, click onSecurity processor detailsto move to that section.
3.Click onSecurity processor troubleshootingand then punch theClear TPMbutton under theClear TPMsection to reset it.
Reset the Windows Security App
Some users said their issue immediately got fixed afterresetting the Windows Security app.
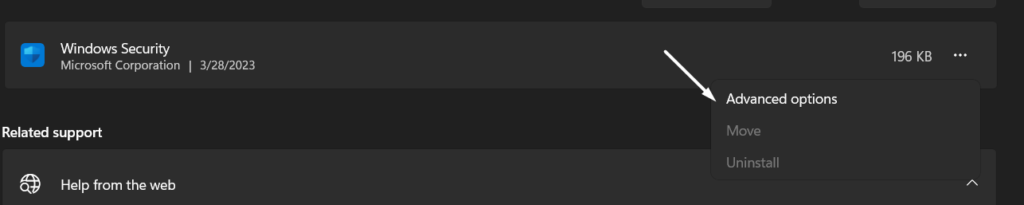
2.choose theInstalled appsoption and search for theWindows Securityapp using the search function.
3.Click onthree dots (…)next toWindows Securityand select theAdvanced optionsfrom the dropdown.
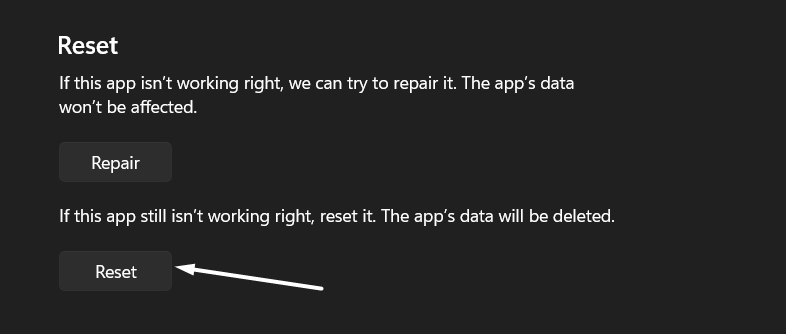
4.Scroll down to theResetsection, and then choose theResetbuttonto scrub the apps data and reset it.
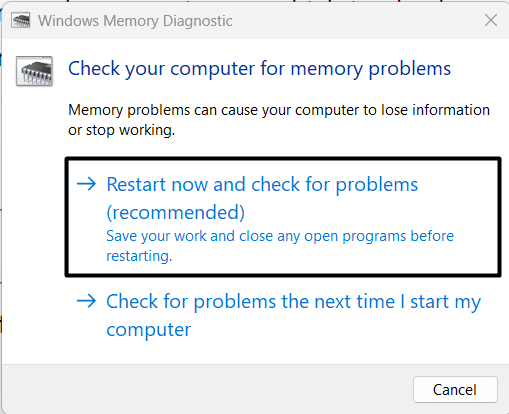
Considering this, we suggest youuse theWindows Memory Diagnosticutilitytoscan issues with your systemsSDRAM and resolve them.
2.Click onRestart now and check for problemson theWindows Memory Diagnosticprompt to cycle your PC.
3.Your system will now shut down and start the Memory Diagnostic test to find issues with the memory.
Once the test completes, the system will restart and display a report stating all the issues on it.
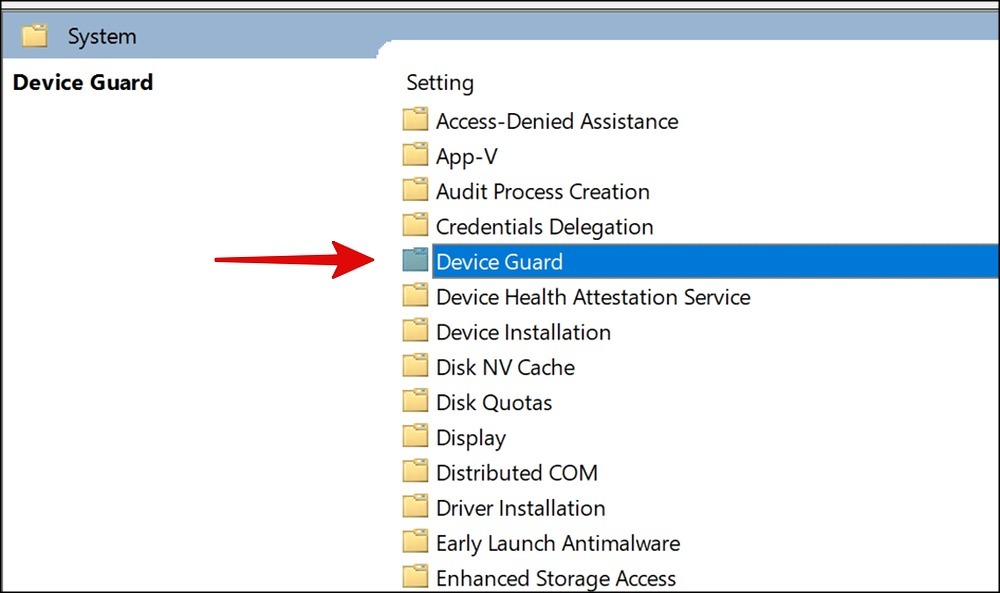
3.Double-punch theSystemfolder and then double-punch theDevice Guardfolder to open it.

4.Click onTurn On Virtualization Based Securityin theSettingtab and set it toEnabled.
5.In the end, hit theApplyoption and thenOKto save all recent changes immediately.
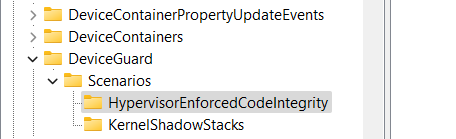
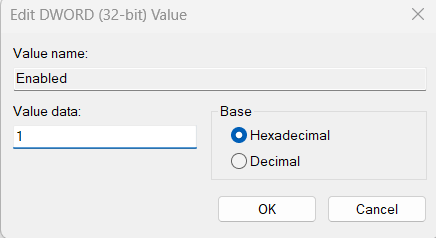
3.Double-tap on theScenariosfolder in the left sidebar and selectHypervisorEnforcedCodeIntegrity.
4.Double-punch theEnabledkey in the right panel, set theValue datafrom0to1and then clickOK.
Due to this, we suggest youupdate your Windows systemto the latest build to eliminate those bugs.
2.choose theCheck for updatesbutton at the top to search for pending Windows 11 updates.

3.If you see that some new updates are available to install, click onDownload & install allto incorporate them.
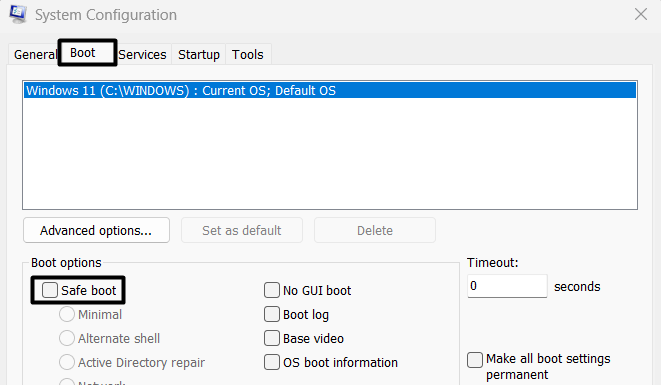
2.Once opened,head to theBootsection, and tick theSafe bootbox under theBoot Optionssection.
3.Proceed to theServicestab, check theHide all Microsoft servicesbox, and click onDisable all.

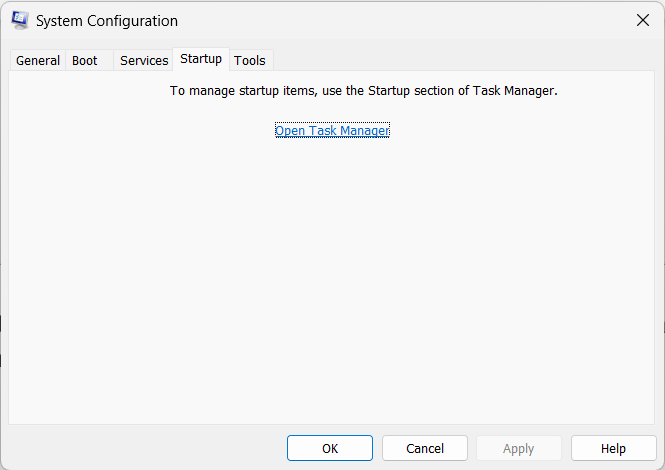
4.Navigate to theStartuptab, and click onOpen Task Managerto open theTask Managerutility.
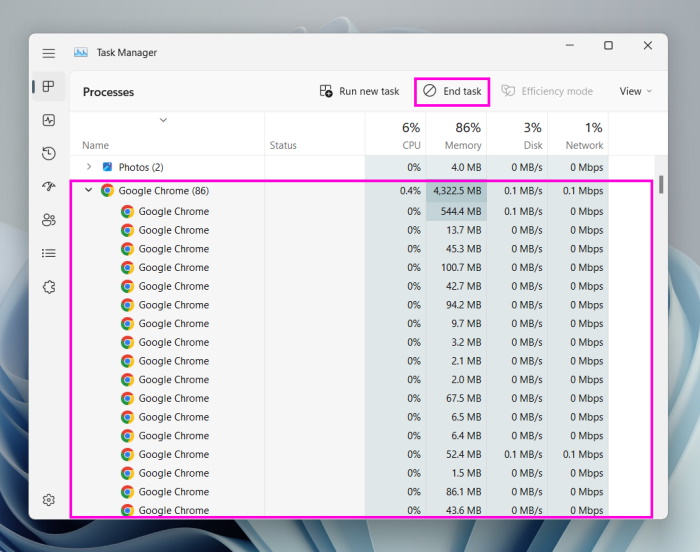
5.Disable all non-Microsoft processes under theProcessessection in the Task Manager utility.
6.Once done, reboot your system and check whether youre now able to switch on Memory Integrity.

If yes, then its clear that a third-party app or service was causing this issue.
Else, use the PC in Safe mode.
Try Resetting Your PC
If updating the system doesnt fix the issue, you could considerresetting it.
But as of now, its the only way to eliminate the Memory integrity is offerror.
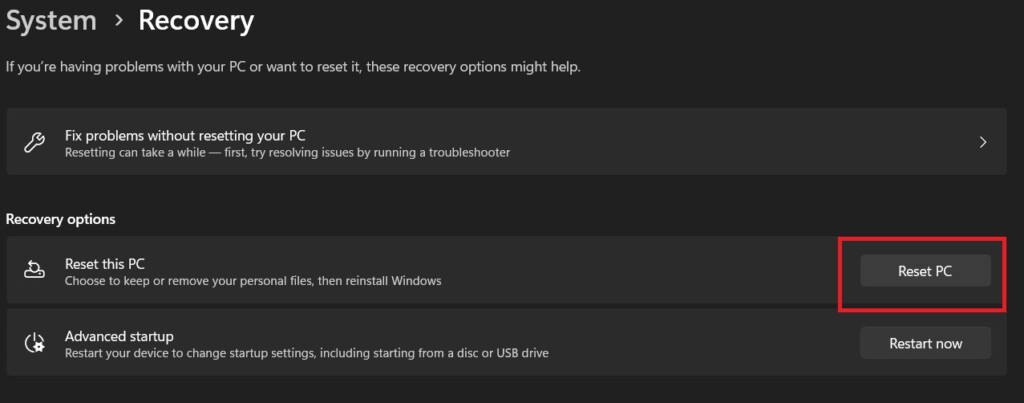
2.Click theReset PCbutton against theReset this PCoption in theRecovery optionsarea.
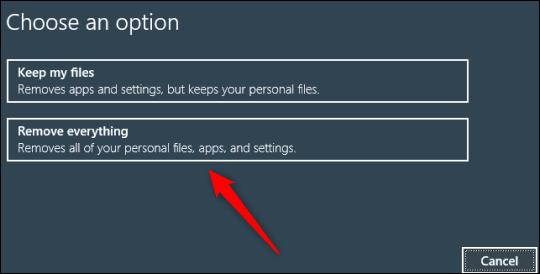
3.SelectRemove everythingon the following prompt and then choose theCloud downloadoption.

4.Finally, press theNextbutton and thenResetto immediately begin the factory reset process.
So, tryclean installing Windows 11on your PC and check whether it fixes the issue.
FAQs
Should Memory Integrity Be Turned On in Windows 11?

Memory Integrity should be enabled on your Windows 11 PC.
Else, your PC will be vulnerable to malicious code attacks.
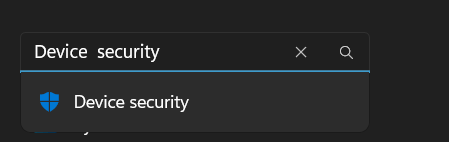
2.Search forDevice securityusing the search box at the top and select it from the search results.
3.Click onCore isolationon theDevice securitywindow and enable/kill the toggle under Memory integrity.
How To Fix Incompatible Drivers Error for Memory Integrity in Windows 11?
If you find some incompatible drivers on your Windows 11 PC, try disabling them.

Why Wont Memory Integrity Turn Off Windows 11?
How Do I Check RAM Integrity in Windows 11?
If yes, then confirm to share which of the mentioned workaround fixed the Memory integrity is off error.