In Windows 11, we can run a slideshow on our PCs lock screen.
However, some users in the Microsoft forum mentioned that the slideshow isnt working on their PCs lock screen.
Fortunately, this issue can easily be fixed by applying someeasy fixes.

In this guide, well shareseveral working workaroundsto fix it in Windows 11 with ease.
So read ahead and learn to fix lock screen slideshow not working in Windows 11.
Why Is the Lock Screen Slideshow Not Working in Windows 11?

There could be several reasons for the non-functioning lock screen slideshow in Windows 11.
2.Right-click thePower iconin theStart Menuprompt, and from the pop-up menu, choose theRestartoption.
It could be possible that you may have mistakenly unselected the slideshow folder.
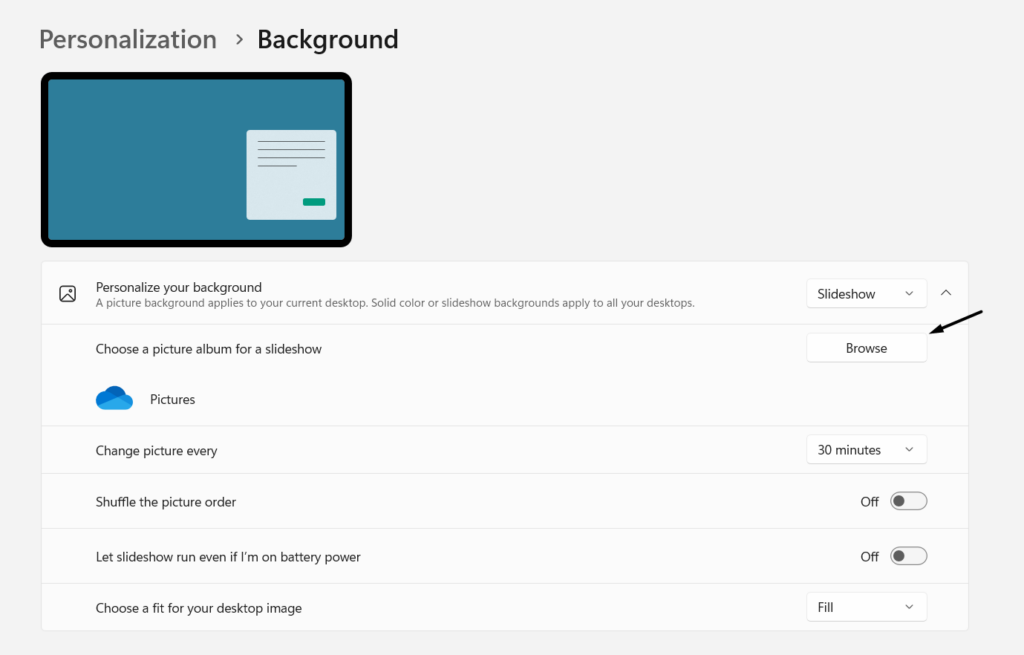
2.In thePersonalizationwindow, choose theBackgroundoption and then punch theBrowsebutton.
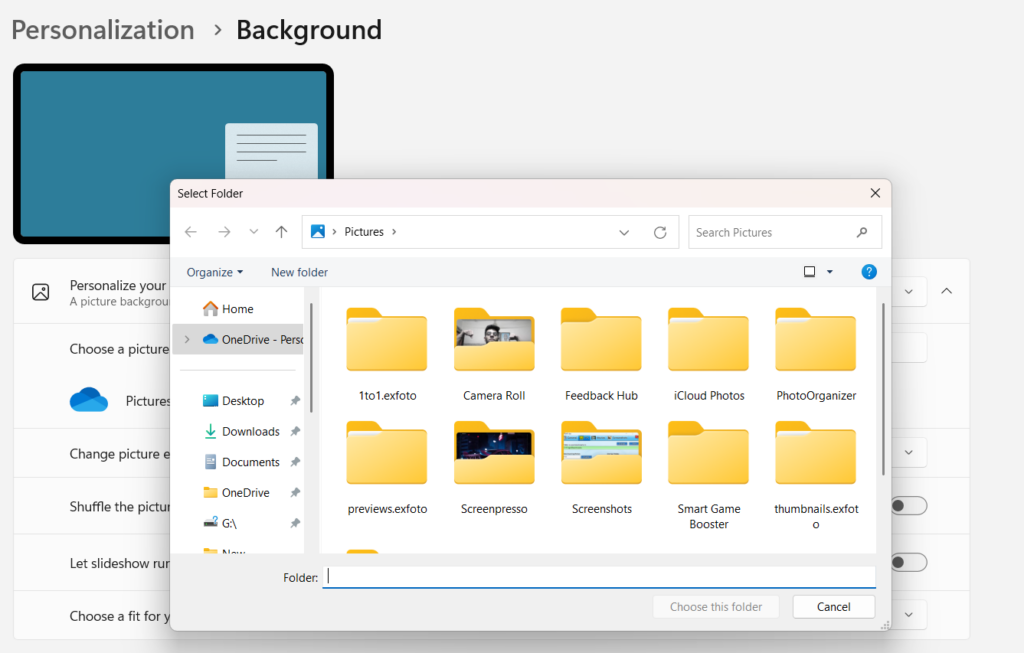
3.In theSelect Folderwindow, find the same slideshow folder, select it, and then clickChoose this Folder.
So try this and find out if it works.
Hopefully, the lock screen slideshow not working problem wont appear again after trying this fix.
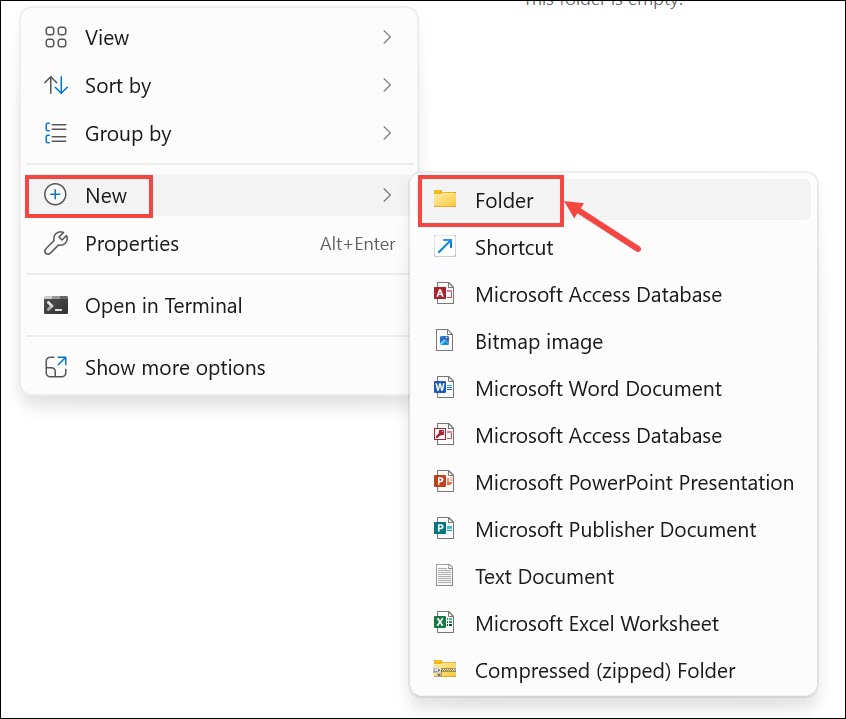
2.Right-punch an empty space in the utility, hover the arrow onNew,and then choose theFolderoption.
4.Go to theBackgroundsection and choose the new folder to make the lock screen slideshow work again.
Due to this, we suggest youdisable itand see if it fixes the issue on your PC.
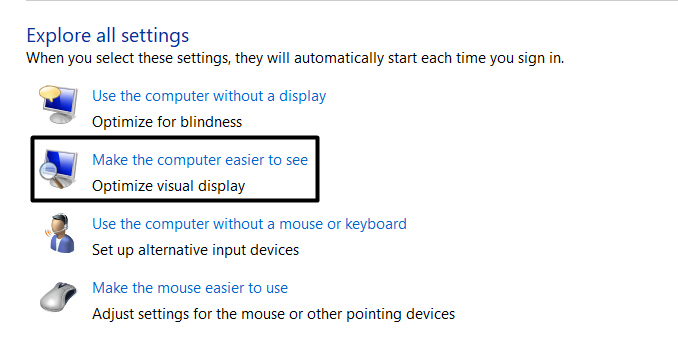
2.In theEase of Accesswindow, selectMake the computer easierto seeto go ahead.
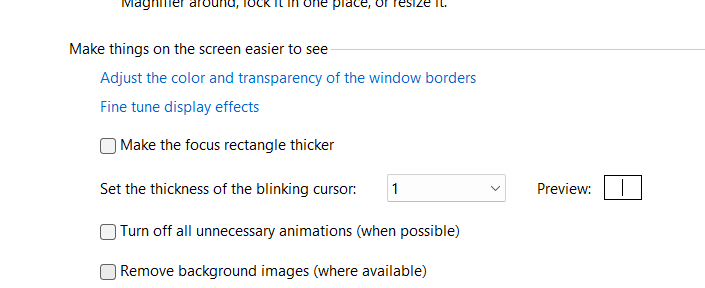
3.On the next screen, turn offRemove background images (where available)underMake the computer easierto see.
Once done, click theApplybutton to save this change.
As a result, the lock screen slideshow isnt working.
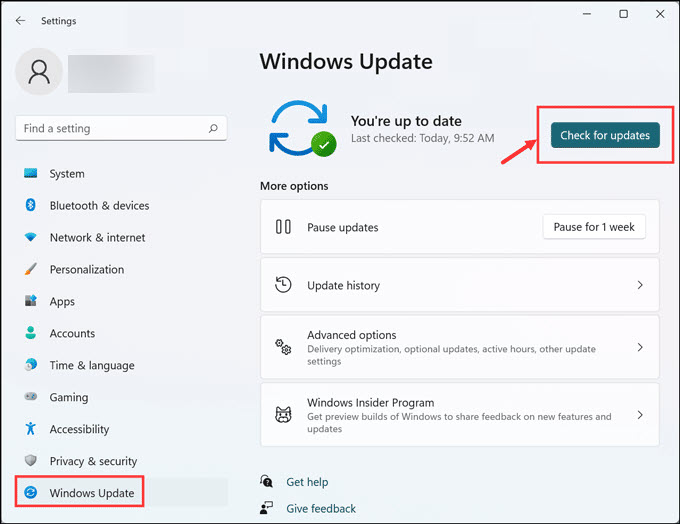
2.In theWindows Updatewindow, clickCheck for updatesto search for new Windows updates.
3.If you see any new updates to install on the PC, clickDownload & installto install them.
In case you see more than one Windows update, choose theDownload & installallbutton.
4.After installing the new Windows updates, reboot your Windows 11 PC and check the issues status.
It could be possible that Windows 11 isnt activated, which is why the slideshow isnt working on it.
Thus, to confirm this,look for the Activate Windows watermarkon the screens bottom right corner.
If the watermark is there, it means Windows 11 isnt activated, and you must activate it.
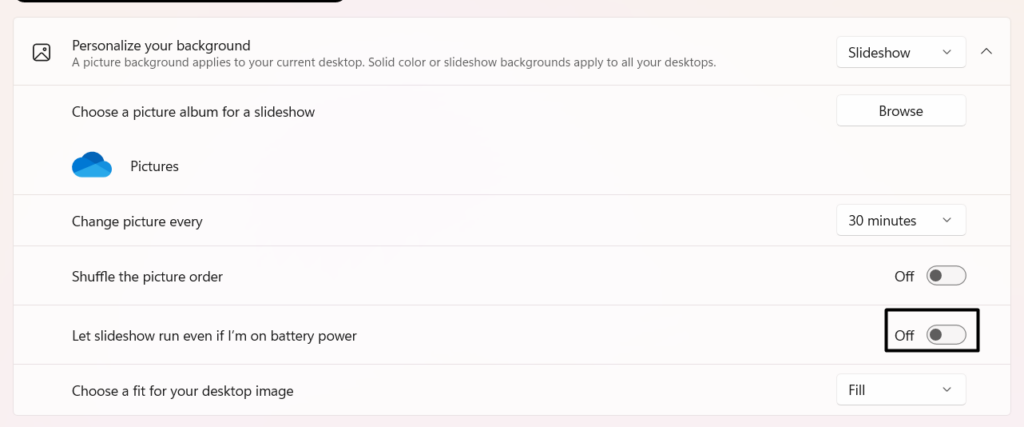
2.In thePersonalizationwindow, enable theLet slideshow run even if Im on battery powertoggle.
3.After doing so, the lock screen slideshow will run even if the PC goes into Power saving mode.
In that case, we suggest yourun an SFC scanon your PC to find those files and fix them.
3.Once the SFC scan is completed, check whether the lock screen slideshow is working properly now.
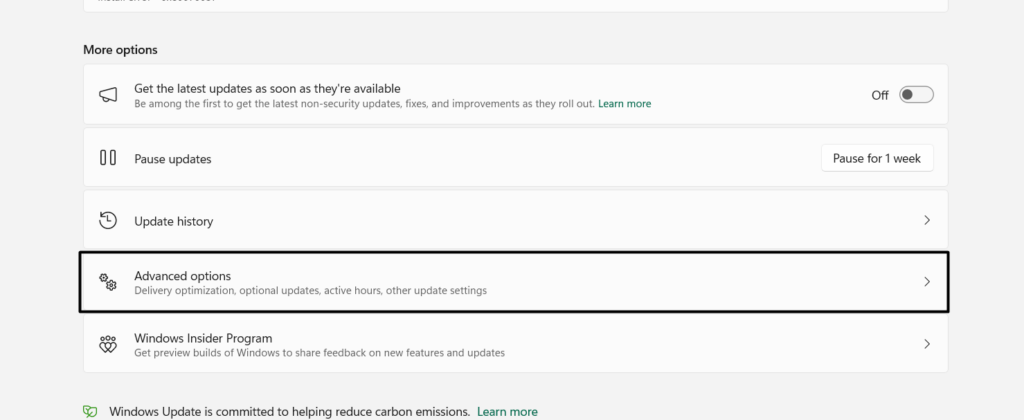
Thus, we suggest youupdate the graphics driverand peek if doing so fixes the issues with it.
2.In theWindows Updatewindow, chooseAdvanced optionsand then select theOptional updatesoption.

3.Choose all the graphics-driver related updates underDriversand clickDownload & installto download and install them on your Windows 11 PC.
Then, verify if the issue is fixed.
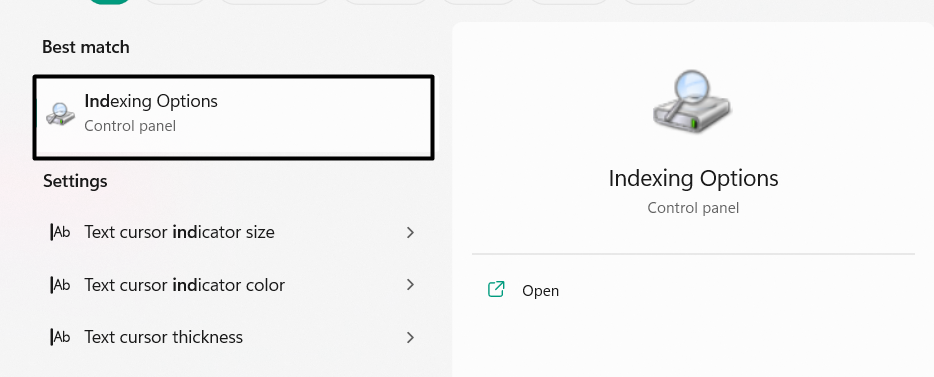
So, we suggest youmake sure that your computers indexing parameters are correct.

2.Select theIndexing Optionsfrom the search results underBest matchto launch the indexing configs.
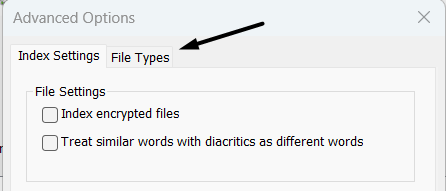
3.In theIndexing Optionswindow, click theAdvancedbutton and then move to theFile Typessection.
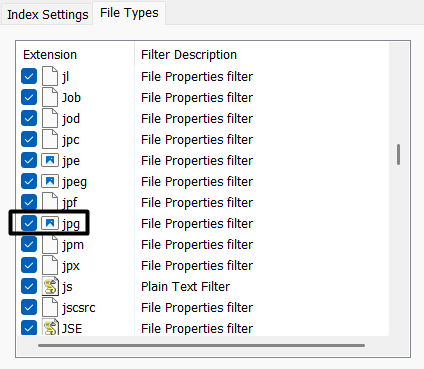
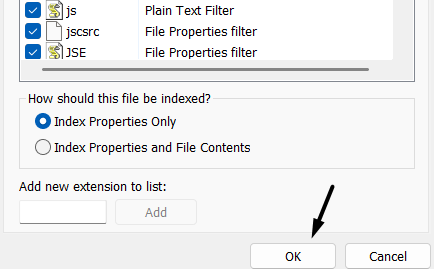
4.In theExtensionssection, search for thePNGandJPGcheckboxes and confirm theyre checked.
5.Lastly, click theOKbutton at the bottom to save the changes and close theIndexing Optionswindow.
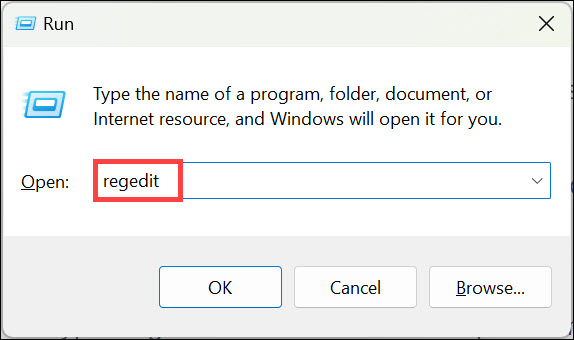
1.Use theWindows key + Rkeyboard shortcut to open theRun app, typeregedit,and hitEnter.
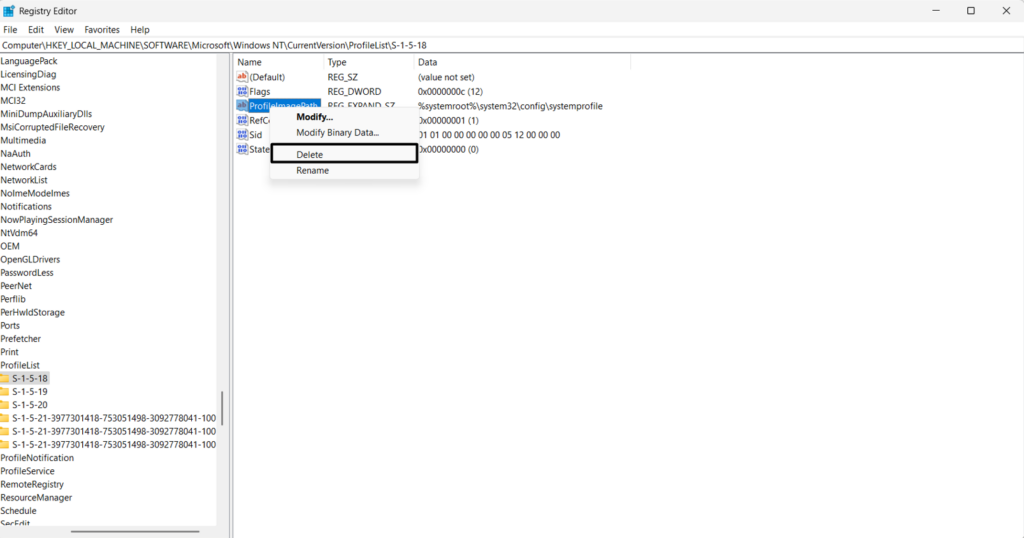
3.In thePersonalizationfolder, find a key namedNoLockScreenSlideshow,and then right-click it.

4.Lastly, choose theDeleteoption from the contextual menu to delete the key from your PC.
1.Use theWindows key + Rshortcut, typegpedit.msc, and hit theEnter keyto open it.
3.In thePersonalizationwindow, simply double-click thePrevent enabling lock screen slide showpolicy.
4.Set the policy either toNot ConfiguredorDisabled,and then clickOKto save the changes.
5.Check whether the lock screen slideshow not working issue is fixed on your Windows 11 PC.
So try the same.

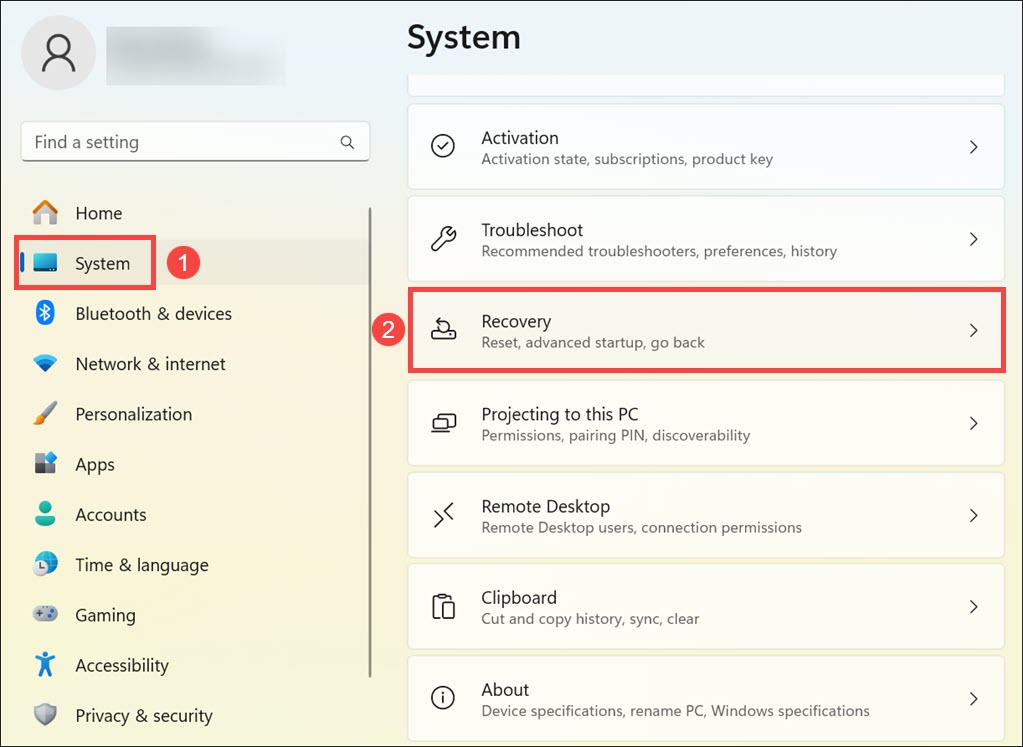
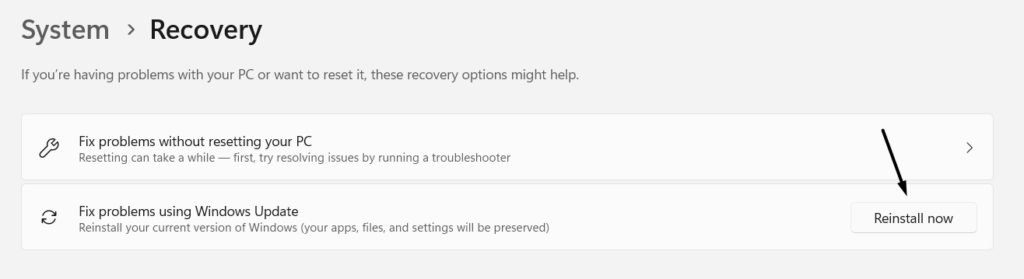
2.On the next screen, select theReinstall nowbutton next to theFix problems using Windows updatetext.
Try the same and test whether it works.
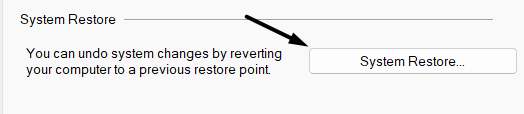
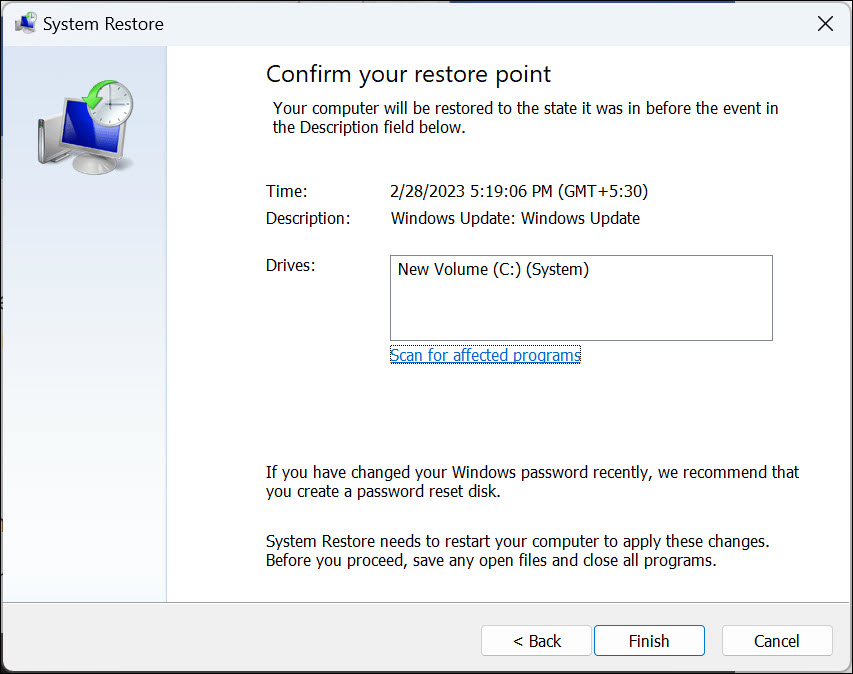
2.Choose theSystem Restore…option underSystem Restoreto view all the restore points.

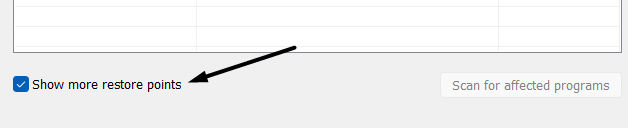
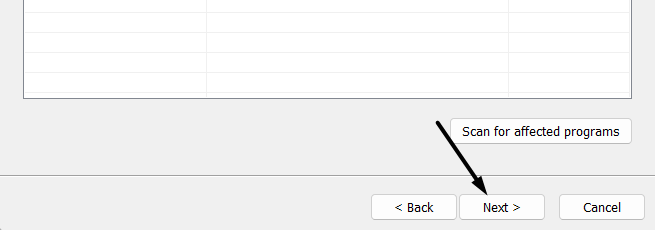
3.Choose theNext >button to move to the next screen and check theShow more restore pointscheckbox.
4.On the next screen, selecta different restore point from the mentioned restore points and clickNext >.
5.In the end,choose theFinishbutton to start system restoration on your PC and let the issue disappear.
FAQs
How Do I Make a Slideshow of Pictures on Windows 11 Lock Screen?
How Do I Fix My Lock Screen Wallpaper Windows 11?
If your Windows 11 PCs lock screen isnt working properly,trigger the SFC scanon your PC.
Why Is My Wallpaper Slideshow Not Working?
Another reason could be bugs and glitches in the OS.
How Do I Set a Slideshow As My Lock Screen Wallpaper?
But no matter what the reasons are, it can easily be fixed by applying some simple workarounds.
Thus, in this guide, we sharedseveral workaroundsto fix lock screen slideshow not working in Windows 11.
At last, we hope this guide helped you fix issues with the lock screen slideshow.
If yes, do let us know which listed fix assisted you in doing so.