Windows users encounter various kinds of errors on their PCs and laptops.
So, what is this Hypervisor error on Windows 11 PCs and laptops?
Is it a serious issue?
Is it easily fixable?
So, check out the following sections for all the details!
What is the Hypervisor Error on Windows 11?
However, much like any other technology, the Hyper-V feature comes with its flaws and limitations.
We have discussed these methods in the following sections.
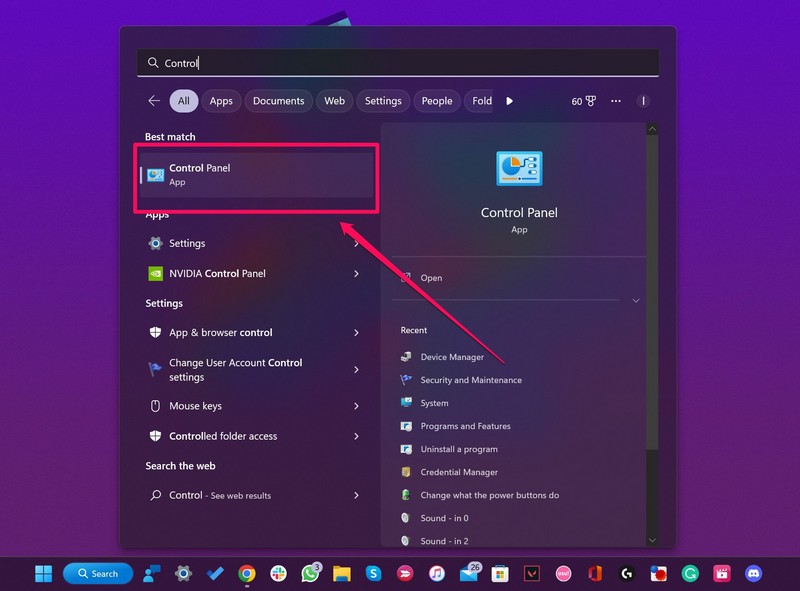
2.Locate theControl Paneland open it on your rig.
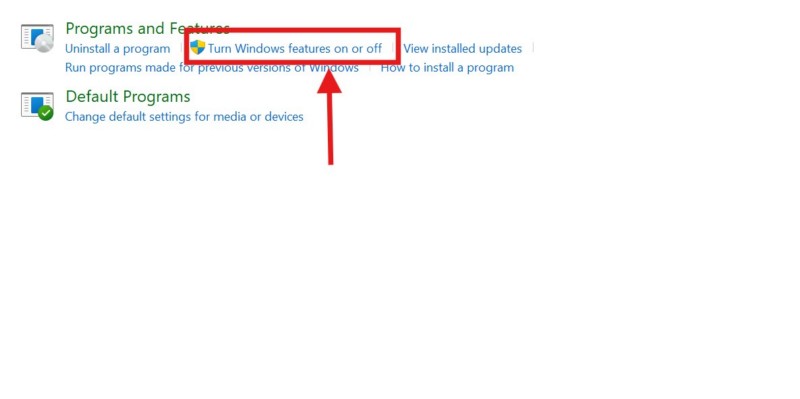
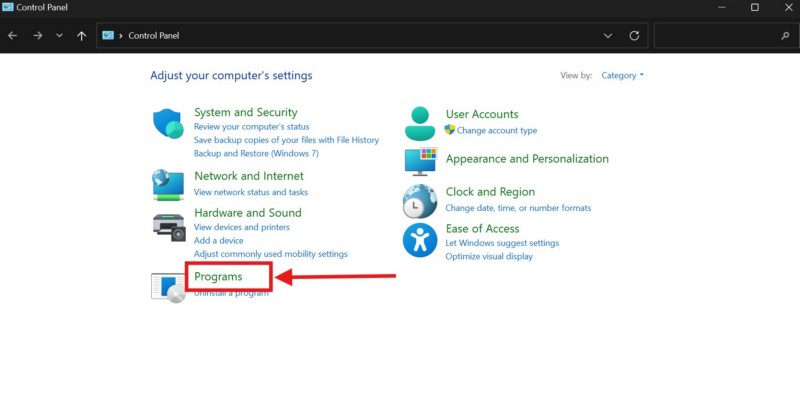
4.Next, click theTurn Windows features on or off buttonunder thePrograms and Features section.
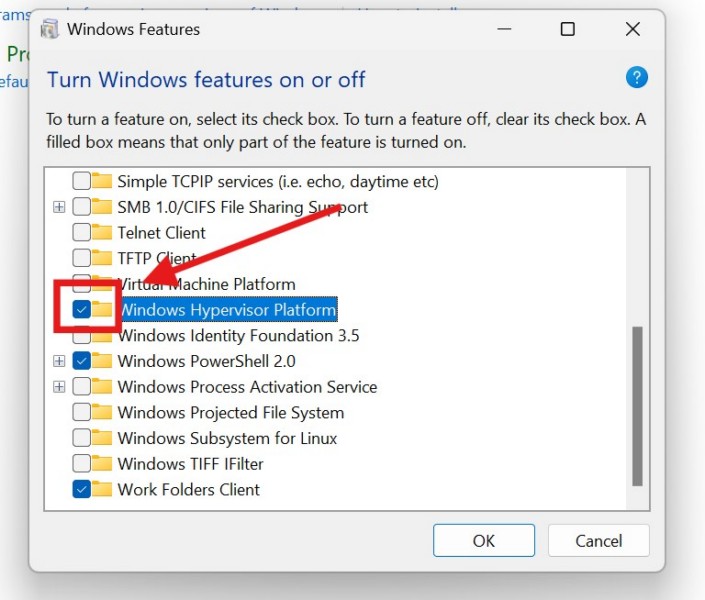
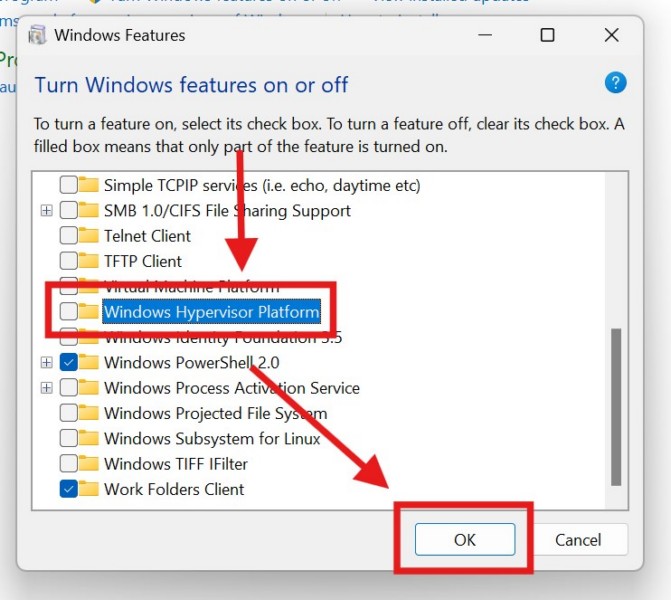
5.Within the following window, locate theWindows Hypervisor Platformoption andclick the checkboxnext to it touncheck the same.
6.Then, locate theHyper-V option, if available, anduncheck the box for it.
7.With theWindows Hypervisor Platform and Hyper-V options unchecked, click theOK buttonto save and shut the Windows Features window.
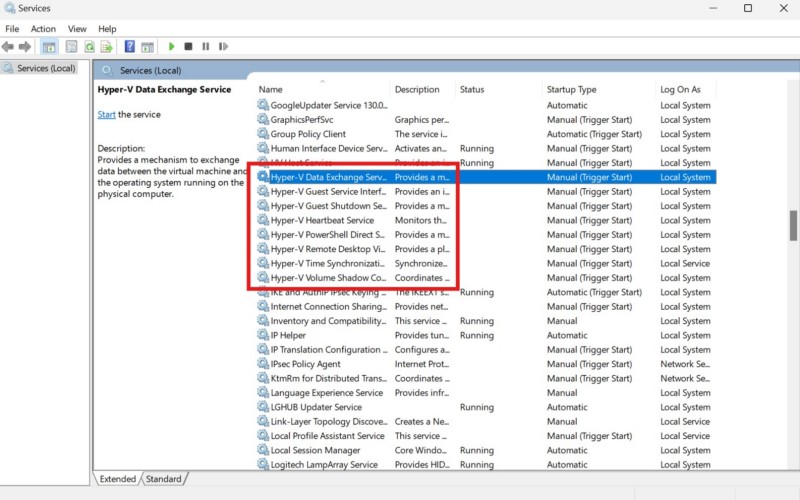
4.Now,right-click each of the Hyper-V servicesand click theStop optionon the context menu to stop them.
5.Once they are stopped, you canright-tap on them againand hit theStart optionto restart the services.
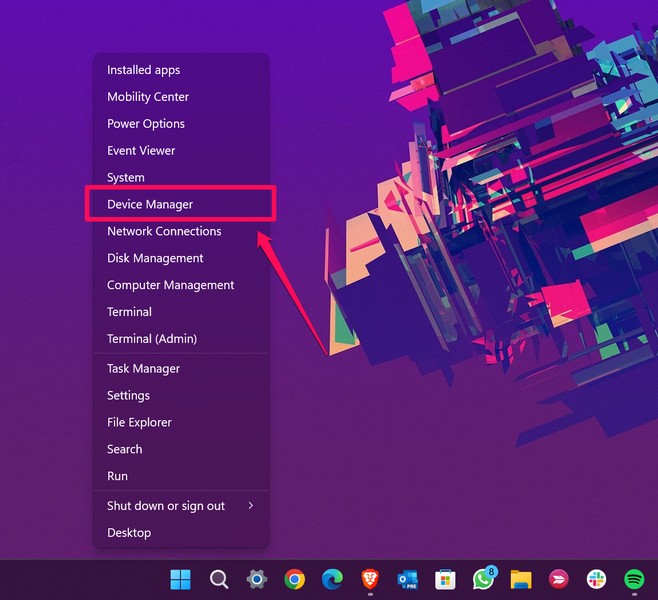
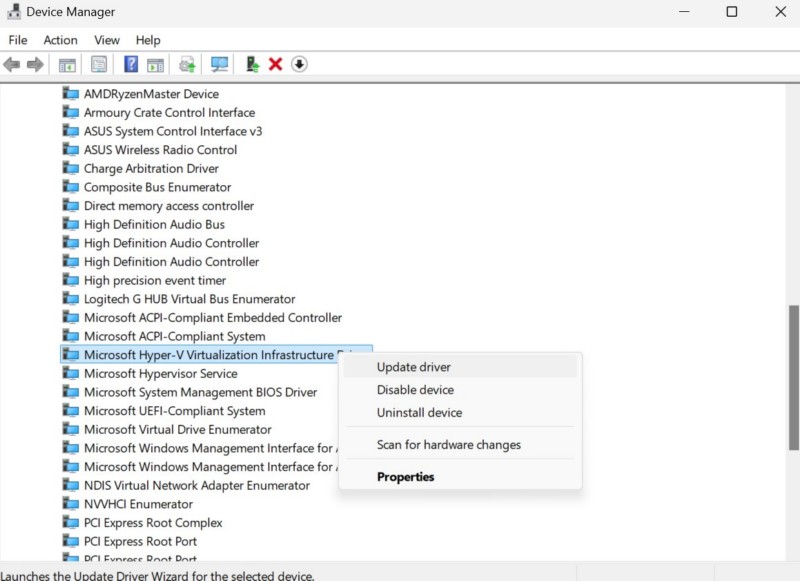
2.Click theDevice Manageroption on the list.
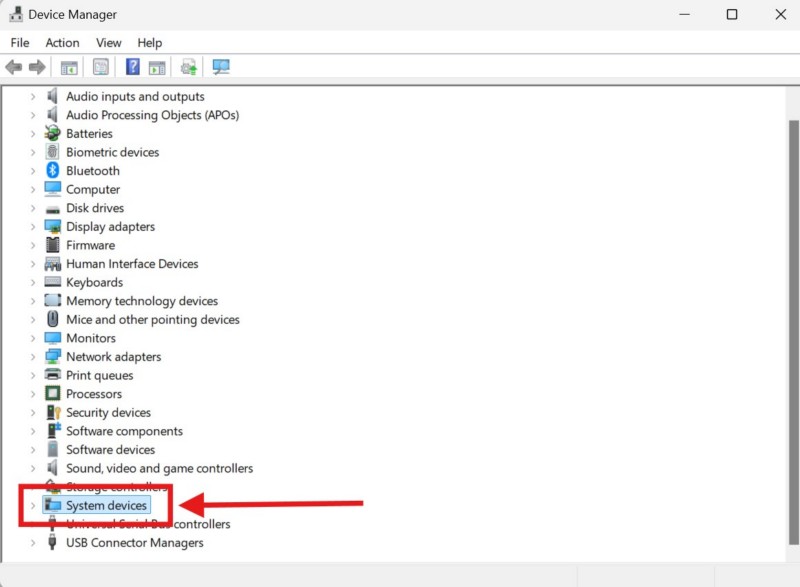
3.Locate theSystem devicesoption andclick the arrow next to itto expand the section.
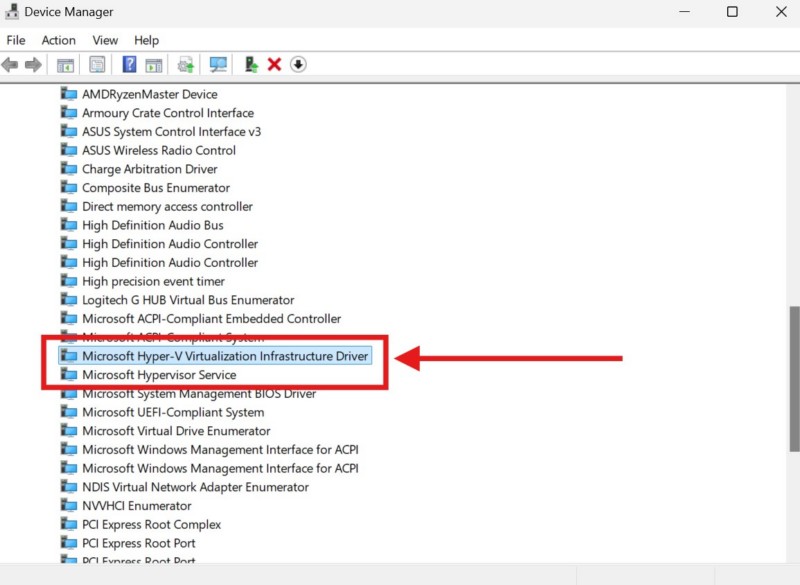
4.Here, locate theMicrosoft Hyper-V Virtualization Infrastructure DriverandMicrosoft Hypervisor Service.
You will need to update both these drivers on your PC or laptop.
5.So,right-tap on the driveryou want to update and hit theUpdate driveroption on the context menu.
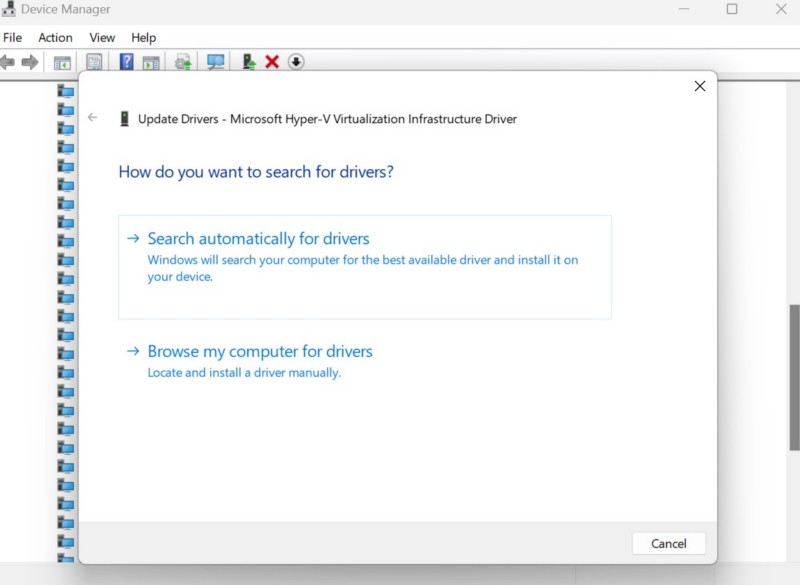
6.Click theSearch automatically for driversoption in the next window.
7.Wait for Windows to automatically detect and plant the latest drivers for the same.
8.Once both the Hyper-V driver and Hypervisor service driver are updated,start your Windows 11 PC or laptop.
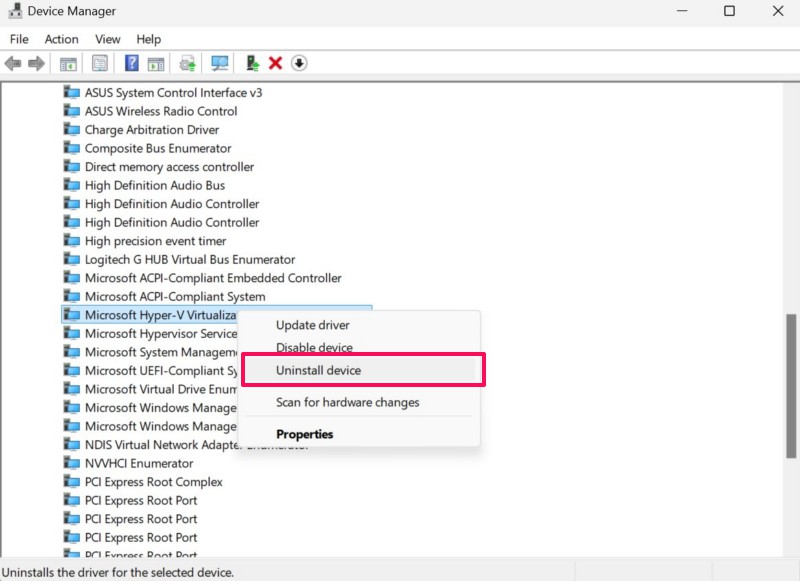
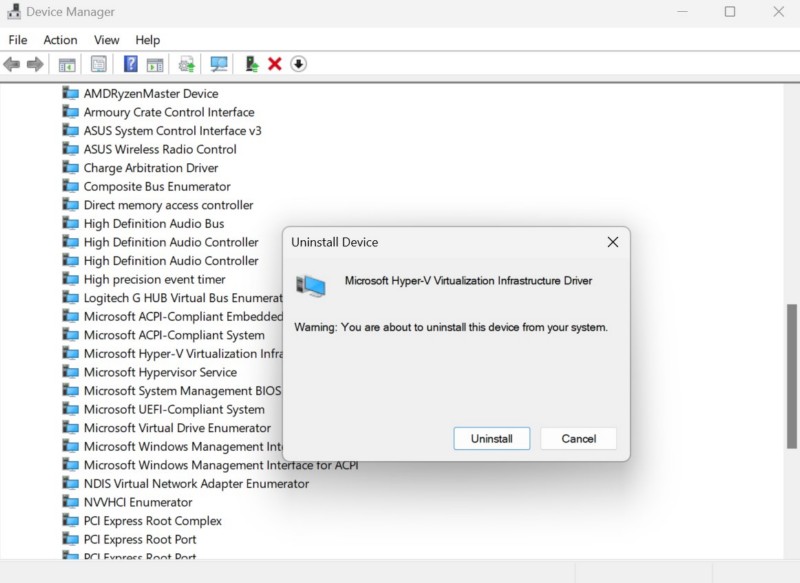
2.Right-clickon theMicrosoft Hyper-V Virtualization Infrastructure Driveroption and hit theUninstall optionon the context menu.
Confirm your actionon the following prompt.
4.Do the samefor theMicrosoft Hypervisor Service driver.
5.After both the drivers are uninstalled,cycle your Windows 11 PC or laptop.
However, the tool will require you to reboot your gadget.
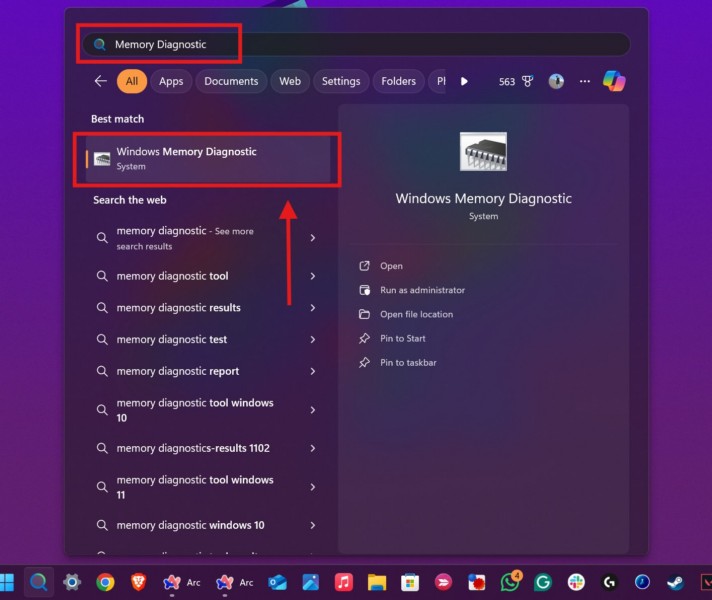
2.pop in inMemory Diagnosticin the provided search box and click theWindows Memory Diagnosticon the search results page.
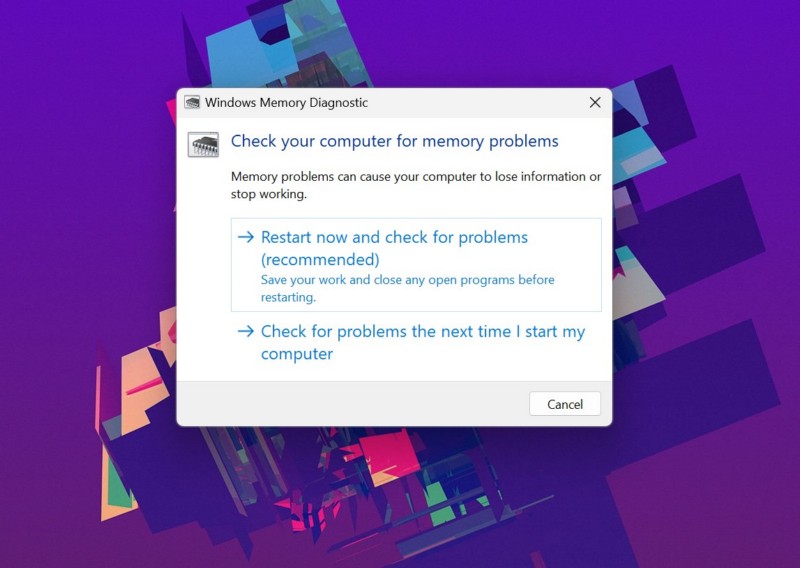
3.Select theRestart now and check for problems (recommended) optionon the following prompt.
4.Wait for your Windows 11 PC or laptop to restart.
you might follow the steps right below to do so on your machine:
1.UseWindows + Sto openWindows search.
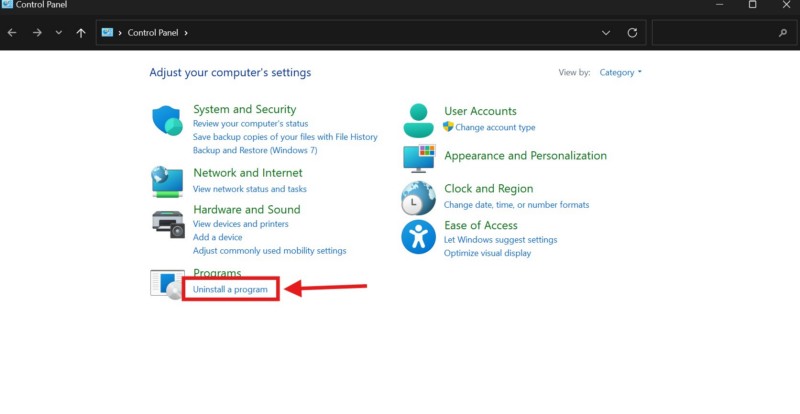
2.Find andopen the Control Panel.
3.Click theUninstall a program buttonunder thePrograms option.
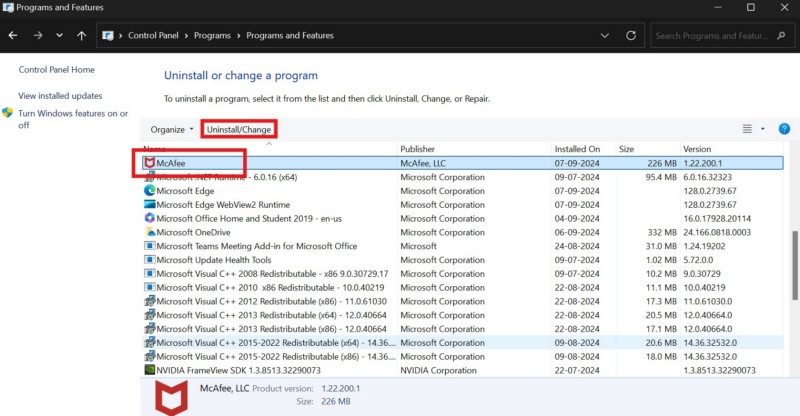
4.Locate the antivirus programon the list,left-click to select, and hit theUninstall/Change buttonabove.
- reset your Windows 11 PCor laptop after completion.
2.Click theRun as administrator buttonfor theCommand Prompt toolon the search results page.
3.ClickYeson the followingUser Account Control (UAC)prompt.
6.After the completion, kickstart your Windows 11 PC or laptop
8.

1.Use steps 1-3from the previous section(Fix #7)toopen an elevated Command Prompt windowon your machine.
3.Wait for all the DISM scans to complete on your unit.
4.After completion, reset your Windows 11 PC or laptop.
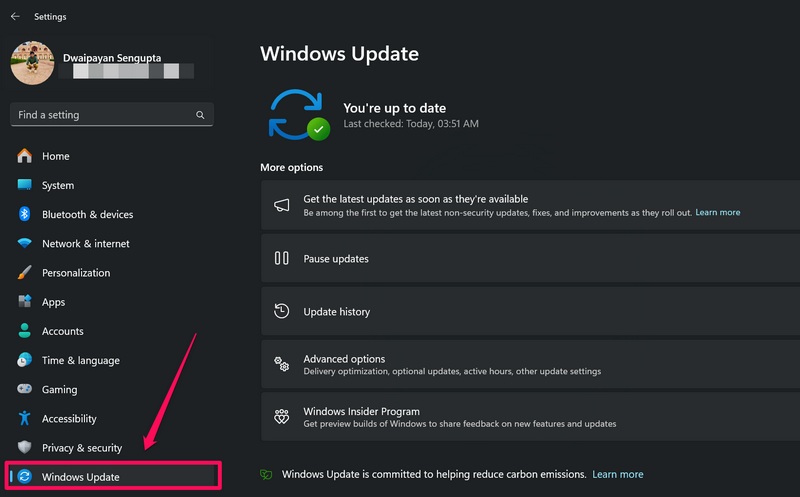
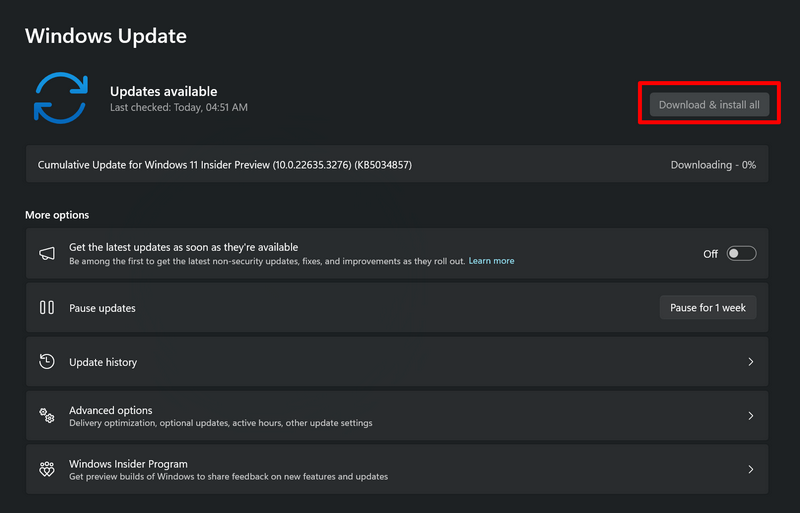
2.Go to theWindows Update tabon the left navigation bar.
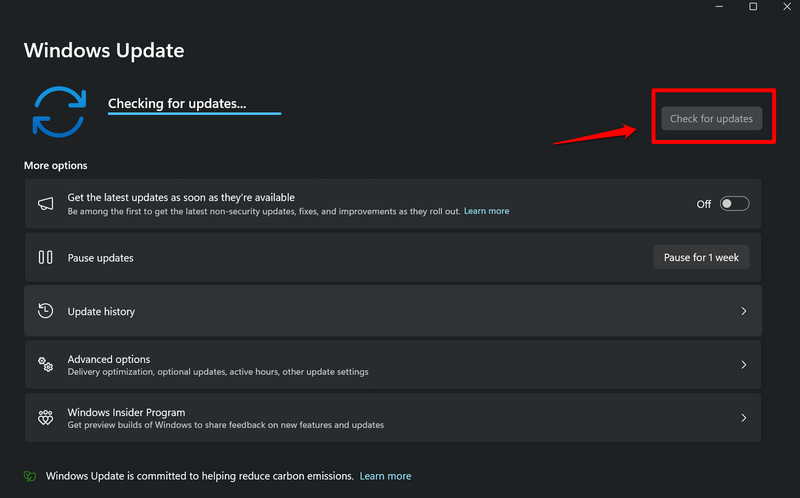
3.If you do not see any update on the right pane, click theCheck for Updatesbutton.
4.Once the latest Windows updates are available,they should start auto-downloading.
In case they do not, click theDownload and install allbutton above to initiate the process.
5.Wait for all the available updates to download.
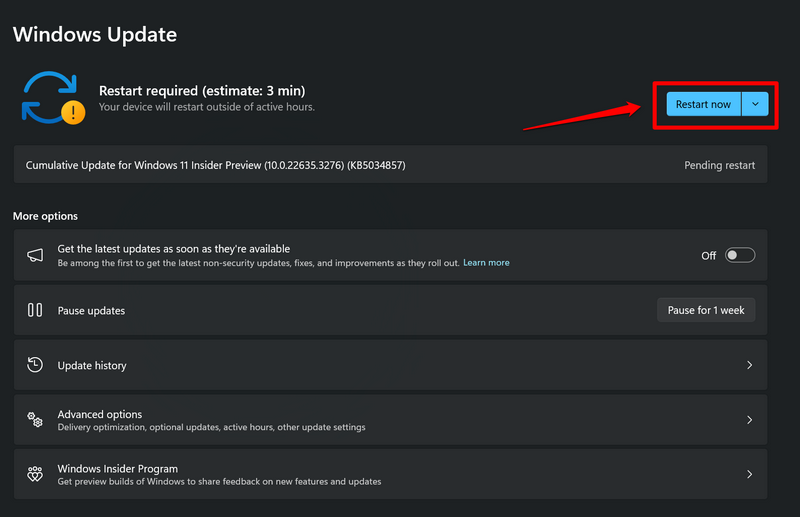
6.Finally, click theRestart now buttonabove to reboot your PC or laptop and implement the new updates.
FAQs
What is Hypervisor on Windows 11?
Why is there no Hyper-V on my Windows 11 PC?
How do I stop Hyper-V from running on Windows 11?
Wrapping Up
So, there you have it, folks!