If you are someone facing issues with headphones in Windows 11, this article is for you!
However, before we proceed, do ensure that the headphones you are using are not broken or damaged.
If they work fine, you’re free to move on to the next fixes.
However, if they do not work, it means that your 3.5mm audio connector might be broken.
you’re able to also ping the customer support of the brand of your PC or laptop.
They will replace it for free if your gadget is under warranty.
To do this, follow the steps right below:
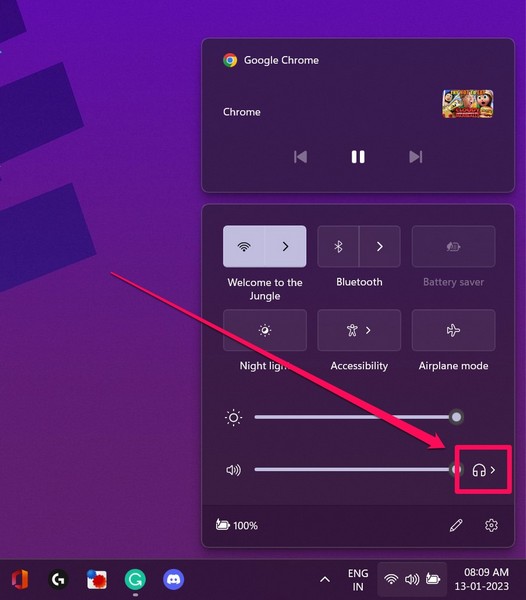
1.UseWindows + Ato open theAction Centerin Windows 11.
- snag the audio iconbeside the volume bar.
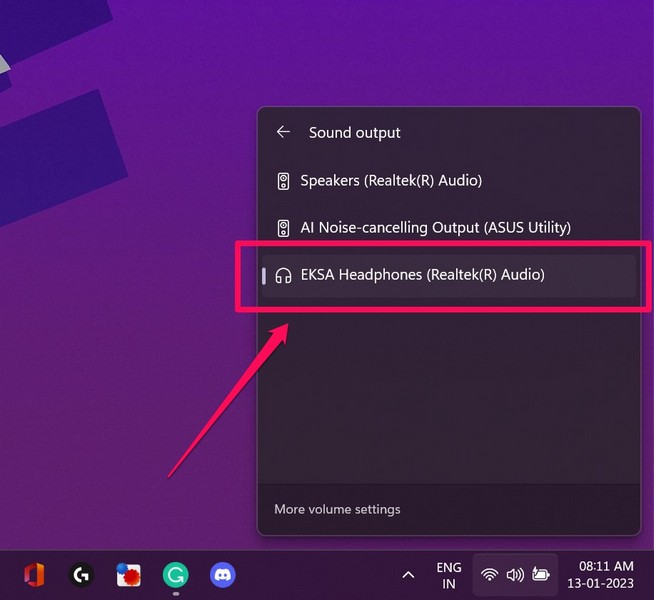
3.verify your headphones are selected.
If they are not,hit your headphones.
Now that you have selected the connected headphones for audio, your headphones should work just fine.
If, however, they do not work and the issue persists, proceed to the next fix.
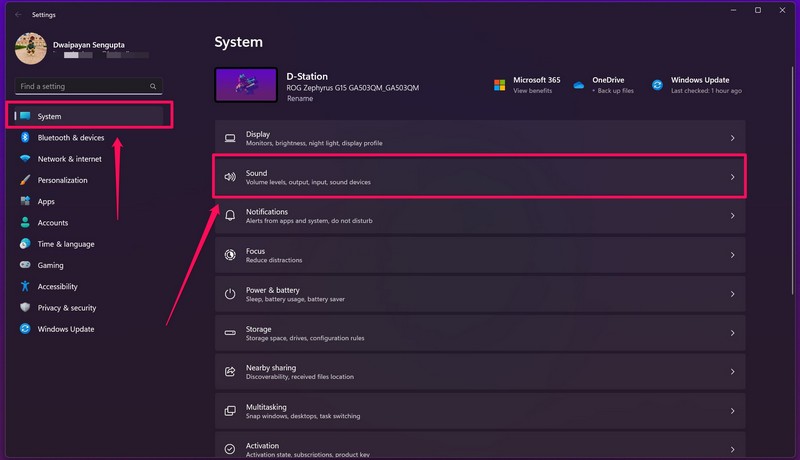
2.UnderSystem, click theSoundmenu.
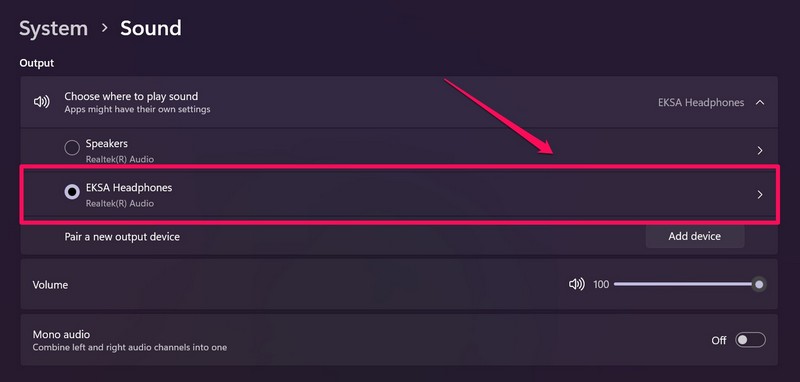
3.tap on the connected headphones toopen the tweaks.
4.Now, see to it that the setting for theAudiofield is showingDont Allow.

This means that your headphones are already allowed to output audio for Windows and other applications.
If, however, it still persists, move on to the next fix.
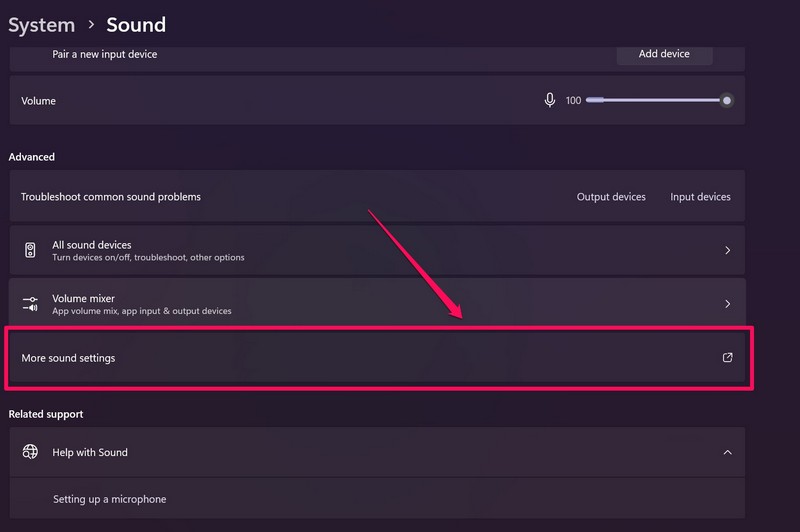
3.Scroll down to find theMore sound settingsoptions and click it to open.
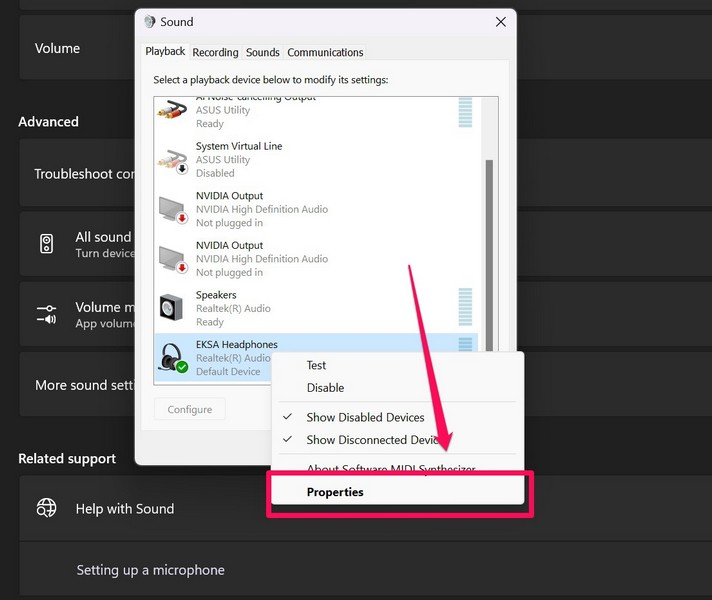
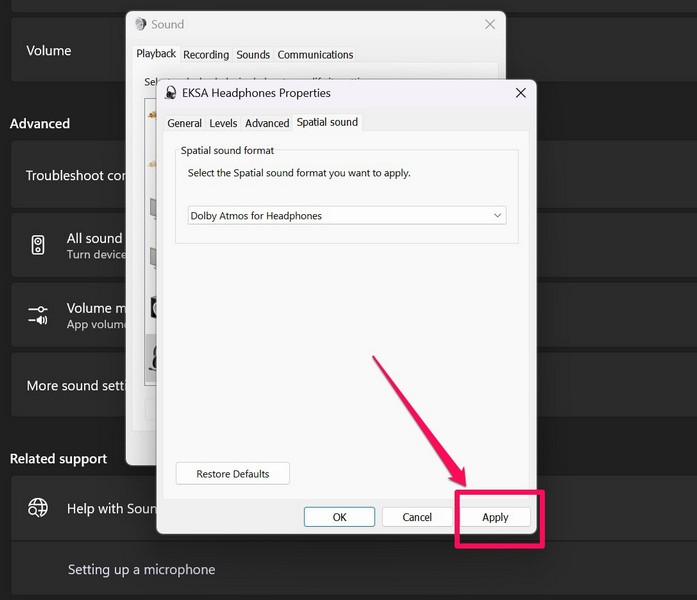
4.Now, find your headphones from the list,right-clickon them, and selectPropertiesfrom the context menu.
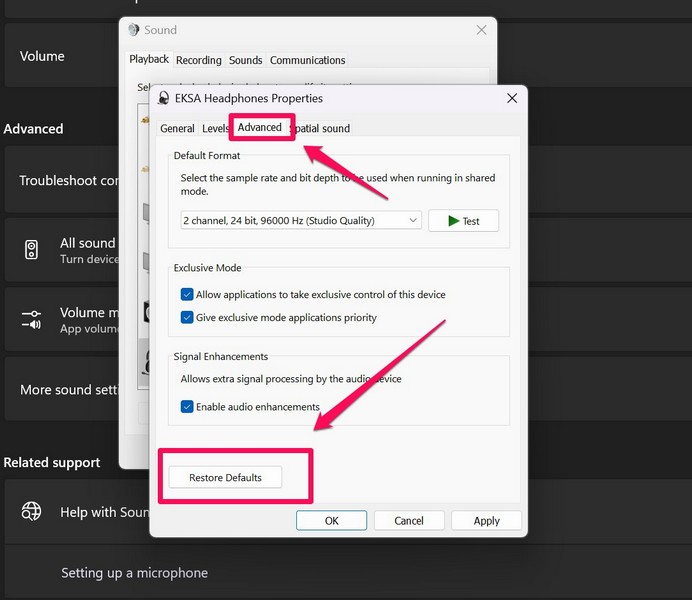
5.Go to theAdvancedtab and click theRestore Defaultsbutton.
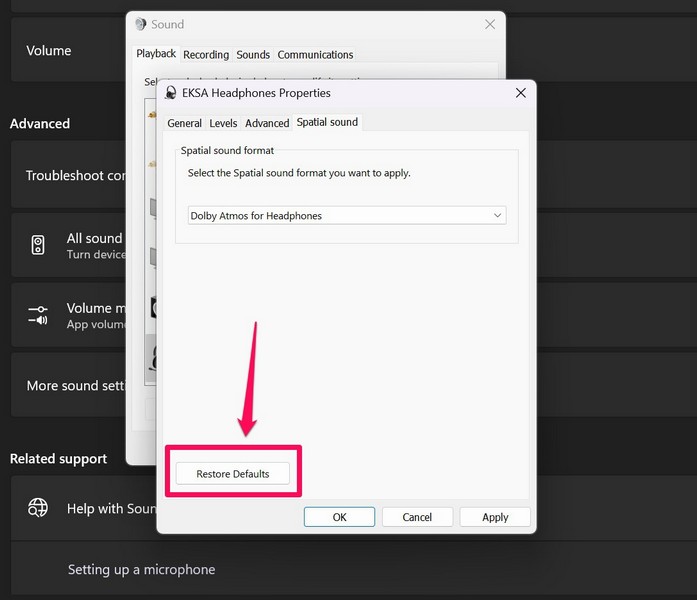
6.Then, go to theSpatial Soundtab and do the same.
7.Click theApplybutton to save the changes.
If the issue persists, proceed to the next fix.
In this case, you should probably update the audio driver of your Windows 11 unit.
To do this, follow the steps right below.
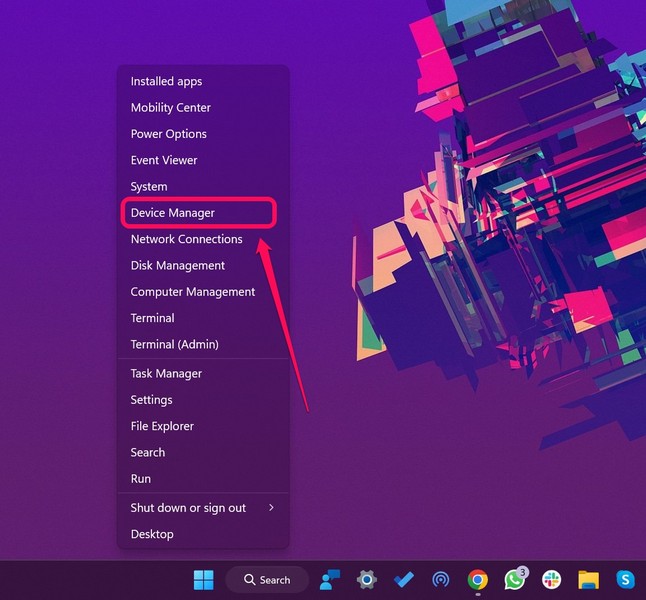
1.UseWindows + Xto open theQuick Linksmenu and selectDevice Manager.
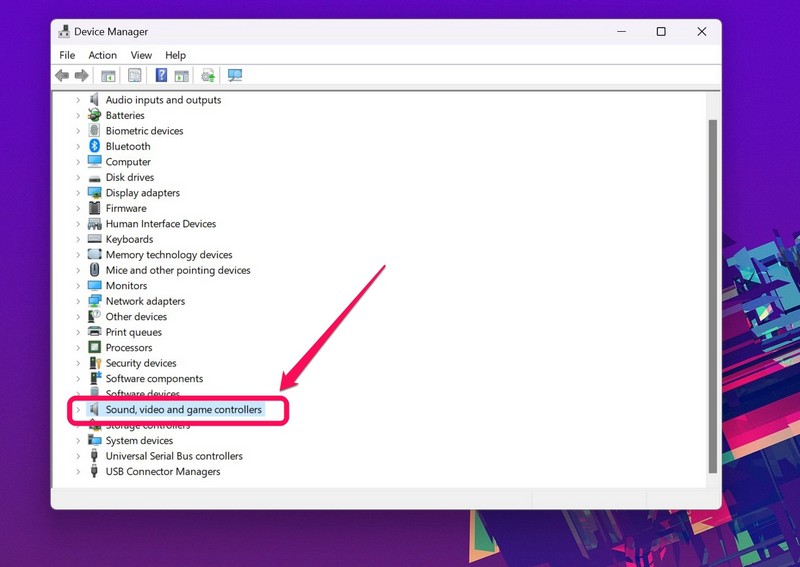
2.In rig Manager, nudge the tiny arrow beside theSound, video and game controllerssection to expand it.
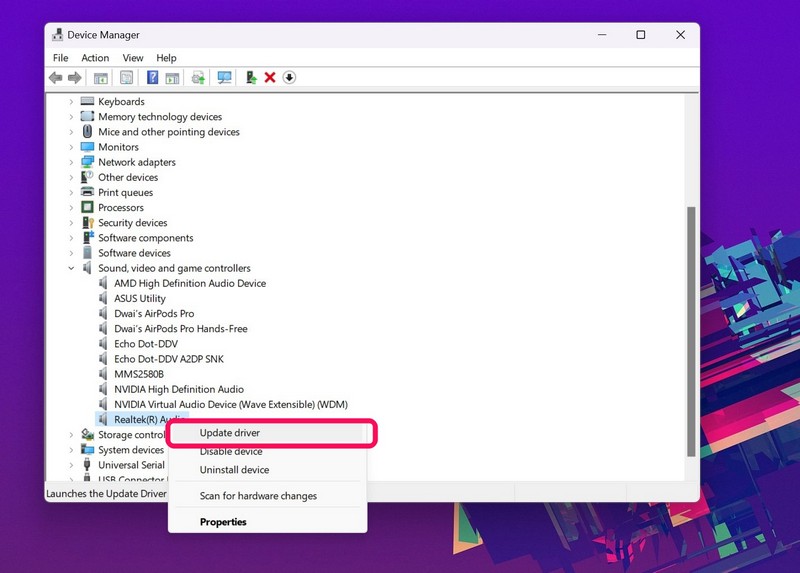
3.Find yourprimary audio driveron the list.
4.Right-pick the audio driverand select theUpdate driveroption from the context menu.
- kickstart your PCor laptop after completion.
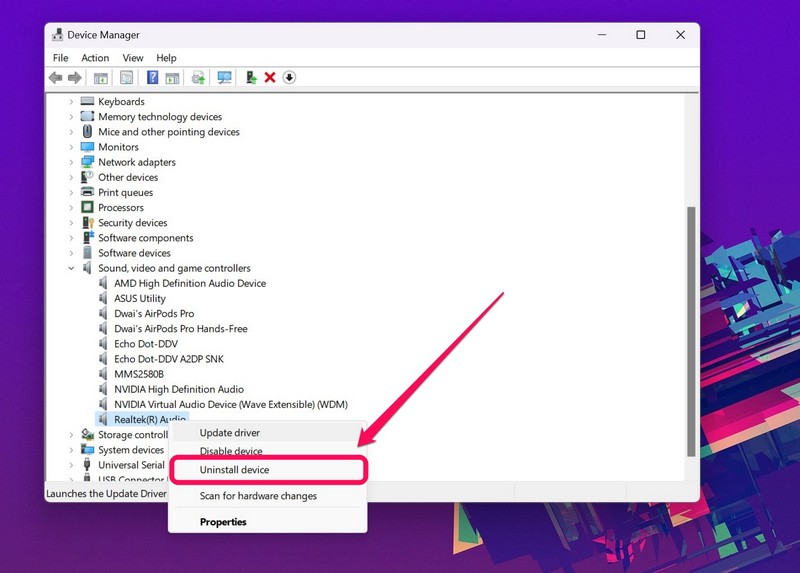
1.Open theDevice Managerin Windows 11 and find the audio driver as explained in the previous fix.
2.Right-choose the audio driverand select theUninstall deviceoption.
3.Confirm your action and let Windowsuninstall the audio driveron your PC or laptop.
4.After the uninstallation,reset your rig.
So, after the restart, try connecting your headphones and check whether the issue still exists or not.
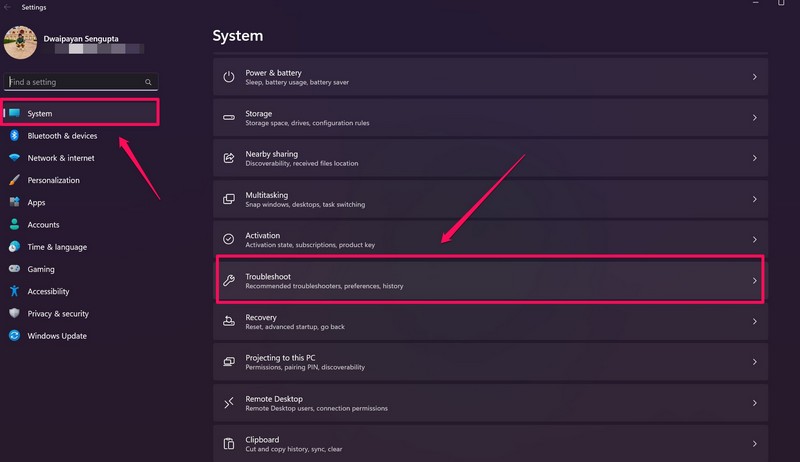
2.While in theSystemtab, go to theTroubleshootmenu.
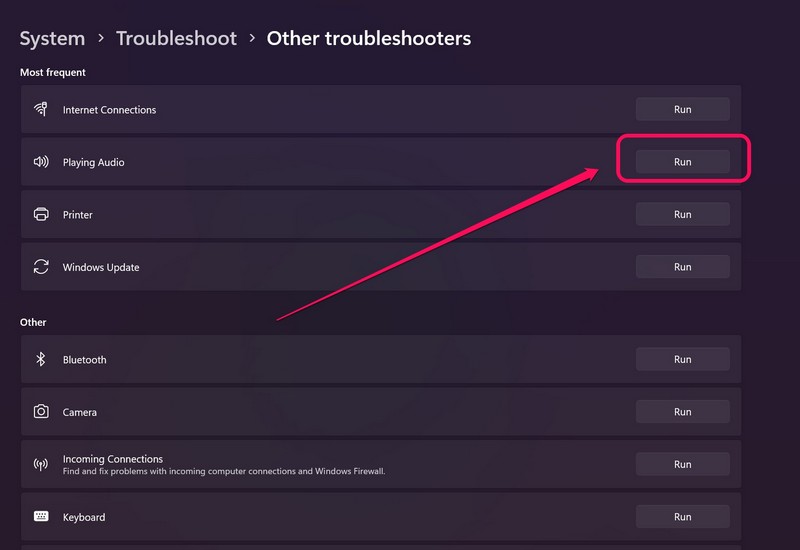
4.Now, find thePlaying Audiotroubleshooter on the list and click theRunbutton beside it.
5.Wait for the troubleshooter to complete the process.
The pairing process varies with headphones.
you might find it in the Troubleshoot options in Windows 11.
We hope one of the above methods helps you get the audio back on your headphones in Windows 11.