Some of them cannot even dive into the feature in the Windows Photos app.
Check out the following sections for all the details!
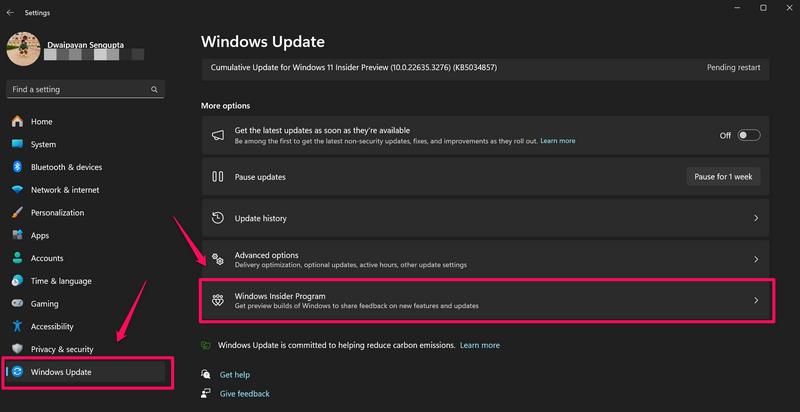
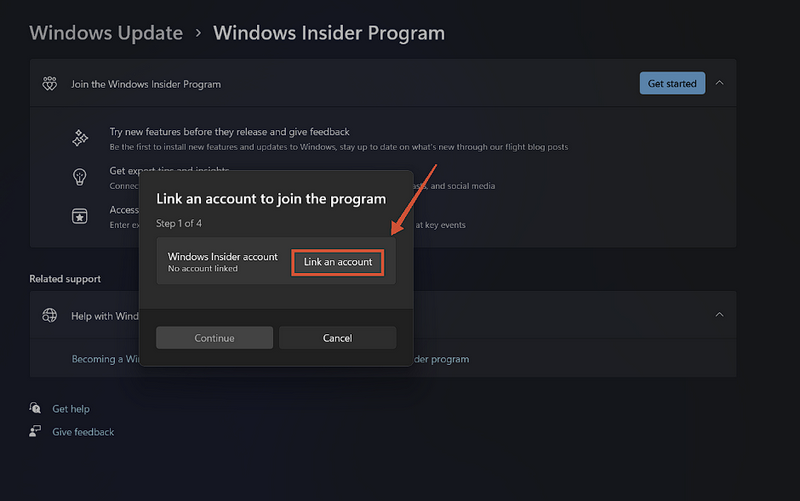
2.Go to theWindows Updatetab on the left navigation bar and click theWindows Insider Programsection.
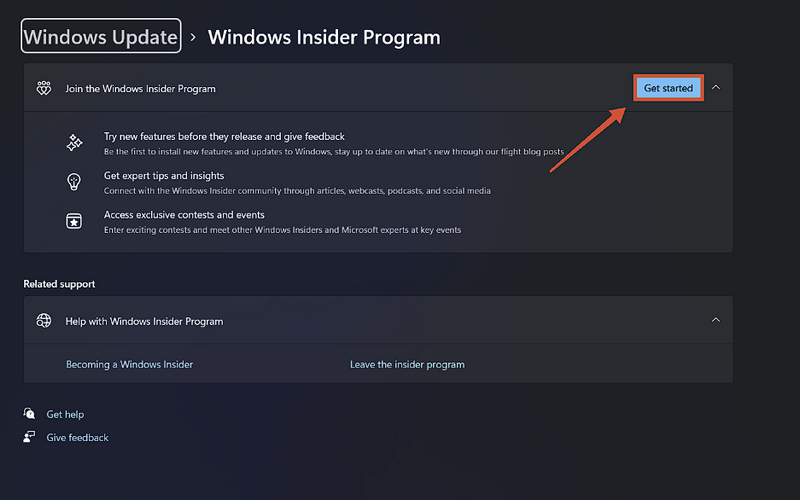
4.Use your Microsoft account toenroll in the Windows Insider Program.
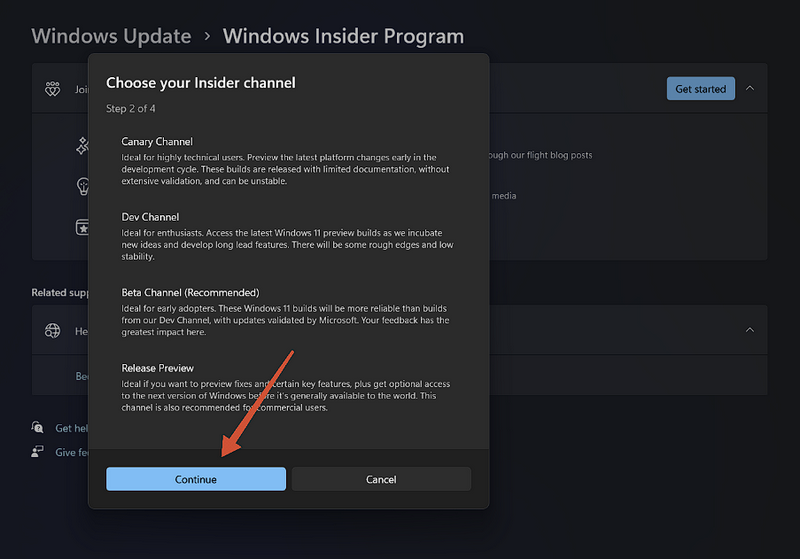
5.After linking your Microsoft account to the Windows Insider Program, choose theBeta Channeland click theContinuebutton.
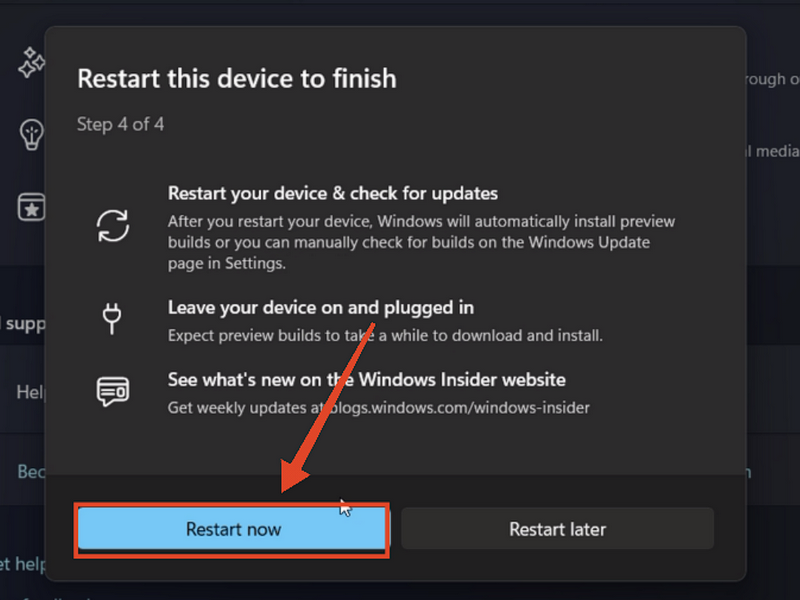
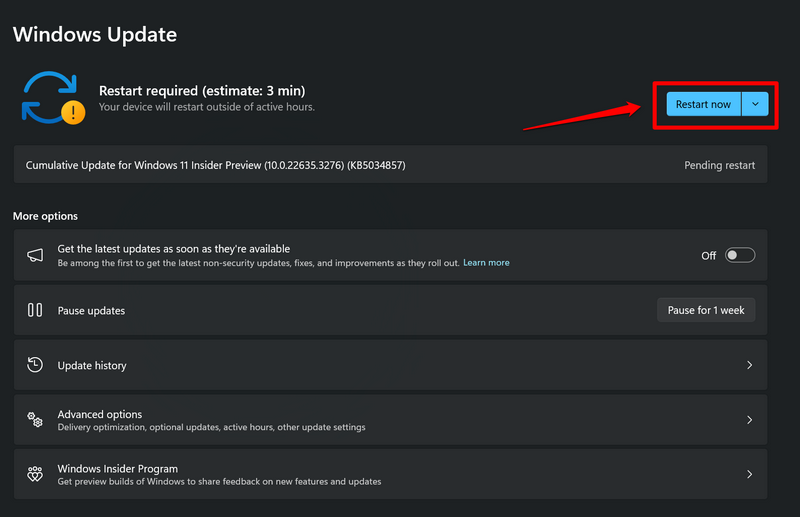
6.You will need torestart your Windows 11 PC or laptopand roll out the latest Windows preview build.
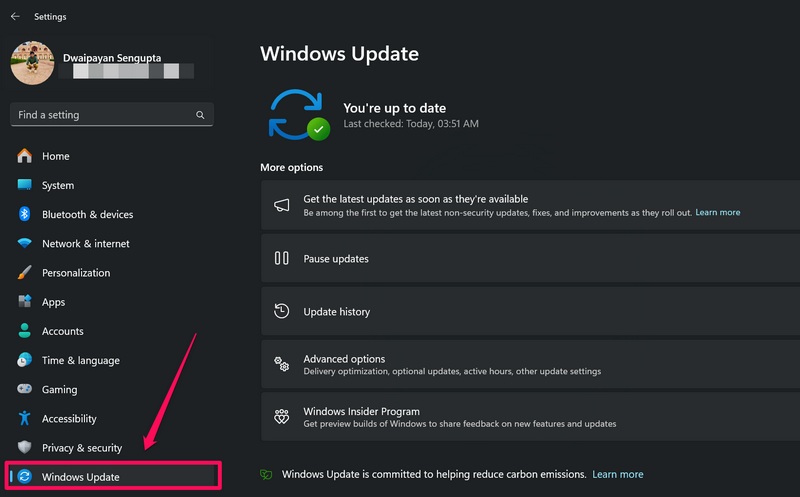
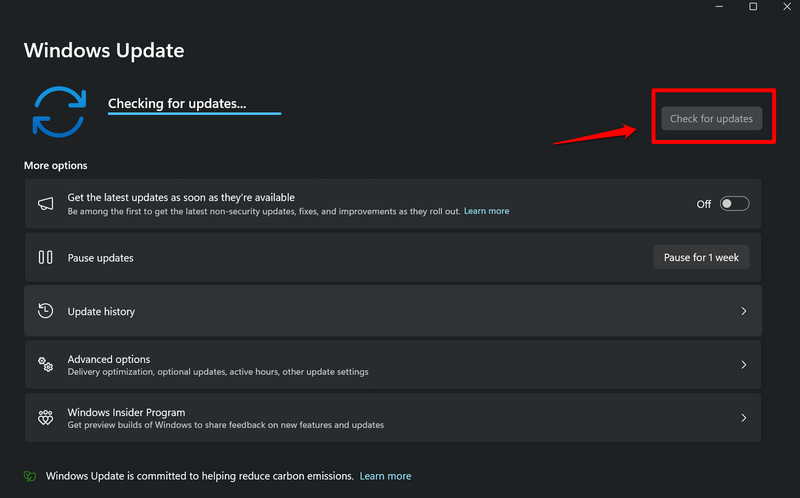
2.Go to theWindows Updatetab on the left navigation bar.
3.Click theCheck for updatesbutton.
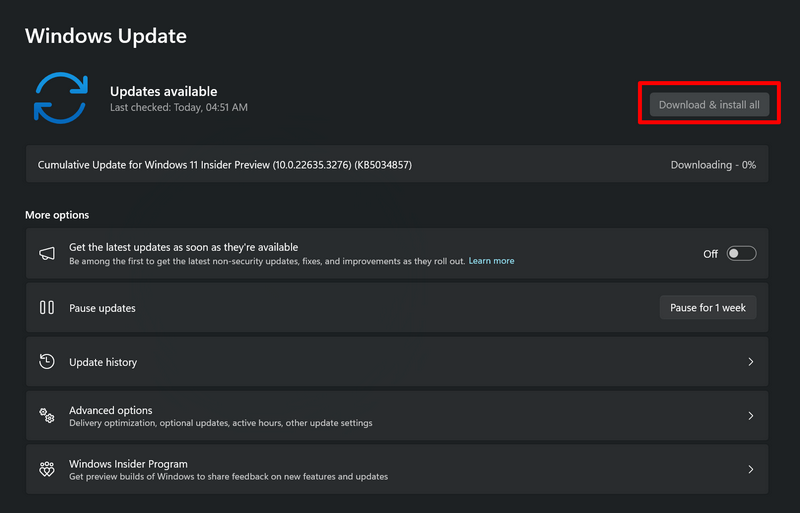
4.Once the latest Windows preview build is available, click theDownload and installbutton to initiate the update.
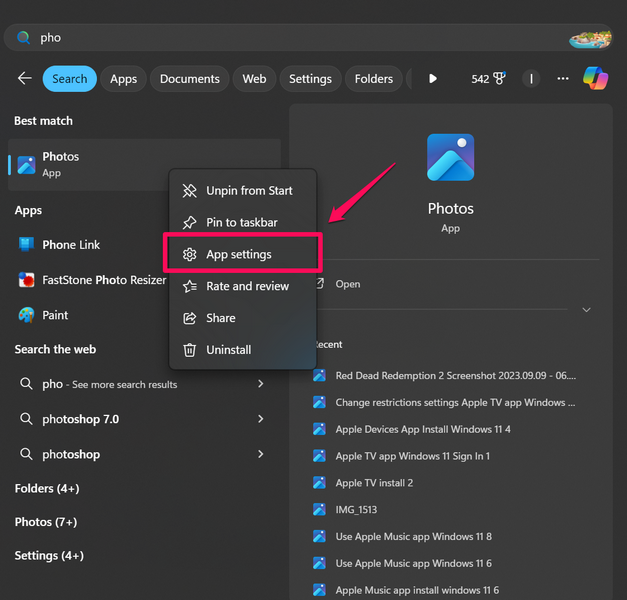
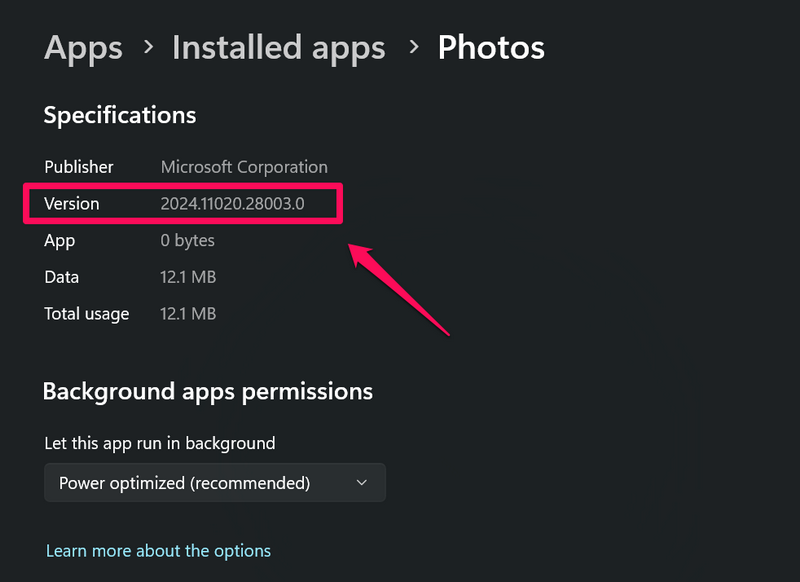
2.Right-punch the appand choose theApp settingsoption on the context menu.
3.On the following page, see to it theVersion numberis2024.11020.21001.0 or higher.
If it is updated, you could proceed to the next fix.
If not, you could continue with the next steps toupdate the Photos appon your Windows 11 gear.
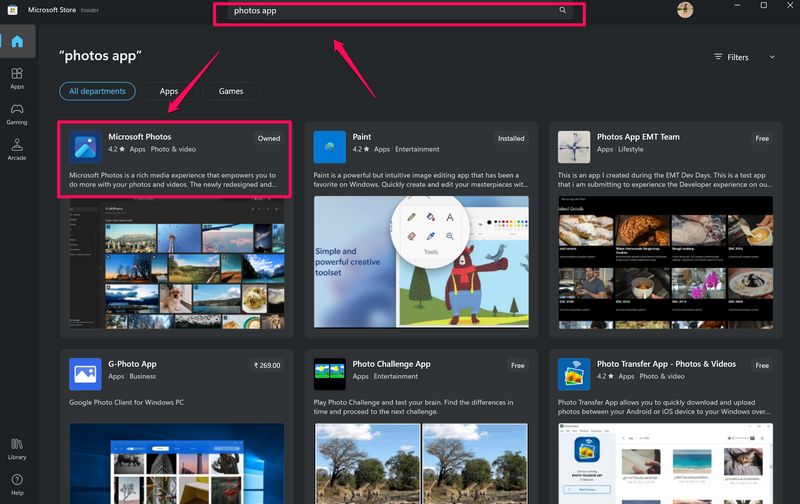
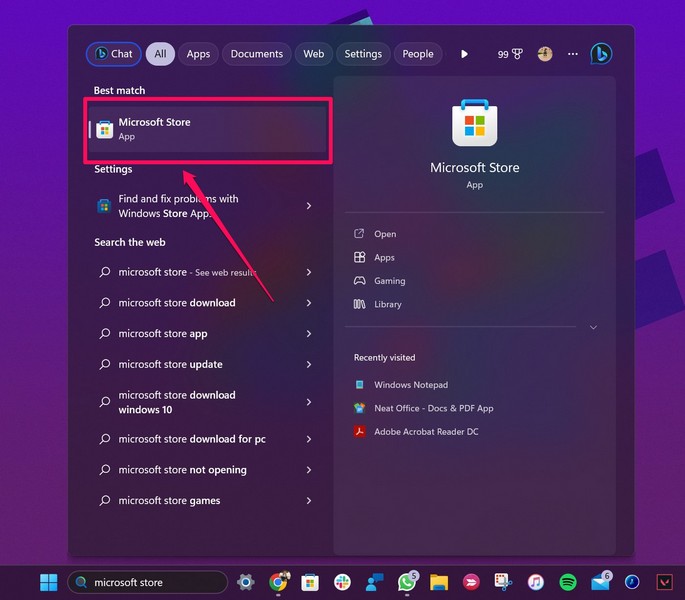
Locate the Microsoft Storeon your PC or laptop andclick it to launch.
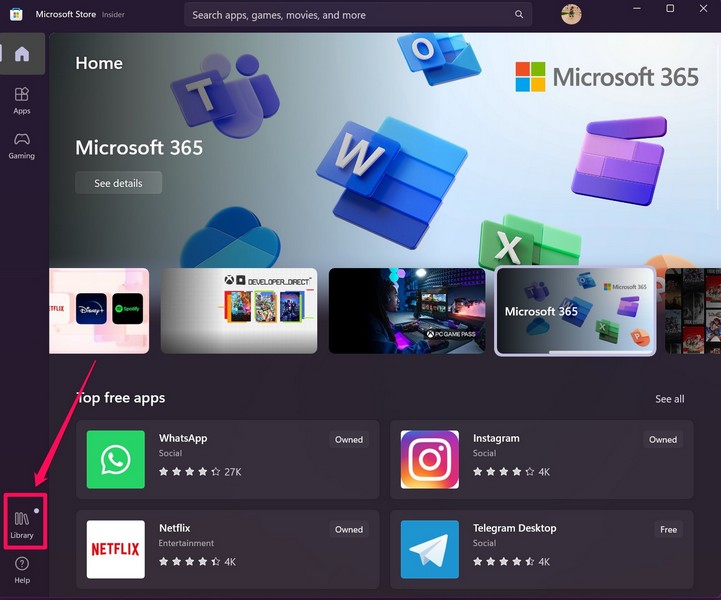
5.Go to theLibrarysection from the left nav bar.
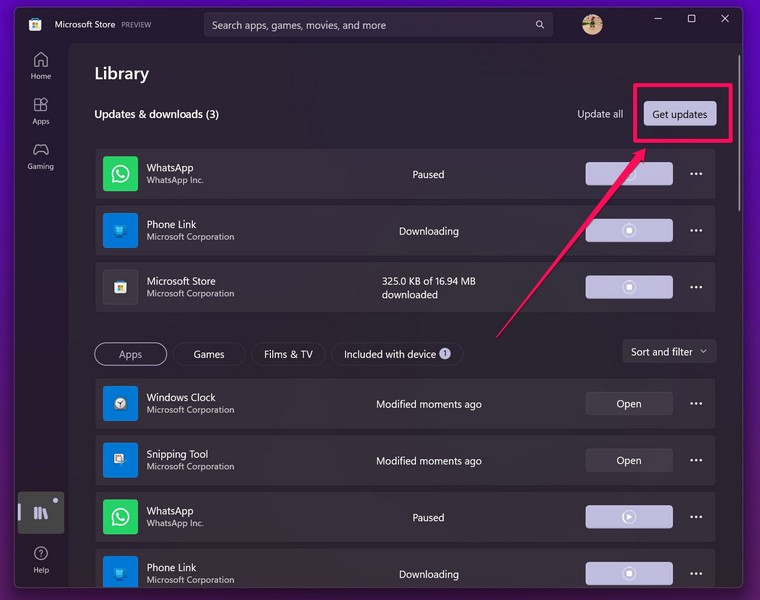
6.find out if there is anupdate available for the Photos appor not.
7.If you dont find it immediately, click theCheck for updatesbutton.
8.Once the Photos app update is available, click theGet buttonbeside it to get it installed on your gadget.
What we mean by this is that the tool requires the necessary hardware to operate properly.
Earlier this year, Microsoftset the baseline DRAM requirementfor AI features in PCs and laptops at 16GB.
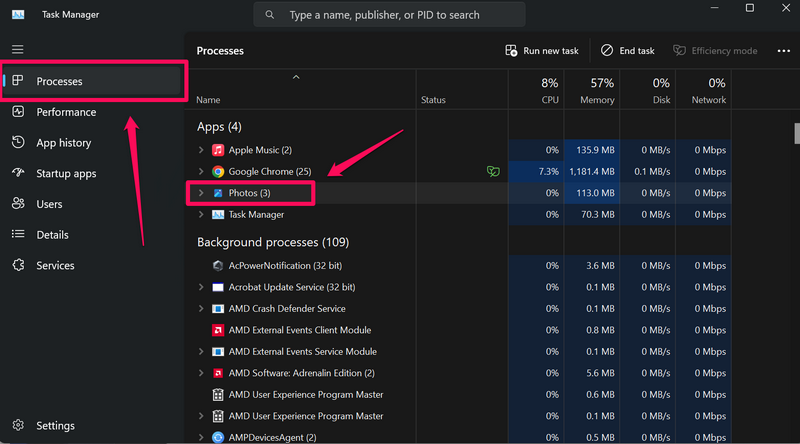
2.In theProcessestab on the left nav bar, locate thePhotos appunder theAppssection.
3.Left-select itto select and then hit theEnd Task buttonat the top.
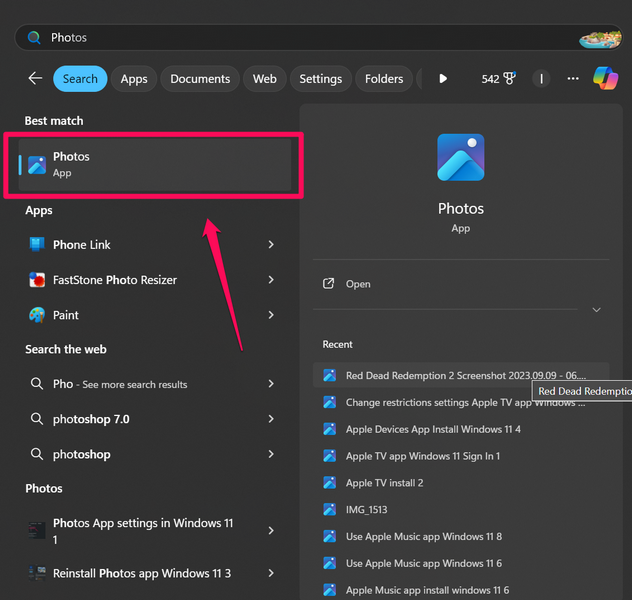
4.Next, useWindows + Sto open Windows search, locate thePhotos app, andclick it to relaunch.
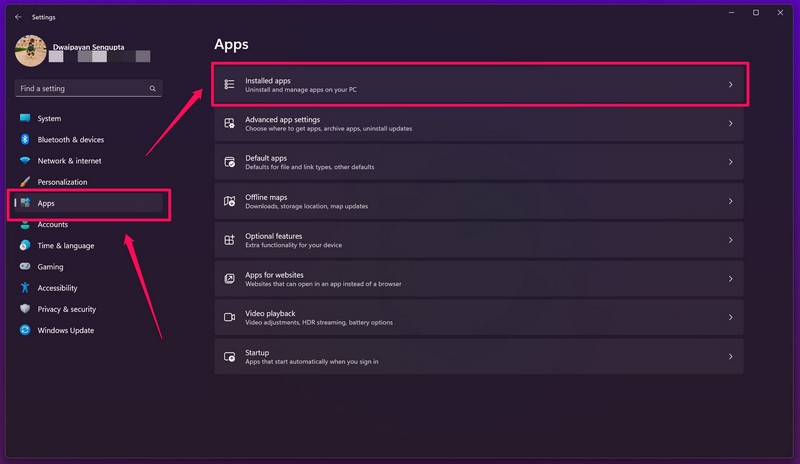
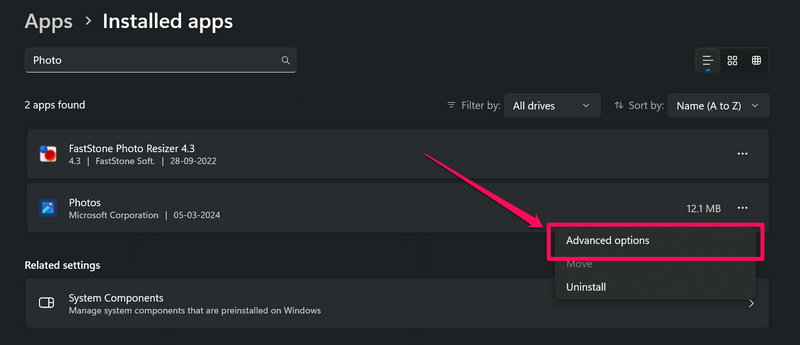
2.Go to theAppstab on the left nav bar and select theInstalled appsoption on the right pane.
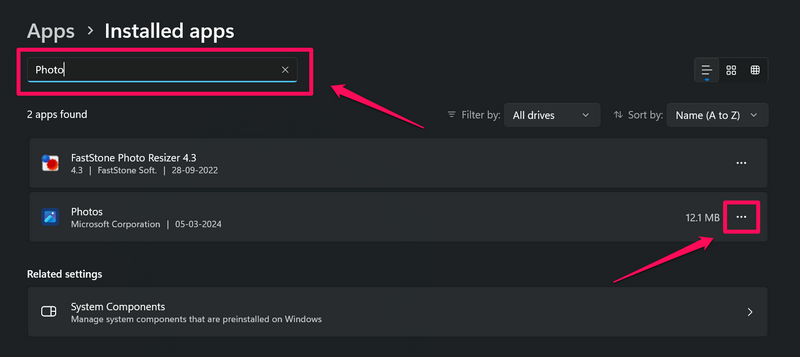
Use the search barabove tolocate the Photos appandclick the three-dot buttonnext to it.
4.ClickAdvanced optionson the context menu.
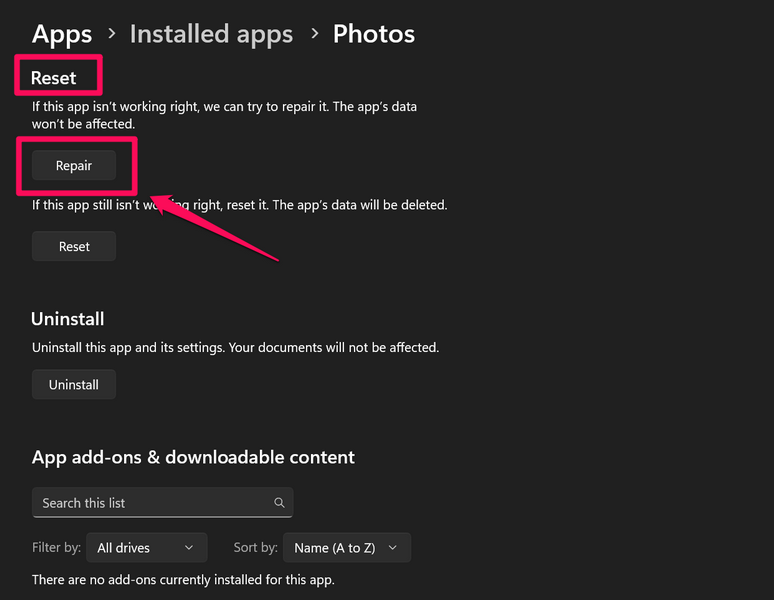
5.On the following page, scroll down to theReset sectionand click theRepair button.
6.Wait for the Repair process to complete.
7.After it is completed,try using the Generative Erase toolin an image.
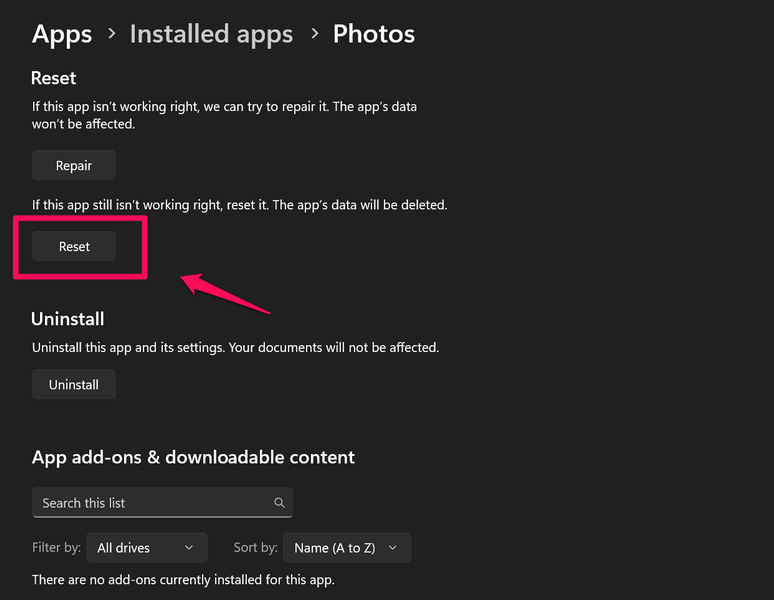
It is worth noting that resetting the app will delete all the app data from your PC or laptop.
This will delete all the app data from your machine and freshly implement the Photos app.
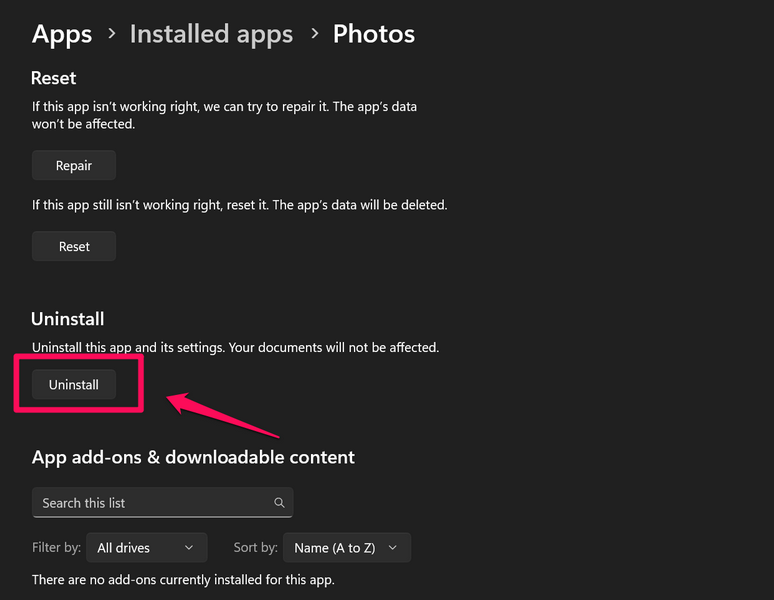
2.Click theUninstall buttonat the bottom of the page.
3.Confirm your actionon the following prompt.
4.Wait for the app to be uninstalled.
5.Next,locate the Microsoft Store appon your equipment andclick it to launch.
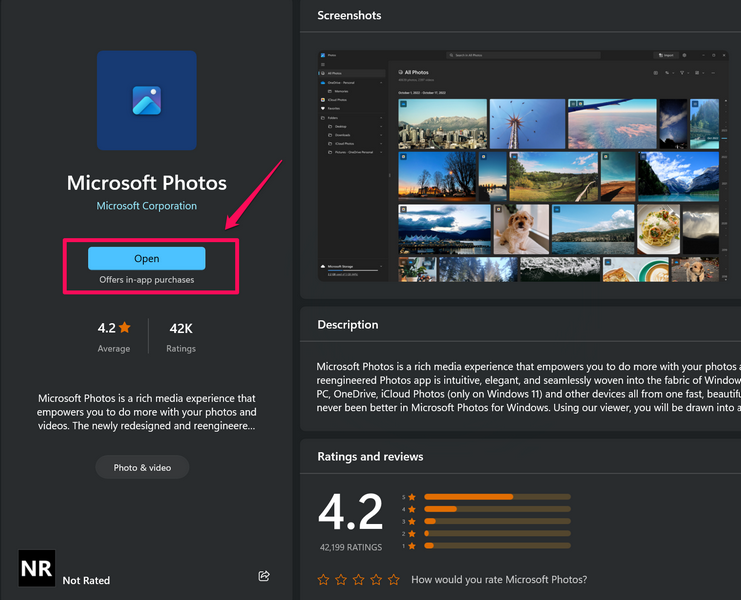
6.Use the search barabovetofind the Microsoft Photos appand click it from the search results.
7.Click theInstall buttonto re-install it on your Windows 11 PC or laptop.
8.Once the installation is completed, click theOpen buttonto launch the Photos app on your rig.
Now, open any image and check whether or not the Generative Erase tool is working properly.
FAQs
Why is Generative Erase not showing in the Photos app on Windows?
The new Generative Erase tool in the Photos app is currently available to Windows Insiders.
It also requires the Microsoft Photos app v2024.11020.21001.0 or higher on Windows.
Is Generative Erase available in the Photos app on Windows 10?
This will help the company improve the tool with future updates to the Photos app.