You see a quick restart closes all background apps and processes and resets the RAM.
This often resolves minor issues that might be preventing features like File Sharing to work in Windows 11.
To do this, follow the steps right below:
1.UseWindows + Ito open theSettings appin Windows 11.
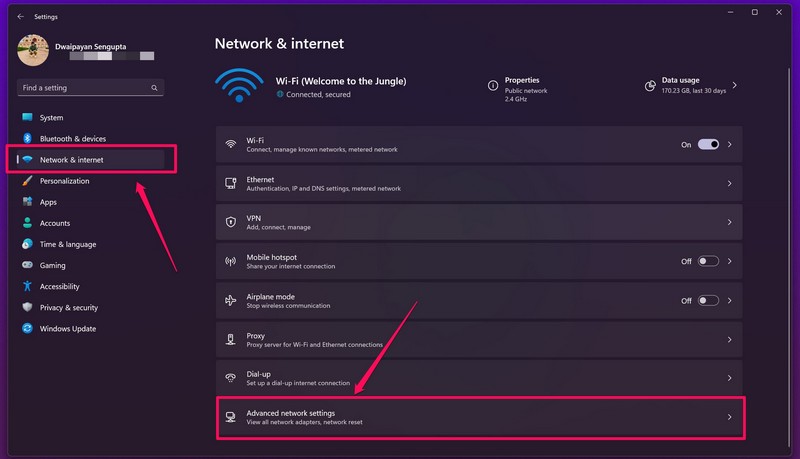
2.Go to theNetwork and internettab and click theAdvanced online grid settingsoption.
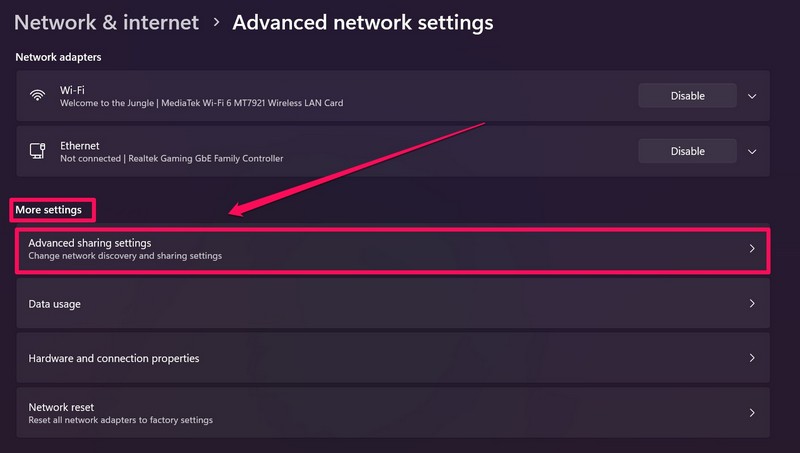
3.Under theMore settingssection, click theAdvanced sharing settingsoption.
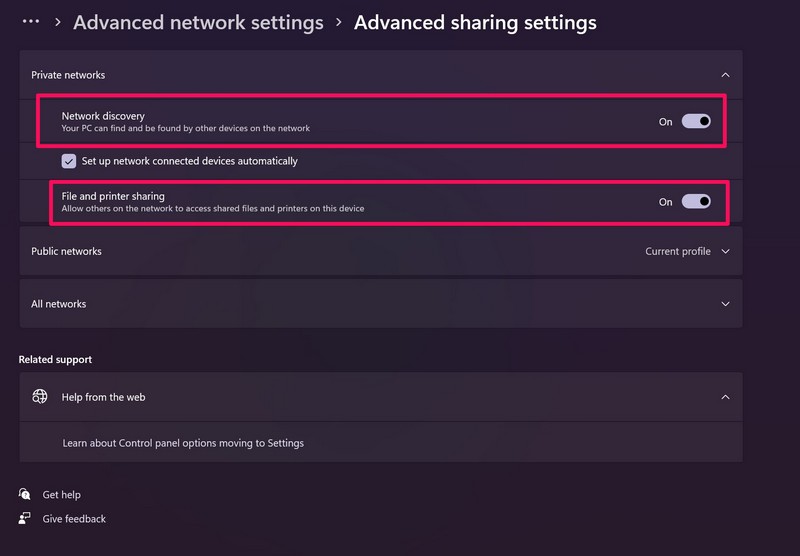
4.Here, under thePrivate Networksection, see to it that the toggles forNetwork discoveryandFile and printer sharingoptions are enabled.
If they are not enabled, hit each of them to enable them right away.
It should work fine now.
If not, move on to the next fix.
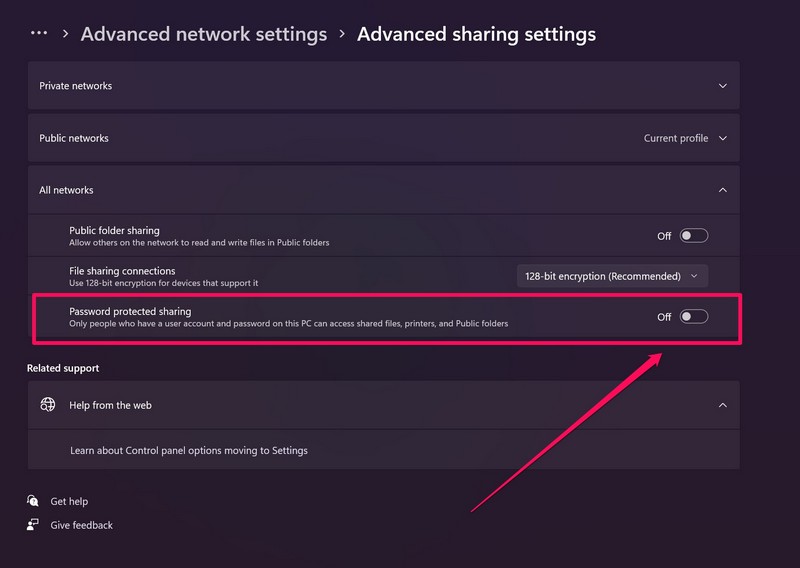
2.Now, expand theAll networkssection.
3.Next, verify that the toggle for thePassword protected sharingoption is turned off.
If it is not, hit the toggle to disable it.
You should now be able to send files over your web connection.
If, however, you still cannot, proceed to the next fix.
In this case, you should probably change the connection-punch in in the File Sharing tweaks in Windows 11.
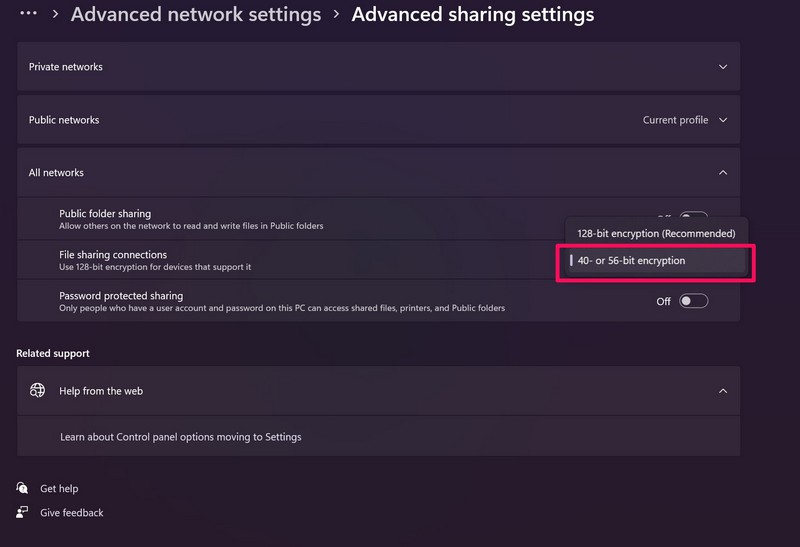
3.Now, poke the drop-down option forFile sharing connectionsand set it to40- or 56-bit encyptionsetting.
If it is not fixed, proceed to the next fix.
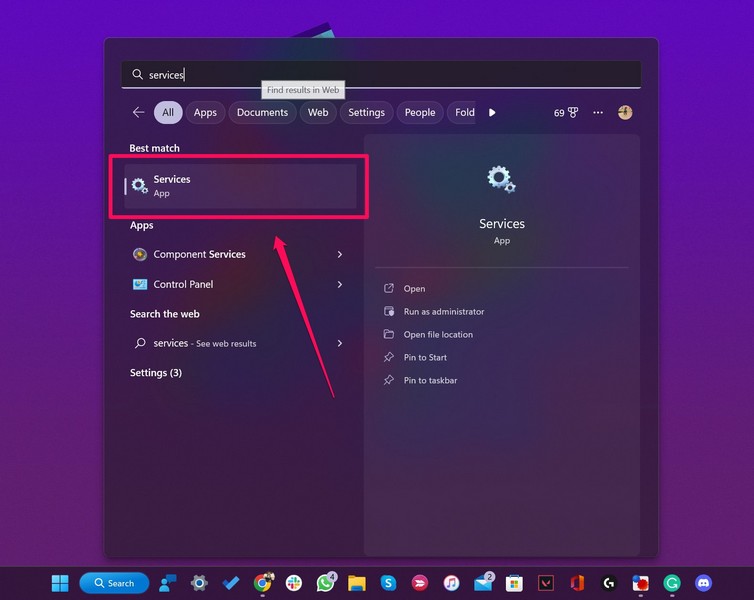
2.Click theServices appfrom the search results.
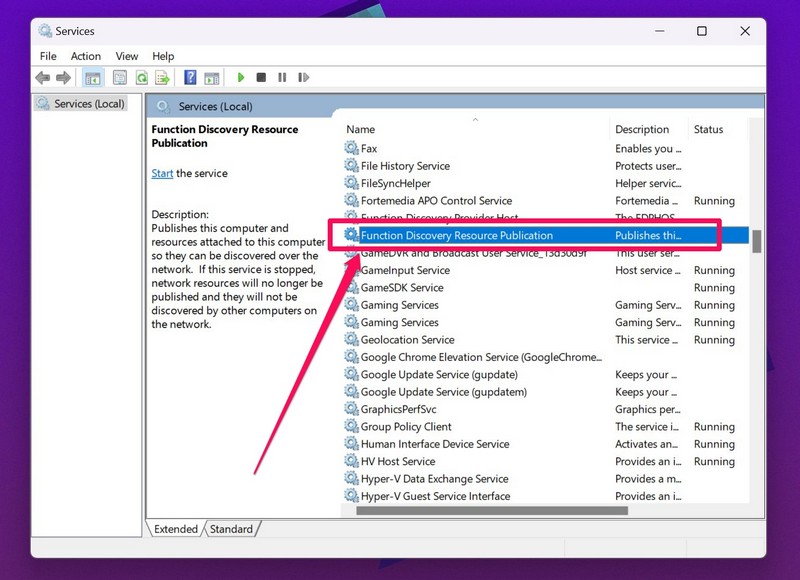
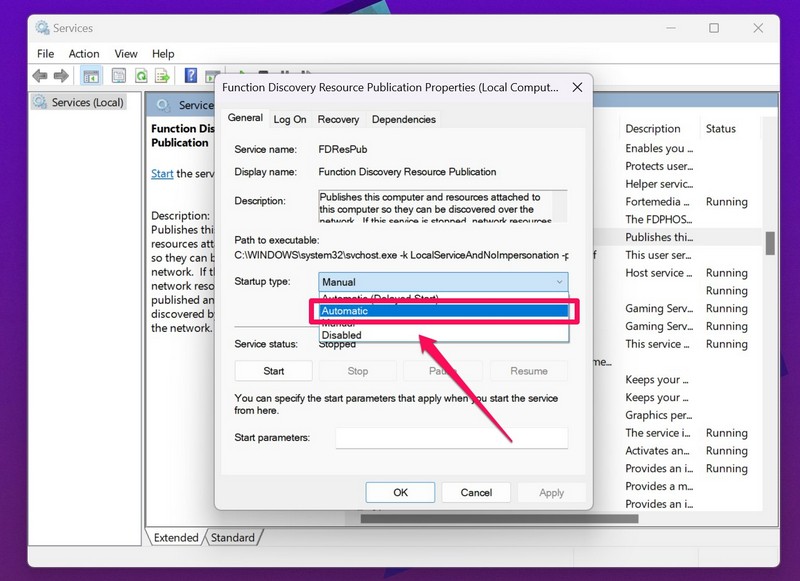
3.Now, on the right pane, find theFunction Discovery Resource Publicationservice.
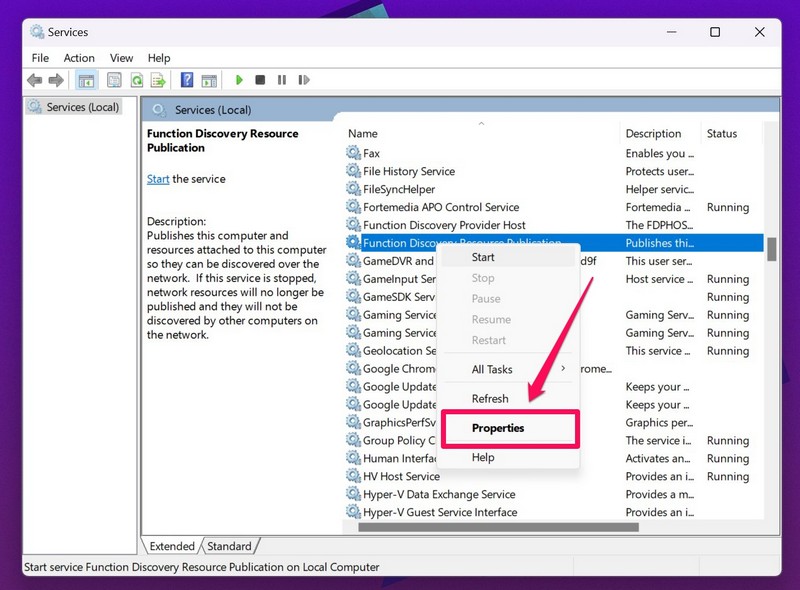
Right-clickon the FDRP service and click onPropertiesfrom the context menu.
5.Now, tap the box beside theStartup typefield and selectAutomaticfrom the drop-down menu.
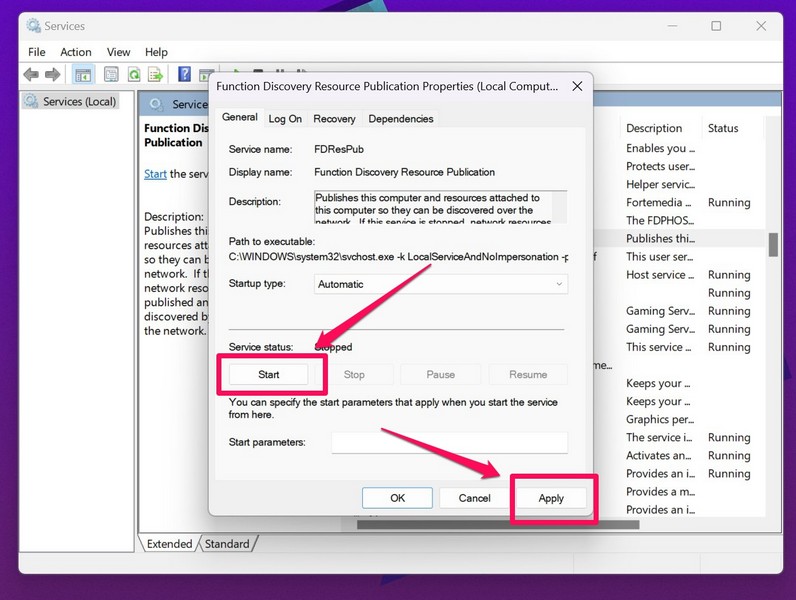
6.Next, click theStartbutton and then click theApplybutton to save the changes and exit the Services app.
7.Restartyour Windows 11 PC or laptop.
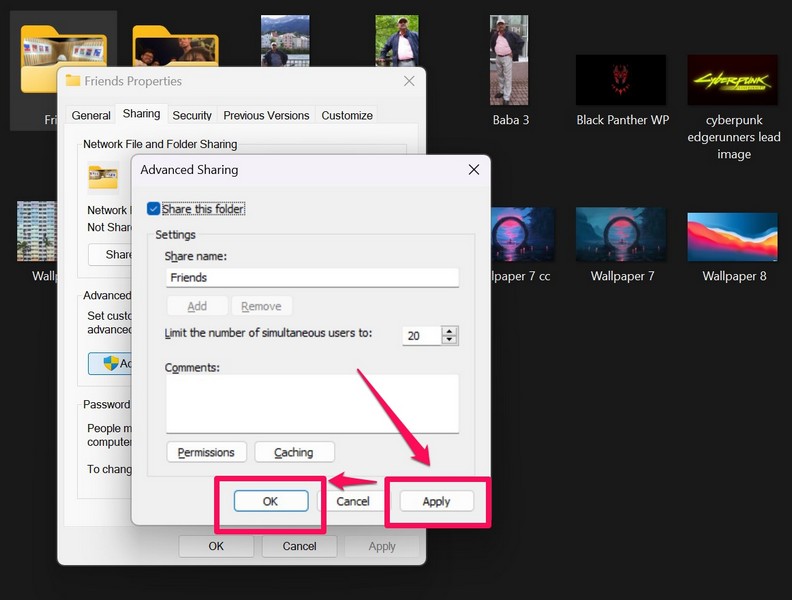
To do this, follow the steps right below:
1.Open File Explorer in Windows 11.
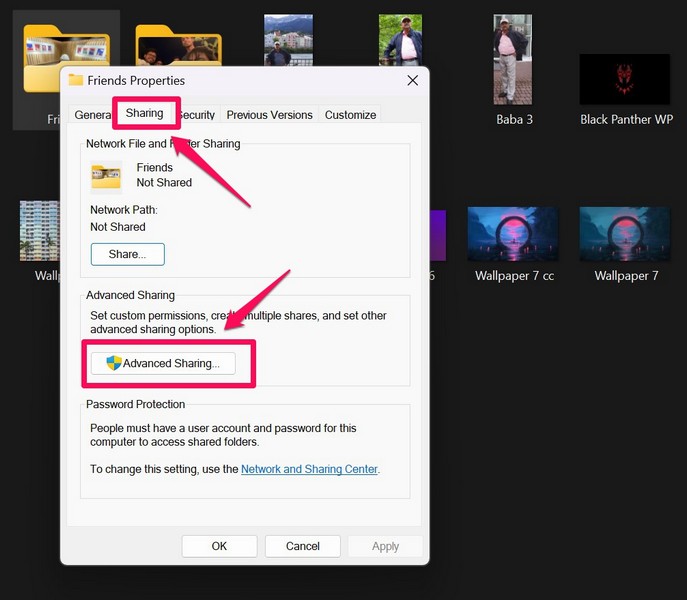
2.Right-clickon the folder that you want to share and selectPropertiesfrom the context menu.
3.Under theSharingtab, click theAdvanced Sharing…button.
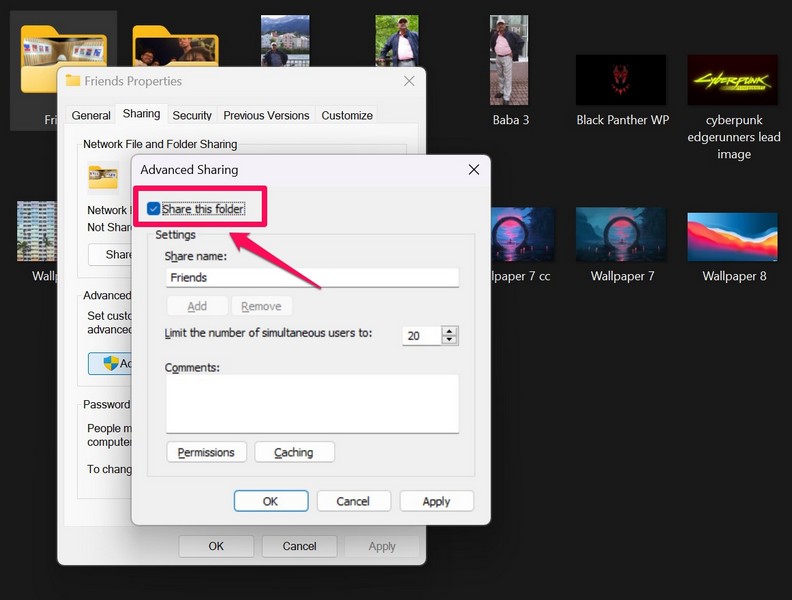
4.Here, check the box for theShare this folderoption to enable it.
5.Now, click theApplybutton to save the changes and click theOKbutton next to exit the folder properties window.
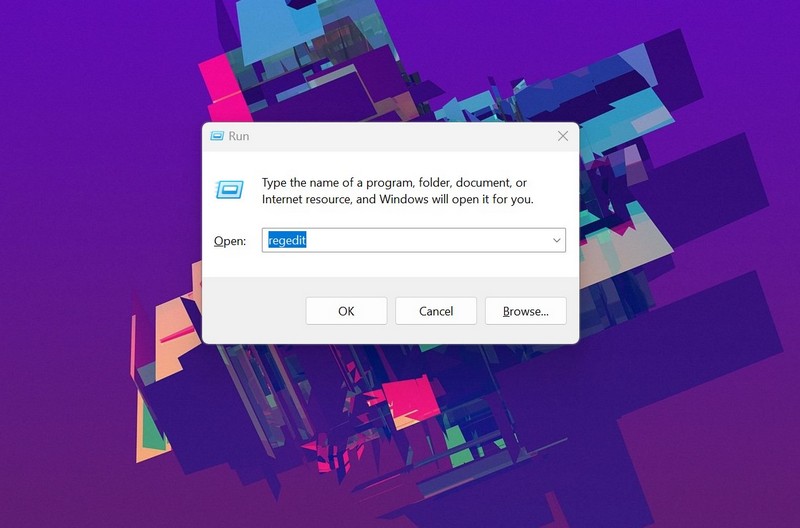
Use Registry Edit in Windows 11
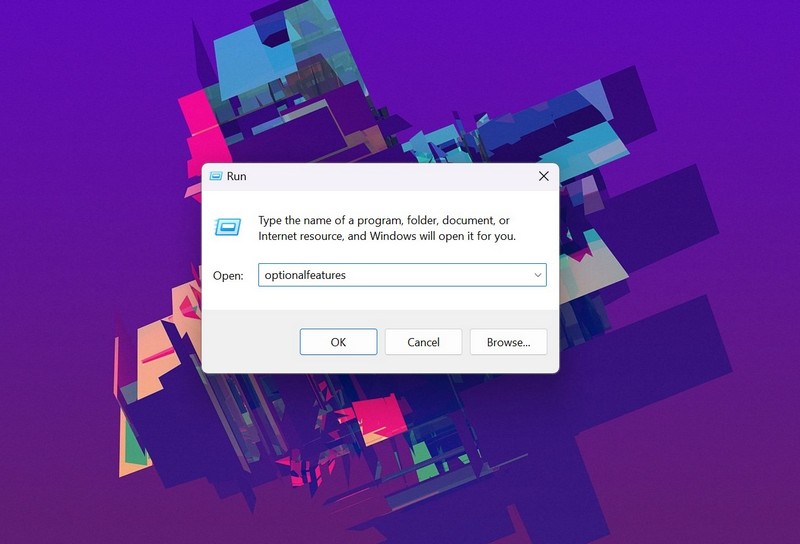
1.Use theWindows + Rshortcut to open theRuntool.
2.punch in in regedit (without quotes) and pressEnterto open it.
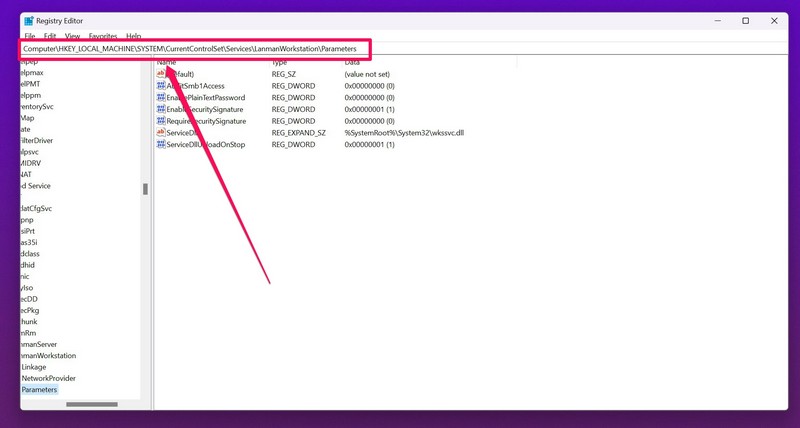
ClickYeson the Windows admin prompt.
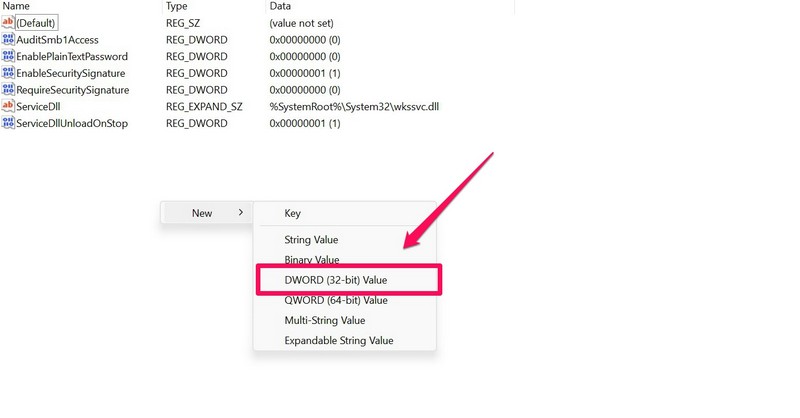
5.Under theNewoption, select theD-WORD (32-bit) Valueoption to create a new key.
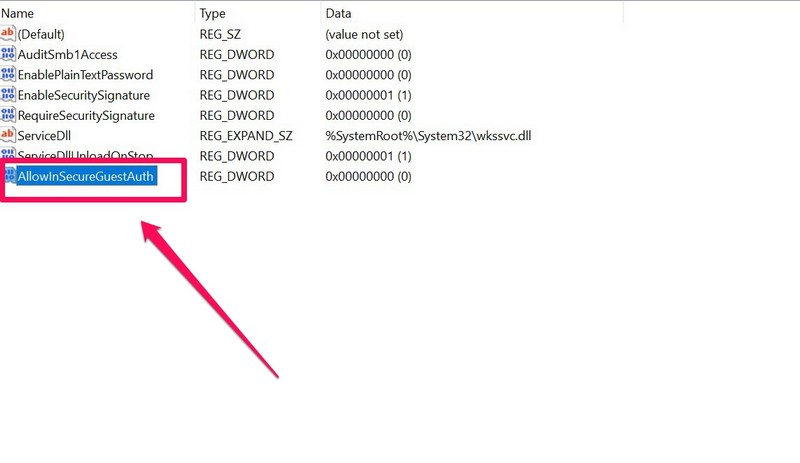
6.Once it is created, name itAllowInSecureGuestAuth.

Double-click itto open its properties.
8.Under theValue datafield, throw in in1and click theOKbutton.
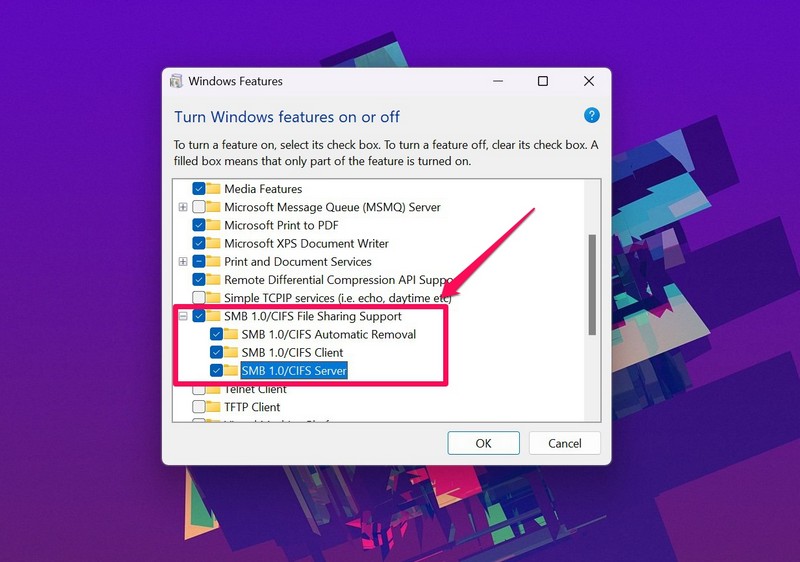
4.Wait for Windows to initiate the protocol on your PC or laptop.
It will prompt you torestart your deviceafter completion.
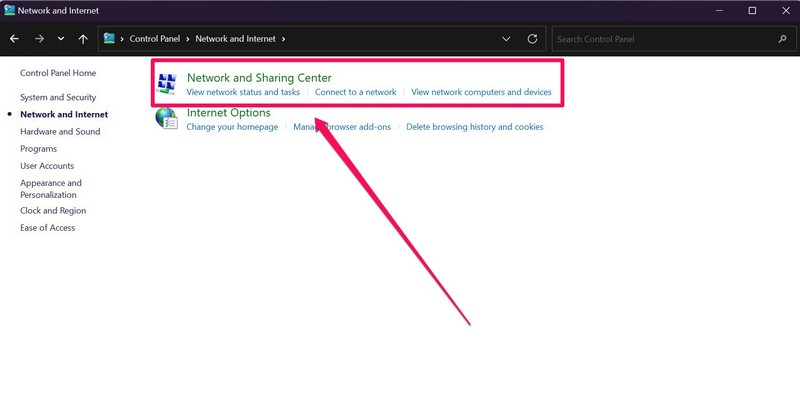
To do this, follow the steps right below:
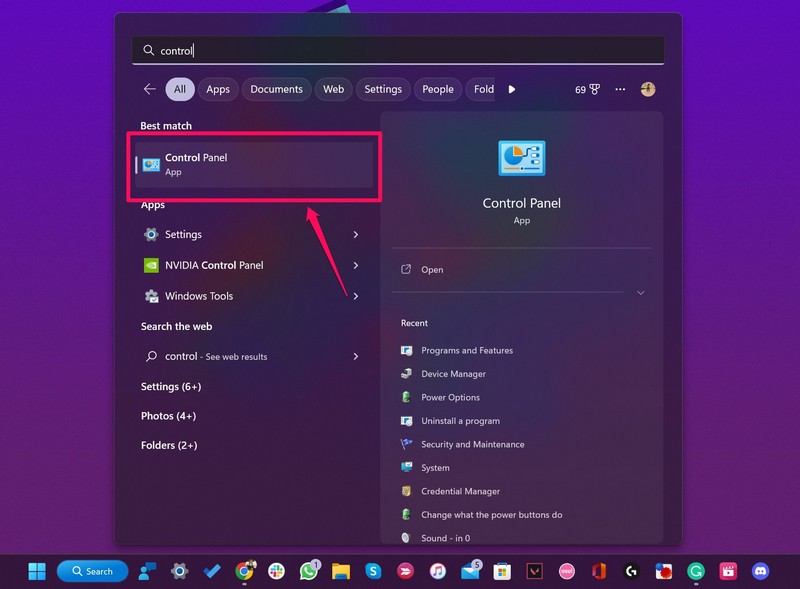
1.UseWindows + Sto open Windows search.
2.Search forControl Paneland grab the system from the search results.
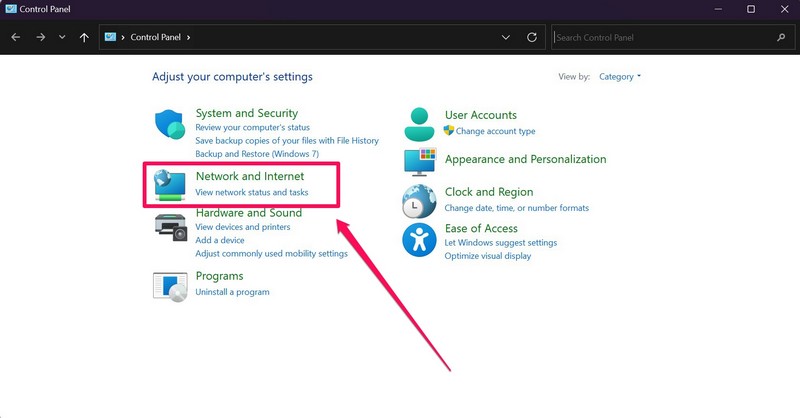
3.Go to theNetwork and internetoption.
4.Click theNetwork and Sharing Centeroption.
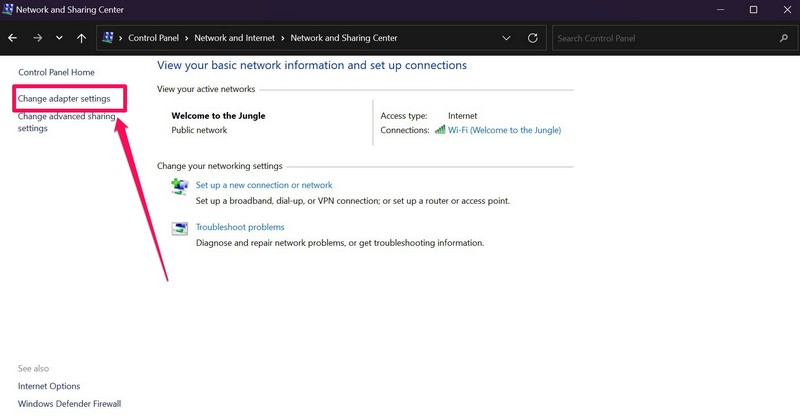
5.On the left pane, click theChange adapter settingsbutton.
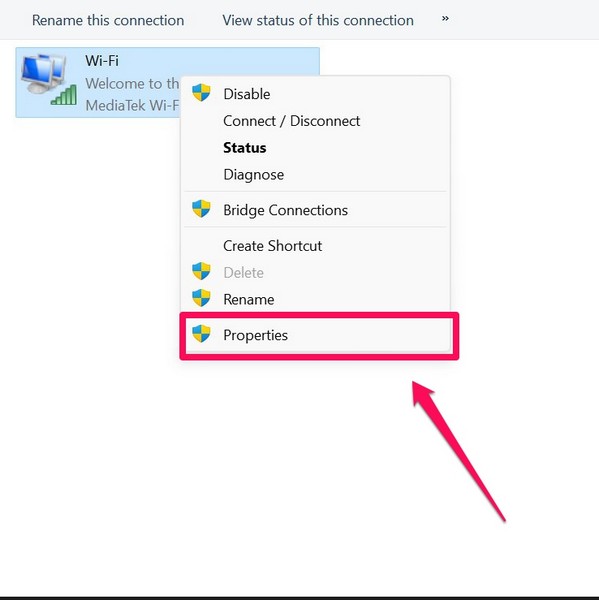
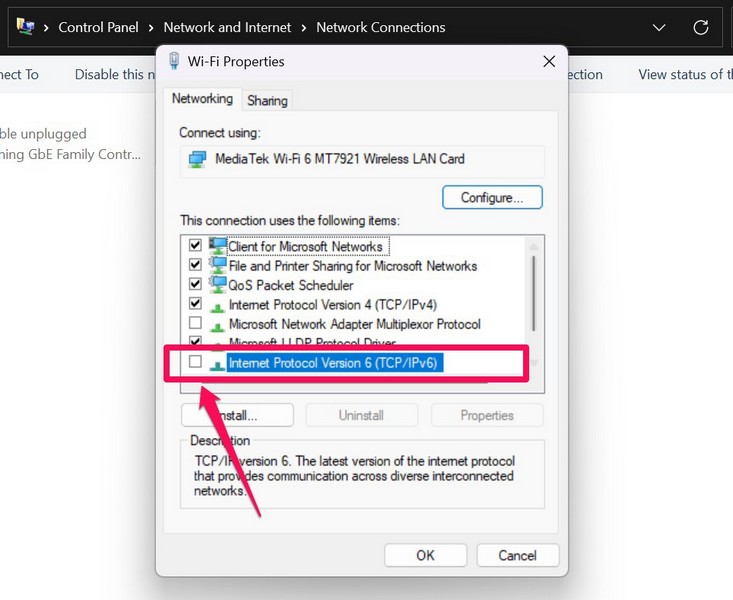
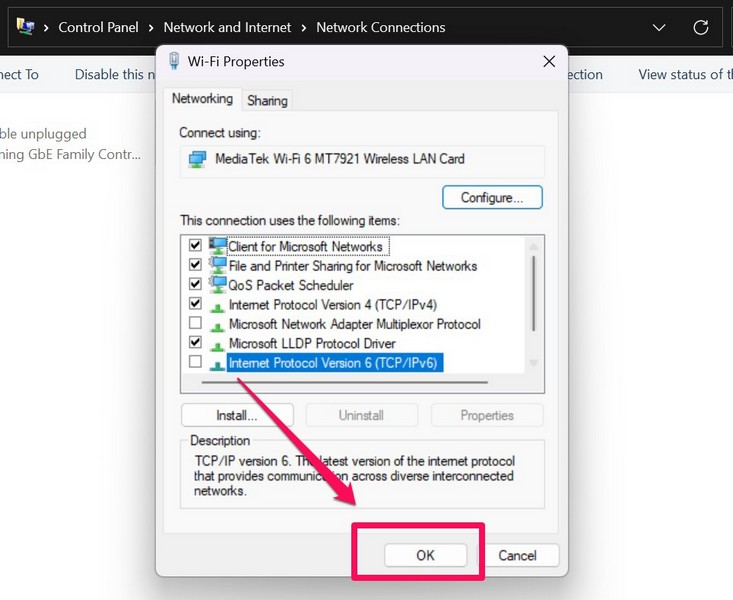
6.Now,right-clickon your active data pipe connection and selectPropertiesfrom the context menu.
If it is checked, click to uncheck it.
8.Lastly, click theOKbutton to save the change.
9.Restartyour Windows 11 machine.
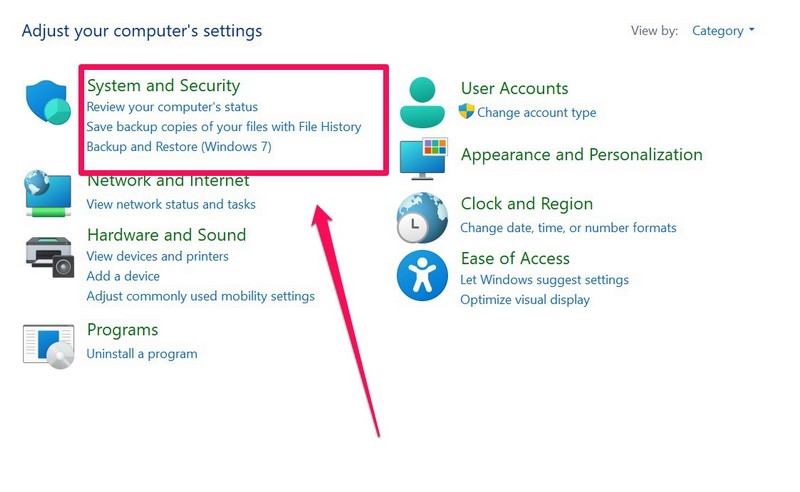
2.Go to theSystem and Securityoption.
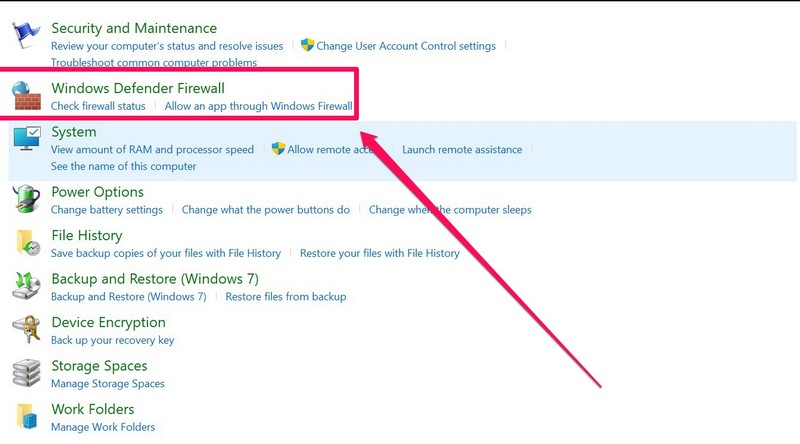
4.On the left pane, click theAllow an app or feature through Windows Defender Firewallbutton.
5.Next, click theChange settingsbutton.
6.Now, find theFile and Printer Sharingoption on the list.
7.confirm that thecheckbox for Private is checkedfor the File and Printer Sharing option.
If it is not, click it to check it.
8.Lastly, click theOKbutton below to save the change.
It should be working fine, considering Windows Firewall was causing all the issues.
Frequently Asked Questions
Why is File Sharing not working in Windows 11?
Where can I adjust file-sharing options in Windows 11?
Here, you’re free to adjust your file-sharing tweaks for private and public networks.