We can change our PCs desktop background as per our liking.
But at times, when wecustomize the computers desktop background, it reverts to a specific picture.
When these kinds of issues appear, we usually ignore them and re-set the wallpaper.

If youre currently experiencing a similar issue and want to get rid of it, fret not.
Here in this fixes guide, well share someworkaroundswith youto fix desktop background keeps changing issue in Windows 11.
So, read ahead and learn to fix desktop background keeps changing in the latest Windows 11.

Why Does Desktop Background Keep Changing in Windows 11?
There could be several reasons for the desktop background changing again and again after setting it in Windows 11.
Here in this section, well share some of the most common reasons for it.
In this section, well mention all thepotential waysto prevent the PCs desktop background from changing repeatedly.
Thus, to fix them,power cycle your PC.
2.In theShut Down Windowsprompt, choose theRestartoption from the dropdown menu.

3.Once done, hitEnterto kickstart your Windows 11 PC or laptop and check the issues status.
We hope the PCs desktop background doesnt change after restarting the Windows 11 PC.
So, we suggest you disable it on your PC and peek if the desktop background still changes.
2.UnderPersonalization, chooseBackgroundand setPersonalize your backgroundtoSolid color.
3.ExitSettings, and then cycle your Windows 11 PC to see if the background still changes.
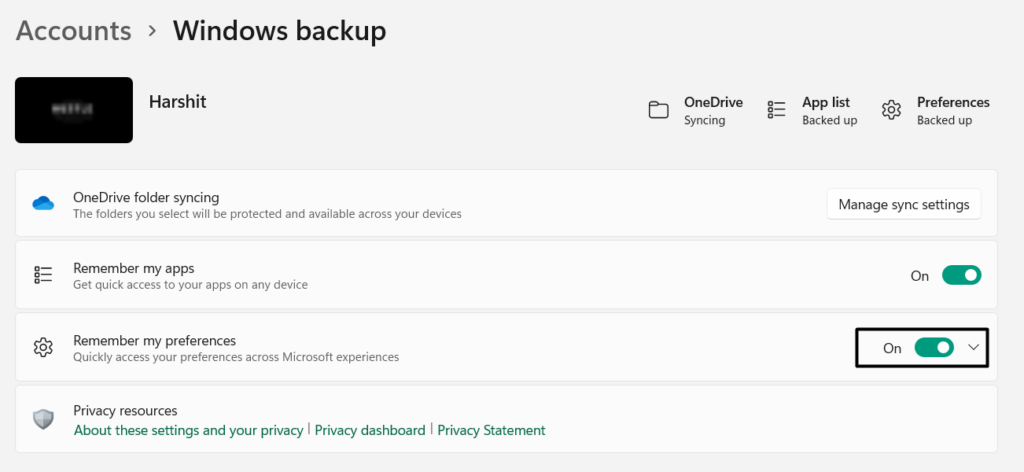
Thus, we suggest you ensure that your PC isnt remembering the prefs to avoid this issue.
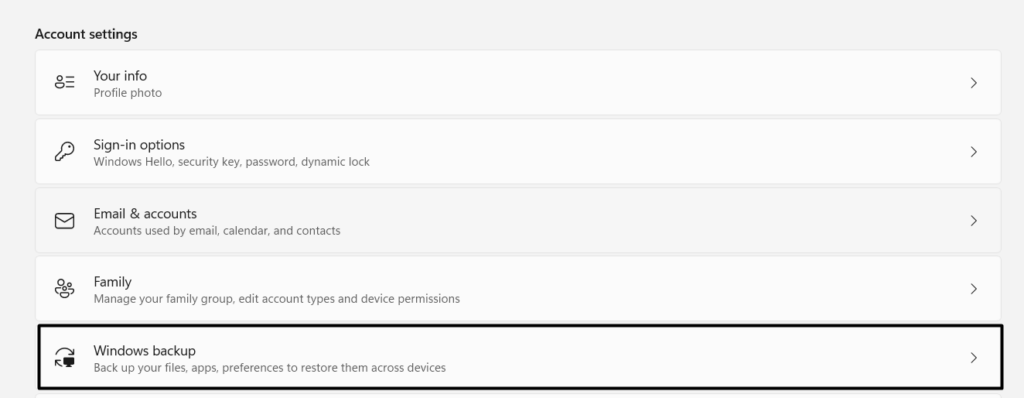
2.In theAccountswindow, select theWindows backupoption and expandRemember by preferences.
3.UnderRemember by preferences, disable theOther Windows settingstoggle and exit the controls app.
4.Finally, reboot your Windows PC or laptop and look to see if the wallpaper changes after the restart.
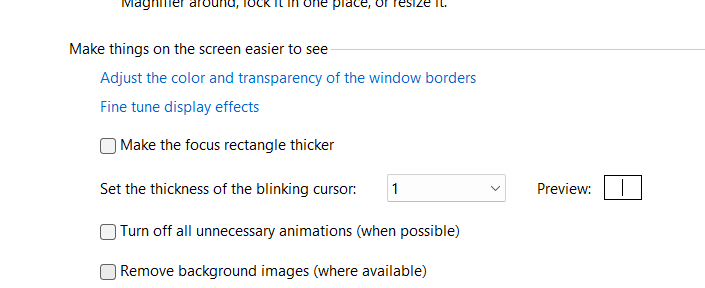
Due to this, we suggest youensure that this option is disabledon your system.
2.Choose theEase of Access Centeroption and then select theMake the computer easier to seeoption.
3.In theMake the computer easier to seewindow, uncheckRemove background images (where available).
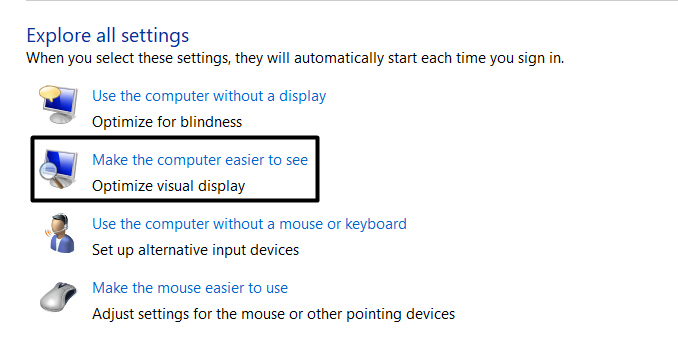
After making this change, clickApplyand thenOKto save the change.
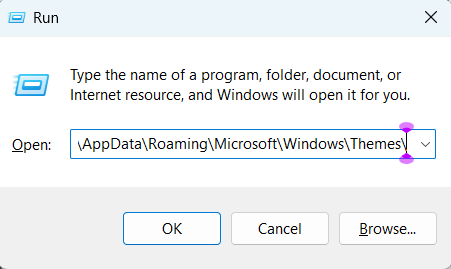
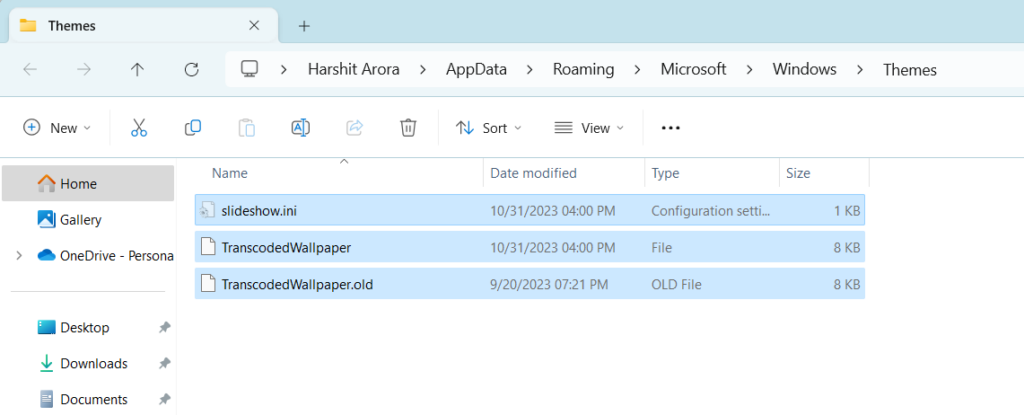
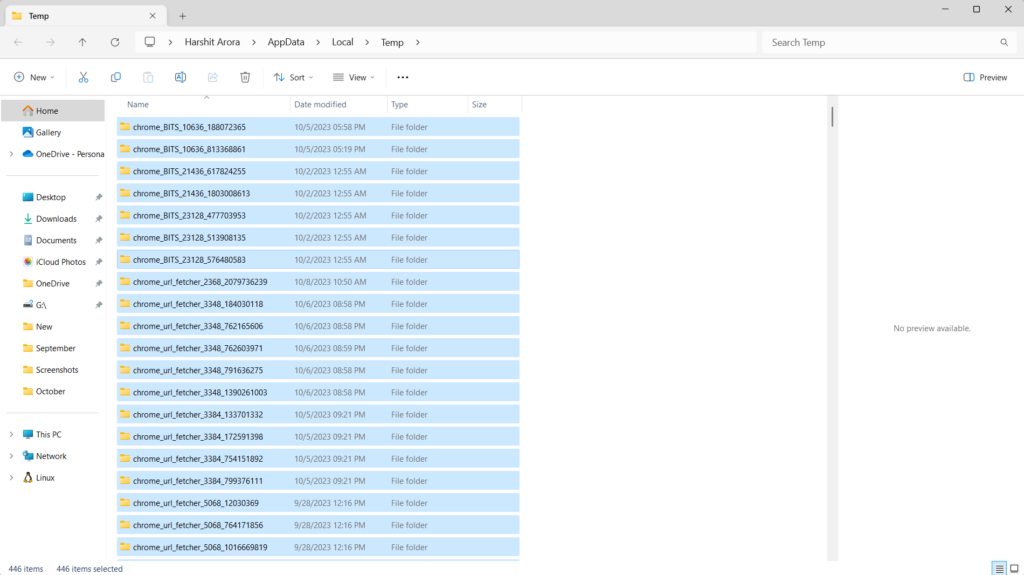
In that case, you need todelete themand verify if this fixes the issue on your PC.
3.In theThemesfolder, choose theViewoption and then selectHidden itemsfrom the dropdown menu.
4.PressCtrl + Ato select all the present folders, and then choose theBinicon in the top navigation menu.
5.After deleting the files, exitFile Explorerand check whether the wallpaper still changes.
3.SelectPolicieson the right, right-click it, and choose theNew > Keyoption from the dropdown menu.
4.Name the keyActiveDesktop,right-click it to fire up the menu, and selectDWORD (32-bit) Value.
5.Name the new valueNoChangingWallPaper,double-click it, and enter1in theValue datafield.
6.Lastly, clickOKto save the changes and fix desktop background keeps changing in Windows 11.

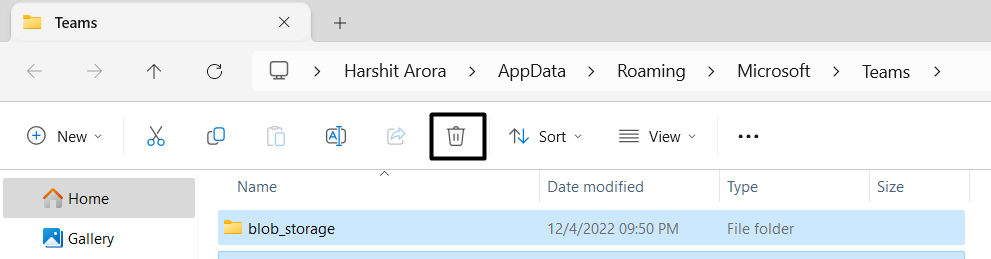
Its found that the corrupted files in this folder could also cause this issue.
2.Choose theViewoption and selectHidden itemsfrom the dropdown menu to view all the hidden files.
3.Find theAsusOledShifterfolder, open it, and select all the files with theWindows + Ashortcut.
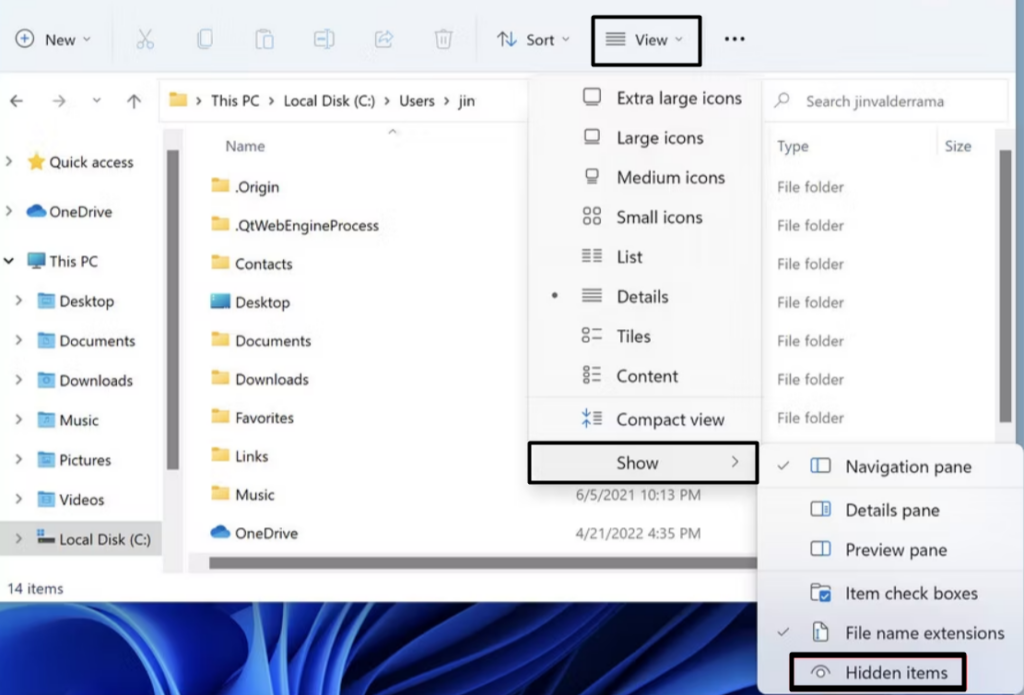
4.Right-click any selected files and choose theBinoption from the context menu to delete them.
5.start your Windows 11 PC and verify if the background is still changing again and again.
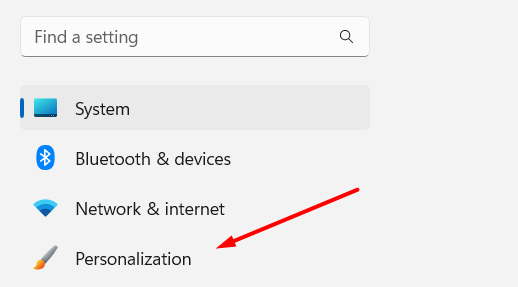
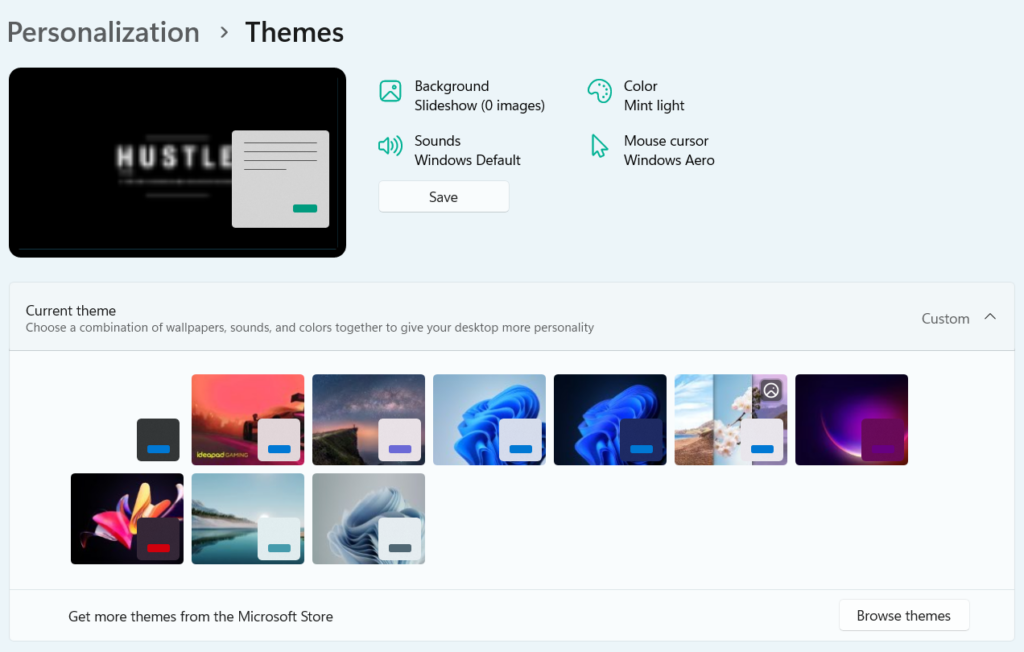
2.In thePersonalizationwindow, chooseThemesto expand the section and access all the available themes.
3.Choose any default theme and kickstart your Windows 11 PC to see if the wallpaper still changes.
So, this could be the same with you.
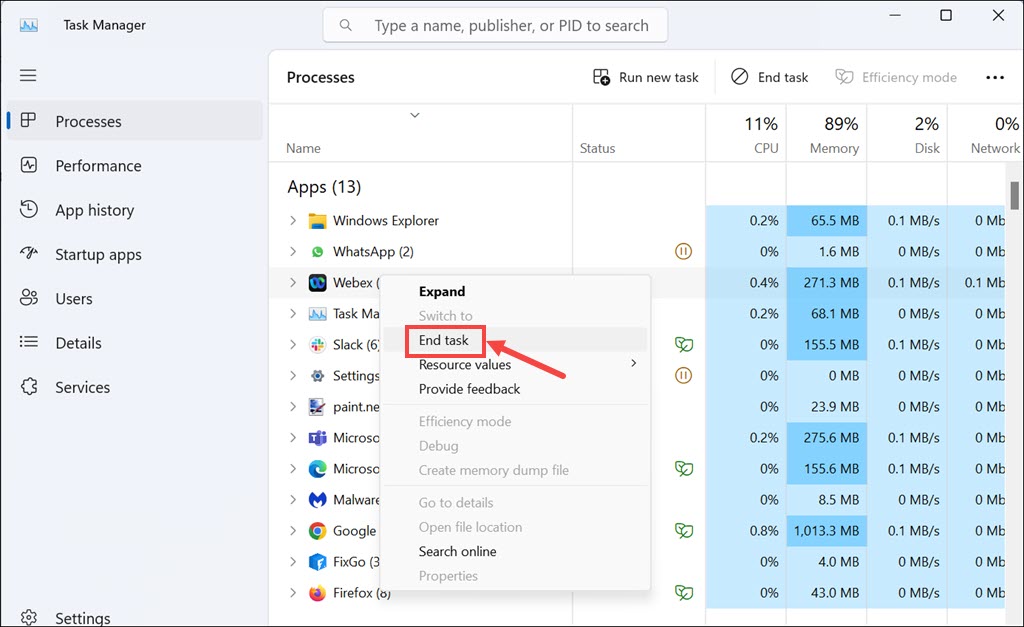
Thus, we suggest yourestart File Exploreron your PC.
2.Right-click theExplorer.exetask, and choose theEnd taskoption from the right-click or contextual menu.
3.After ending the process, launch theFile Explorer appto restart the task and fix the issue.
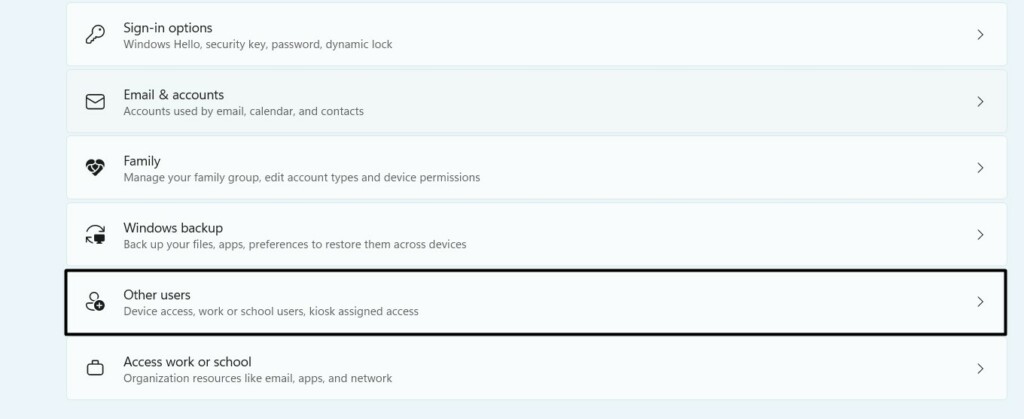
Create a New User Account
It may be possible that there are some problems with the user account.

Hence, this issue is appearing.
In that case, we suggest youcreate a new admin accounton your PC to see if thats the case.
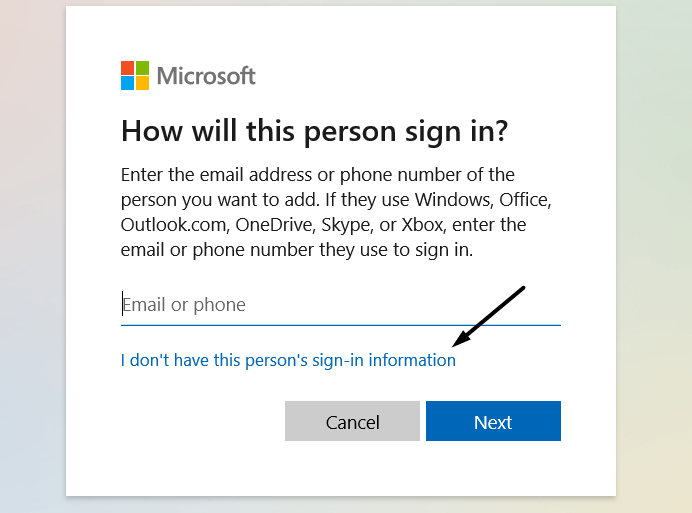
2.Move to theAccountssection of theSettings appfrom the left and then select theOther usersoption.

3.Choose theAdd accountoption and select theI dont have this persons sign-in informationoption.
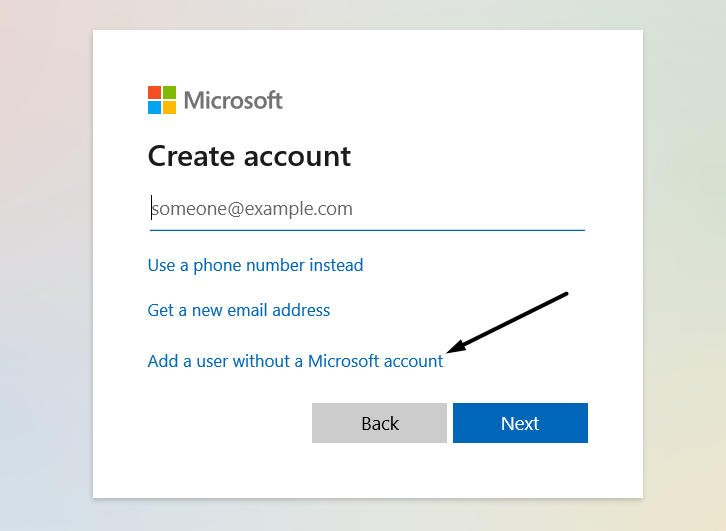
4.ChooseNextand then choose theAdd a user without a Microsoft accountoption to go ahead.
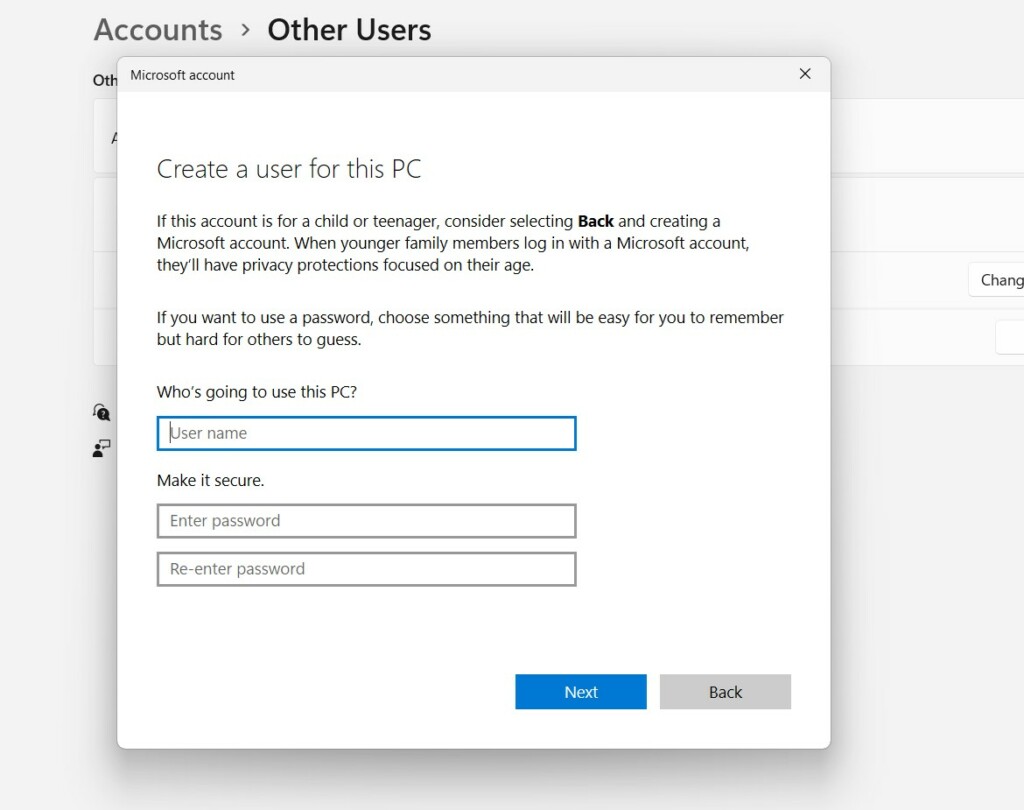
6.Once done, clickNextto create a new user admin account on your Windows 11 PC or laptop.
7.After creating the account, go to theOther userssection and then choose the local account.
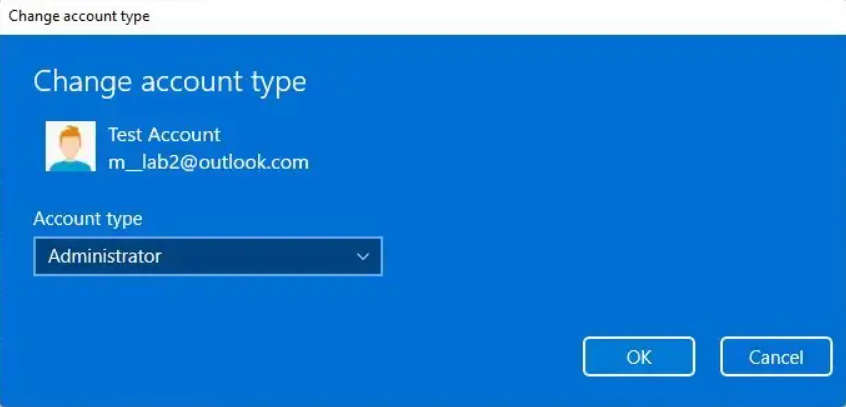
8.SelectChange account typenext toAccount options, and chooseAdministratorfrom the menu.
Youve now created a new user account on your PC.
So, you might now sign in to the PC with the new account.
Uninstall the Recent Windows Update
For some users, this problem started appearing after installing a new update.
If this is the case with you,uninstall the most recent Windows updatefrom your Windows 11 system.

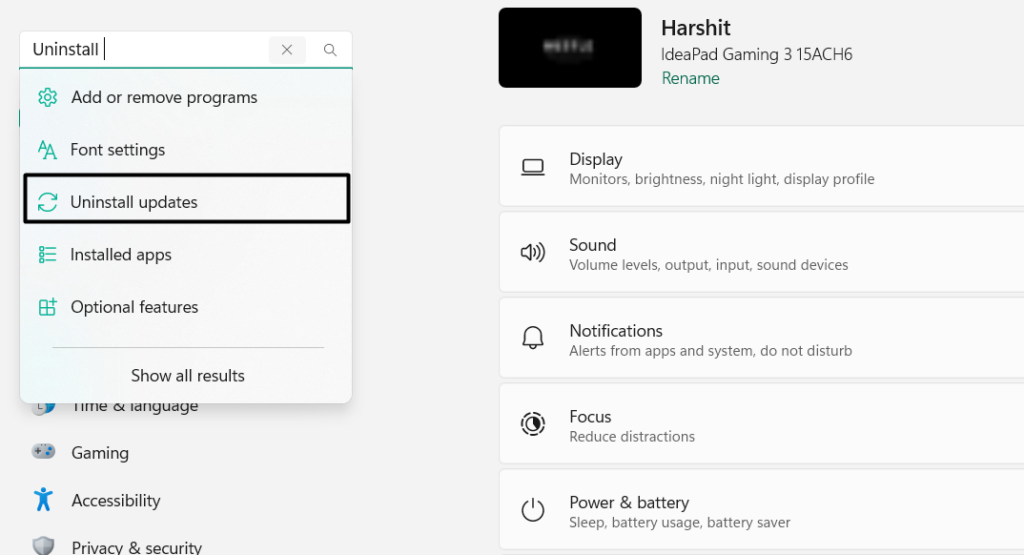
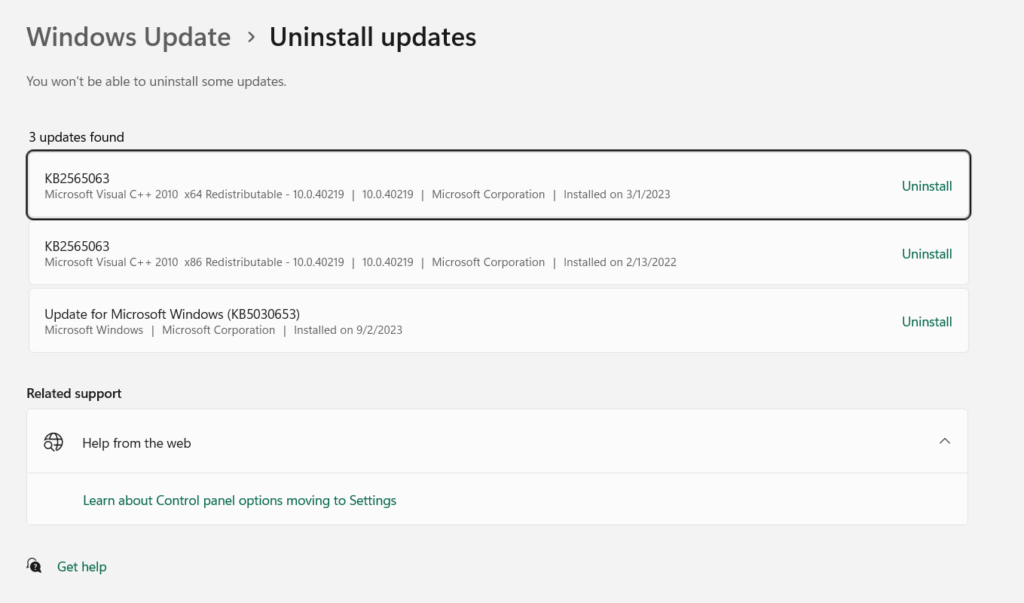
2.SelectUninstall updatesfrom the search results and look for the conflicting Windows updates.
3.Choose theUninstalloption next to it to uninstall the selected Windows update from your PC.
In that case,search and install new updatesto see if they bring change to this issue.
2.In theWindows Updatesection, click theCheck for updatesbutton to find the new Windows updates.
3.If you see any new updates to install, click theDownload & installallbutton to install them on your PC.
Thus, to check this,clean boot your Windows 11 PCand find out if the same issue reappears.
If yes, an external app is causing this issue on your PC.
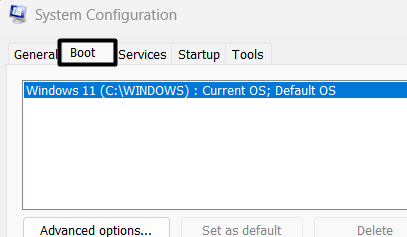
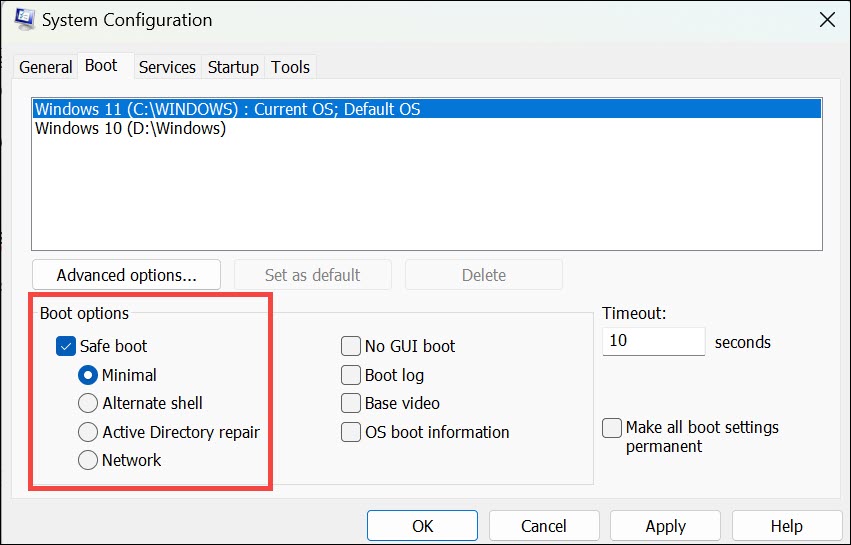
2.Press theEnter keyon your keyboard to openSystem Configurationand go to theBoottab.
3.Under theBoot optionssection, tick theSafe bootcheckbox and then chooseNetwork.
4.ChooseApplyto save the changes and then proceed to theServicestab in the same window.
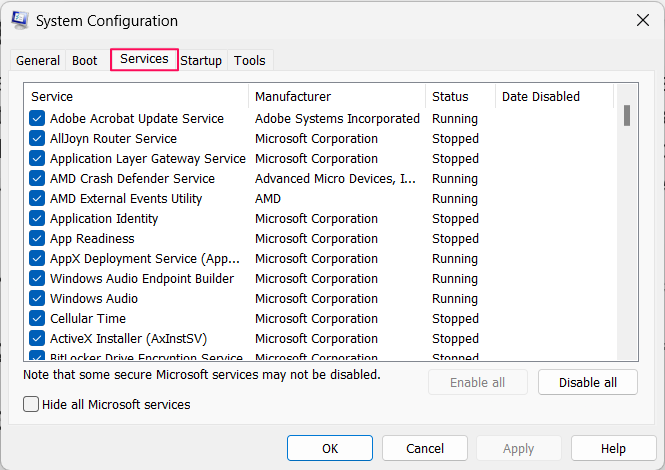
5.In the next window, tick theHide all Microsoft servicescheckbox and then chooseDisable all.
6.After ending all the non-Microsoft services, proceed to theStartupsection and then chooseOpen Task Manager.
7.Close all the running processes and then check whether the background remains the same now.
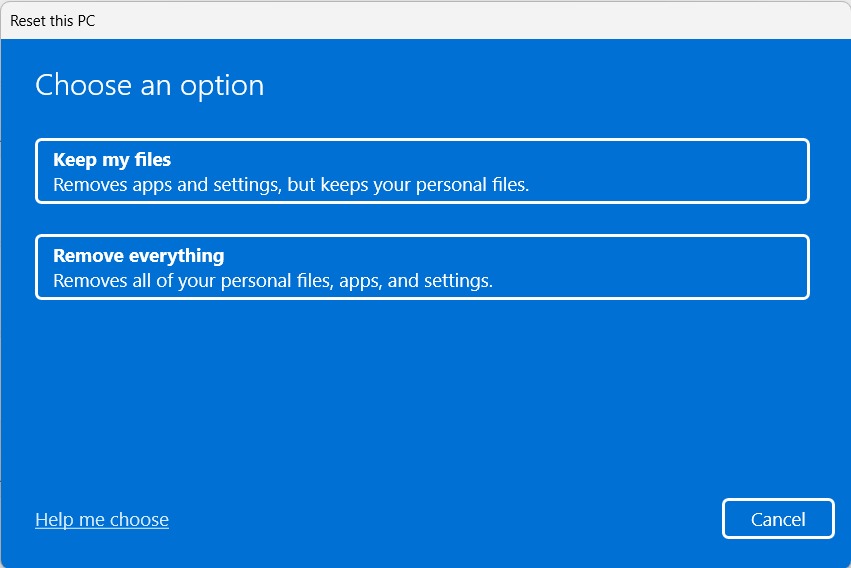
Also, you wont lose any data on your PC if you try it.
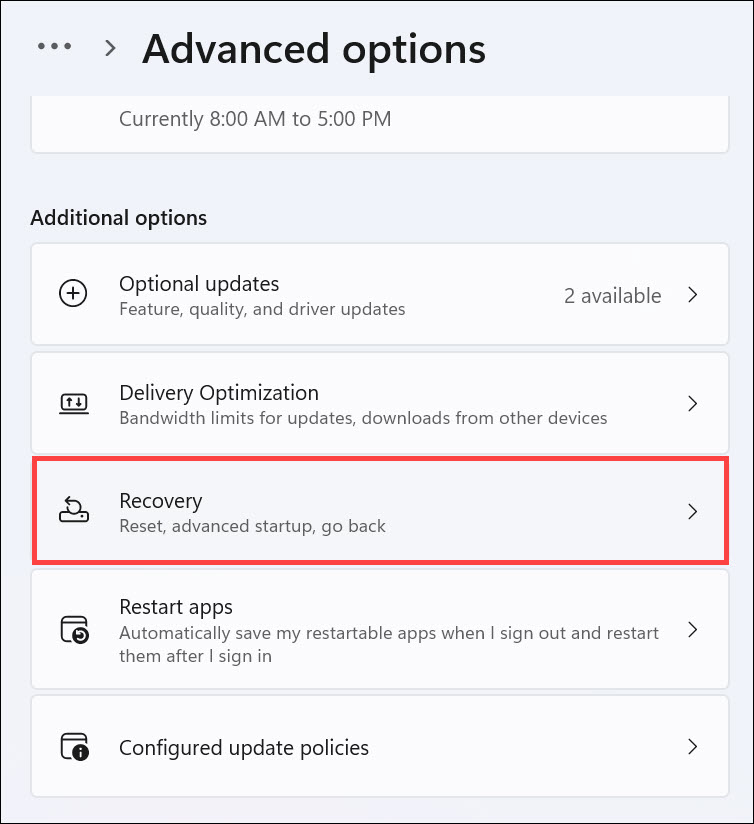
2.In theRecoverywindow, chooseReset PCnext toReset this PCto get a new window on your PC.

3.In the new window, chooseKeep my filesand then press theCloud downloadbutton.
4.In the end, answer the other questions to continue factory resetting your Windows 11 PC.
FAQs
Why Does Windows 11 Keep Changing My Desktop Background?
How Do I Stop Windows 11 From Automatically Changing My Wallpaper?
If this doesnt fix the issue, restart File Explorer on your PC to resolve issues with it.
Why Is My Wallpaper Changing by Itself?

Other reasons could be bugs and glitches, conflicting updates, etc.
How Do I Stop My Desktop Background From Changing?
But luckily, this issue can easily be fixed by trying some troubleshooting methods.
Thus, in this guide, we shared several methods to fix desktop background keeps changing in Windows 11.
So, we hope the methods we shared in this guide helped you fix it.