Could you imagine writing a document without using the Backspace key?
Its impossible to do this, as it helps you delete the letter or word while writing.
It also helps in several other tasks.

However, unfortunately, for some users, this nightmare has turned into reality.
Luckily, this issue can easily be fixed, and this is what this guide will show.
Why Is the Backspace Key Not Working in Windows 11 With Ease?

There could be several reasons for the non-functioning of the Backspace key in Windows 11.
Thus, we suggest youcheck for hardware issuesin your external keyboard.
To check this, plug the keyboard into another PC and see if it works.
Hence, this issue is appearing.
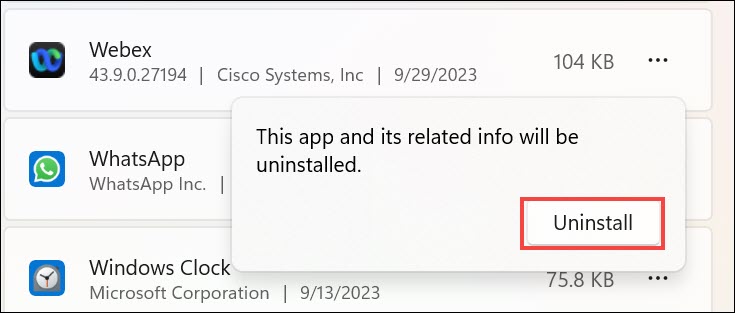
2.Choose thethree dots (…)next to it, and then choose theUninstalloption from the dropdown menu.
3.In the end, click theUninstallbutton in the new prompt to delete the selected app from your system.

In that case,kickstart your Windows 11 PCto see if this fixes them.
2.In theShut Down Windowsprompt, chooseRestartfrom the dropdown menu and hitEnter.
3.Once the PC is rebooted, openNotepad, write something, and delete it using the Backspace key.

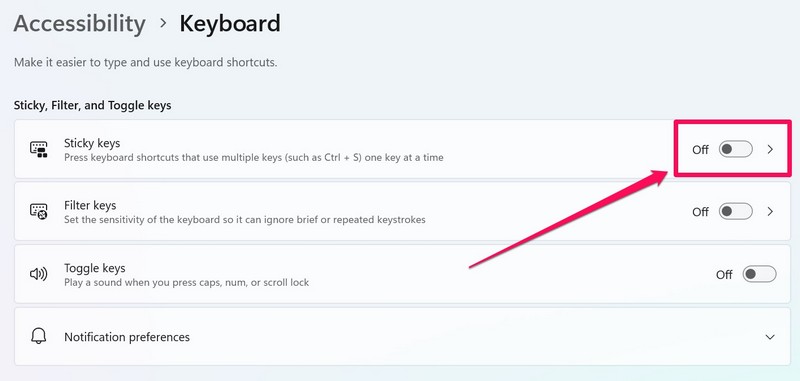
Due to this, we suggest youensure that the Sticky keys option is disabledon your PC.
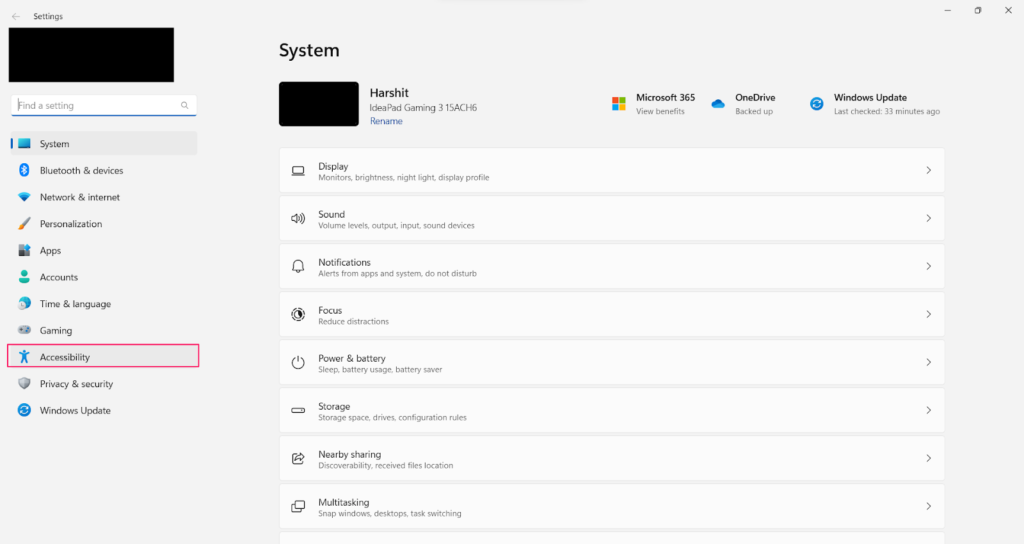
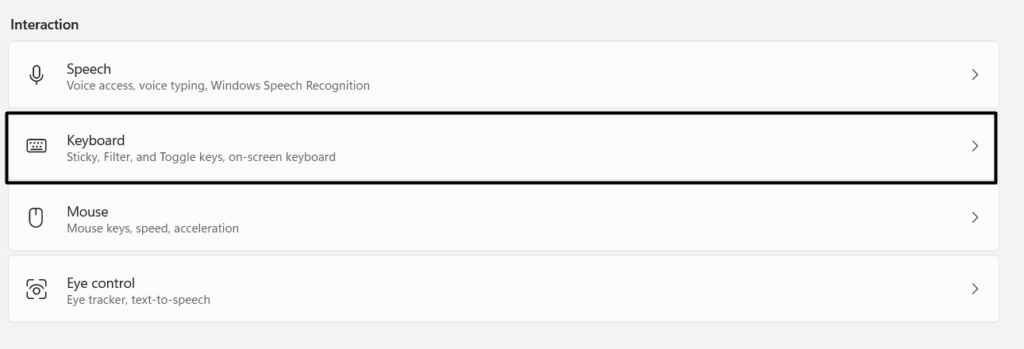
2.In theAccessibilitywindow, selectKeyboardand navigate toSticky, Filter, & Toggle Keys.
3.UnderSticky, Filter, & Toggle Keys, disable theSticky keysoption and power cycle your Windows 11 PC.
So, take advantage of it andrun iton your box.
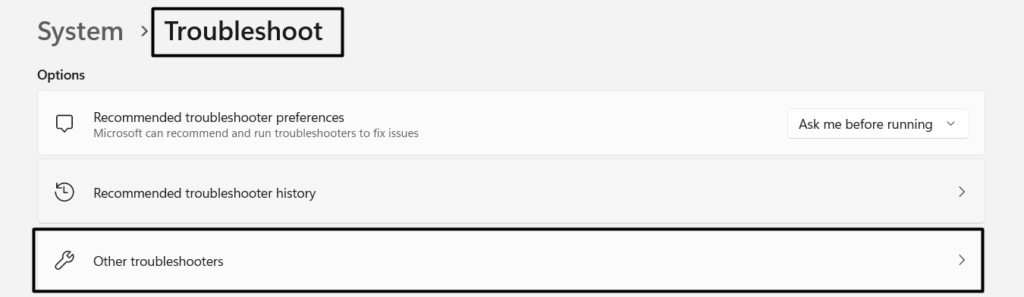
2.In theTroubleshootwindow, chooseOther troubleshootersto view all the native Windows 11 tools.
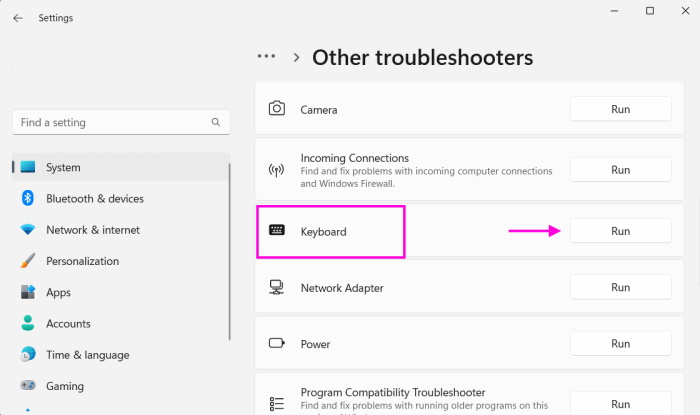
3.On the next screen, underOther, find theKeyboardtroubleshooter and click theRunbutton next to it.
4.Wait for the Keyboard troubleshooter to find and fix issues with the Windows PCs keyboard.
If it asks you some questions or follows some on-screen instructions, do the required.
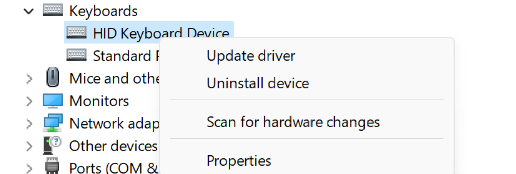
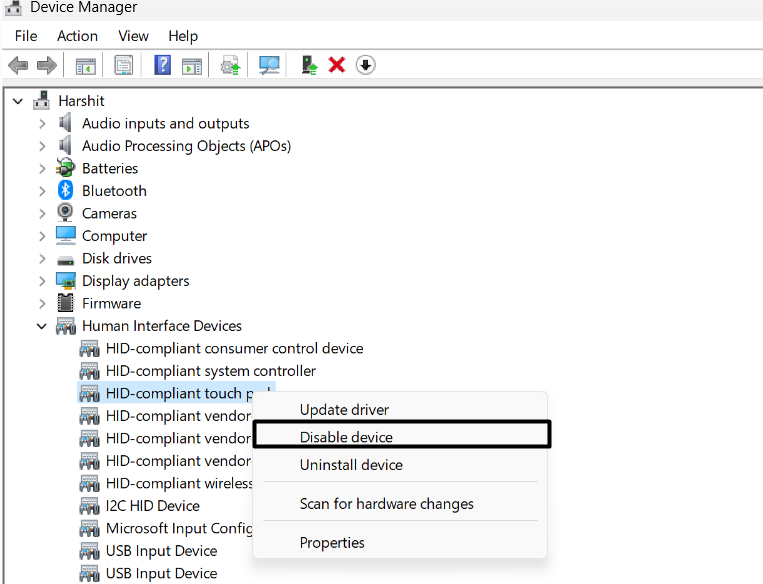
2.Right-click it, and from the contextual menu, choose theDisable deviceoption and chooseYes.
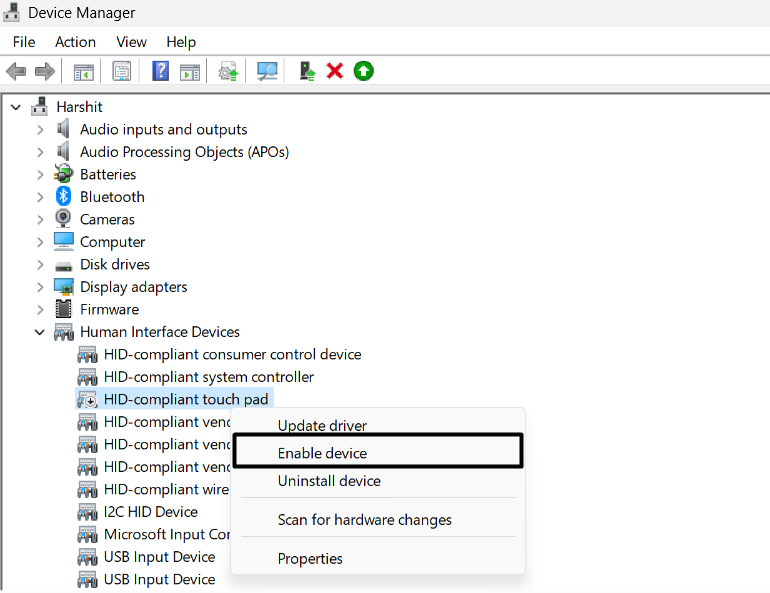
3.Right-hit the same driver again, and then clickEnable devicein the menu to re-enable it.
4.Exit equipment Manager and restart the PC to check the Backspace key not working issue status.
Check for Driver/Optional Updates
Outdated drivers sometimes become glitchy and originate issues like these on Windows 11.
This could be the same with your PCs keyboard adapter.
So, check for optional updates for your PCs keyboard driver and install them.
2.Go to theAdvanced optionssection and chooseOptional updatesto view all the installed updates.
If you find new updates, select them and install them.
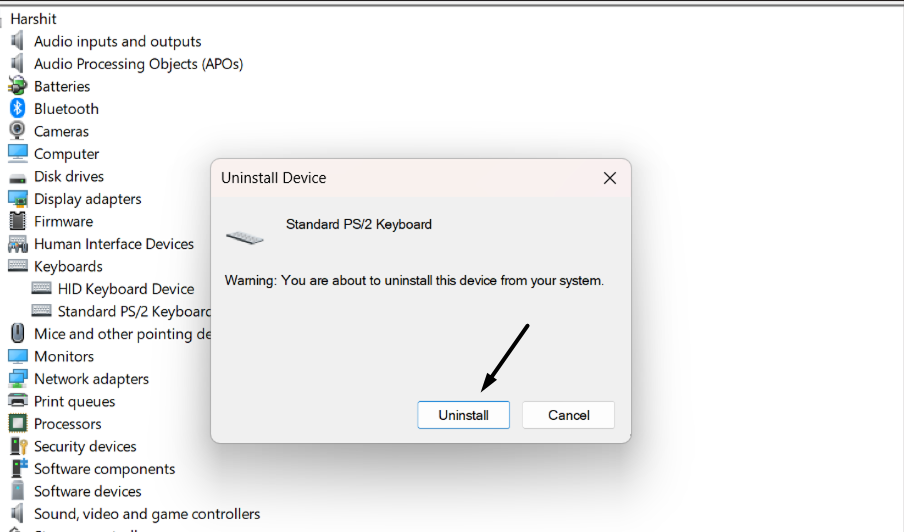
2.Right-click it, and from the right-click menu, choose theUninstall deviceoption to get a new window.
3.In the new prompt, chooseUninstallto confirm the computer to remove the driver from the PC.
4.Once the adapter is uninstalled from the PC, restart it to reinstall it and check the issues status.
Check for Windows 11 Updates
It may be possible that the issue is appearing because of the outdated OS.
If you dont see any new updates, clickCheck for updatesto search for new updates.
2.After searching for the new PC updates, hit theDownload & install allto set up the available updates.
3.Once done, check whether the Backspace key not working issue is now fixed on your Windows 11 PC.
So, simplyunplug all the external devicesone by one and check the issues status when doing so.
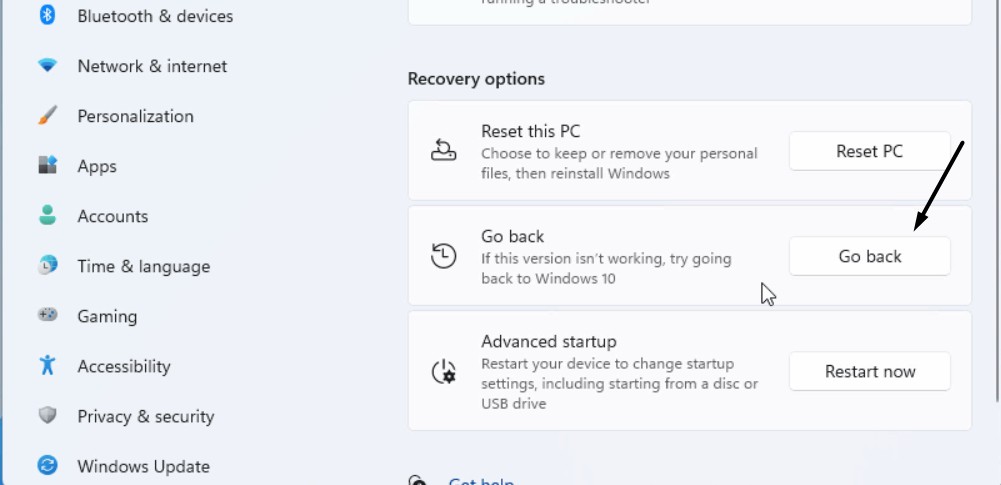
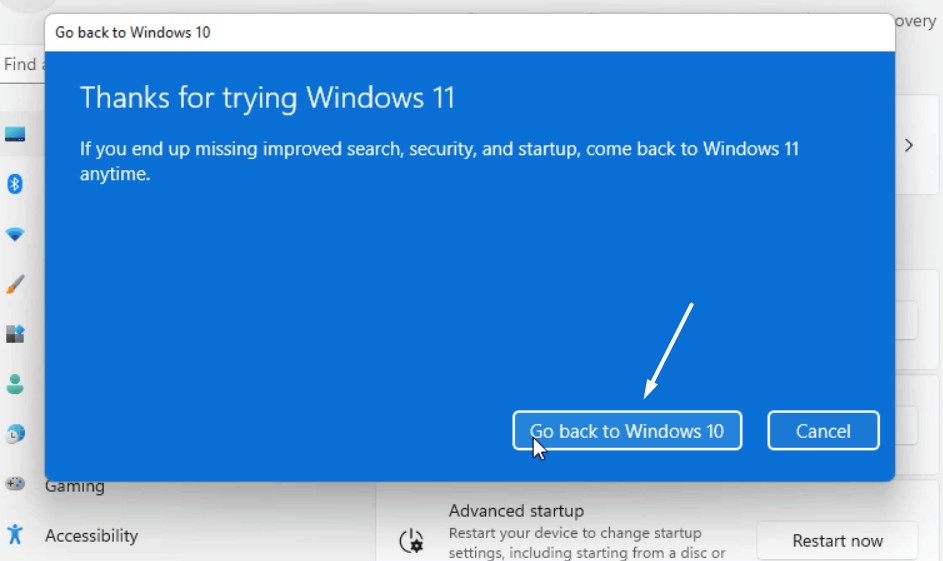
1.In theSettings appon your Windows 11 computer, hit theRecoveryoption on the right pane.
2.In theRecoverywindow, click theGo backbutton next toGo backin theRecovery optionssection.
If the button isnt clickable, it means the PC isnt available to move back to the previous version.
Reset the Keyboard
If the issue is still there, considerresetting the keyboards settingson your PC.
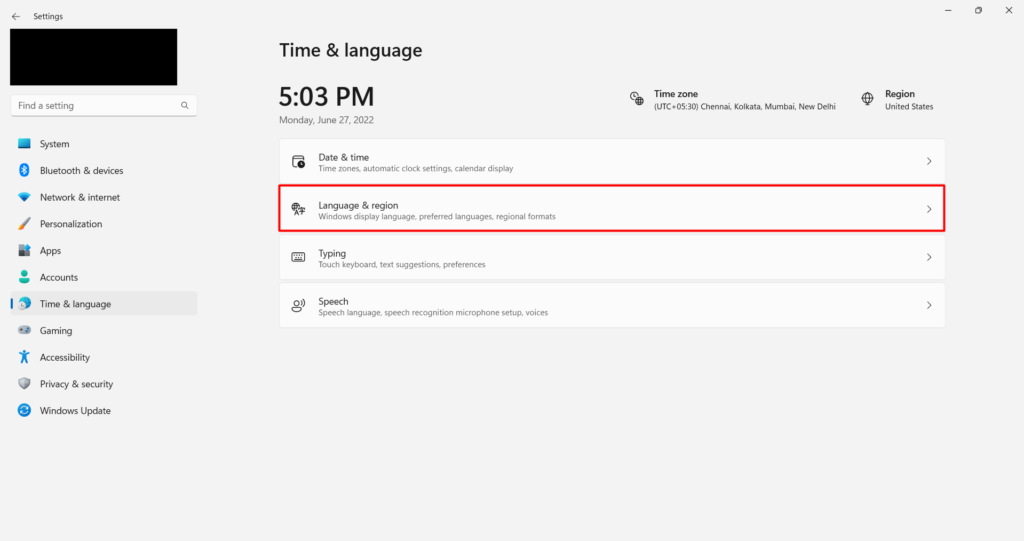
you’ve got the option to do this in the prefs app on your Windows PC.
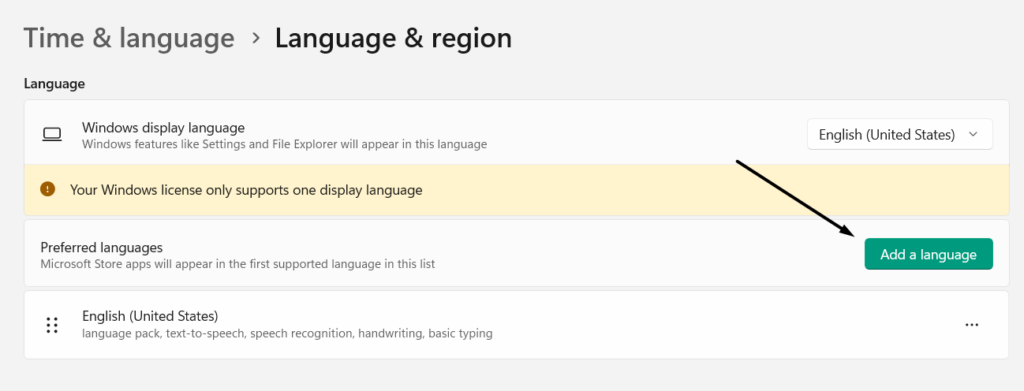
2.In theTime & languagewindow, choose theLanguage & regionoption and go toPrefered languages.
3.UnderPrefered languages, move your primary language down and then up again to reset the parameters.
Check For Malware and Viruses
Malware and viruses in the computer also cause these issues.
This could be the same in this case.
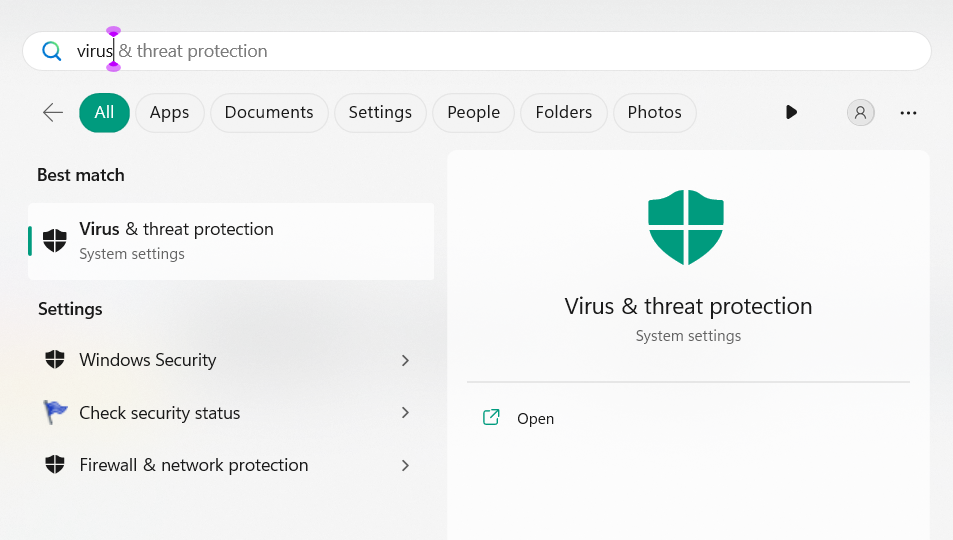
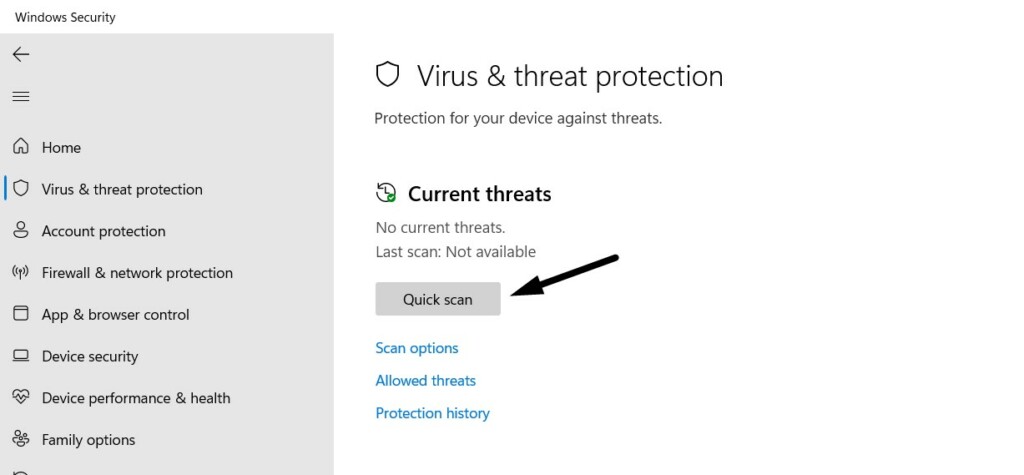
So we suggest yousearch your PC for malware and virusesand delete them.
2.ChooseQuick scanto start the malware and viruses scan in theVirus & threat protectionwindow.
3.Once the scan is completed, find out if it found some malicious files on your PC.

This will completely reset its options back to default without affecting the data stored on the storage.
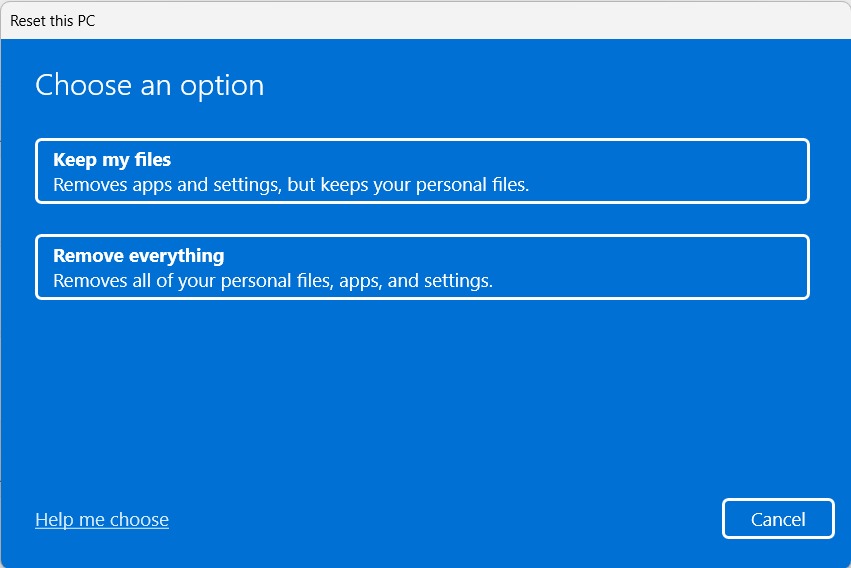
2.UnderRecovery options, clickReset PCnext to theReset this PCoption to openChoose an optionwindow.
3.In theChoose an optionwindow, selectKeep my filesand then move ahead to complete the process.

4.Once the reset process is completed, peek if the keyboard is working properly with the PC.
FAQs
Why Is My Backspace Key Not Working?
How Do I Fix My Keyboard Keys Not Working Windows 11?

Another way to fix issues with it is to update the keyboard adapter in the PC.
Why My Delete Button won’t go?
How Do I Turn Off Sticky Keys in Windows 11?
We hope this Backspace key not working troubleshooting guide helped you eliminate it.
If yes, let us know which mentioned fix helped you fix Backspace key not working in Windows 11.