These include issues with your internet web connection, your web connection adapters, or your system itself.
A quick restart of your system force-closes all the program and background processes.
After that, the Always On VPN should start working on your PC or laptop.
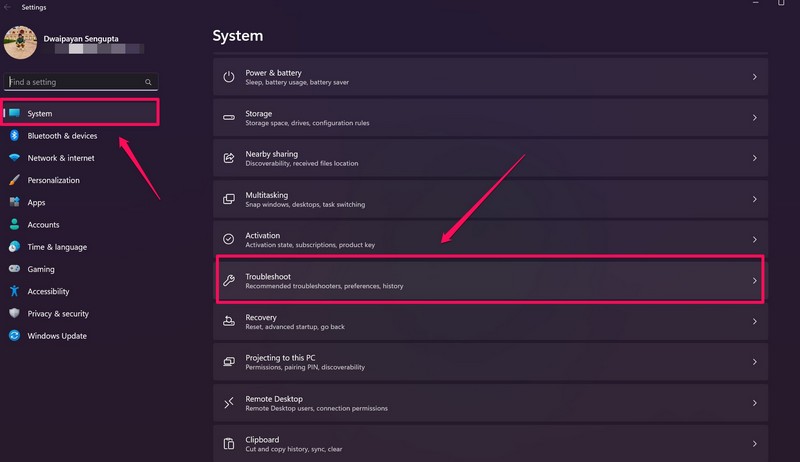
1.UseWindows + Ito launch theSettingsapp in Windows 11.
2.Under theSystemtab on the left navigation bar, go to theTroubleshootermenu.
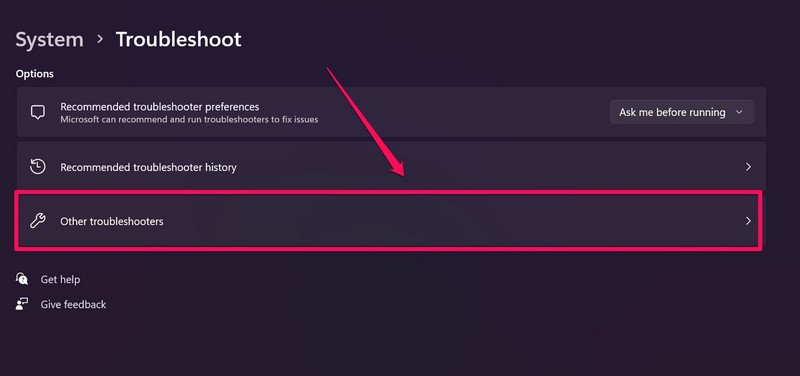
3.Click theOther troubleshootersbutton on the following page.
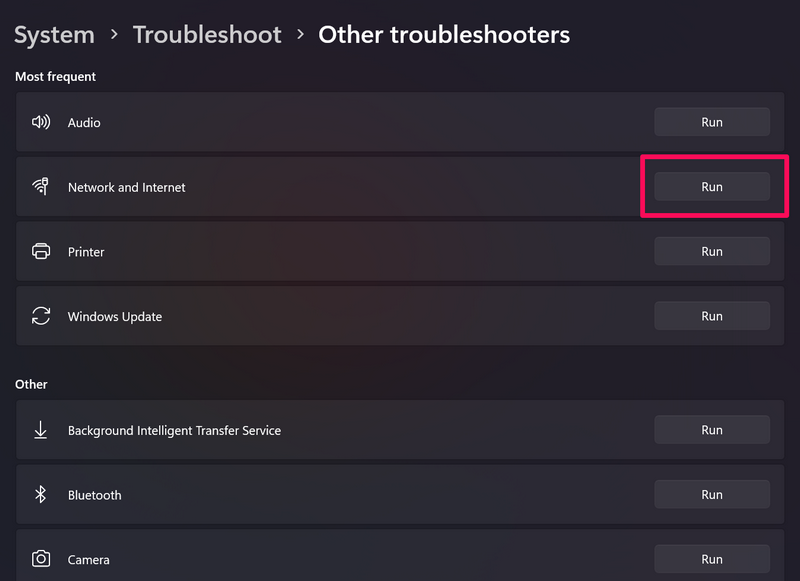
4.Here, click theRunbutton beside theNetwork and Internetoption to trigger the corresponding troubleshooter.
5.Wait for the process to complete.
At the time, Microsoft even released a fix for the issues with a software update.
2.Go to theWindows Updatetab and click theCheck for updatesbutton.
Needless to say that your equipment should be connected to an active internet internet at this stage.
3.Once the latest available Windows 11 updates show up, click theDownload & installbutton to start the process.
4.Wait for the updates to download on your machine.
5.Next,reset your Windows 11 PCor laptop to complete the update process.
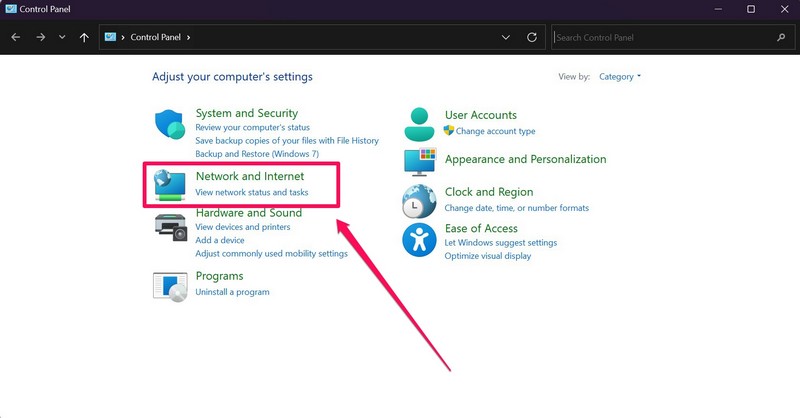
2.In the Control Panel window, click theNetwork and internetoption.

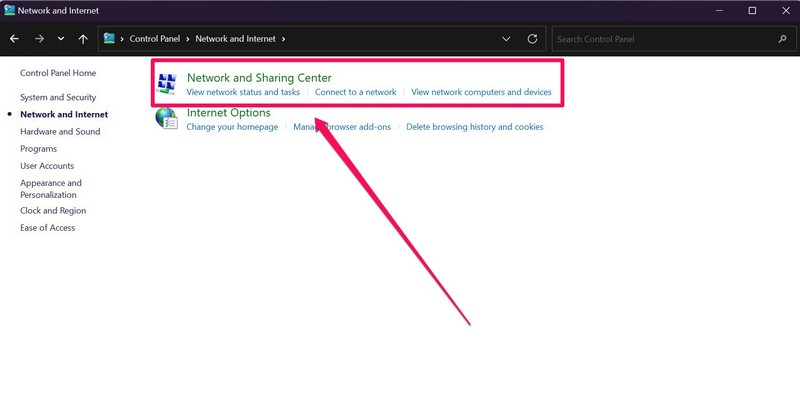
3.Now, click theNetwork and Sharing Centeroption on the right pane.
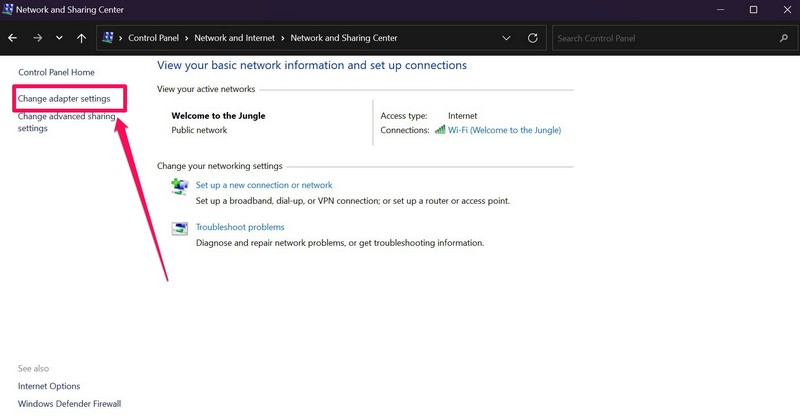
4.Next, click theChange adapter settingsoption on the left navigation bar.
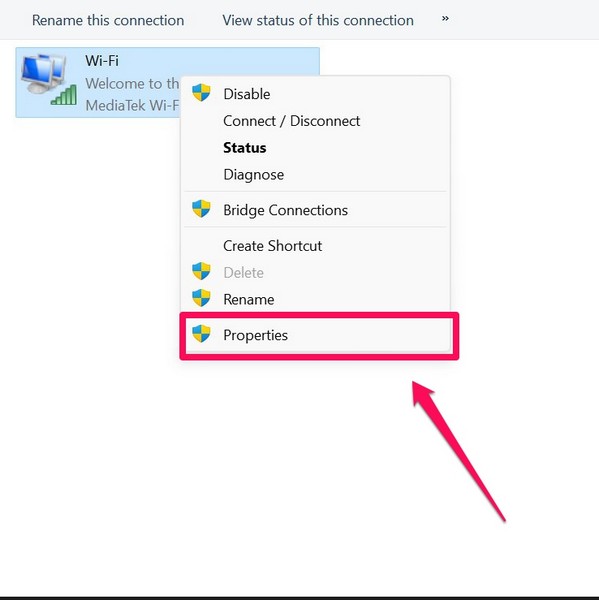
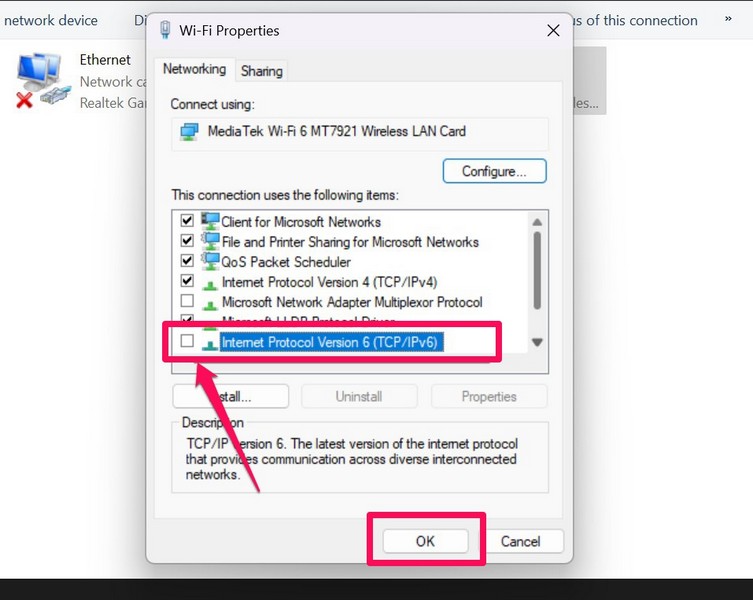
Right-choose your current networkand selectPropertieson the context menu.
Uncheck the box beside itand click theOKbutton to save the change.
- cycle your Windows 11 PCor laptop after the change.
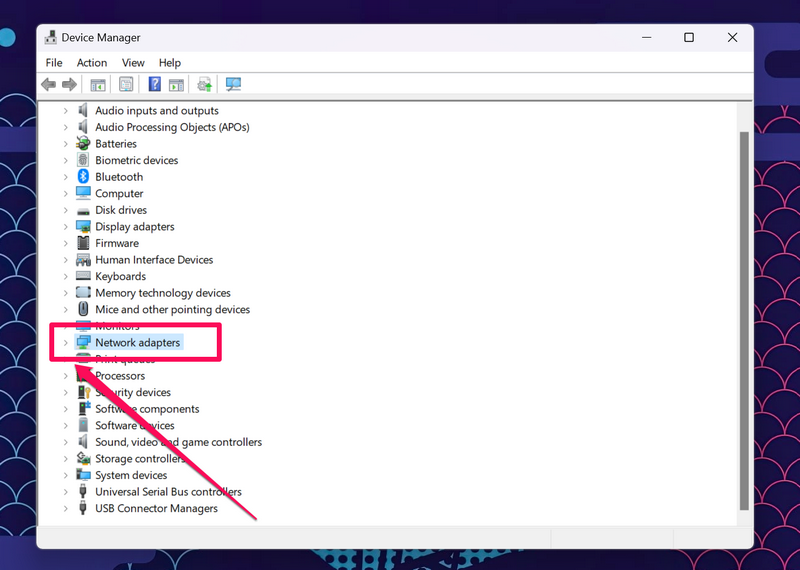
2.ClickDevice Manageron the following Quick Links menu.
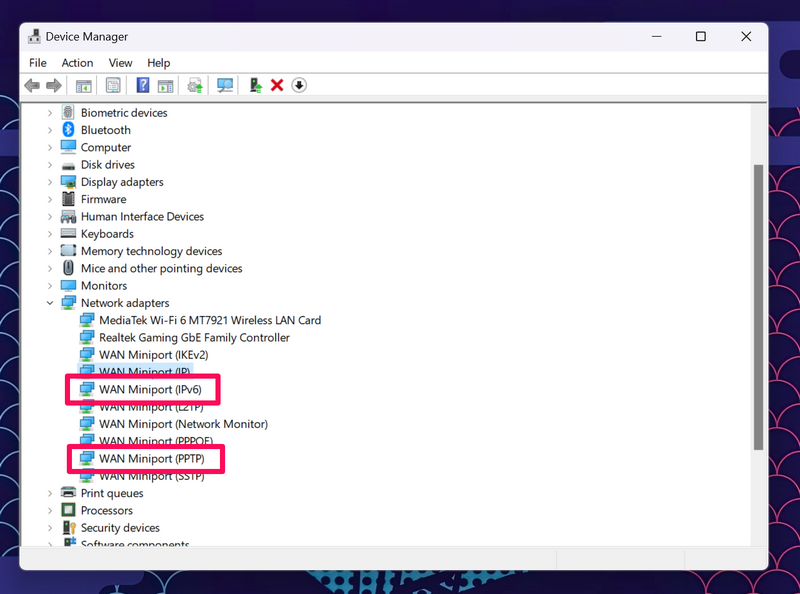
3.In the gadget Manager window, nudge the small arrow beside theNetwork adaptersoption to expand it.
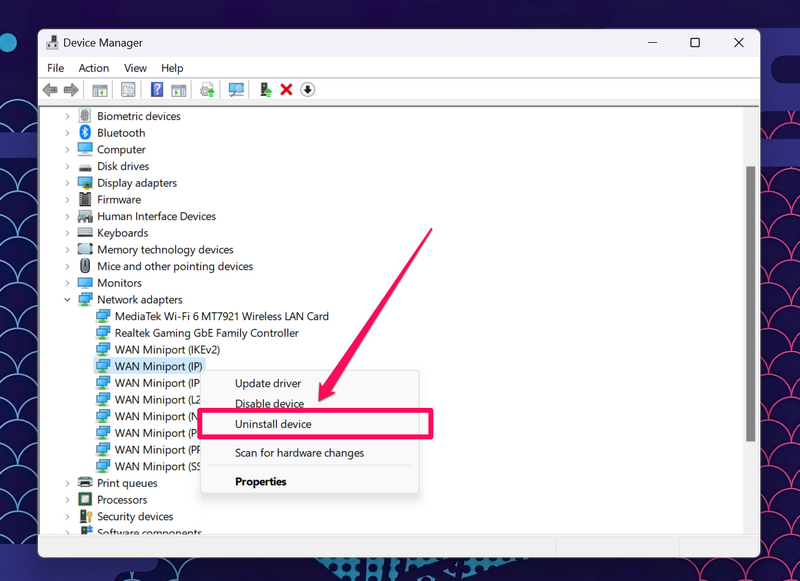
4.Next, locate theWAN Miniport (IP)data pipe adapter driver on the list.
5.Right-press itand hit theUninstall devicebutton.
6.Confirm your actionon the following prompt.
7.Do the same thing for theWAN Miniport (IPv6) andWAN (PPTP)drivers as well.
8.Once all the drivers are uninstalled,power cycle your Windows 11 PCor laptop.
1.UseWindows + Sto launch Windows search and key in incmdin the text box.
2.Once theCommand Prompttool shows up in the search results, click theRun as administratorbutton.
3.ClickYeson the following User Account Control prompt.
5.Wait for the last command to execute.
6.kickstart your Windows 11 PC or laptop after completion.
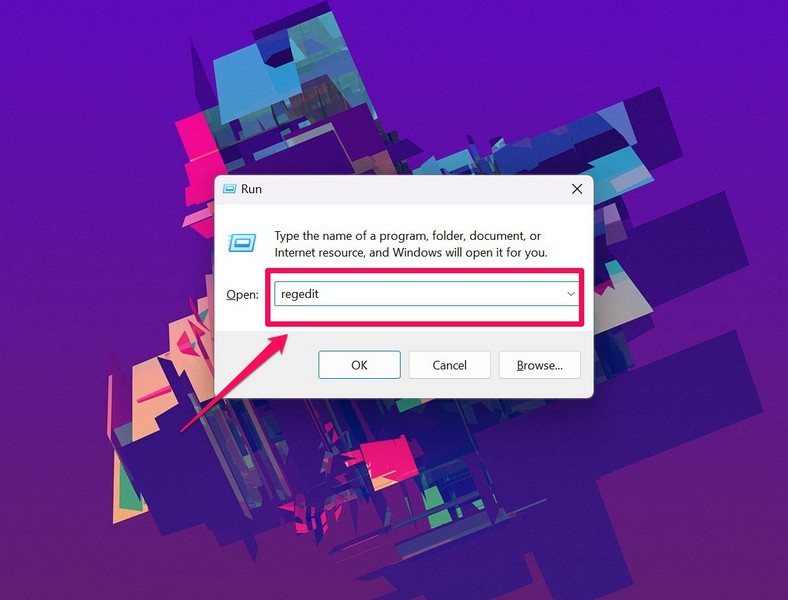
1.PressWindows + Rto launch the Run tool on your Windows 11 PC or laptop.
2.key in inregeditin the text field and pressEnter.
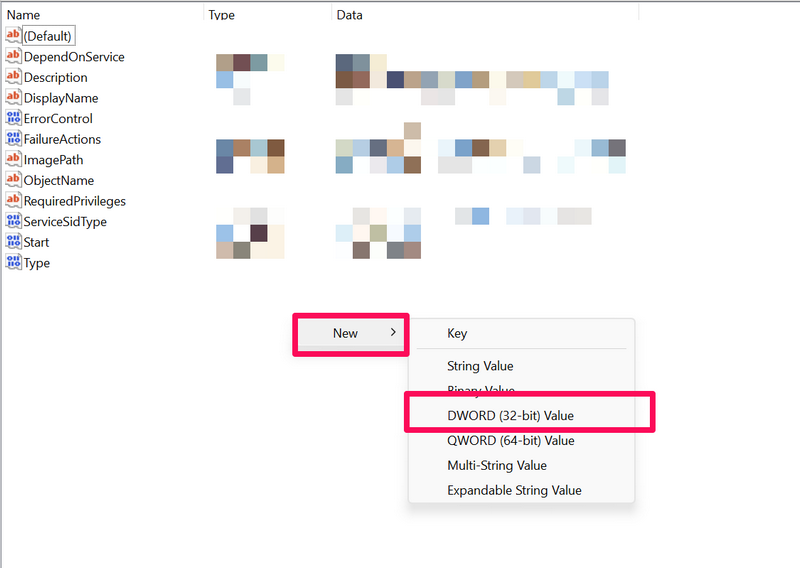
5.Next,right-tap on a black spaceon the right pane to open up the context menu.
6.Here, under theNewmenu, select theDWORD (32-bit) Valueoption from the list.

This will create a new DWORD value underPolicyAgent.
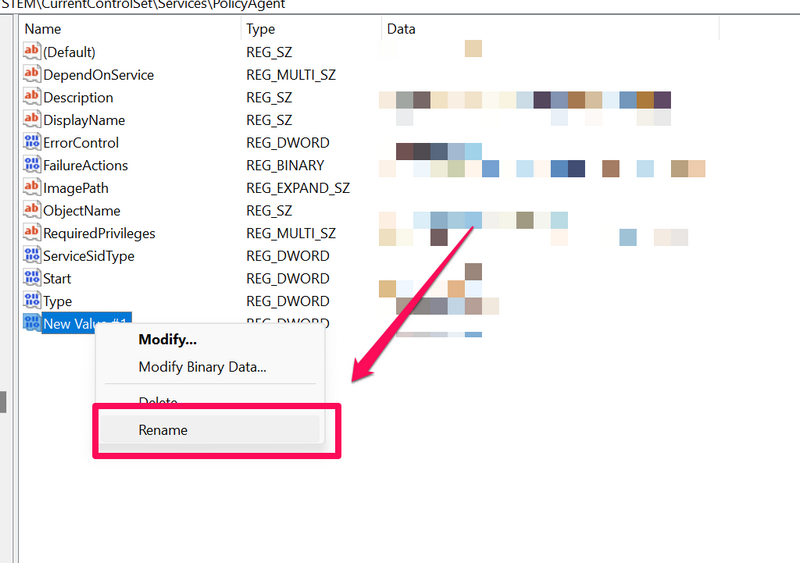
7.Now, right-choose the newly-created value and select theRenameoption.
8.Rename the value toAssumeUDPEncapsulationContextOnSendRule.
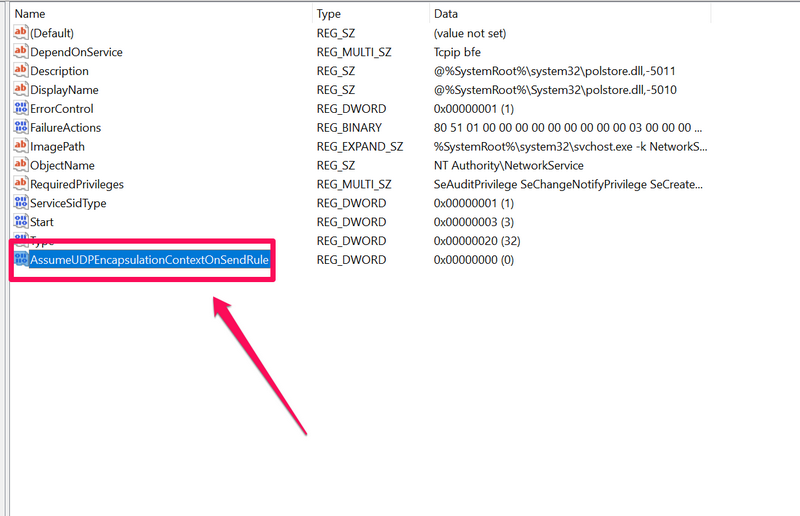
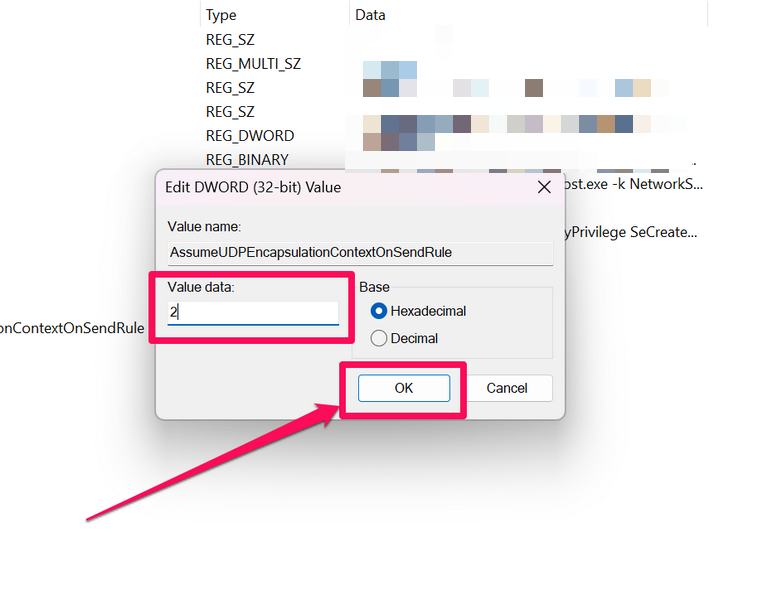
10.Set theValue data to 2and hit theOKbutton.
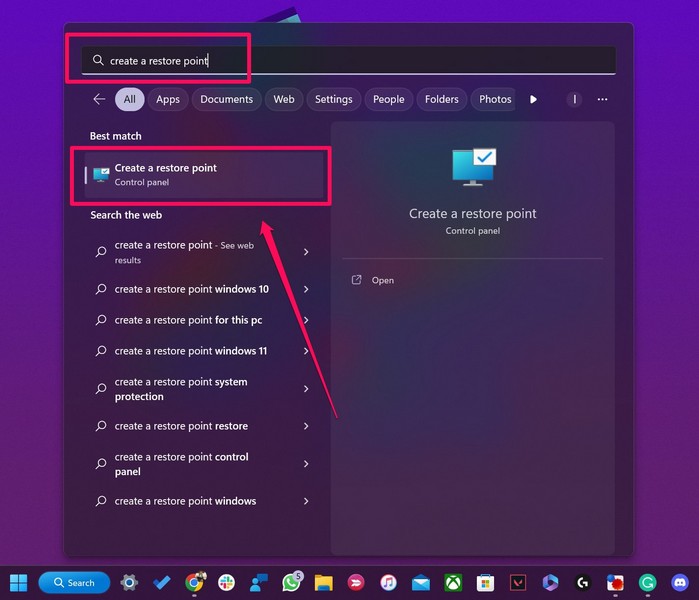
2.jot down increate a restore pointand you will see the same appear in the search results.
Click it to open.
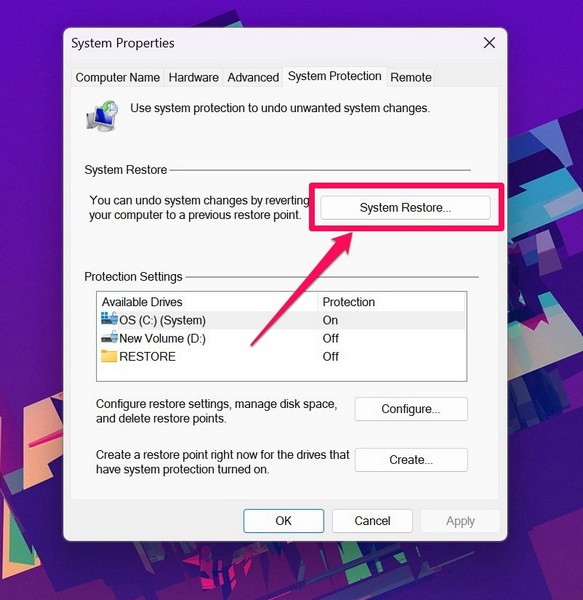
3.Now, in the System Properties windows, click theSystem Restore…option.
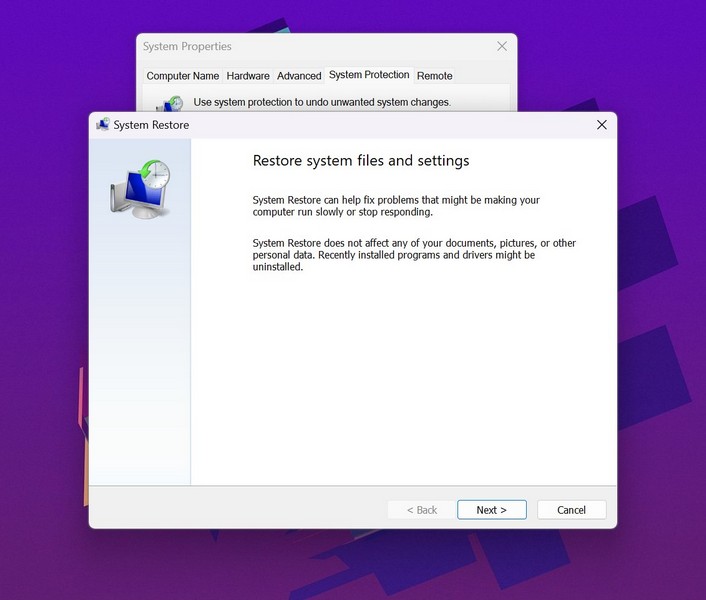
4.Continue tofollow the on-screen instructionsto successfully restore your Windows 11 PC or laptop.
At this point, the service should be up and running on your machine.
FAQs
What is Always On VPN in Windows 11?
The Always On VPN is a remote access solution that Microsoft offers to users.
Does Always On VPN work in Windows 11?

Why is the Always ON VPN not working in Windows 11?
Final Words
So, there you have it!