So read this troubleshooting guide ahead and get rid of it with ease.
Why Is the Adobe Acrobat DC Not Working on Windows 11?
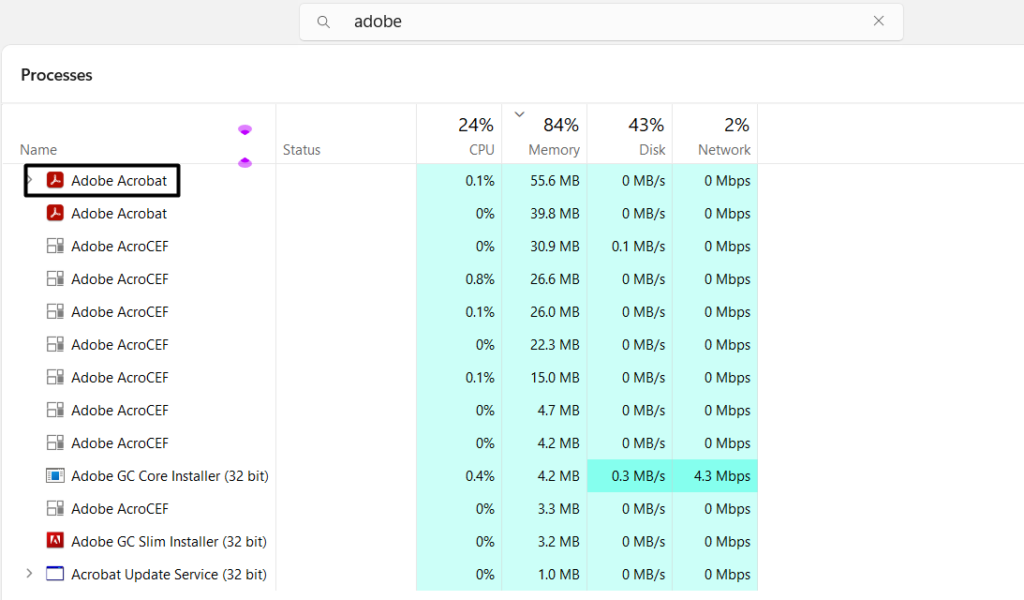
Varied factors could be the reason for the non-functioning Adobe Acrobat DC program on Windows 11. you could easily end the task using the Task Manager app on your Windows 11 PC or laptop.
2.In theTask Managerwindow, find theAcrobat processtask using the search box at the top.
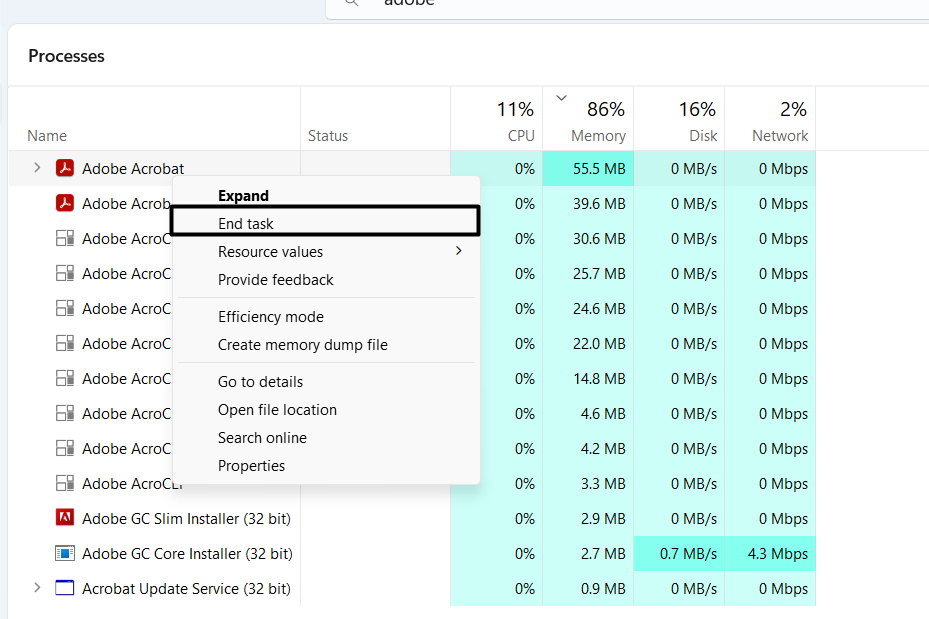
3.Right-click theAdobe Acrobatprocess, and from the drop-down menu, chooseEnd task.
4.Finally, initiate the Adobe Acrobat app again on your setup and confirm the issues status.
Reboot Your Windows 11 Computer
1.To reboot your Windows computer, pressAlt + F4to open theShut Down Windowsprompt.
2.In theShut Down Windowsprompt, choose theRestartoption from the drop-down menu.
3.Finally,hit theEnter keyto reboot your Windows PC and confirm the issues status on it.
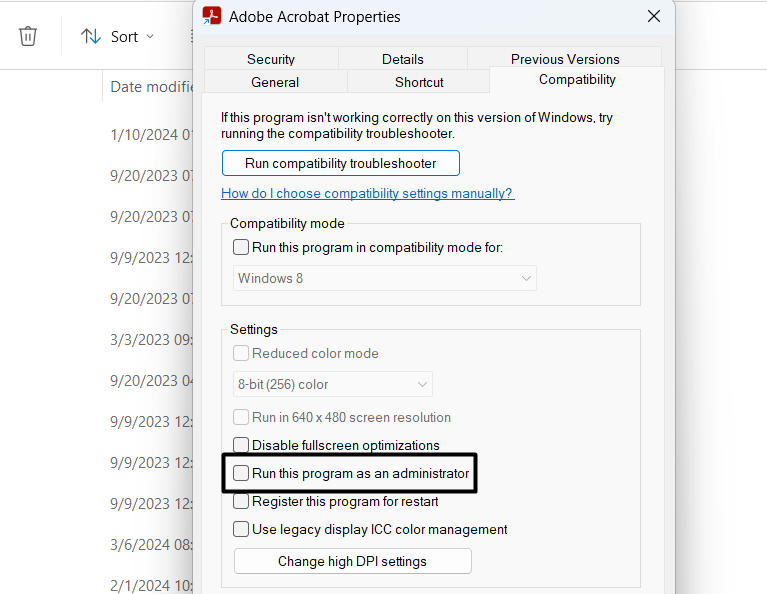
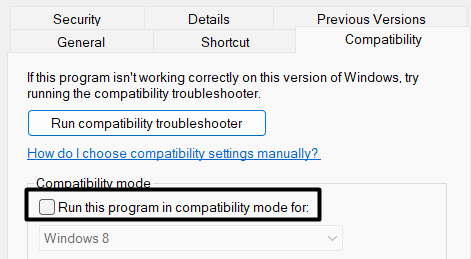
2.In theCompatibilitytab, check mark theRun this program as an administratorcheckbox.
3.Once done, click theApplybutton to apply all the changes and confirm the issues status.
4.ChooseApplyto save the above changes and then clickOKto exit the opened window.
5.Once done, open theAdobe Acrobat DC appon your PC and peek if it opens or works.
Doing so will eliminate all the problems and error messages with it, including the Error establishing connection error.
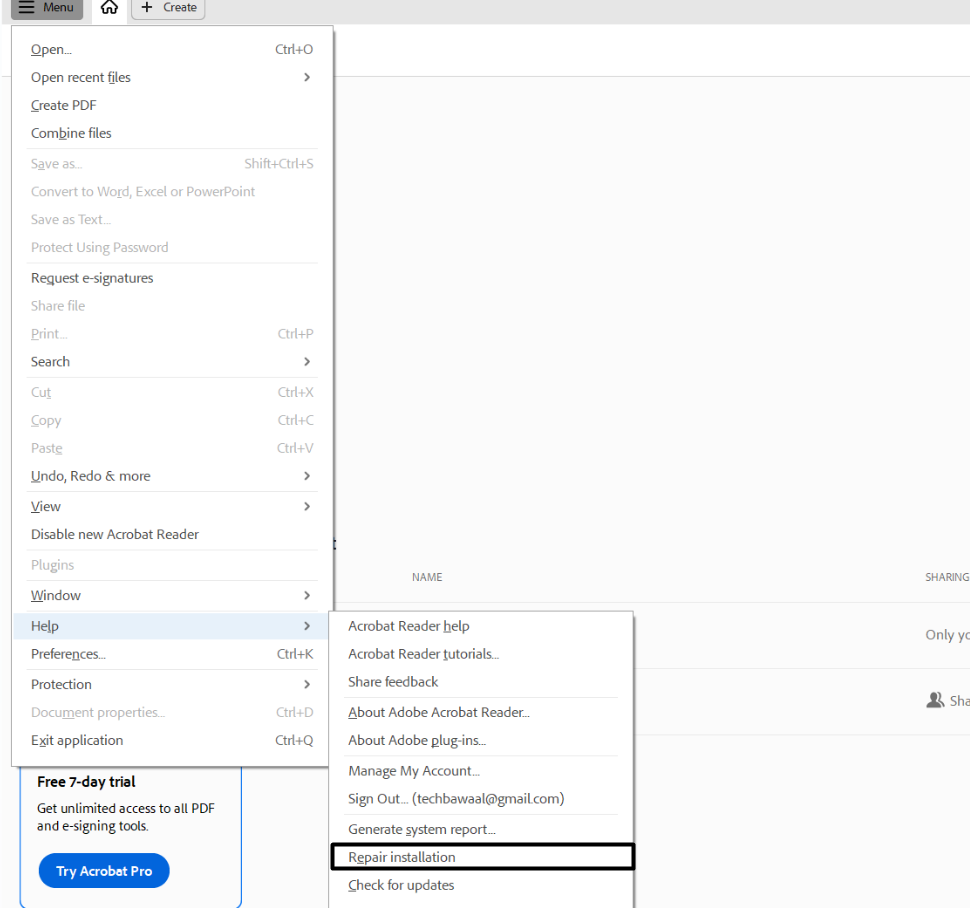
2.Choose theHelpoption from theMenudrop-down, and from the sub menu, chooseRepair installation.

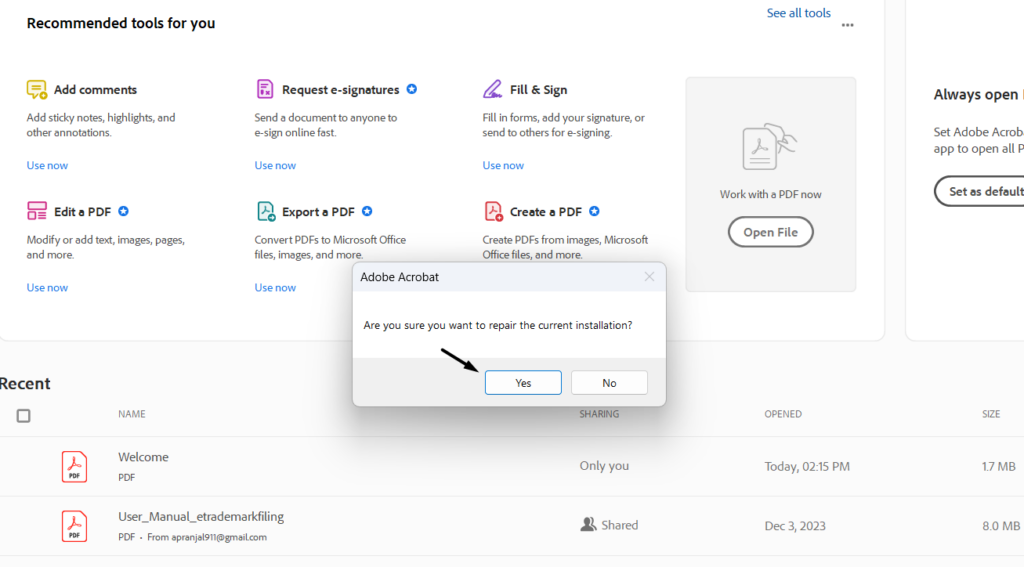
3.In the next dialog box, click onYesto establish a new connection and start the repair install process.
Once the process is completed, close and bring up the Adobe Acrobat DC app.
Below are the prompts to do so:
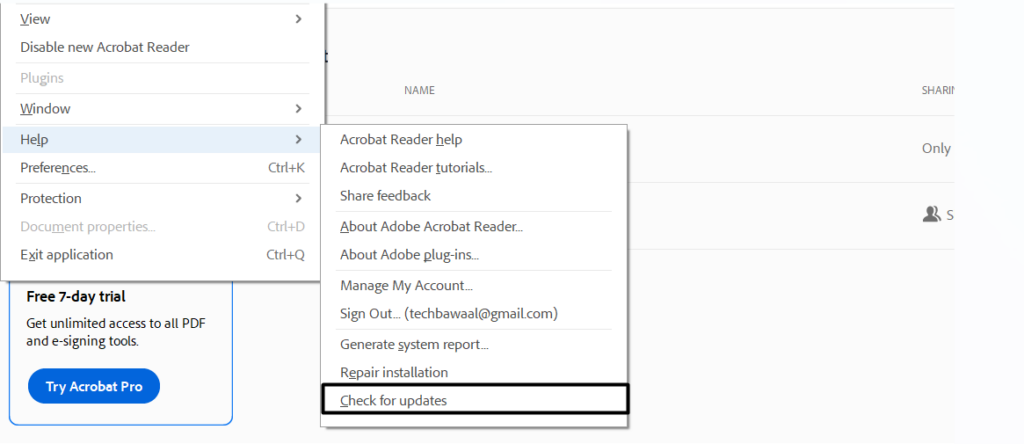
1.Open theAdobe Acrobat appon your box and click theHelpoption in theMenu.

2.From theHelpdrop-down, choose theCheck for updates…option to search for new updates.
3.Once done, let the app find and plant the new app updates to eliminate the issues with it.
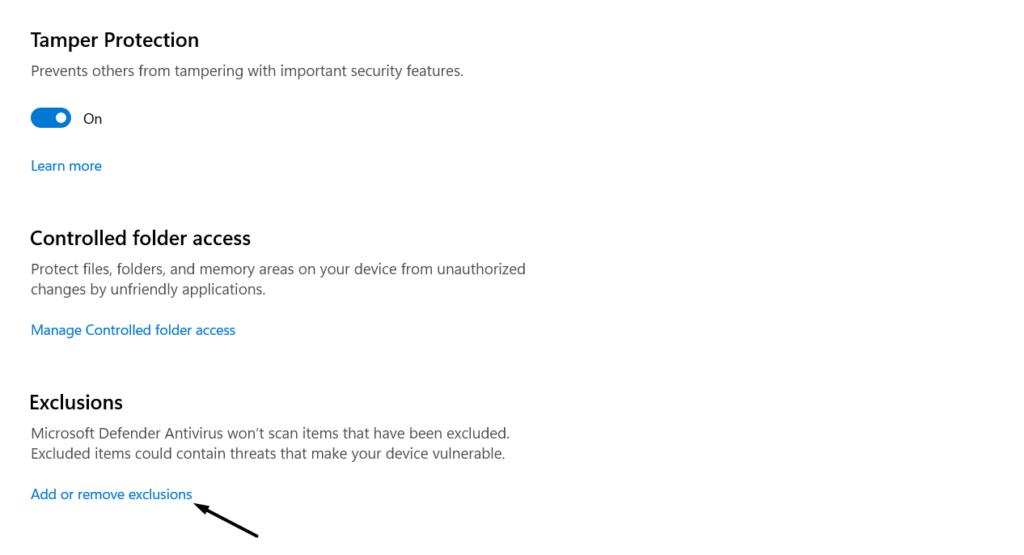
So,exclude the Adobe Acrobat DC program from the Windows Defender Antivirus scan.
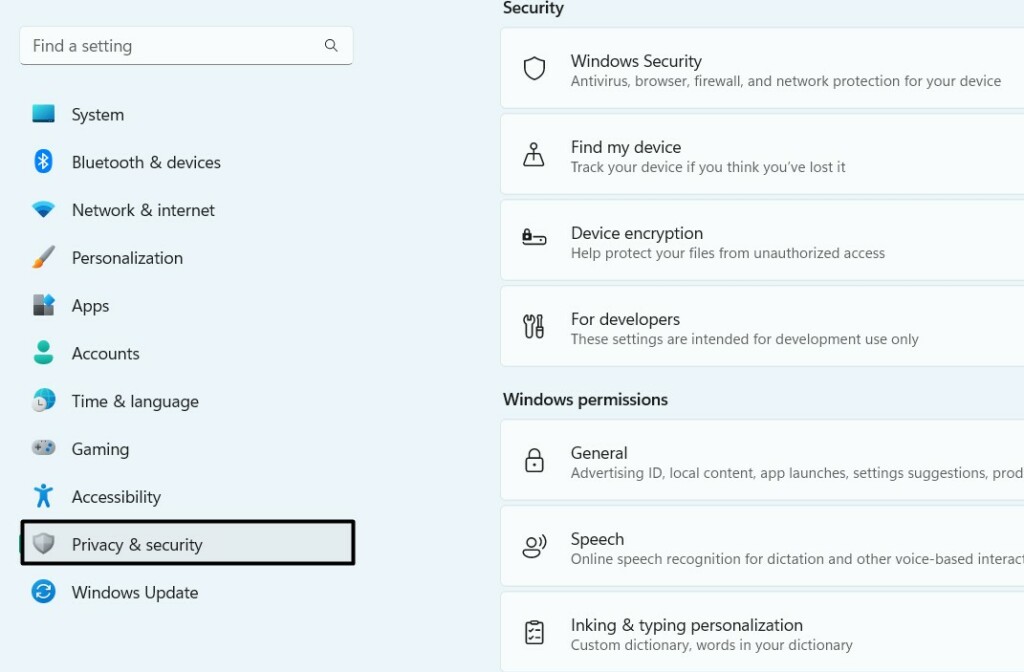
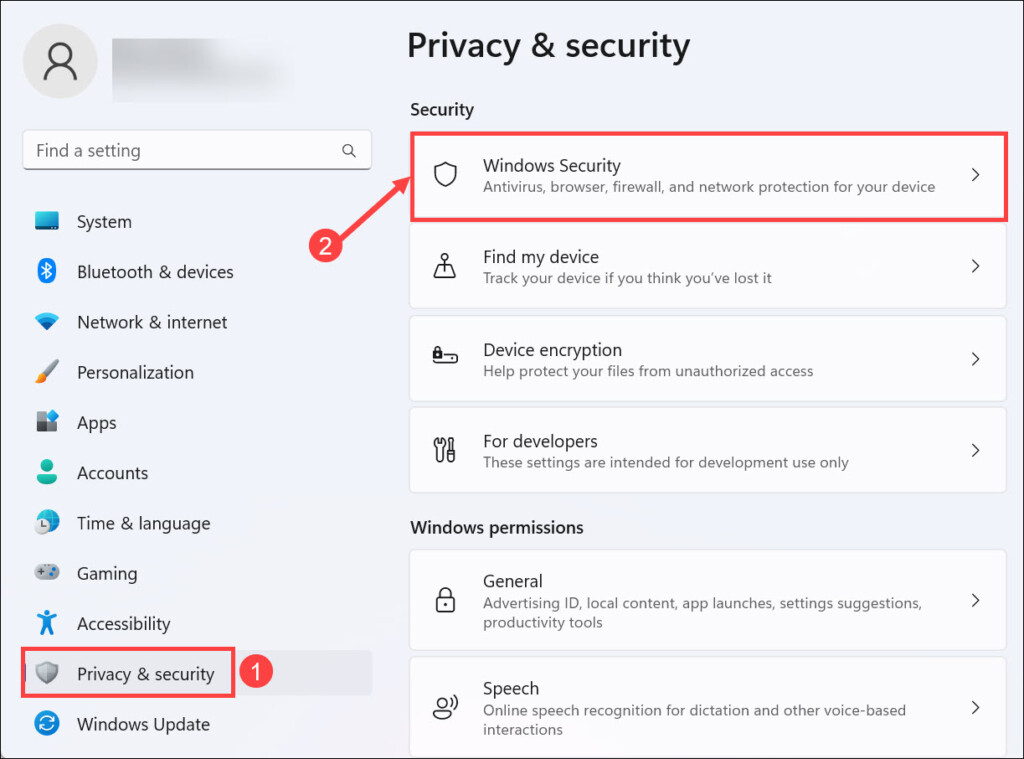
2.In thePrivacy & securitywindow, chooseWindows Securityto kick off the app on your PC.
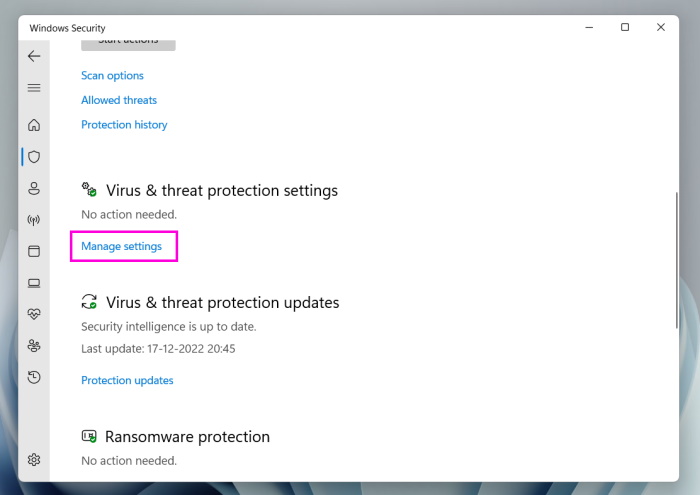
3.In the app, choose theVirus & threat protectionoption and then clickManage controls.
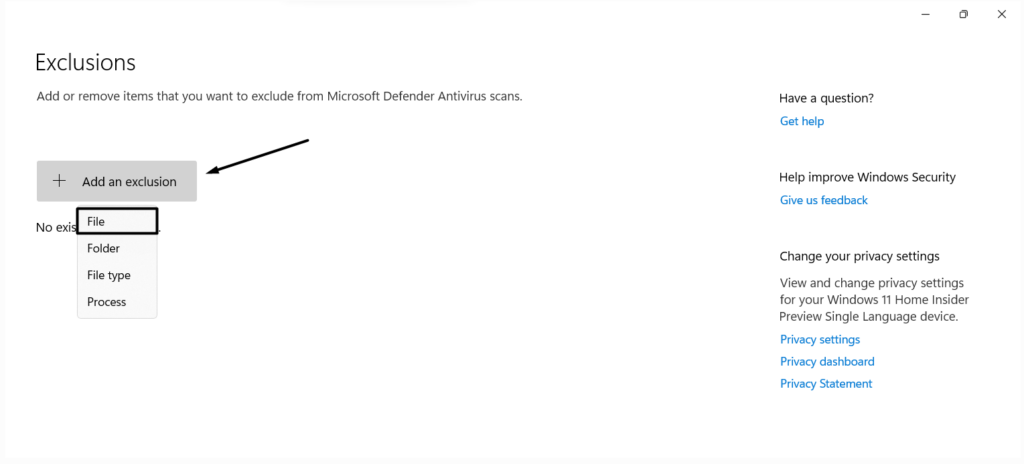
4.In theManage settingswindow, choose theAdd or remove exclusiontext to move ahead.
5.Click theAdd an exclusiontext and then choose theFileoption from the drop-down menu.
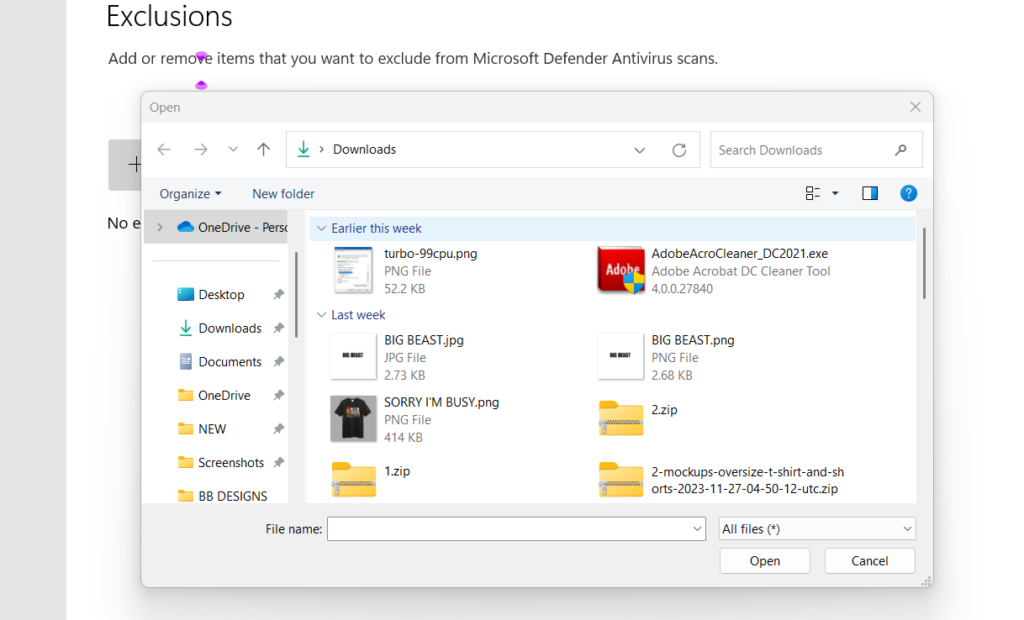
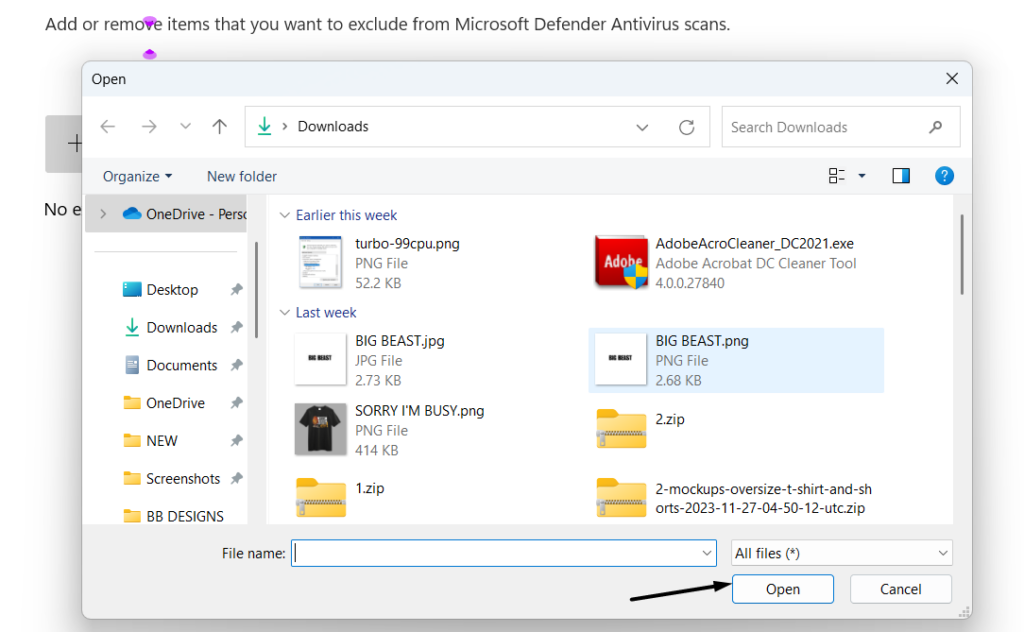
6.In theFile Explorerwindow, go to the location where the Adobe Acrobat DC app is saved.
7.Once youre there, choose it, and then click theOpenbutton to exclude it from the scan.

2.Once the executable file is downloaded, simply choose it and then choose theYesbutton.
4.Finally, click theClean Nowoption to look for the problematic Acrobat files and delete them.
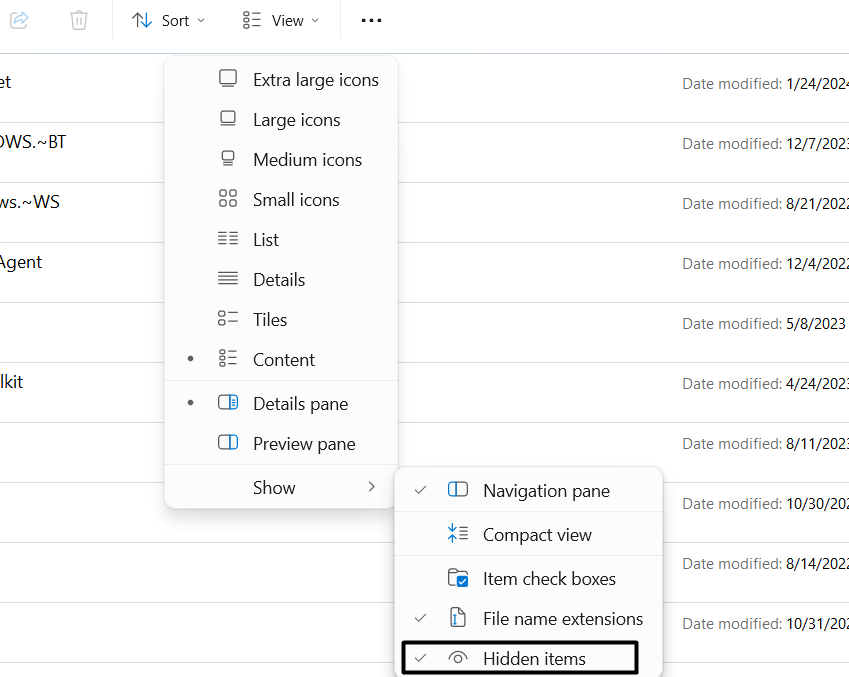
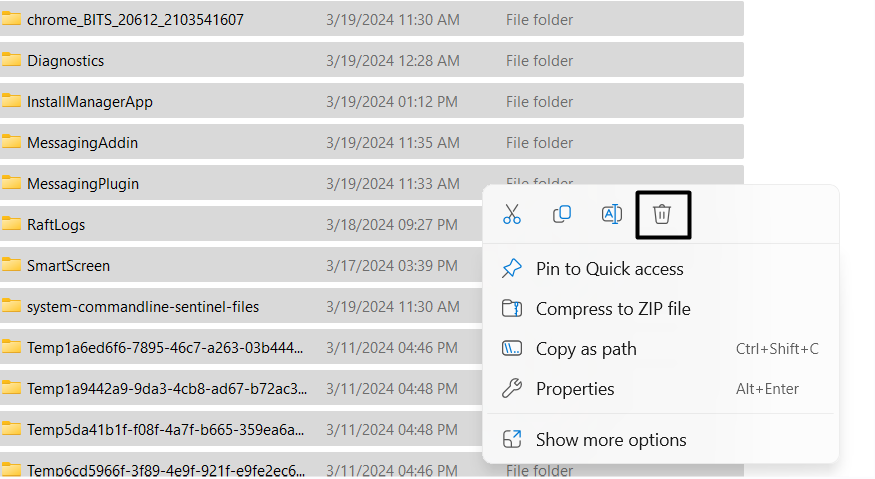
3.From theShowmenu, choose theHidden itemsoption to make all the hidden files visible.
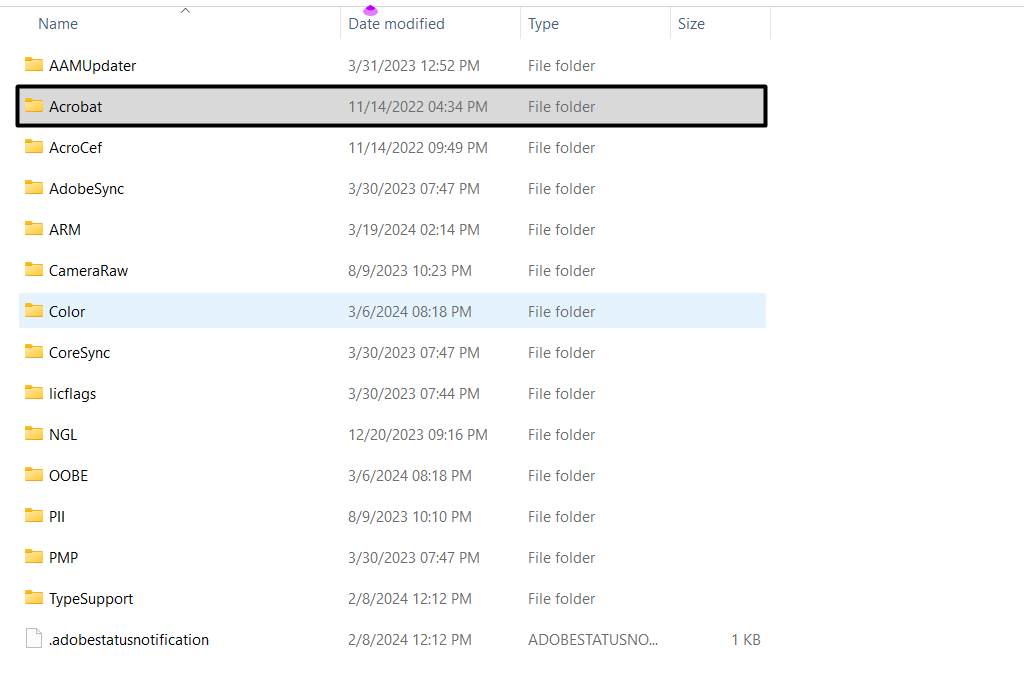
4.Once done, delete the entireAcrobatfolder and then reinstall the Adobe Acrobat DC app.
Clean the Updates Cache
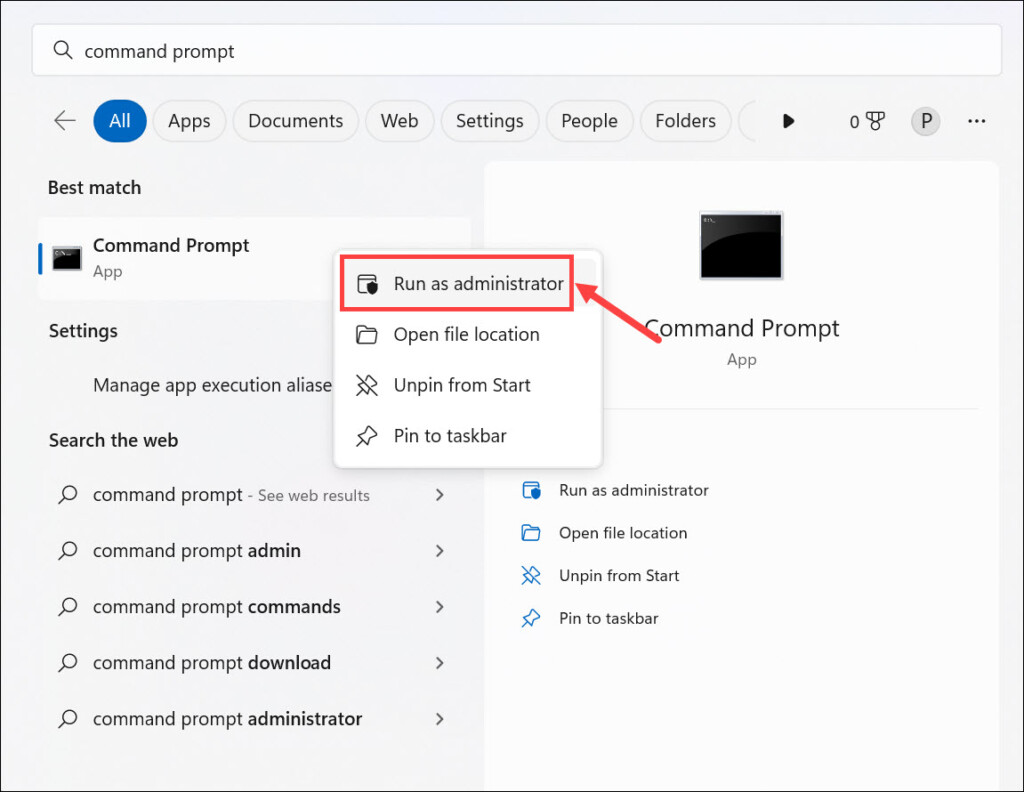
1.Open theWindows Search Box, typeCommand Prompt, and chooseRun as administrator.
This will dump the temporary and useless cache data and refresh the entire PC.
3.From the context or right-click menu, choose theBinorDeleteoption to delete all the files.
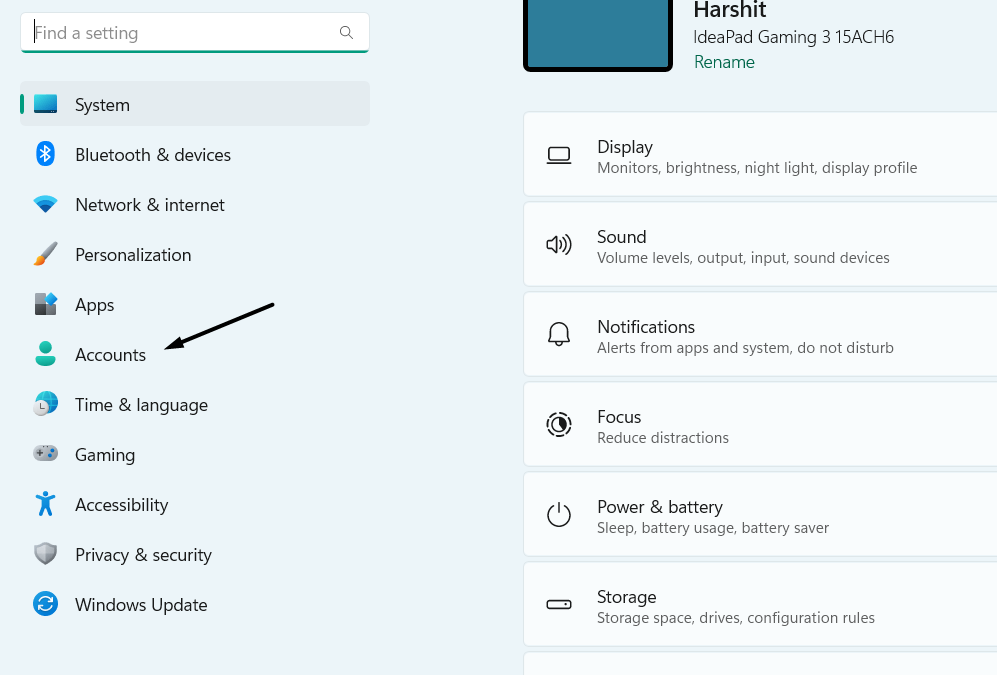
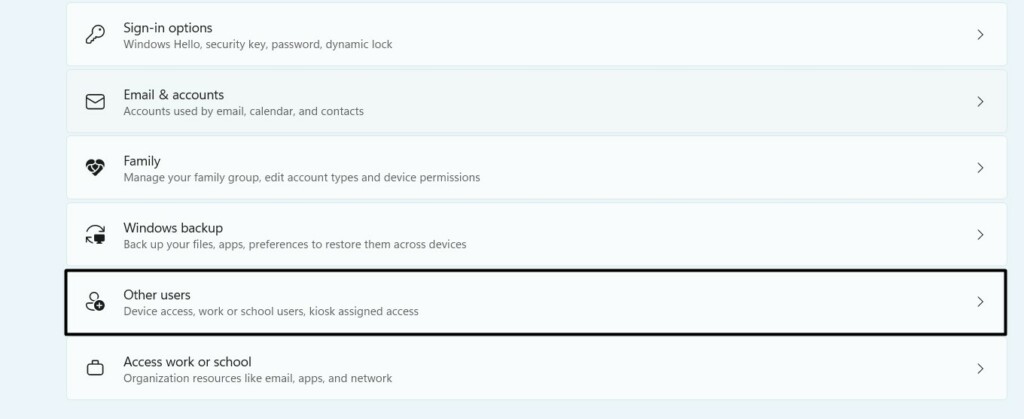
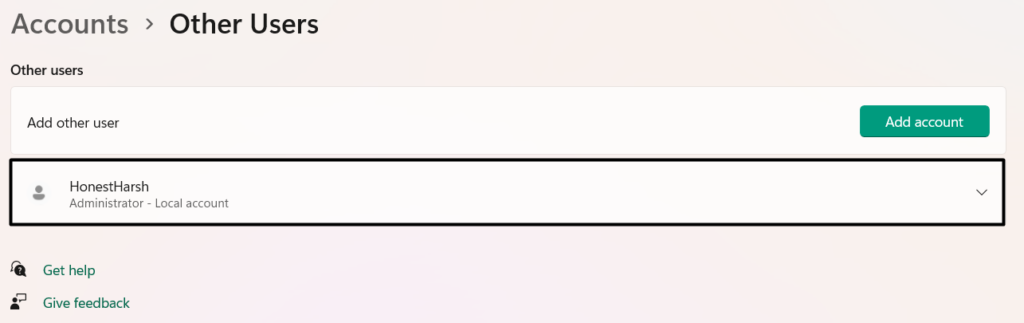
2.In theAccountswindow, under theAccount settingssection, select theOther usersoption.
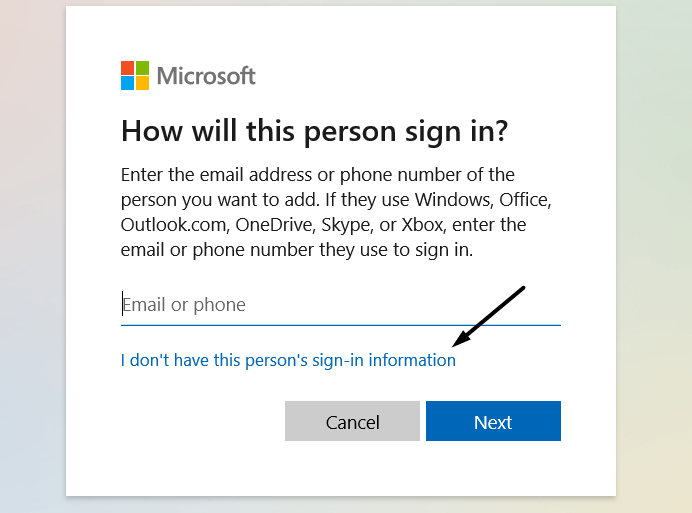
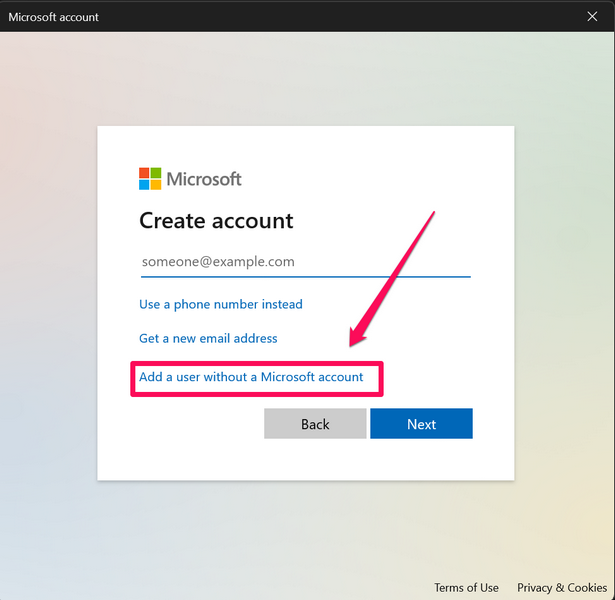
3.Choose theAdd accountbutton andselect I dont have this persons sign-in informationtext.
4.Select theAdd a user without a Microsoft accountoption and follow the on-screen steps.
To do so, move to theOther userssection of the PCsSettings program.
6.On the next screen, choose the newly created account and change the user role to admin.
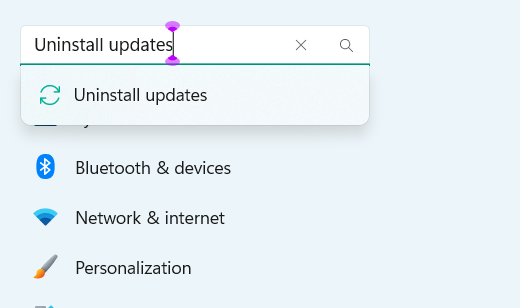
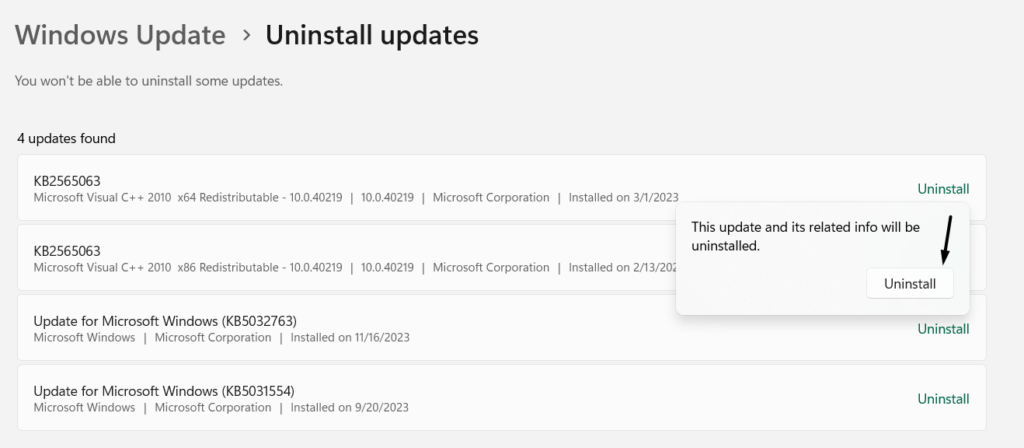
2.Place the cursor in the search bar at the left, typeUninstall updates, and then choose it.
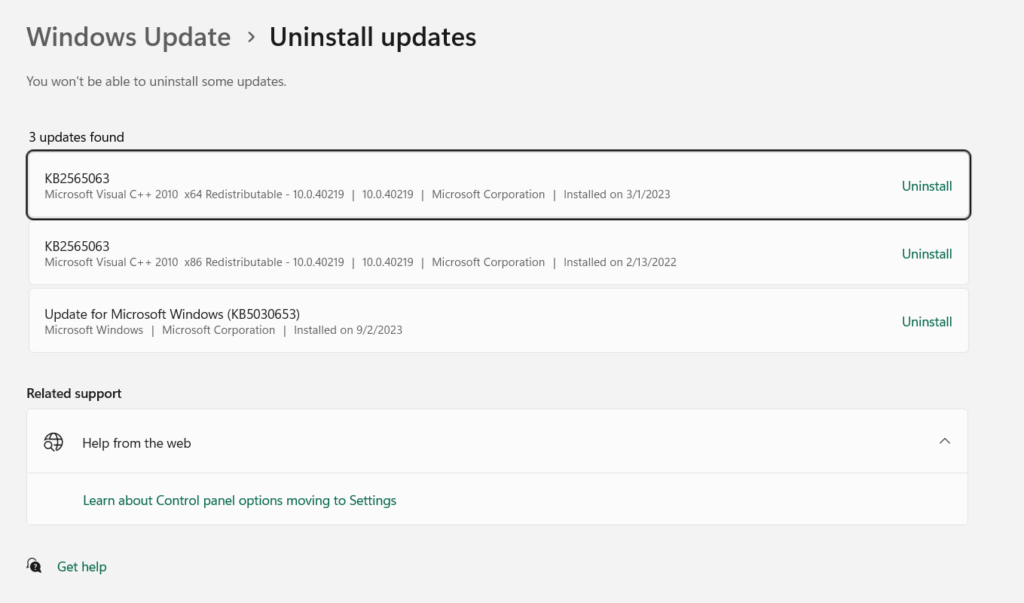
3.In the next window, find the recently installed Windows 11 update and clickUninstallnext to it.
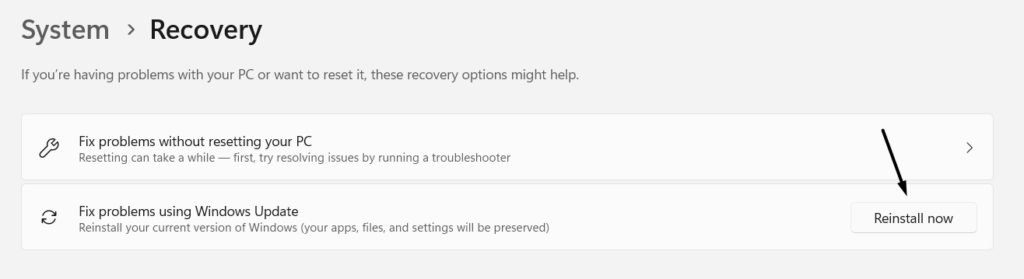
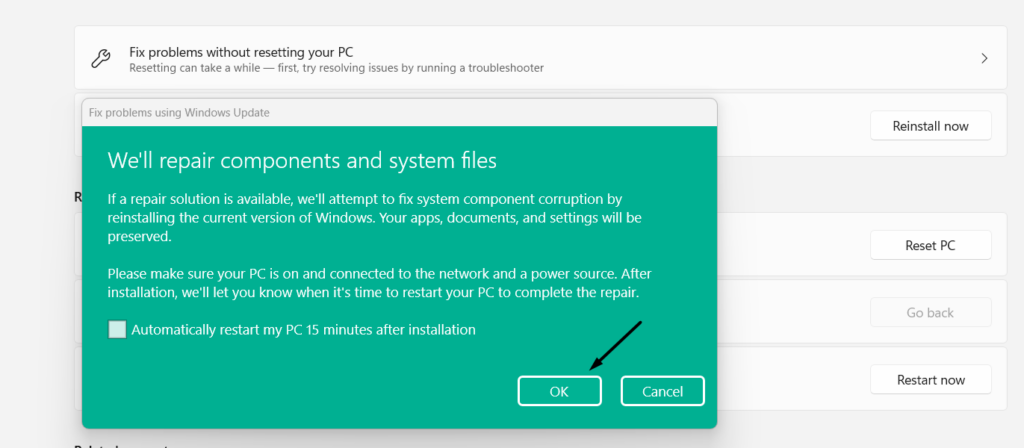
2.UnderRecovery, next toFix problems using Windows update, click onReinstall now.
3.In theFix problems using Windows updatewindow, choose theOKbutton to start it.
2.Choose theStart nowoption to kick off the Adobe Virtual Assistant and explain your issue to it.
3.Once done, answer the next set of questions according to your experience and connect to an assistance.
The Adobe Acrobat support assistant will help you fix these issues.
FAQs
Is Adobe Acrobat DC Compatible With Windows 11?
Yes, Adobe Acrobat DC is compatible with the latest Windows 11 and works without any issues.
How Do I Repair Adobe Acrobat Windows 11?
you might find the option to repair Adobe Acrobat in itsHelpmenu.
Why Wont Adobe Acrobat Open on Windows 11?
It could also be possible that your Windows 11 gadget user account has been corrupted.
Why Is Adobe Acrobat DC Not Working?
Other reasons could be third-party antivirus programs, missing admin rights, temporary folders, etc.
How Do I Repair Adobe Acrobat DC?
However, like other PDF viewers, it also, at times, experiences issues in working properly.
For instance, it doesnt open or launch on the PC.
Lastly, let us know which listed fix helped you fix Adobe Acrobat DC not working on Windows 11.