Especially when you have a ton of images to manage.
That said, read on to learn how to convert images in Apple Files app on iPhone and iPad.
No wonder, many have started to liken it to macOS Finder in terms of versatility.
1.First off, open theApple Files appon your iPhone.
2.Now, head over to the folder where your images are stored.
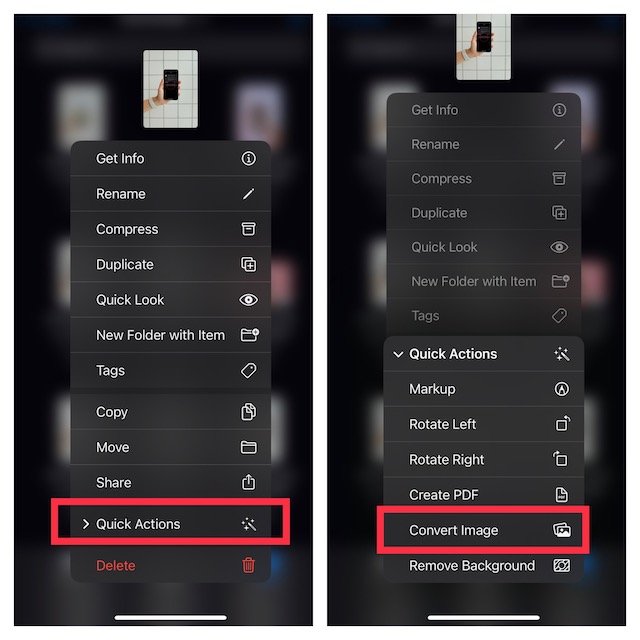
3.Next, long-press on an image and chooseQuick Actionsin the contextual menu.
4.Tap onConvert Imagein the menu.
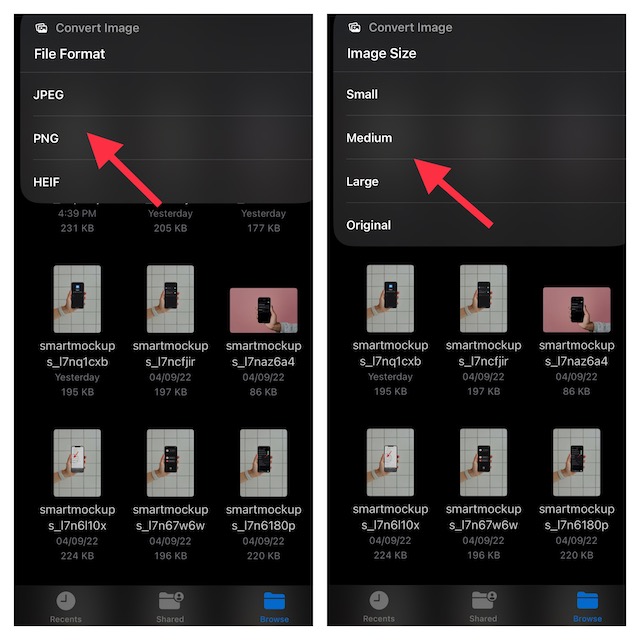
5.opt for desired image format such asPNG, JPEG, and HEIFin the menu.
6.Finally, choose the preferred image size such asLarge, Small, Medium, and Original.
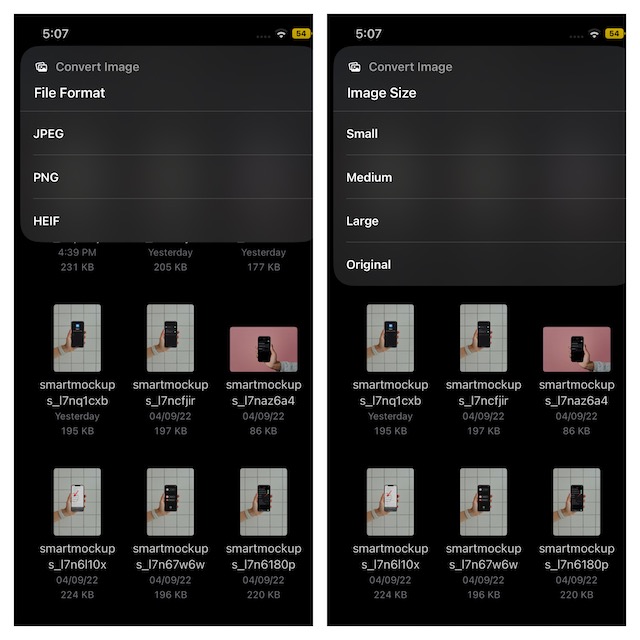
The Files app will instantly convert the image and save it in the same location.
Hence, you wont have to look around to find the converted image in the app.
2.Tap on thetriple-dotaka ellipsis icon at the upper right corner of the screen
3.Now, choose Selectin the menu.
4.Next, it’s crucial that you select all the photos that you would like to convert.
5.Next up, tap on thetriple-dot iconthat appears at the bottom right corner of the screen.
6.SelectConvert Imagein the menu.
7.Choose the preferredimage formatin the popup menu.
The Files app will immediately convert the selected photos and save them all in the same folder.
