HEIC (High-Efficiency Image Container) is probably the best way to capture high-quality images without cluttering the storage.
Both in terms of compression and image quality, it has a clear edge over JPEG.
So, whats holding you back?
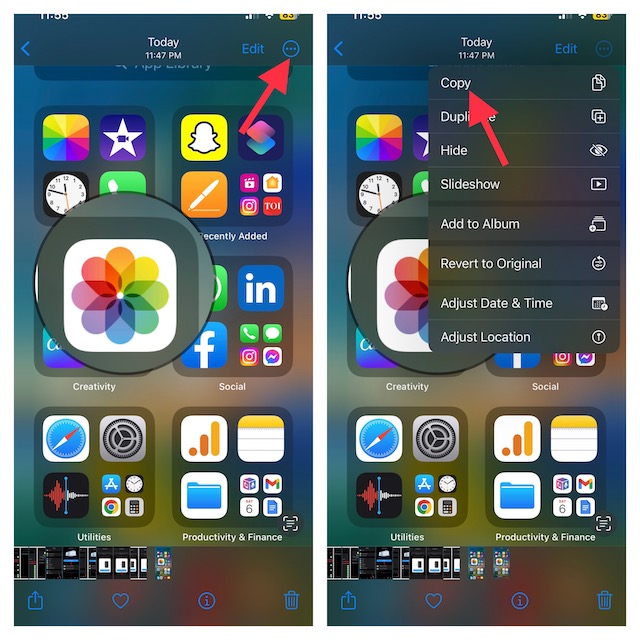
1.First off, open thePhotos app.
Then, find the very photo it’s crucial that you convert to JPG and Share.
2.Tap onthree dotsfrom the top right corner and chooseCopy Photo.
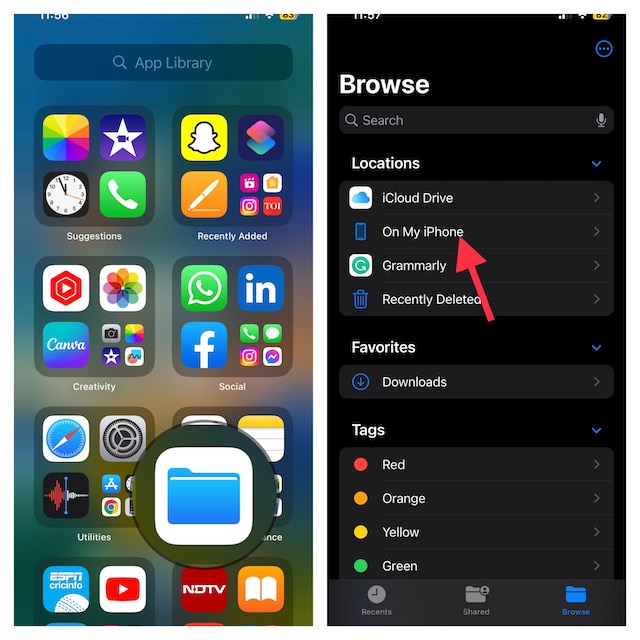
3.Then, open theFiles appand tap onOn My iPhone.
4.After that, long-press on an empty area and hit Paste in the menu.
Thats all there is to it!
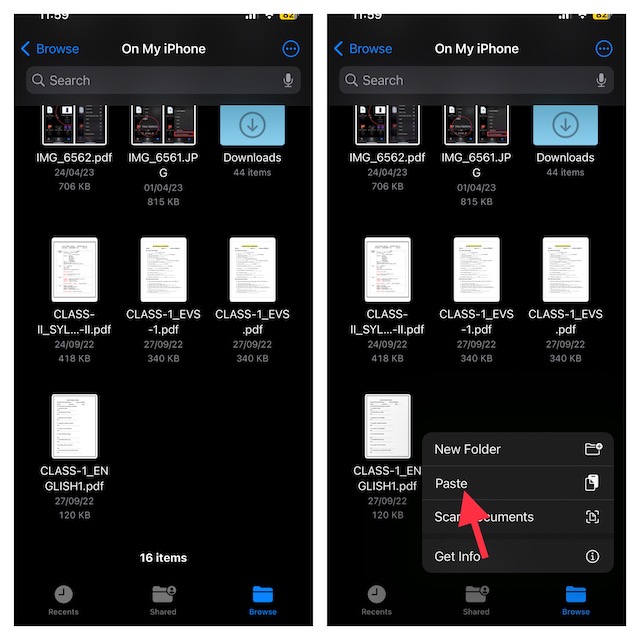
You have successfully converted the image into JPEG format.
Note that you might follow the same steps to turn multiple HEIC photos into JPEG format at once.
you’re free to also set your iPhone to automatically transform HEIC images into JPEG.
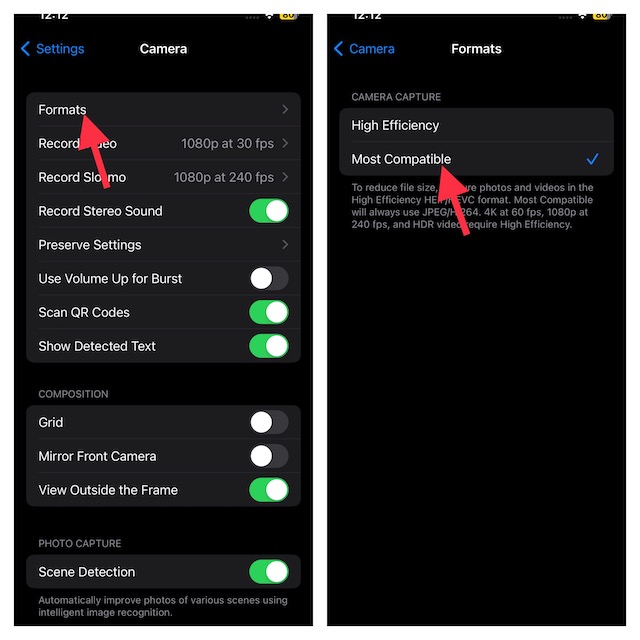
1.To get going, open theSettingsapp on your iPhone and select Camera.
2.Now, tap on Formats and then choose Most Compatible.
Going forward, your iPhone will automatically save HEIC shots into JPEG.
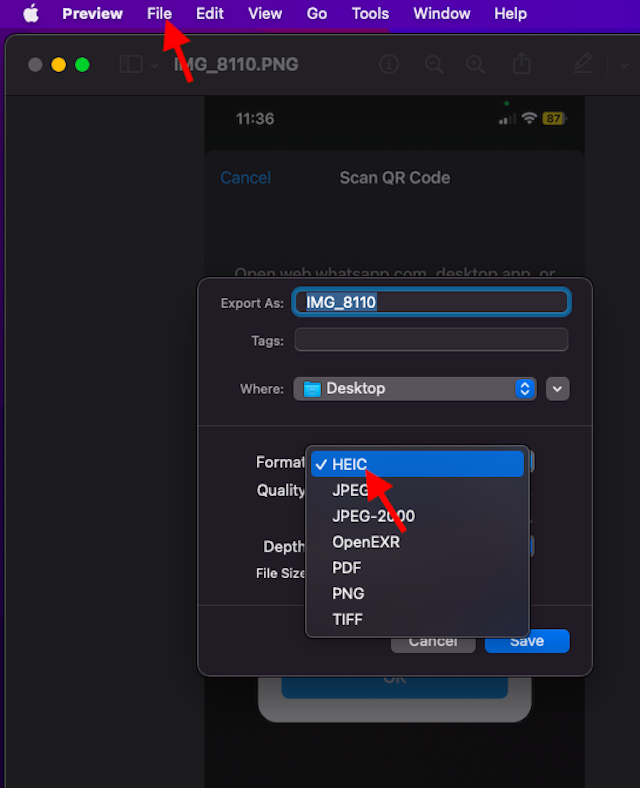
1.To do so, initiate the HEIC photo on your Mac.
2.Then, punch theFilemenu at the top and selectExportin the drop-down menu.
3.After that, chooseJPGas the preferred format.
Also, choose the desired location where you want the image to be saved.
4.Finally, press Save and you are done!
Keep worries aside as you’ve got the option to get it done without breaking any sweat.
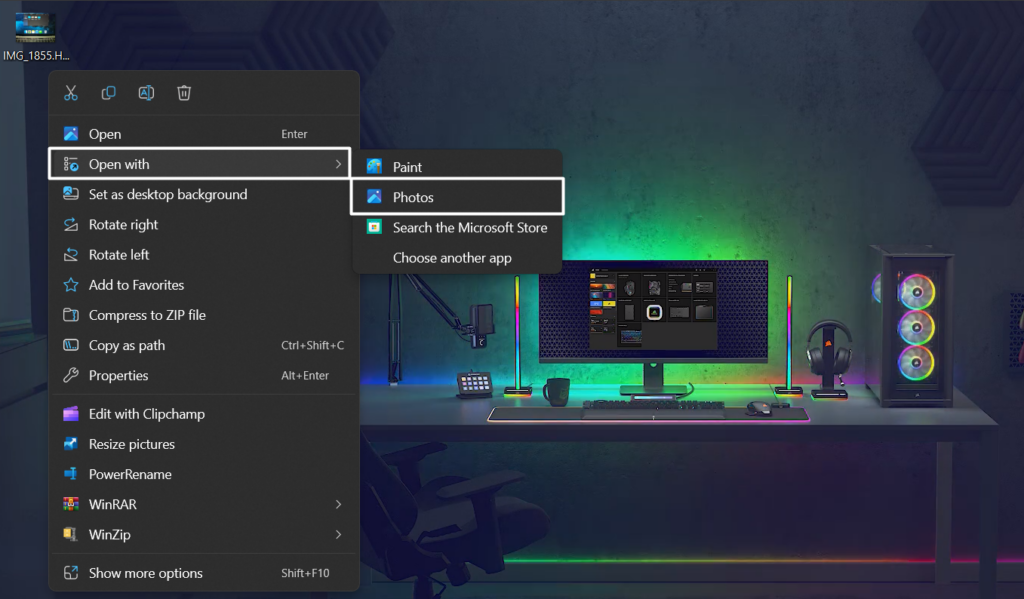
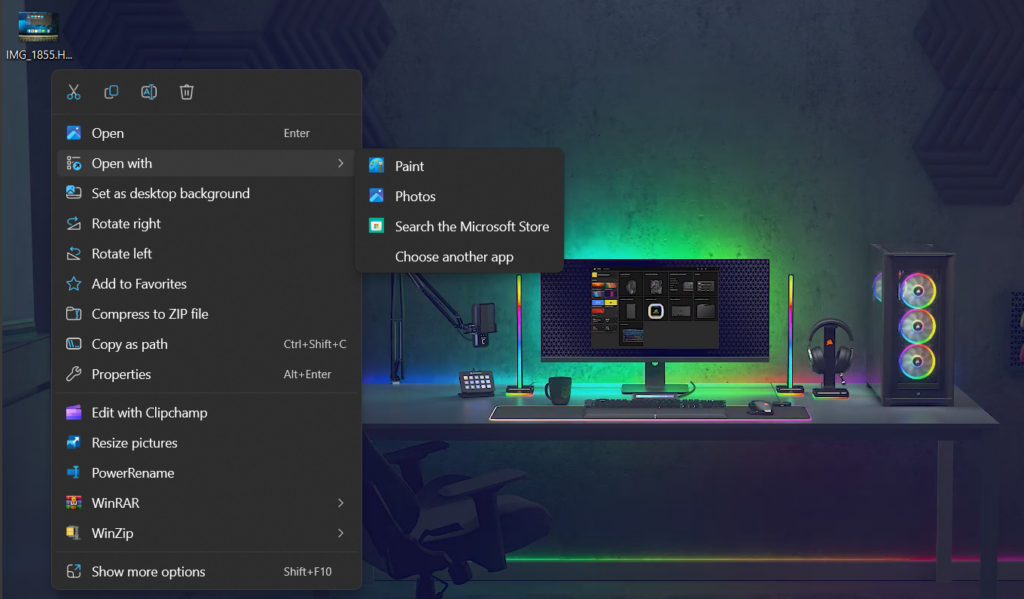
1.To begin with, right-press the HEIC image.
2.Now, click onOpen withand choosePhotosin the contextual menu.
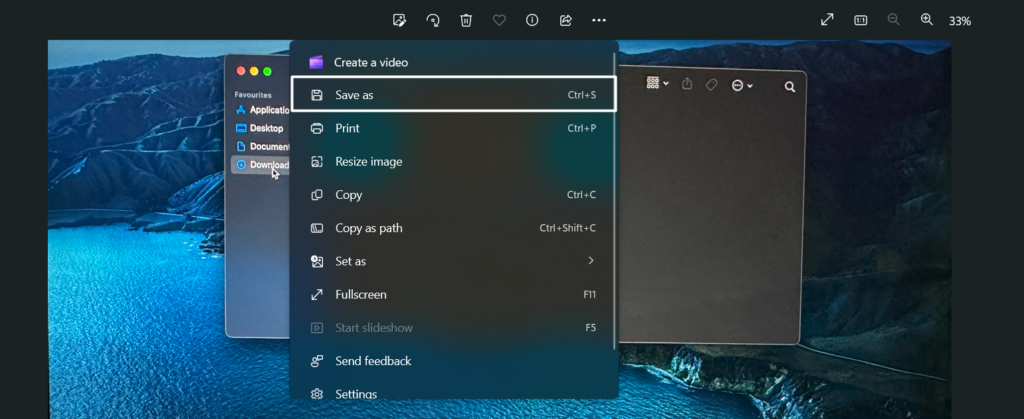
3.Click onSee moreand then hit the menu button.
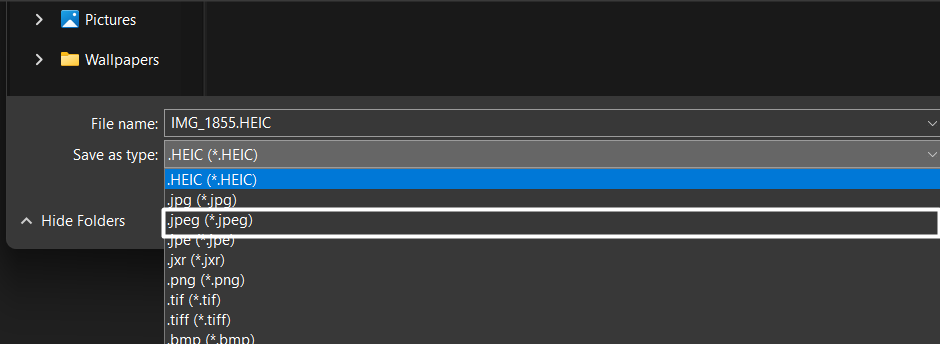
4.After that, select Save as -> JPEG and hitSave.
Signing Off…
There you have it!
Thats how you could convert your HEIC photos into JPG on your iPhone, Mac, and PC.
The conversion makes your photos viewable on other devices even when they arent Apple users.
Besides, it also comes in handy when a particular photo editing software lacks the support of this image.
