Windows will record everything that occurs on your operating system.
This post fromMiniTool Solutionprovides you with 3 ways on how to check USB history on your rig.
Why Do it’s crucial that you View USB rig History?

Windows keeps logs of a history of rig connections on your system.
All the USB devices that are connected to and unplugged from your system.
How to check USB history?
In the following paragraphs, we will show you 3 ways to do that.
Without further delay, lets get started!
Do you know how to safely remove the hard drive from your system?
This post will introduce 2 types of hard drive removal policies on Windows 10/11.
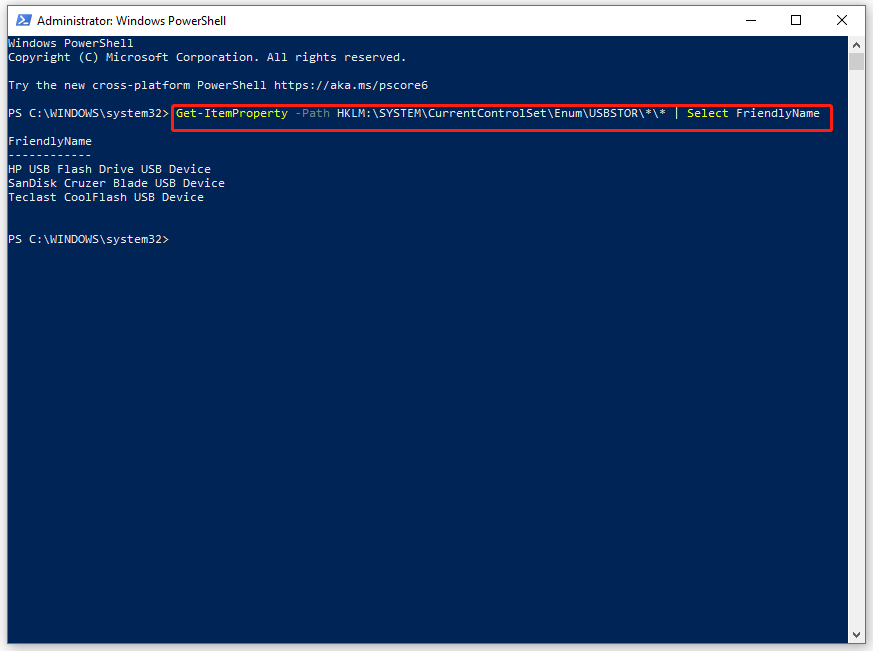
How to Check USB History via Windows PowerShell?
Windows PowerShellis designed to automate system tasks, create system management tools for commonly implemented processes and more.
To do so:
Step 1.
Right-choose theStart iconand selectWindows PowerShell (Admin).
Therefore, it’s possible for you to also view USB history via it.

Heres how to
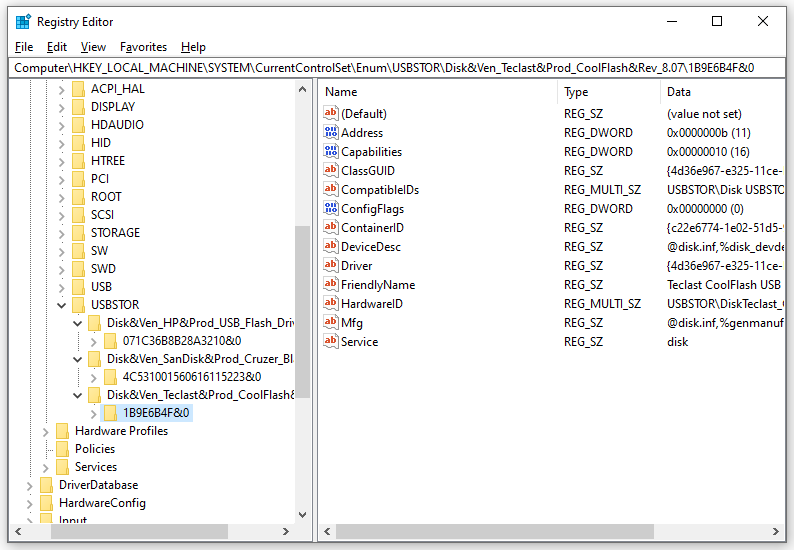
Step 1.
PressWin+Rto evoke the search bar.
Navigate to the following path:
HKEY_LOCAL_MACHINE\SYSTEM\CurrentControlSet\Enum\USBSTOR
Step 4.
Under theUSBSTORfolder, it’s possible for you to see keys named with all your USB devices.
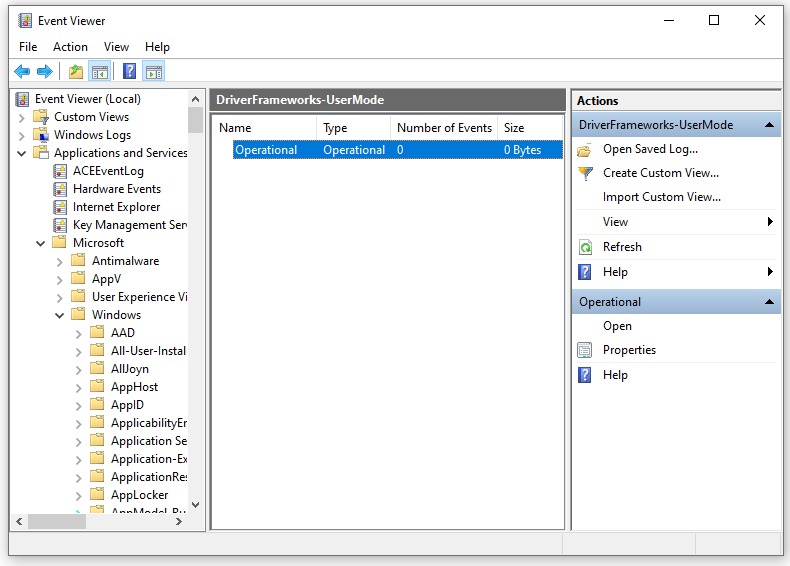
How to Check USB History via Event Viewer?
Also, you could view USB history viaEvent Viewer.

This utility provides a log of applications and system messages.
Heres how to check USB usage history via it:
Step 1.
PressWin+Sto fire up the search bar.
ExpandApplication and Services Logs>Microsoft>Windows>DriverFrameworks-UserMode>Operational.
By default, this log is disabled, so you’re gonna wanna enable it manually.
To do so: click onPropertiesin the right pane > tickEnable Logging> save the changes.
Event Viewer is a Windows inbuilt utility that contains a number of logs.
What to do if Event Viewer logs are missing?
Read through the post to get fixes now!
With a backup copy in hand, it will be much easier to regain your data.
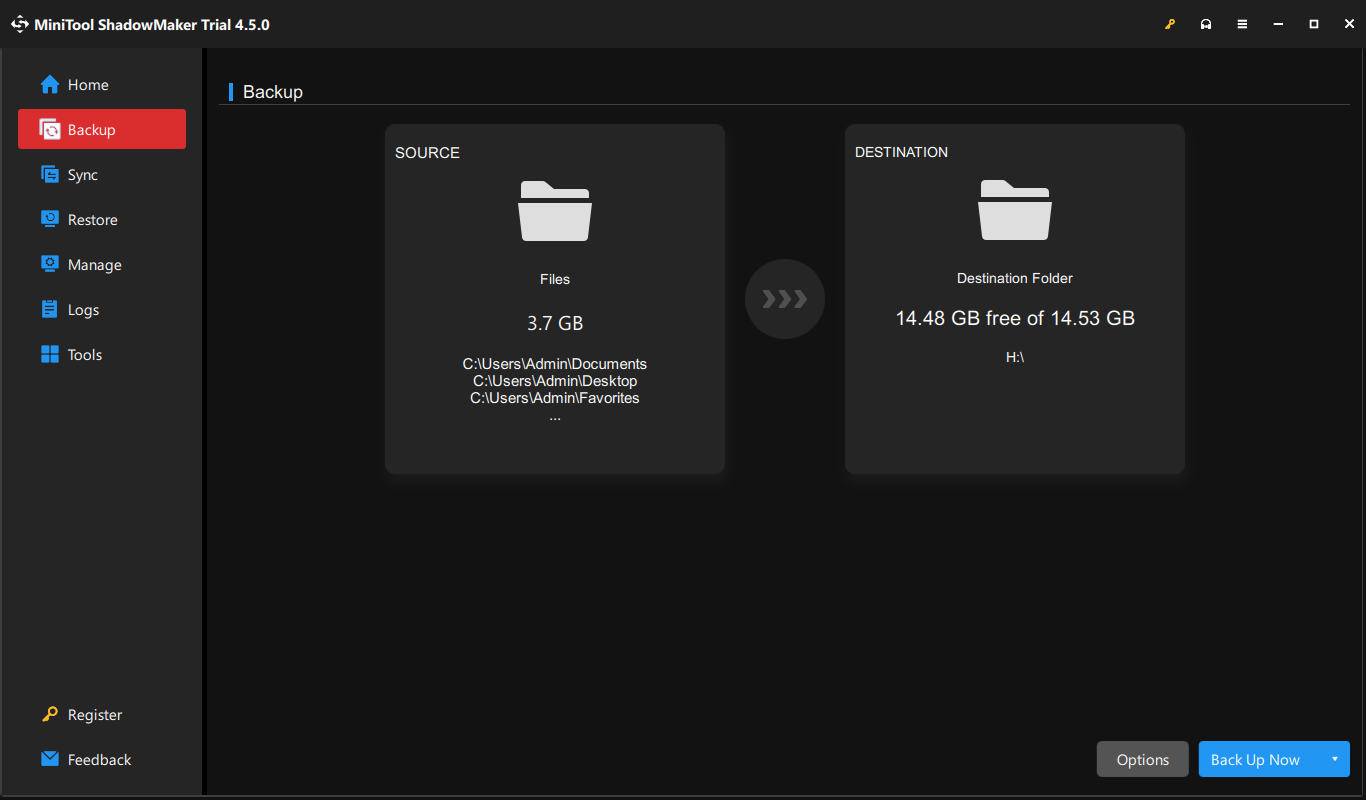
Heres how to create a file backup with it:
Step 1.
Launch MiniTool ShadowMaker and hitKeep Trial.
MiniTool ShadowMaker TrialClick to Download100%Clean & Safe
Step 2.
In theBackuppage, hitSOURCE> selectFolders and Files> pick the files you want to protect.
Then, go toDESTINATIONto choose a storage path for the backup image.
Click onBack Up Nowto start the process at once.
This guide will introduce 3 ways to create a scheduled backup on Windows 10/11.
Keep reading to get the detailed steps now!
Final Words
This post illustrates how to detect USB history in 3 ways.
Which method do you prefer?
We sincerely hope that your data can always be safe and sound!
