Microsoft dropped the subsequent iteration of its Windows operating system, Windows 11, earlier this year.
When you install Windows 11 on your PC, It will boot with the default screen resolution.
If you face any blurriness on your screen, your best bet will be to change screen resolution.
Here, in this article, I have provided four possible ways to change screen resolution in Windows 11.
I have provided a step-by-step process to change display screen resolution using all these methods.
Go ahead follow the technique that feels convenient to you.
From controls
The easiest way to change screen resolution in Windows 11 is from the controls app.
Microsoft has added the option to change the resolution right in the built-in options app.
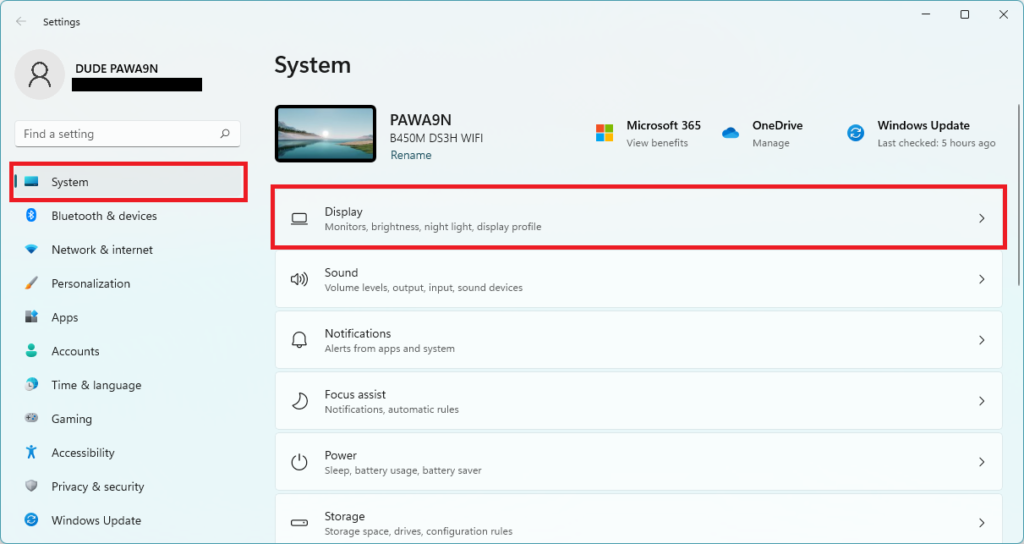
Step 1:PressWindows Key + Ion your keyboard to open theSettingsapp.
Step 2:In the configs app, tap onSystemon the left side.
Under System prefs, tap onDisplay.
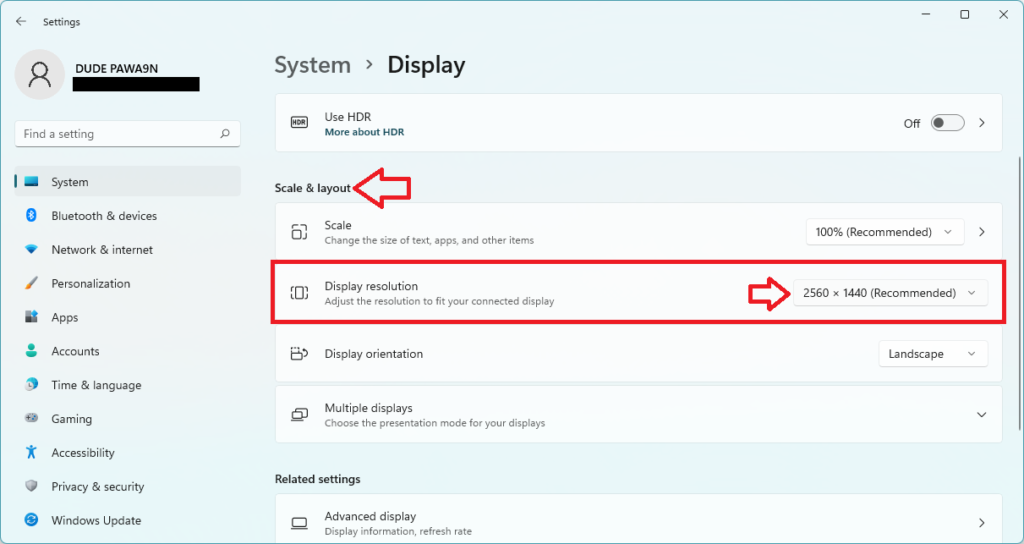
Step 3:In the Display prefs, scroll down toScale & layoutsection.
Under the Scale & layout section, you will findDisplay resolutionsettings.
It will be showing the current resolution of the Display.
Step 4:Tap on the drop-down arrow right to the current screen resolution.
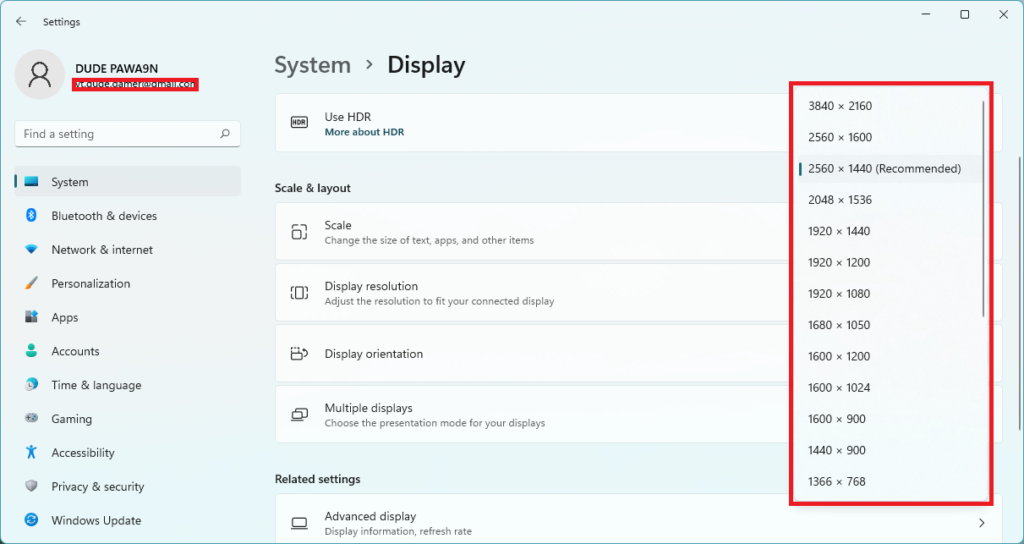
Now a list of different available resolutions of your Display will appear.
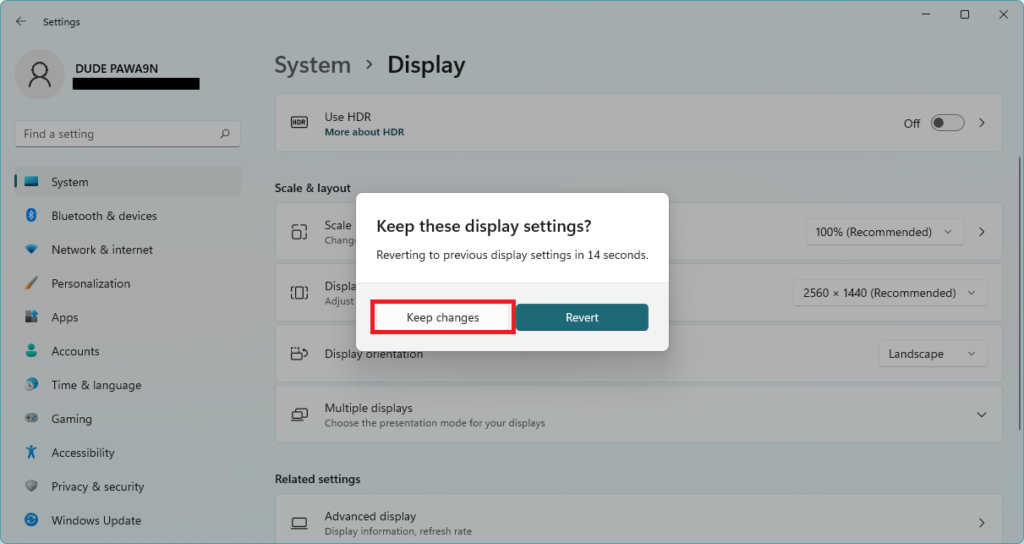
The system also marks the best possible resolution for your Display as recommended.
choose the resolution as per your requirement.
Tap on Keep changes to save the newly selected screen resolution.
You have successfully changed screen resolution in Windows 11.
From Advanced Display parameters
Step 1:Open theSettingsapp on your PC and tap onSystemon the left side.
Under System prefs, tap onDisplay.
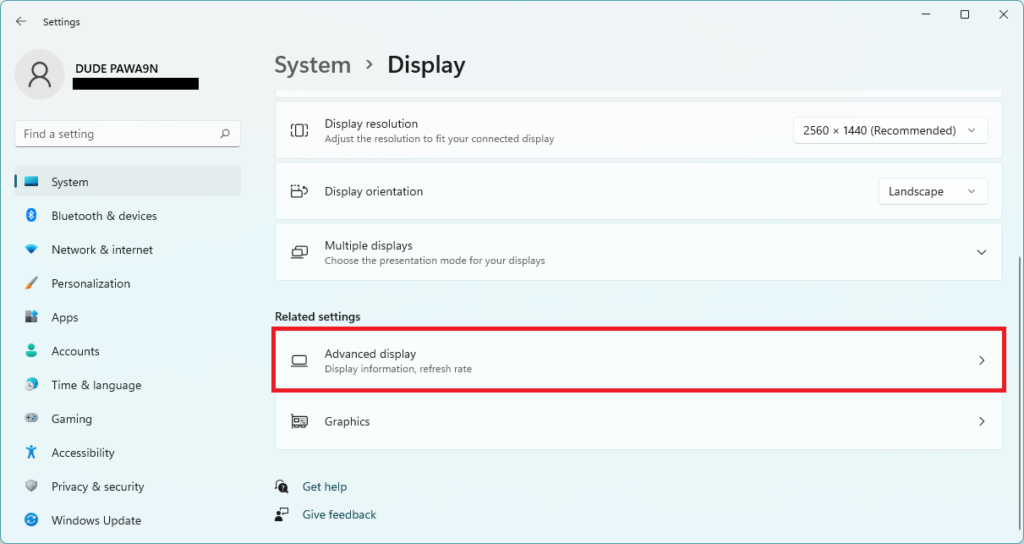
Step 2: In the Display prefs, scroll down to theRelated settingssection.
Under Related options, you will find theAdvanced displayoption.
Tap on thearrowicon next to the Advanced display to expand it.
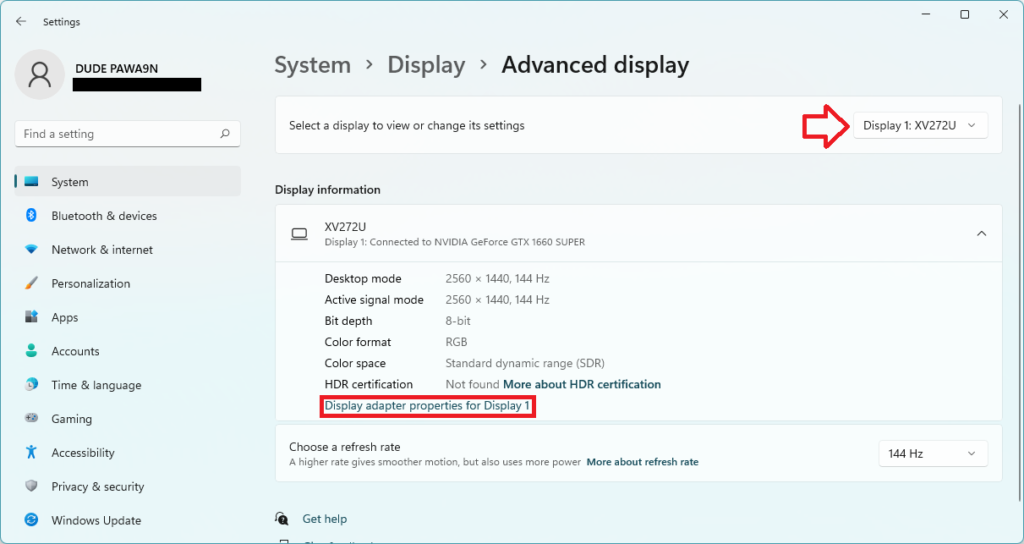
Step 3: Under the Advanced display parameters, grab the display you want to change the screen resolution.
Step 4: Scroll down to theDisplay informationsection and tap onDisplay adapter properties for Display 1.
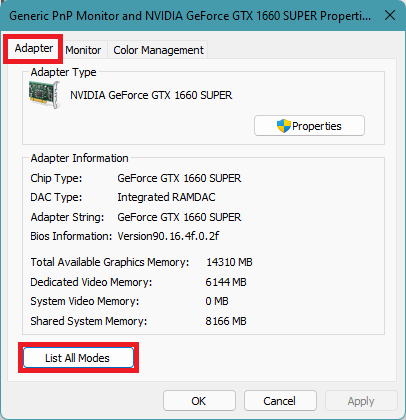
Step 5: By default, you will land on the Adapter tab.
From there, tap on theList All Modesbutton.
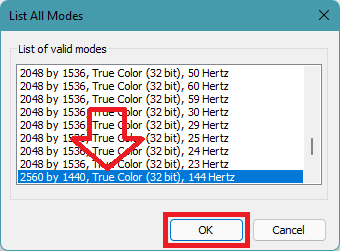
Step 6: Now, a list of all valid modes for your PC will appear on the screen.
Scroll through the list and select a resolution from it.
Once done, tap onOK, and then on the Adapter tap.
Dont forget to tap onApply.
Step 3:In theIntel Graphics Command Centerapp, tap onDisplayon the left side.
Step 4:You will land on the General tab under Display parameters.
The very first option in the General tab will be Resolution.
It will show the current resolution of the screen.
There will be a drop-down arrow right to the present resolution.
snag the resolution as per your requirement.
If you get a confirmation prompt after selecting the resolution, tap on theKeep changesbutton.
If your PC has NVIDIA graphics, then NVIDIA Control Panel app should be there.
If the app is not available, it’s possible for you to download it fromhere.
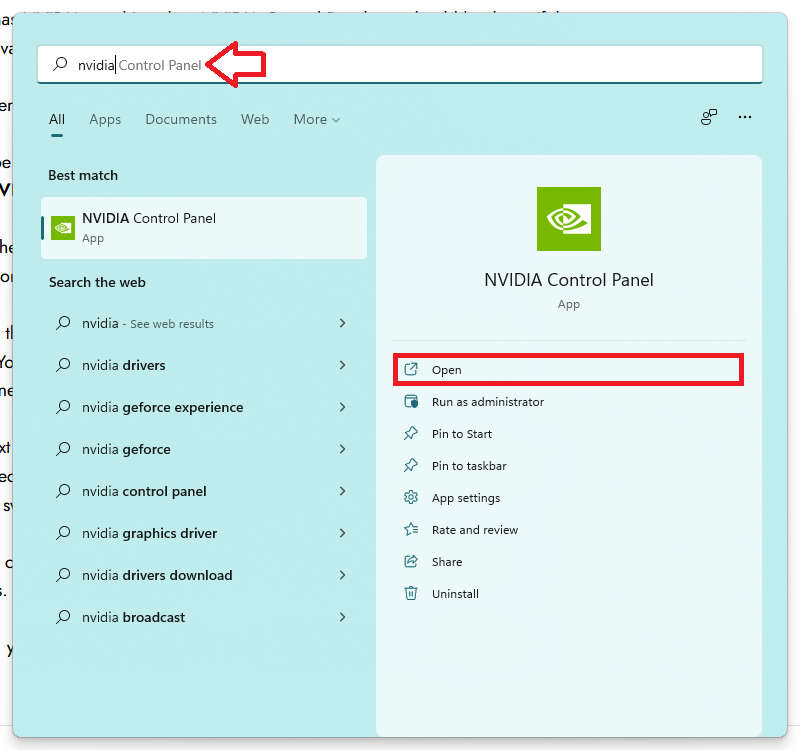
Step 1:OpenSearch by pressing the magnifying glass in the taskbar.
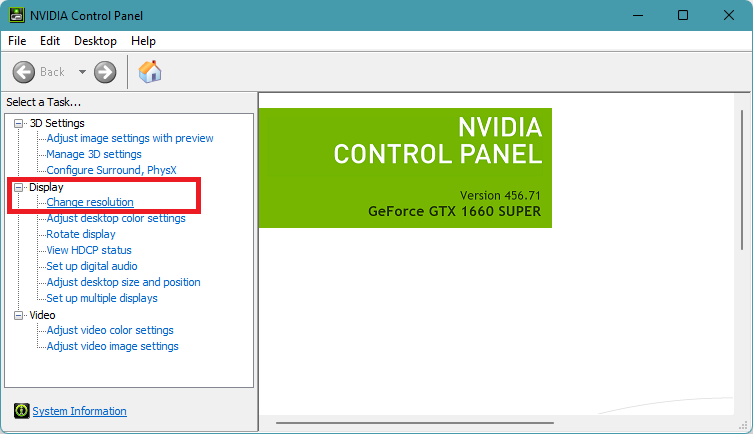
Step 3:In theNVIDIA Control Panelapp, tap onDisplayon the left sidebar.
Under Display tap onChange resolution.
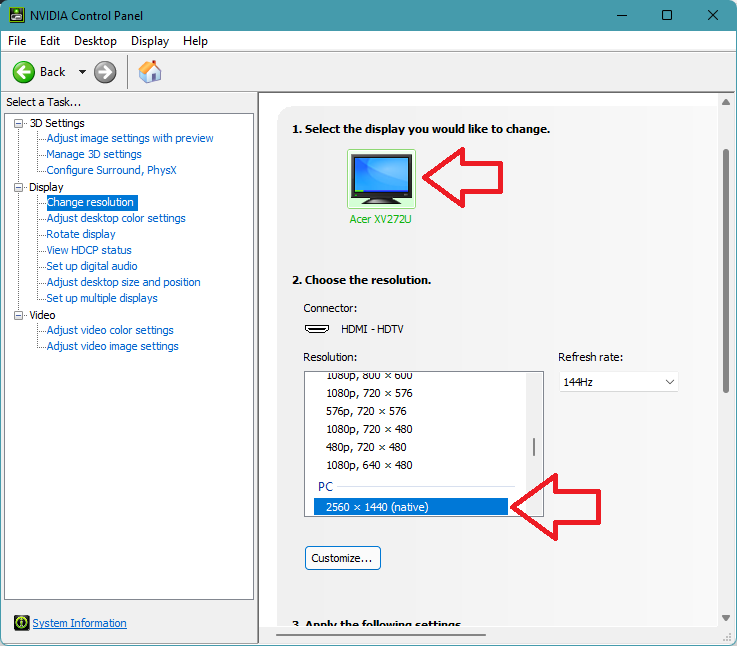
Step 4:On the Change resolution page, snag the display you want to change the resolution.
Step 5:Next up, tap on the drop-down menu icon below resolution under Choose the resolution section.
Step 6:If a confirmation prompt appears on the screen, tap onApply Changesto save the changes.
Once done, you have successfully set a new screen resolution usingNVIDIA Control Panelapp.
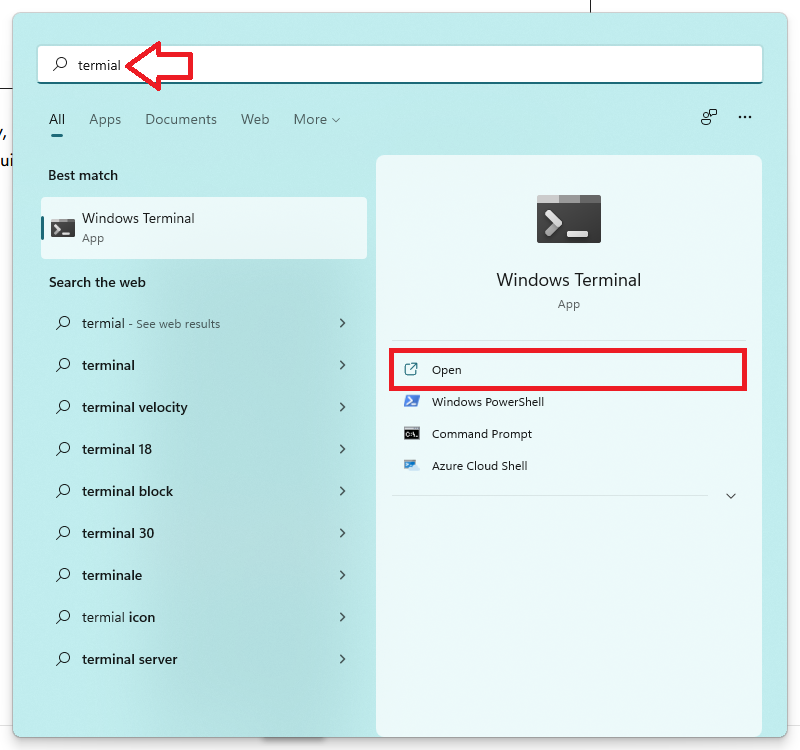
TypeWindows Terminalin the search bar and double hit the best match to launch Windows Terminal on your PC.
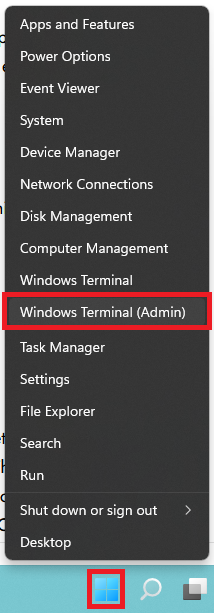
In the Quick links menu, tap onWindows Terminalto launch it.
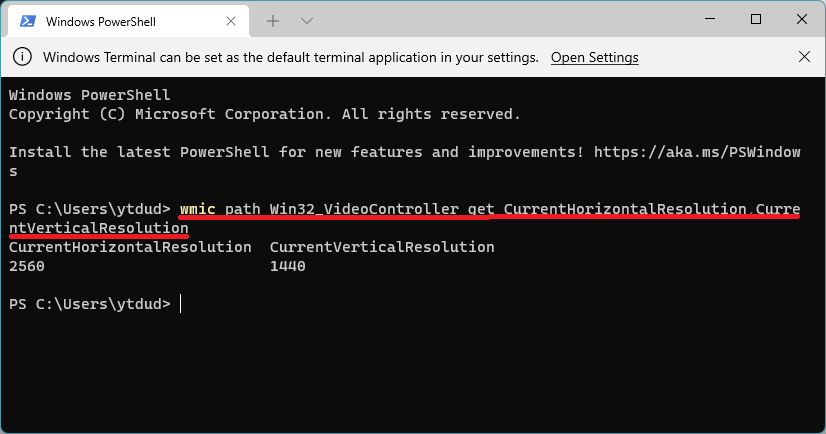
Step 2:InWindows Terminal, copy and paste the below command and press enter.
I know you will only be able to see the screen resolution by running the above command.
FAQs
How do I change screen resolution in Windows 11?
you’re free to change screen resolution in Windows 11 from the controls app.
Microsoft has added the option to change screen resolution under Display tweaks.
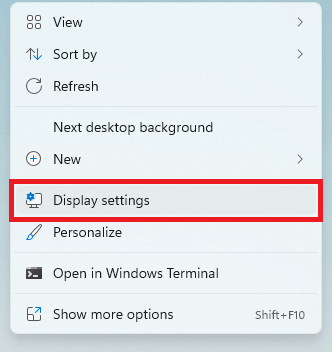
Right-click anywhere on Desktop and tap onDisplay controls.
Scroll down to thescale & layoutsection and change screen resolution.
How do I change my screen Resolution to 1920X1080?
you’re able to change your screen resolution to19201080from the Windows controls app.
TypeWindows Key + Ito open theSettingsapp and head over to display configs.
Scroll down to thescale & layoutsection and select19201080as your new Display resolution.
Final Words
Undoubtedly, Screen Resolution is an essential aspect of a Display.
It decides how text and images will look on the screen.
There are many ways to change screen resolution in Windows 11.
Which method would you like to follow for changing the screen resolution?
yo drop a comment below and let us know.
