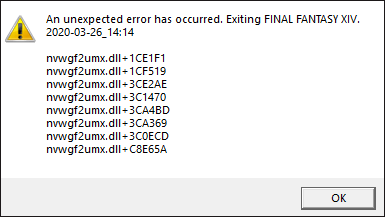
Nvwgf2umx.dll Crash
It is frustrating to receive an issue notification when you play games.
What does the nvwgf2umx.dll error mean?
As its name implies, it is associated with aDynamic Link Library (DLL) file.
Why does nvwgf2umx.dll crash happen?
Solutions to Nvwgf2umx.dll Error
Now follow the tutorials below to perform the above solutions.
Here is how to do it:
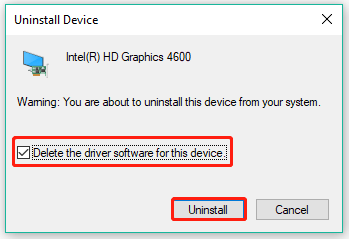
Step 1:OpenDevice Managerby pressingWindows + Xand then choosingDevice Manager.

Step 2:Once inside the unit Manager window, expand theDisplay adapterscategory and double-smack the listed unit.
Step 5:Wait for your system to finish uninstalling the GPU driver.
Step 6:Reboot your box to let your system reinstall the driver automatically from Windows Update.
If it persists, proceed to the next solution.
Fix 2: Disable Antivirus
Most people install an anti-virus program on computers to secure data.
Have you installed one on your rig?
If yes, the nvwgf2umx.dll error might be triggered by the program.
To verify whether the program is the culprit, you should disable it.
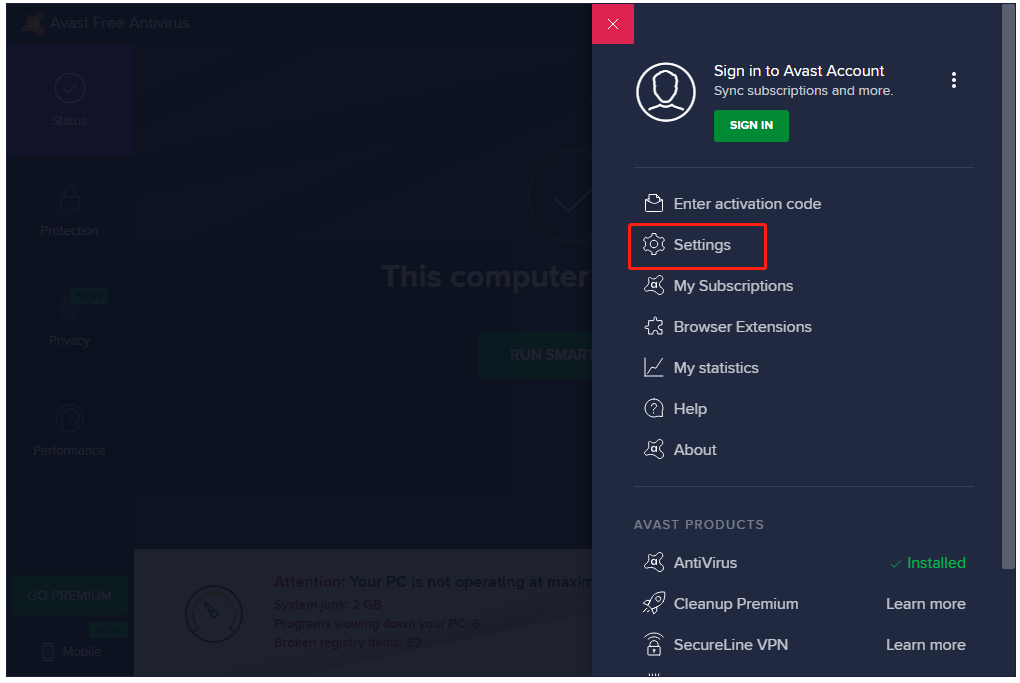
Here we takes Avast for example, showing how to turn off the program temporally.
Step 1:OpenAvastto access its main interface.
Step 2:Click theMenuoption at the top-right corner and then choose theSettingsoption from the menu.
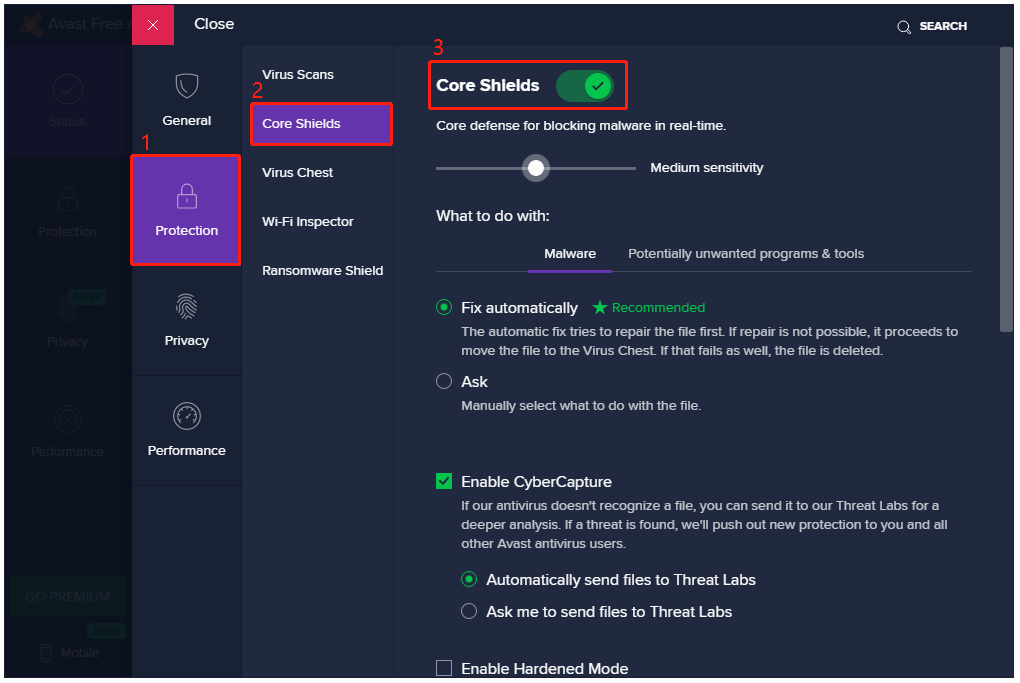
Step 3:Switch to theProtectiontab and then theCore Shieldstab.
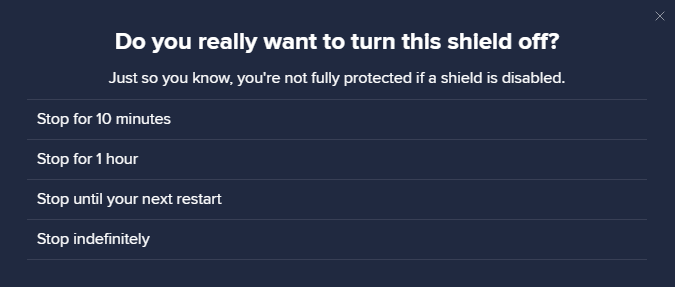
Then, toggle off theCore Shieldsbar.
Step 4:Select how long you want to keep Avast disabled.
In this case, you might choose theStop until your next restartoption.
Step 5:Click theOK, STOPbutton once it appears to confirm that you want to suspend the program.
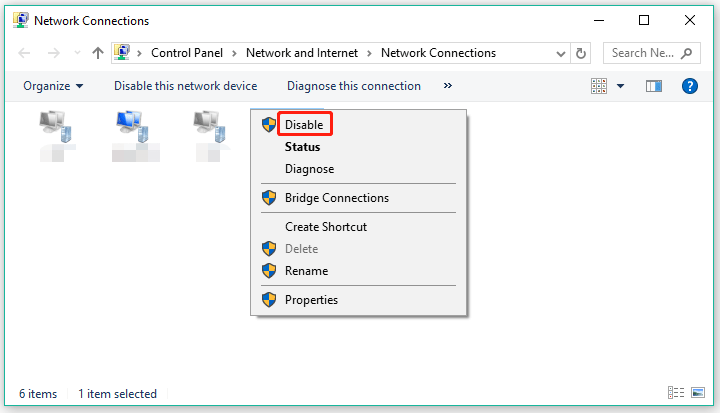
Fix 3: Disable VPN
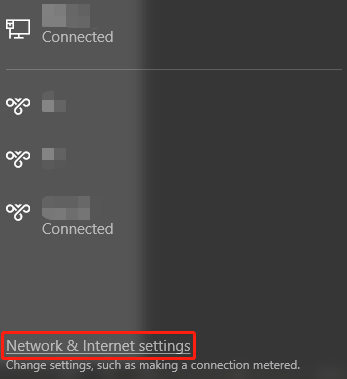
If you are using VPN, just try disabling it.
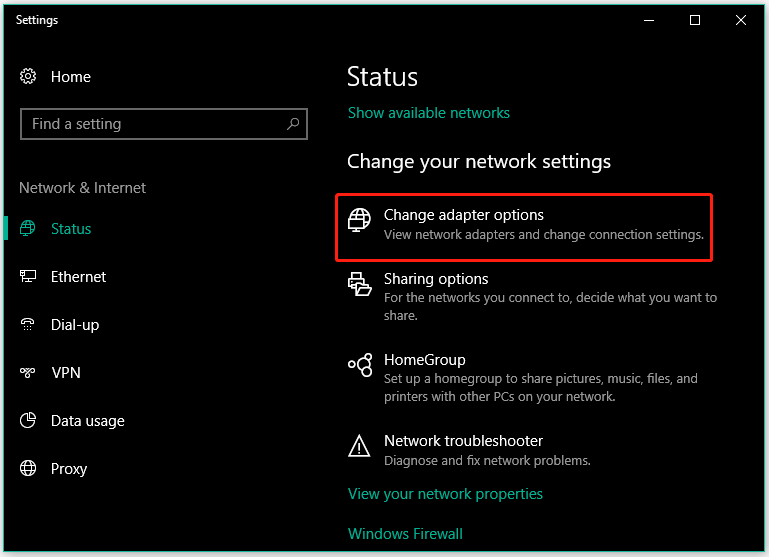
Step 2:Click theChange adapter optionsoption on the options window.
Now fire off the problematic game again and see if nvwgf2umx.dll crash happens again.
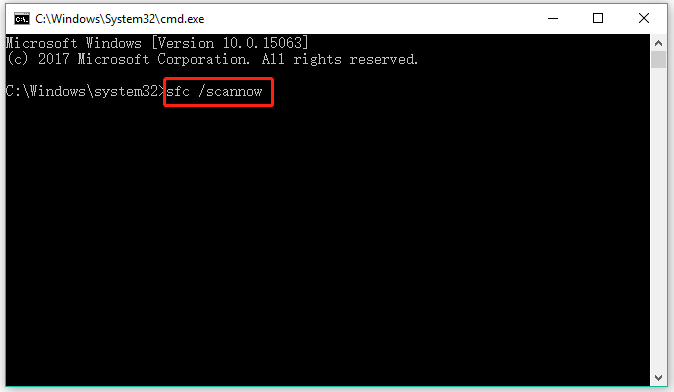
So, execute the sfc/scannow command right now.
Step 1:Run Command Prompt window as an administrator.
Step 3:Wait for the scan to finish and then start your system.
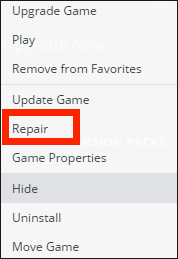
Fix 5: Verify the Game Files
Now verify if the files of the game are corrupt.
Here we show how to do that on different platforms including Steam, Epic Games, and Origin.
On Steam
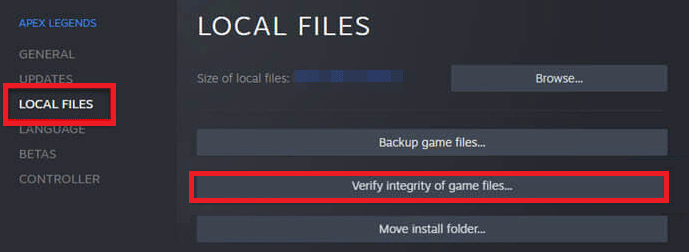
Step 1:Launch theSteamapp and then go to itsLIBRARYtab.
Step 2:Find the problematic game in the list, then right-click it, and choose thePropertiesoption.
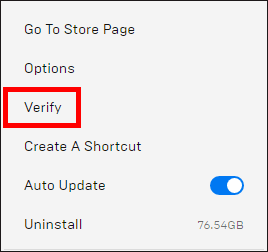
Step 1:Open theEpic Gamesapp and go toLibrary.
Step 2:Find the problematic game in Library and hit the three dots next to the game name.
Step 3:Choose theVerifyoption from the pop-up window.
On Origin
Here is how to check the integrity of game files via Origin.
Step 1:initiate the Origin app and go to theMy Game Librarytab.
Step 2:Find the game to be verified, right-click it, and choose theRepairoption.
Does the nvwgf2umx.dll error disappear after verifying the game files?
If yes, thats great!
If not, c’mon move to the next solution.
So, if the issue still shows up, give this solution a try.
We have detailed the game uninstallation process in the post:How to Remove Game from Steam Library?
Here Is Your Guide.
you might refer to it.
Therefore, if you also overclocked your CPU, like reset it back to its factory prefs.
Here is how to do that:
Step 1:Power off your gear and then power it on.
Step 2:During the booting process, enter the BIOS of your motherboard.

Step 4:Hit theF10key on the keyboard to save the change.
After stopping overclocking your CPU, it is time to see if the nvwgf2umx.dll error persists.
Before updating your BIOS, lets check your BIOS version first.
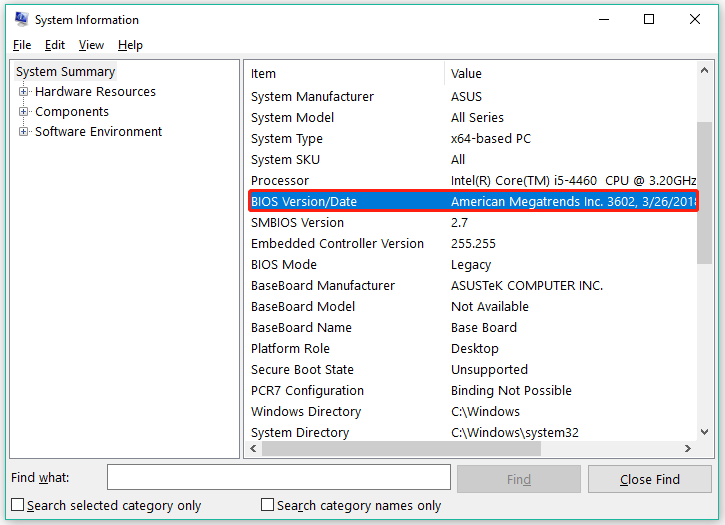
If your BIOS version is not the latest one, you’re free to update it.
Butnote thatincorrect operations will bring about more issues and even failure to start Windows.
Hence, it is highly recommended that you back up your setup before upgrade your BIOS.
How to back up your gear with ease?
How to upgrade your BIOS?
It is a trustworthy disk & partition management tool.
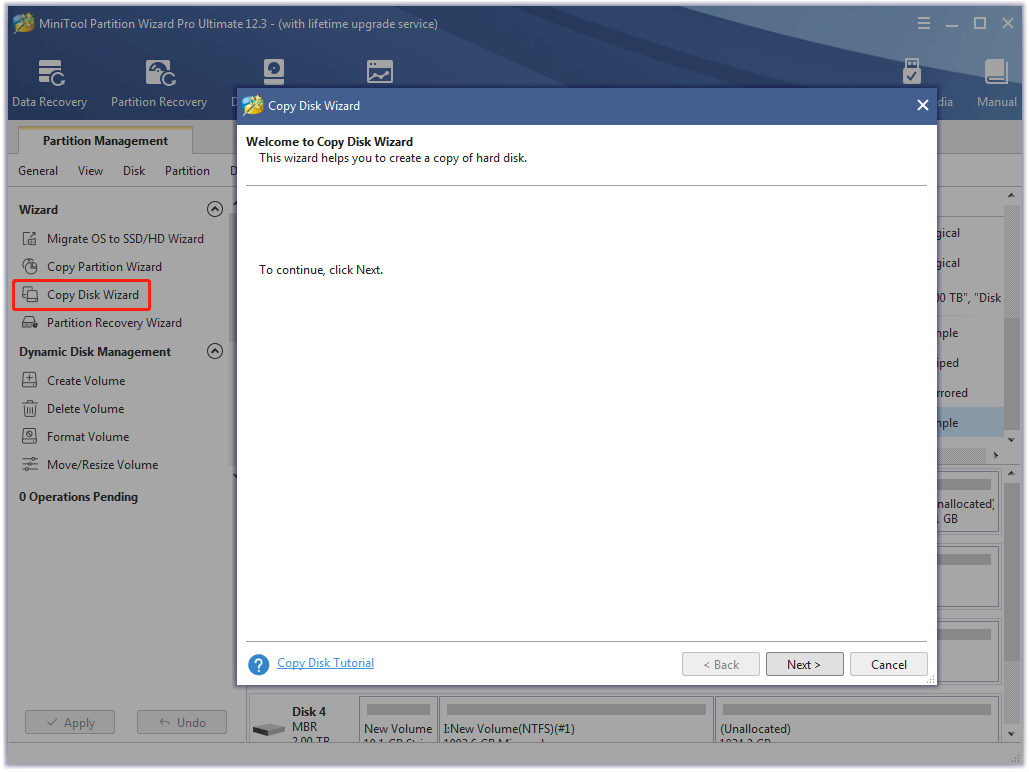
Now start backing up your machine via MiniTool Partition Wizard.
Step 2:Launch MiniTool Partition Wizard.
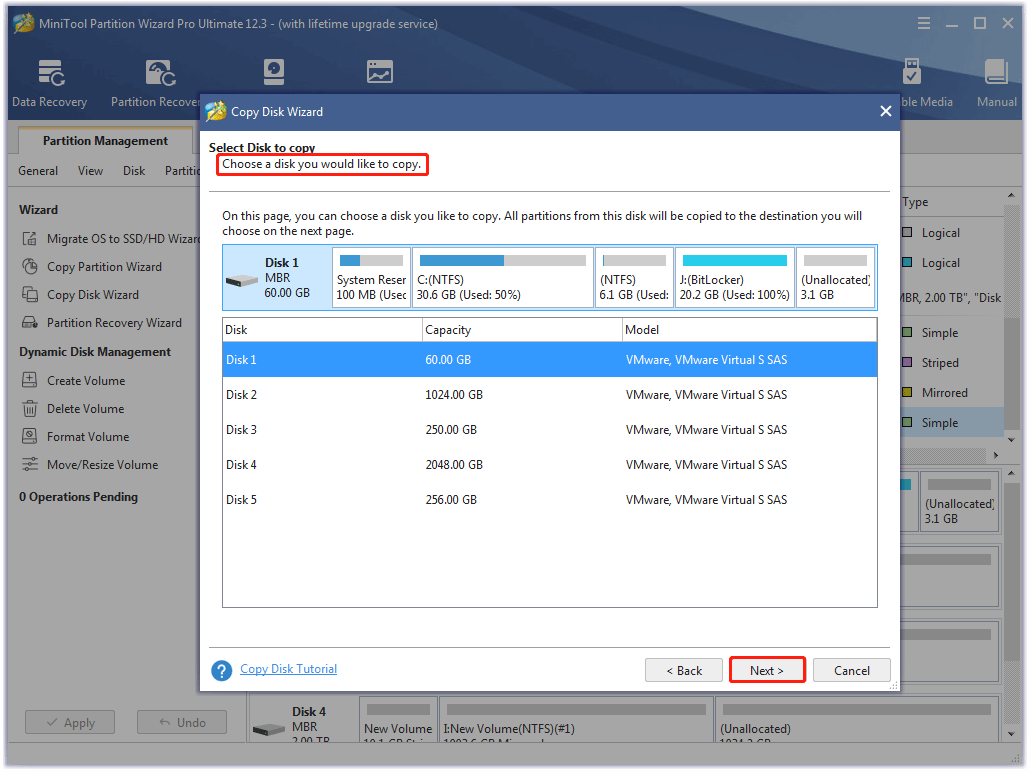
Step 4:grab the system disk as the source disk and then click theNextbutton.
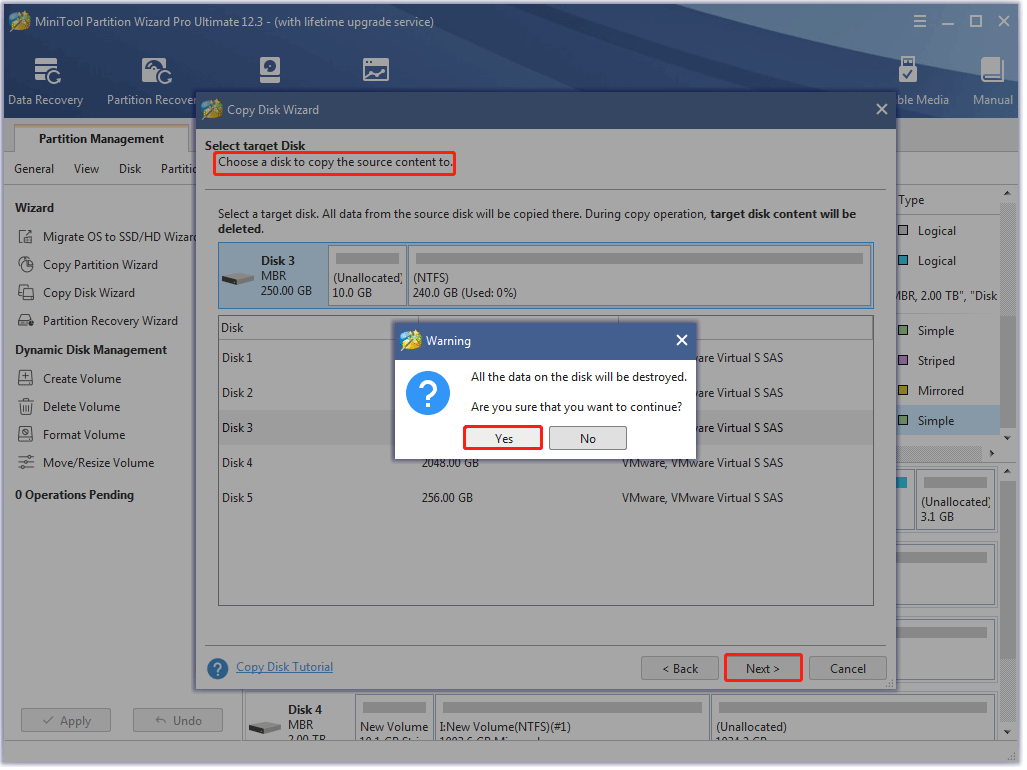
Step 5:Choose the prepared disk as the target disk and then click theNextbutton.
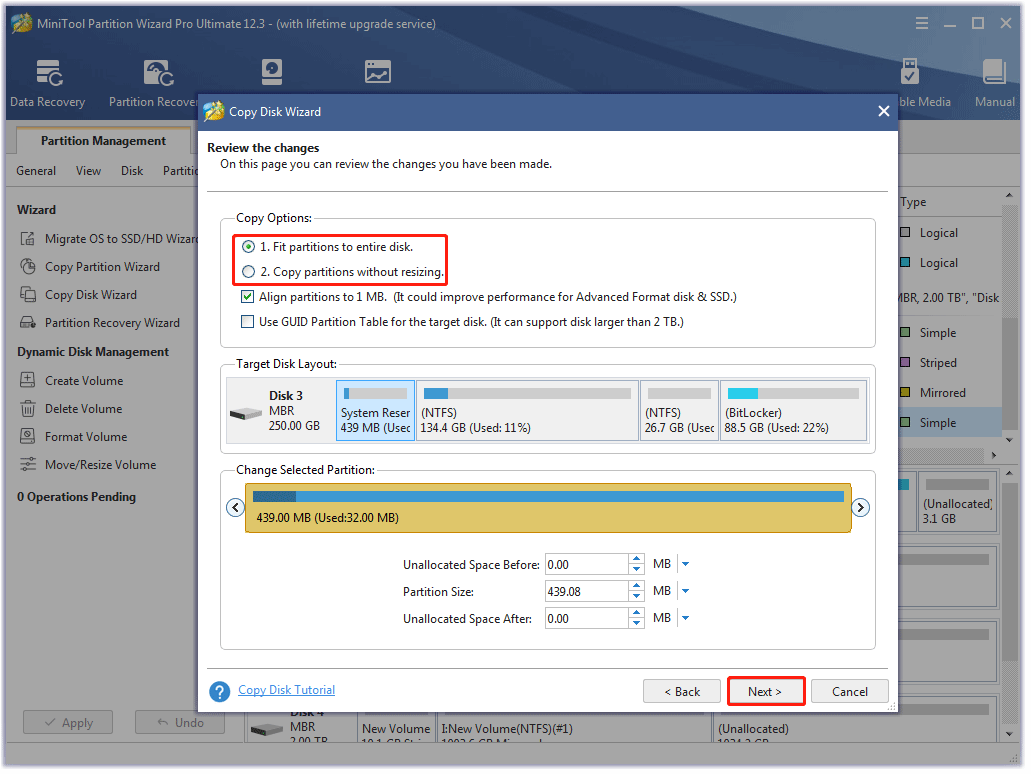
Step 6:Choose a copy method and click then theNextbutton.
Step 7:Read the note on the new window and then click theFinishbutton.
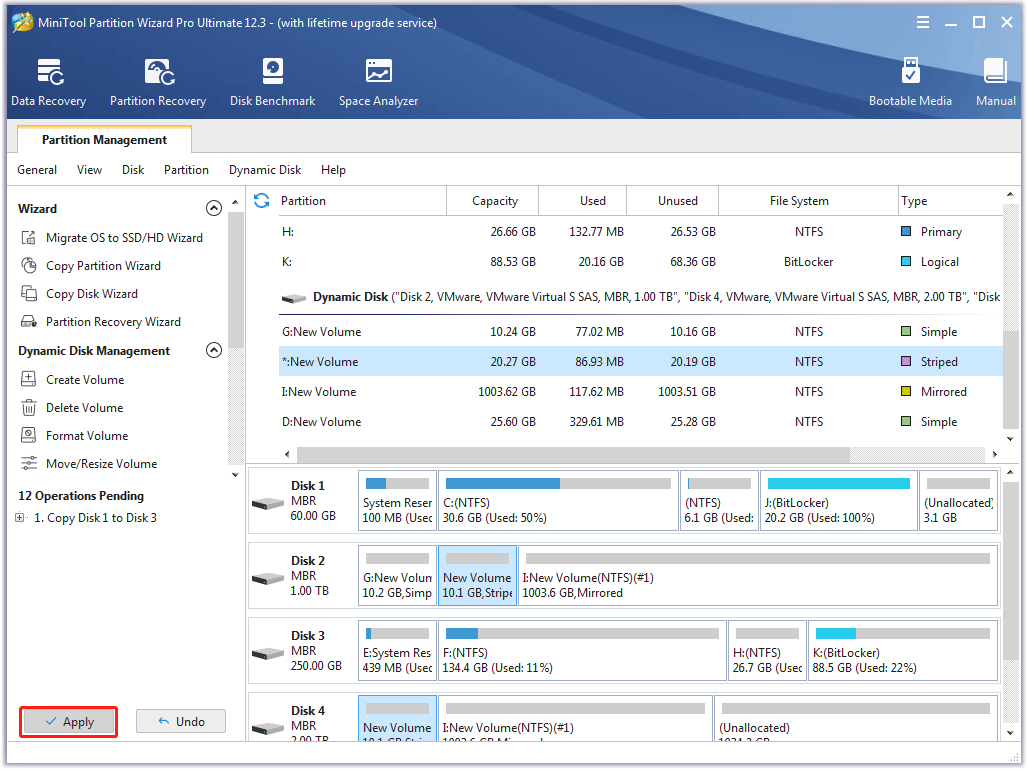
Step 9:Wait for the program to finish this backup.
Once it ends, reject the external drive, and put it in a safe place like a drawer.
Here is the tutorial.
Step 1:Download the latest BIOS version from the BIOS manufacturers support site.
Step 2:Unzip the BIOS update file and copy it to a blank USB flash drive.
Step 3:power cycle your system to enter the BIOS screen.
Step 4:Back up the BIOS configs if you see any option likeBackuporSave.
Step 5:spin up the BIOS update tool.
Step 7:Wait for the flashing process to finish and then kickstart your gear.
Bottom Line
Thats all about how to fix nvwgf2umx.dll crash.
Have you solved the issue by applying the above solutions?
If you have any doubts about these solutions, just leave your message in the comment zone.
If you have any doubts about MiniTool Partition Wizard, kindly contact us via[email protected].
