Besides, there could be more reasons for this error in Windows 11.
But luckily, this can be fixed with some simple troubleshooting.
In this guide, well sharesome potential workaroundsto fix it.
Windows 11 Start Menu Up 1
Why Does the L2TP Connection Attempt Failed Because the Security Layer Encountered a Processing Error Appear?
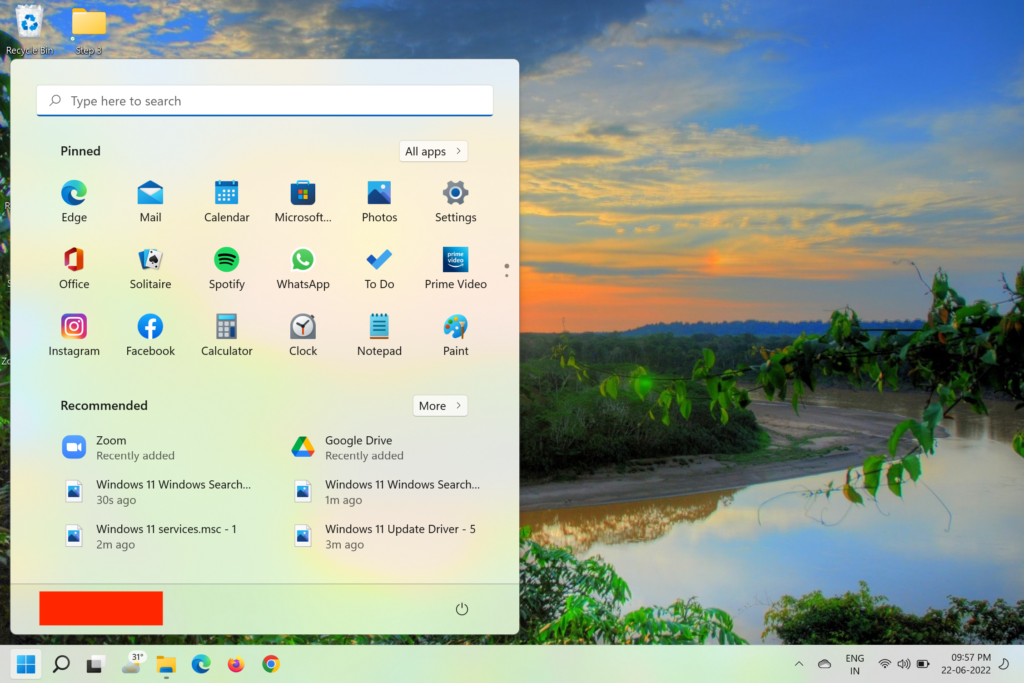
1.Press theWindows keyon your keyboard to open theStart Menuon your Windows 11 PC.
2.In theStart Menu, click thePowericon, and then chooseRestartorUpdate and restart.
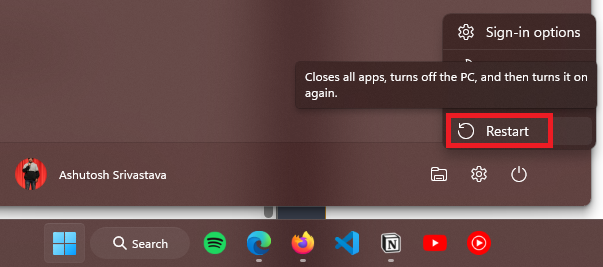
3.Once done, let your Windows 11 computer restart and confirm whether the issue is fixed.
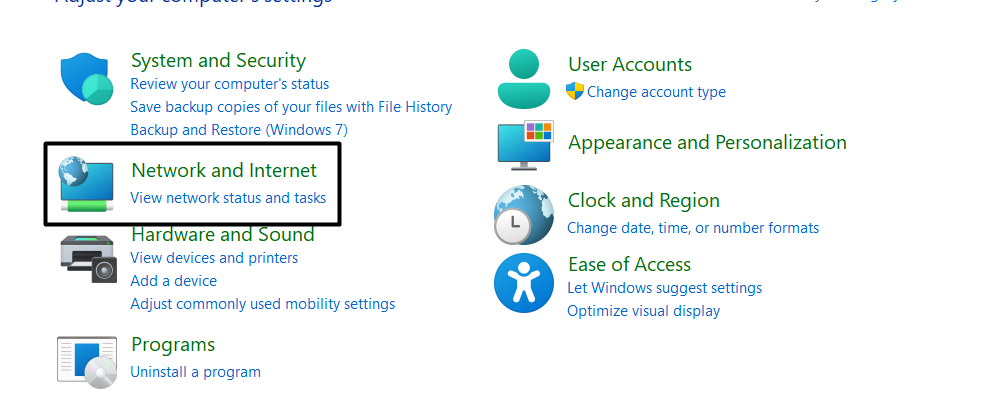
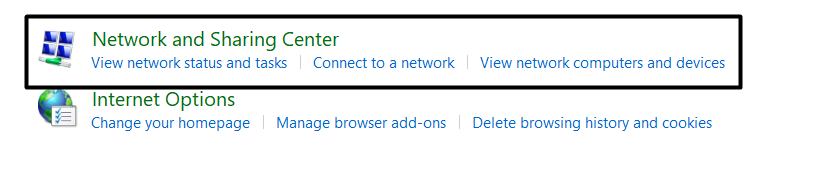
2.In theNetwork and Internetwindow, selectNetwork and Sharing Centerto move ahead.
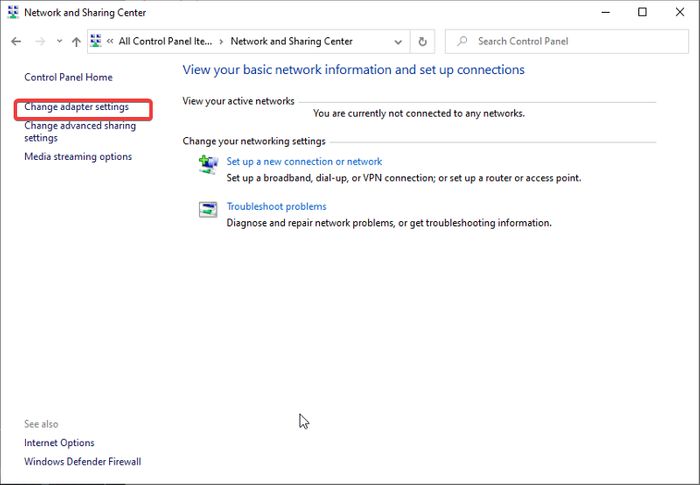
3.Choose theChange adapter settingsoption from the left and right-tap the VPN web connection.
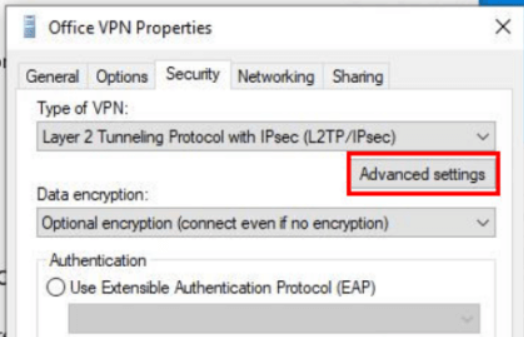
4.Choose thePropertiesoption from the contextual menu and proceed to theSecuritytab.
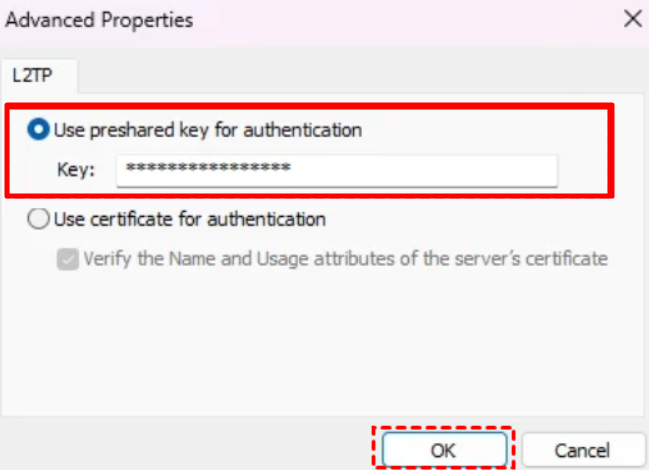
5.In theSecuritytab, simply choose theAdvanced settingsbutton in theType of VPN:section.
6.In the end, tick theUse preshared key for authenticationcheckbox and click theOKbutton.
7.Once done, try connecting to the VPN again and then check whether the error still appears.
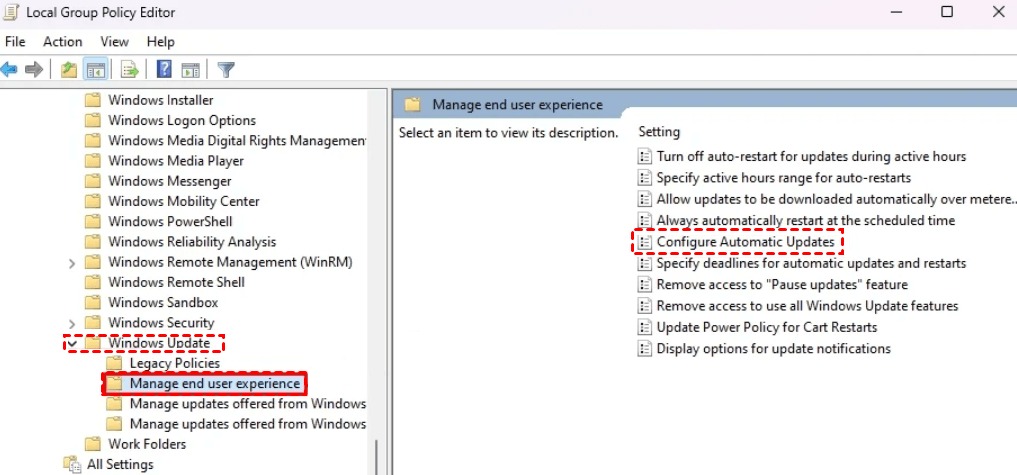
4.In theConfigure Automatic Updateswindow, choose theEnabledradio button and clickApply.
5.In the same window, chooseNotify for download and auto installfrom theOptions:dropdown.
6.Lastly, clickApply,then choose theOKbutton to end the window and save the changes.
This is because they help establish an internet connection.
Thus, we suggest youmake sure that these protocols are enabledon your Windows 11 PC.

2.In the next window, chooseChange adapter settingsand then right-smack the VPN connection.
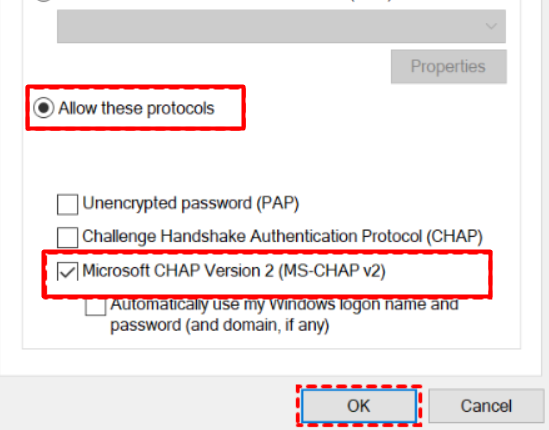
3.Choose thePropertiesoption from the right-click menu and proceed to theSecuritytab.
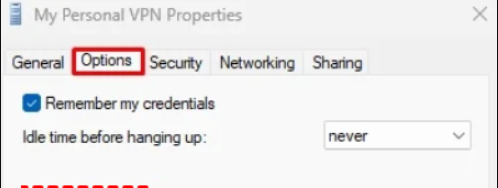
4.In theSecuritytab, enableAllow these protocolsand thenMicrosoft CHAP version 2.
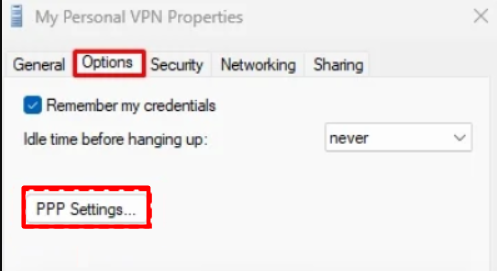
5.Click theOKbutton to save the changes and then proceed to theOptionstab of the window.
6.Click thePPP tweaks…button, check theEnable LCP Extensionsoption, and clickOK.
7.After making the above changes, the VPN should now connect to your Windows 11 PC.
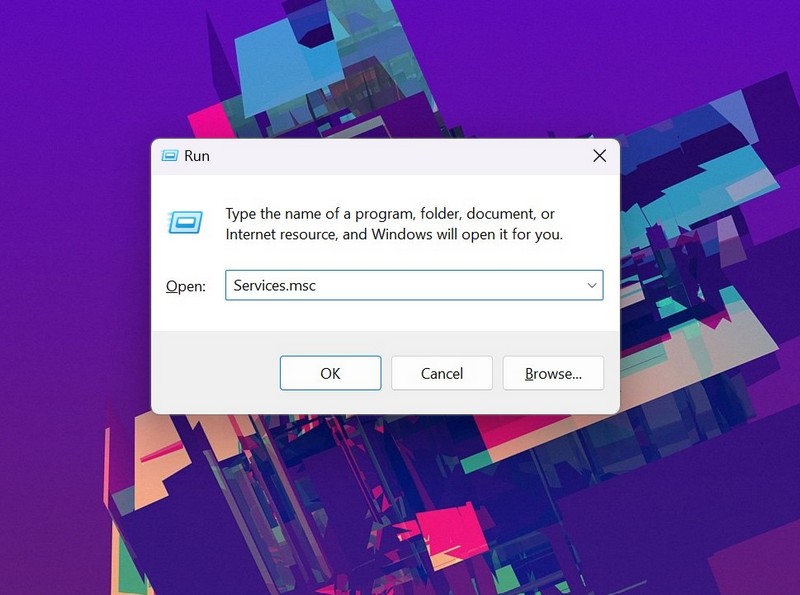
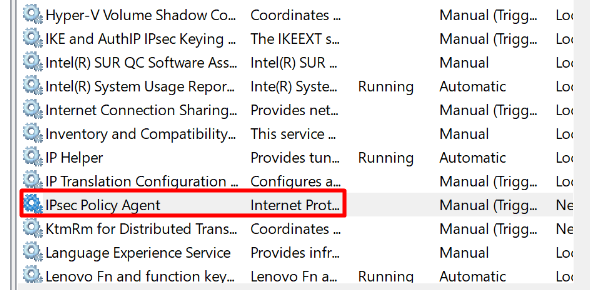
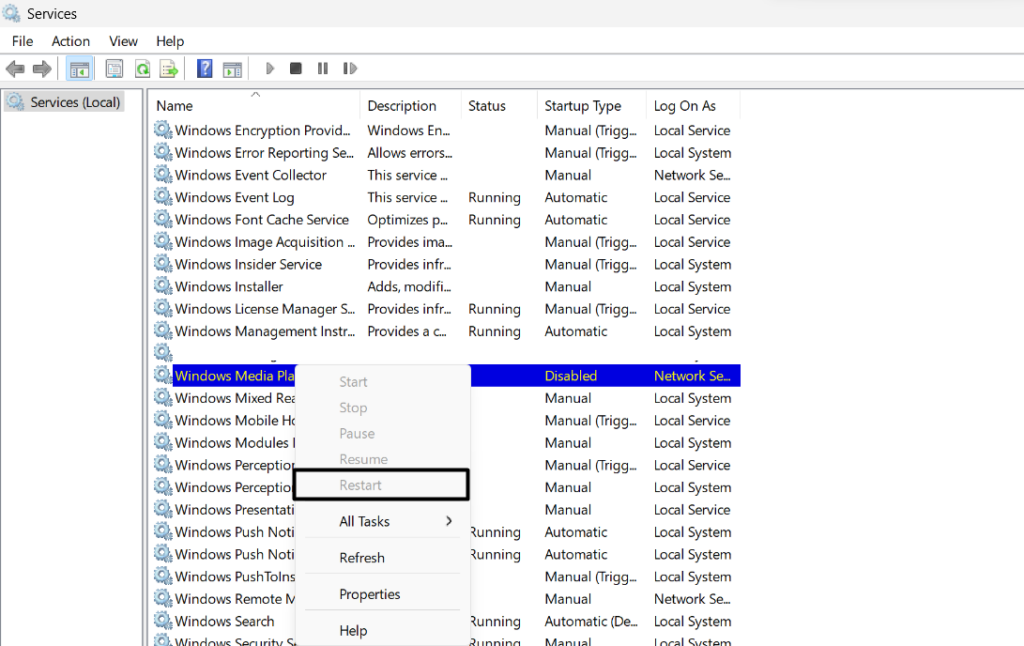
In that case, we suggestrestarting the IPSec Policy Agentserviceon your PC.
2.In theServiceswindow, searchIPSec Policy Agentand right-click it to get a context menu.
3.From the contextual menu, choose theRestartoption to reinstate this particular service.

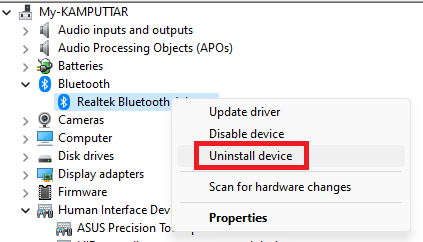
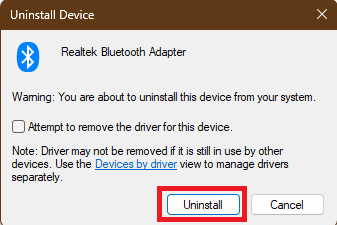
Considering this, we suggest youreinstall the web connection adapterson your Windows 11 PC.
3.In theUninstall Devicewindow, chooseUninstallto remove the driver from your rig.
4.Once done, repeat the same steps with other VPN adapters and then cycle your system.
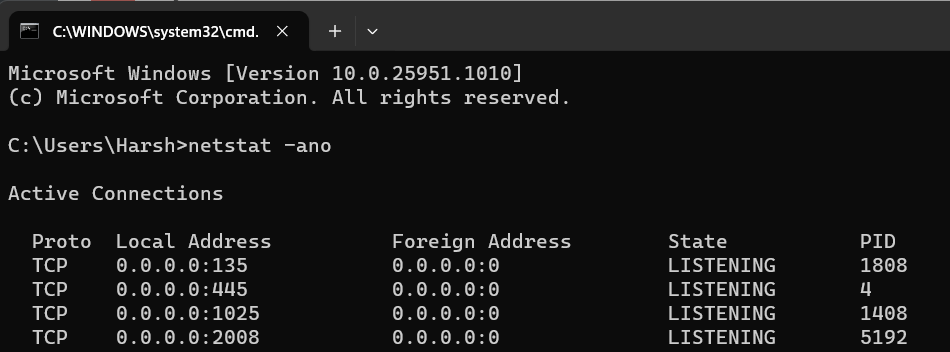
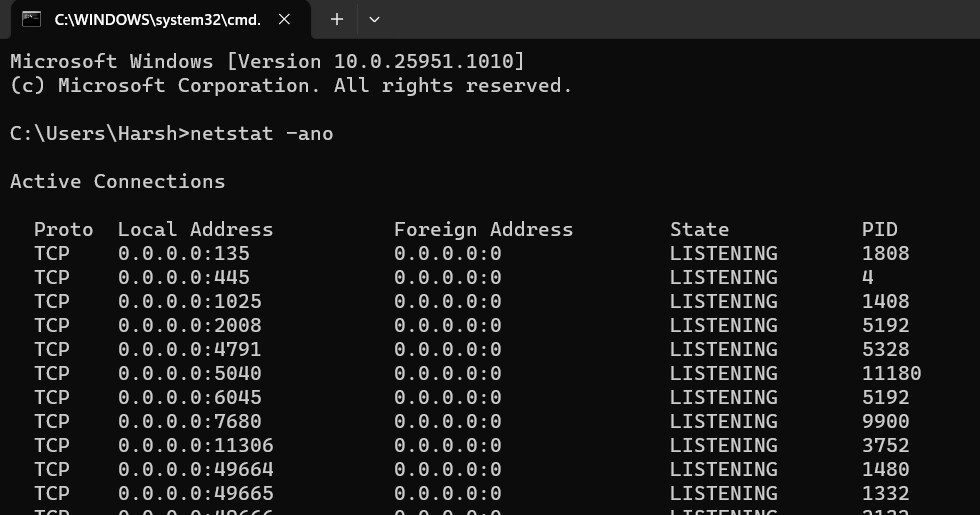
2.In theCommand Promptwindow, copy-paste thenetstat -anocommand in it and hitEnter.
3.UnderActive Connections, see if the UDP Ports 500 and 4500 are mentioned there.
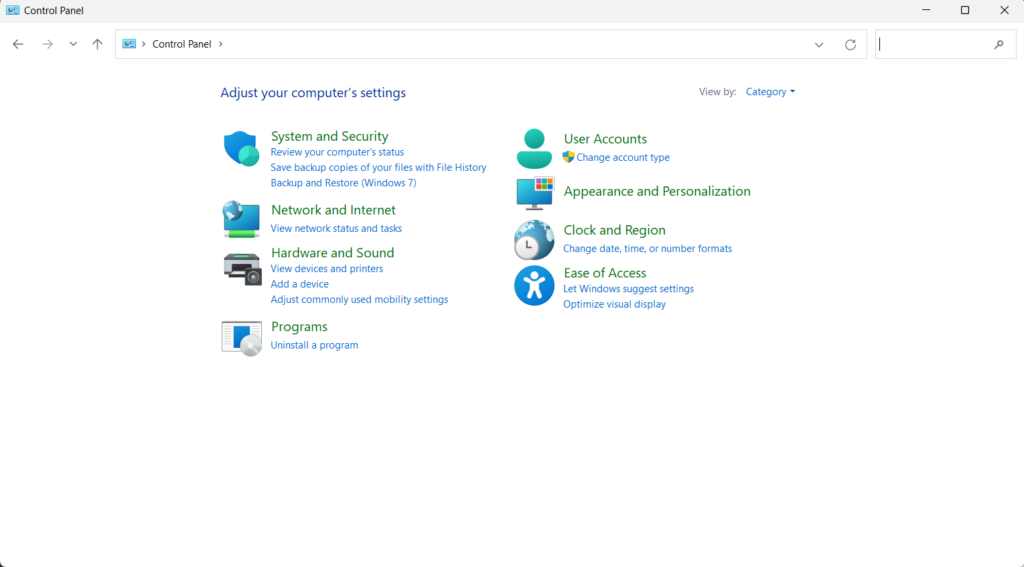
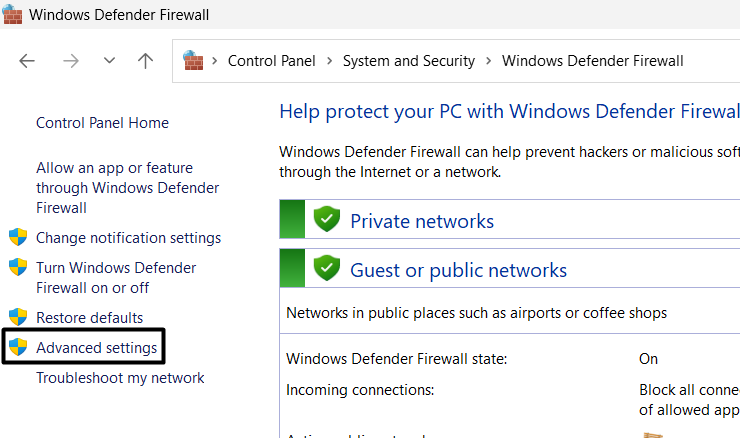
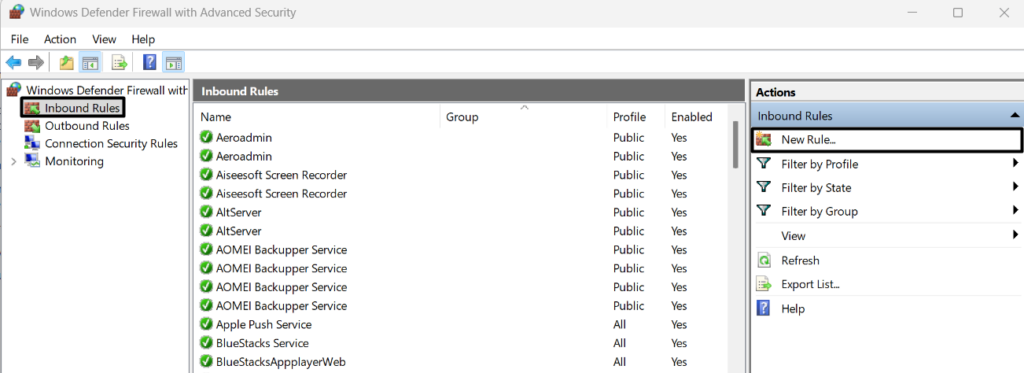
4.To make the UDP Ports available, open theControl Panel utilityon your Windows 11 PC.
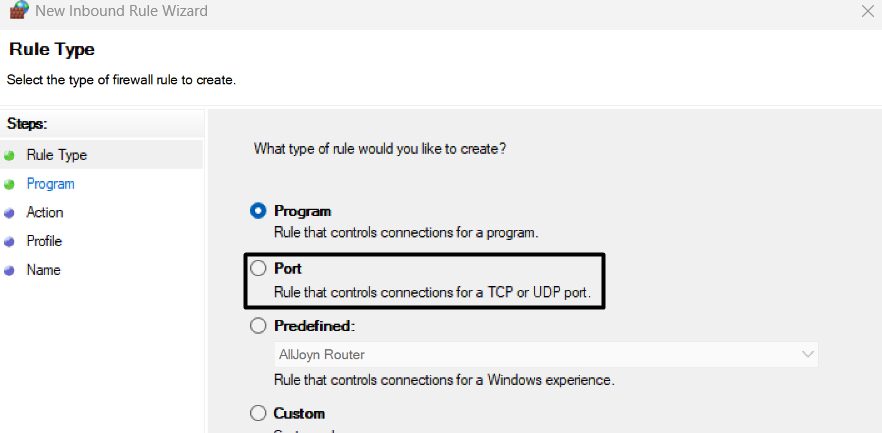
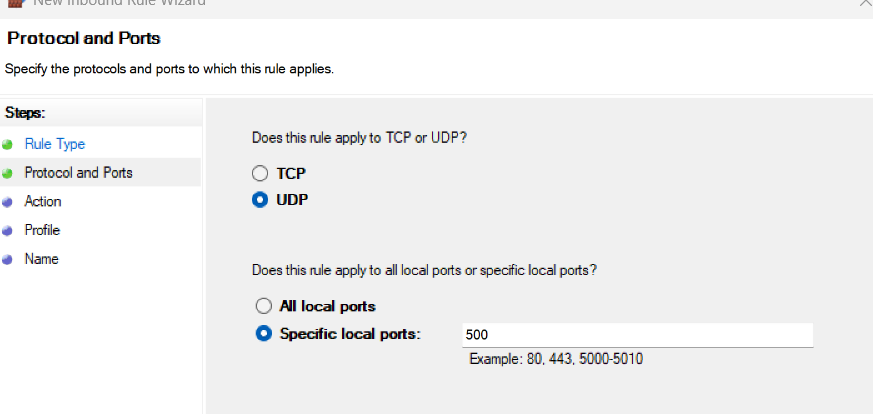
9.SelectUDP, type500in theSpecific local ports:text box, and then tickAllow the connection.
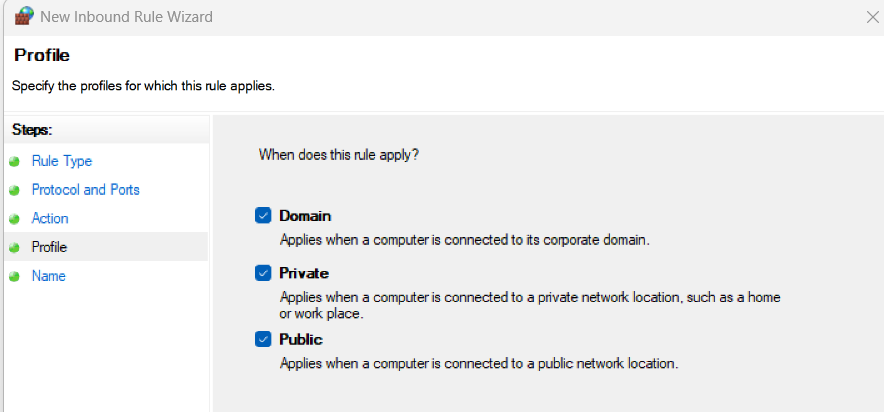
10.Choose theNext >button and then check theDomain, Private and Publicoptions to go ahead.
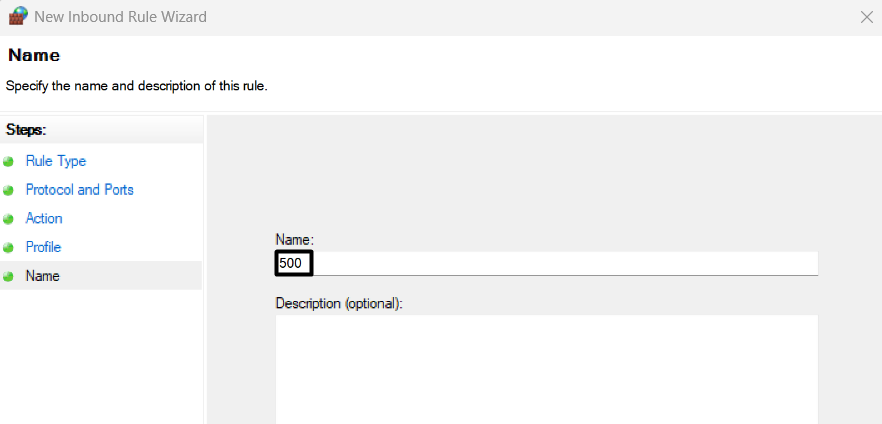
11.select theNext >button, name it500, and then click theFinishbutton to save the changes.

Finally, follow the same steps to make the4500UDP Port available on your system.
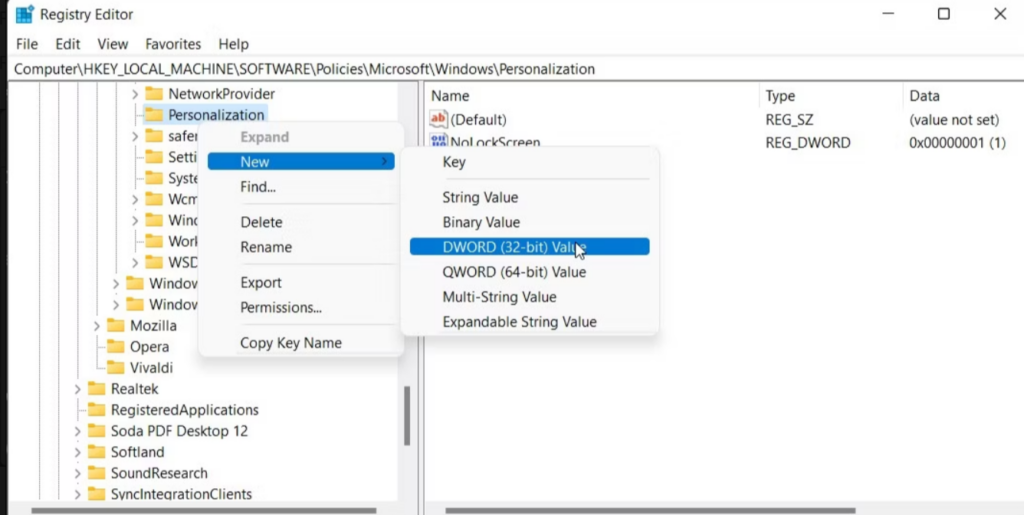
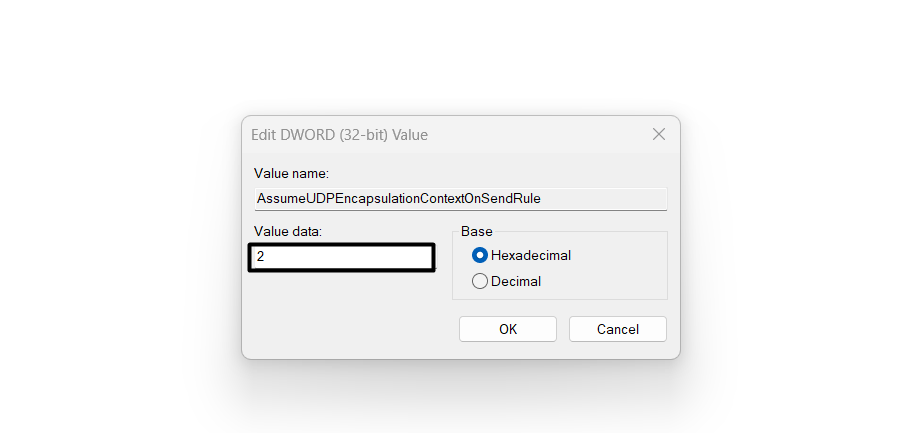
3.Name the key,AssumeUDPEncapsulationContextOnSendRule,and hitEnterto save it.
4.Double-hit the new key in theValue data:text field, enter2, and clickOKto save the changes.
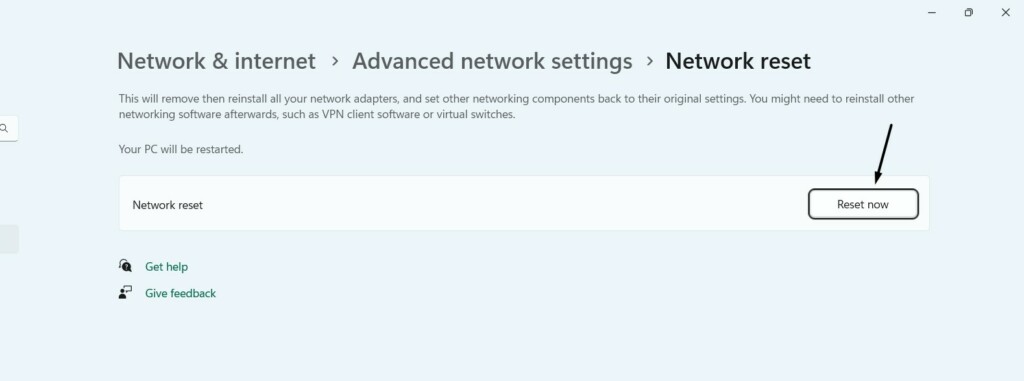
Thus, to peek if this is the same,reset your systems networksettings.
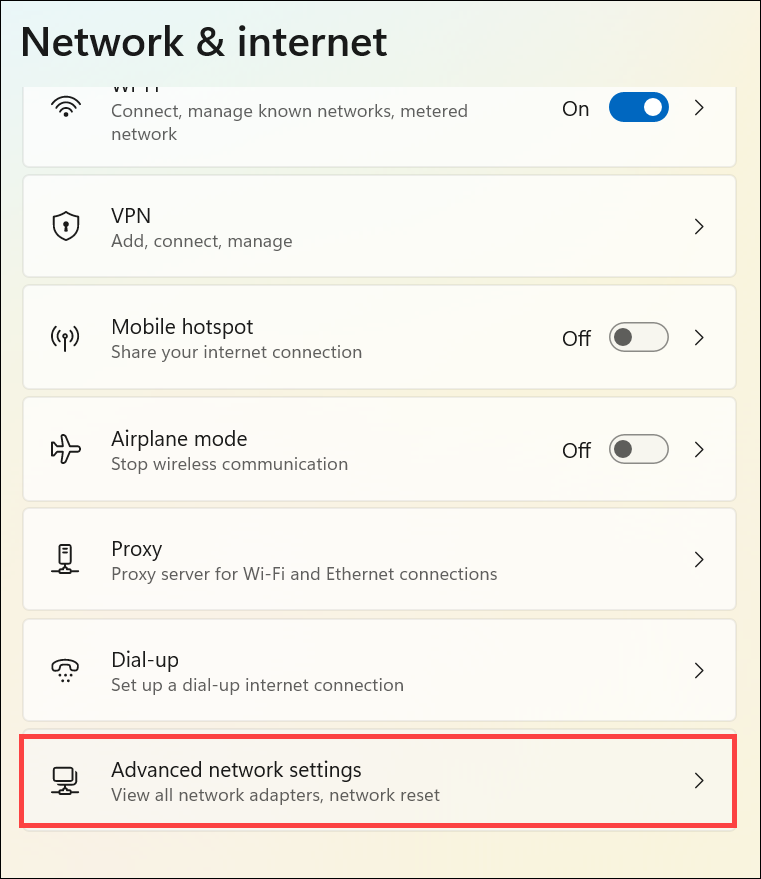
2.Choose theAdvanced connection settingsoption in theNetwork & Internetwindow to go ahead.
3.Click theNetwork resetoption, and then click theReset nowbutton next toNetwork reset.
4.In the end, cycle your Windows 11 PC or laptop and check whether the error is gone now.
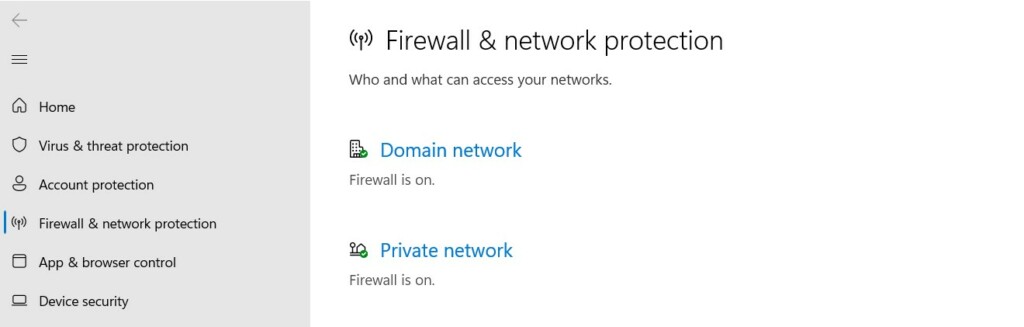
Disable Your Firewall
It could be possible that your systems firewall is stopping the VPN from connecting.
As a result, this error appears on your Windows 11 PC.
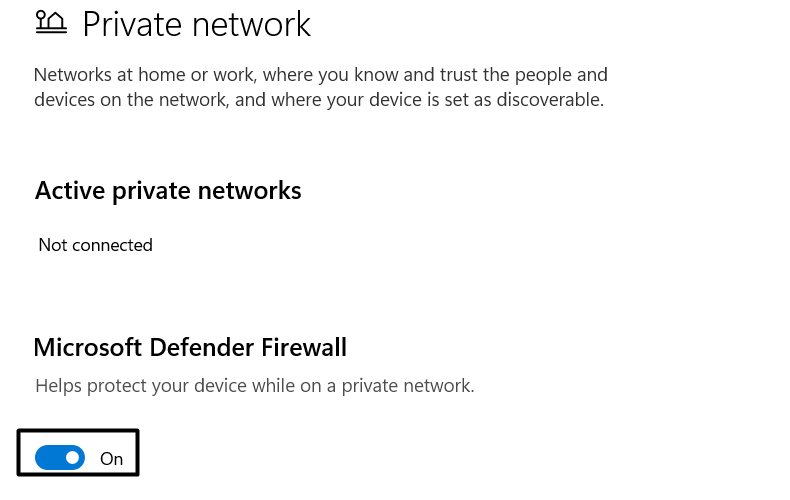
2.In theFirewall & web link protectionwindow, simply choose thePrivate networkoption.
3.On the next window, switch off the toggle underMicrosoft Defender Firewallto turn it off.
4.Once done, go back to the previous window, choosePublic internet,and turn off the toggle.
If yes, then turn on the firewall again on your system to continue the protection.
2.In theAppswindow, choose theInstalled appsoption to view all the installed programs.
3.Look for the antivirus app installed on your rig and click thethree dots (…)next to it.
4.Choose theUninstalloption from thethree dots (…)menu and select theUninstalloption.
5.After deleting the app from your PC, peek if the error is still appearing after using the VPN.
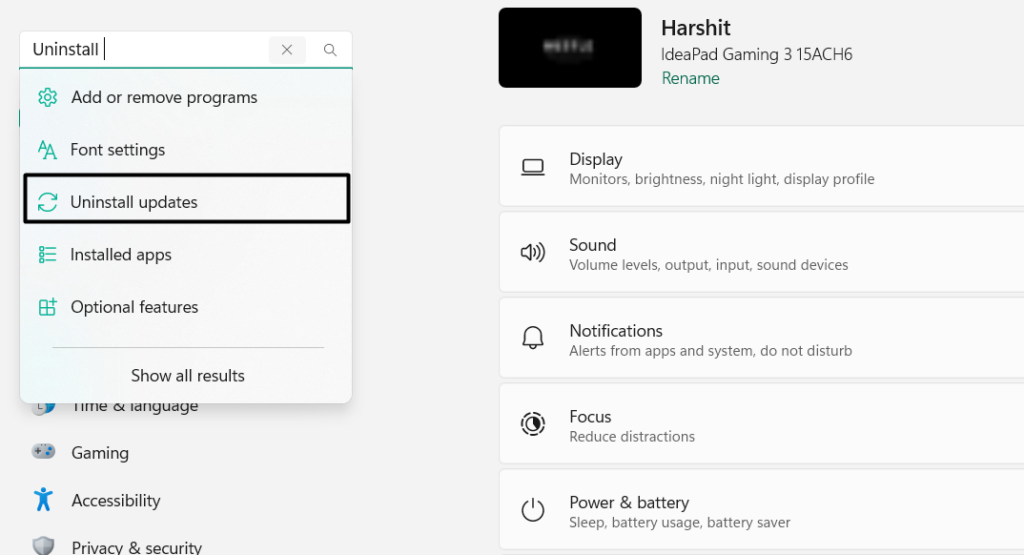
If thats the case with you, consideruninstalling itfrom your system to fix it.
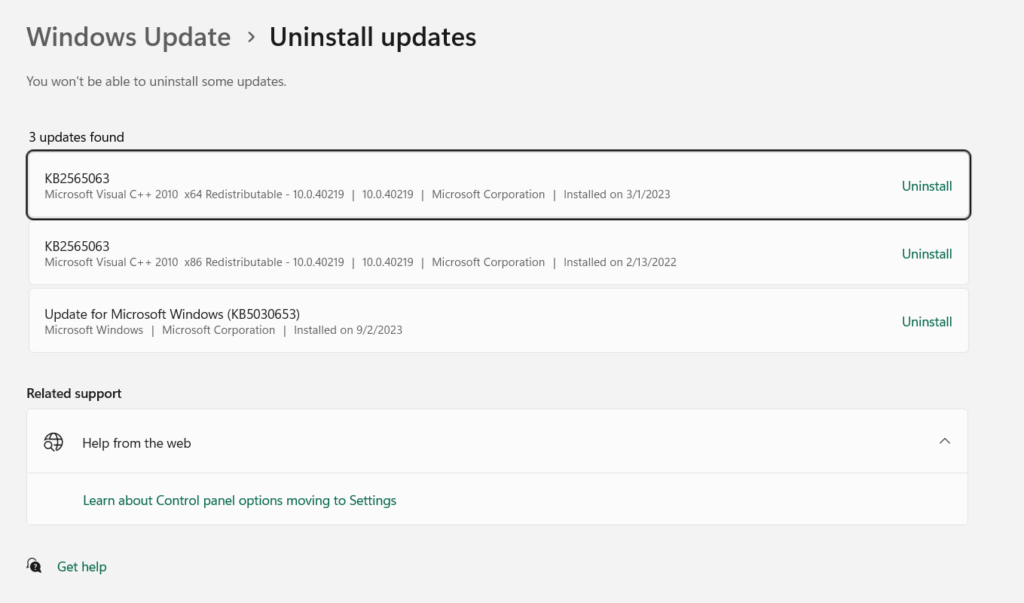
2.Choose the same from the search results and search for the conflicting update in the next window.
3.Once found, click theUninstallbutton and thenUninstallto remove the update from the PC.
You canuse a third-party VPNuntil the problems with the operating system are fixed.

We hope you dont get the same error when connecting to a third-party VPN on the system.
If this doesnt fix the issue, reset your IPsec Policy Agent service.
How to Setup L2TP Over IPsec?
How Do I Enable L2TP?
you’re able to use the Windows integrated VPN functionality to enable L2TP on your Windows 11 PC.
Why Is L2TP VPN Not Working After Windows Update?
So, to fix this issue, consider deleting it from your PC.
But no matter what the reason is, its completely fixable.