It prevents new restore points from being created in the system.
Fix 1.
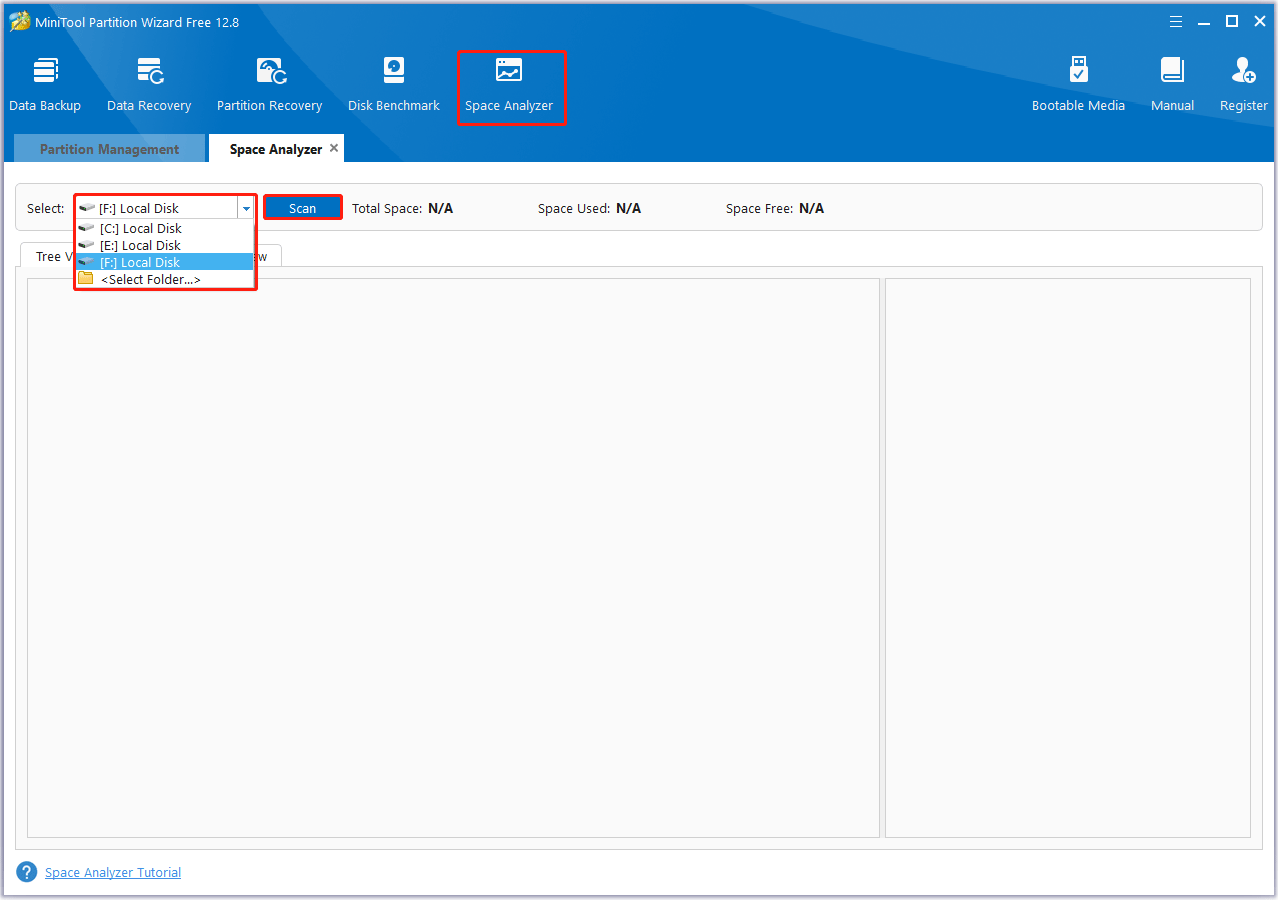
To fix this issue, we recommend you delete unnecessary files from the disk to get more free space.
Then launch it to enter the main interface.
Step 2: Select theSpace Analyzerfeature on the top toolbar to launch the disk usage analyzer.
Step 3: In the next window, pick the target disk from the drop-down menu.
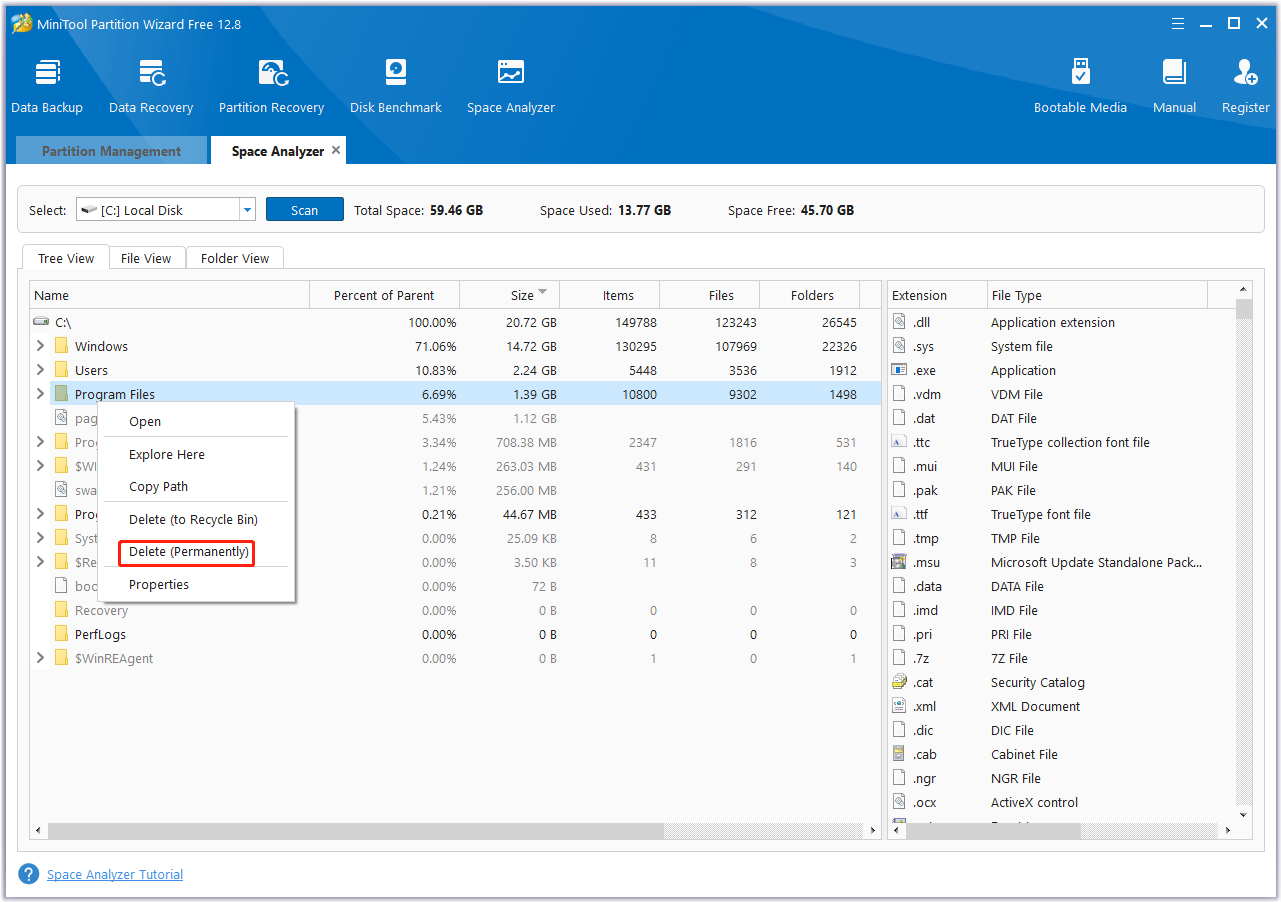
Step 4: Wait until the scanning completes.
Right-punch the space-consuming and useless files/folders.
Then selectDelete (Permanently)to remove them.
Heres how to do it on a Windows 10/11 PC.
Step 1: Press theWin + Rkey to open theRundialog box.
Then typesystempropertiesprotectionin the box and pressEnter.
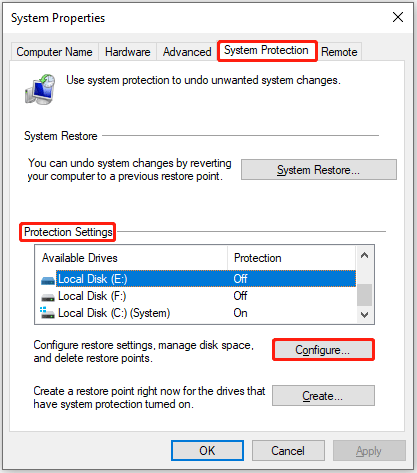
Step 2: TheSystem Propertiesdialog box will appear.
Then switch to theSystem Protectiontab.
Step 3: Under theProtection Settingssection, snag the drive on which youre trying to create the restore point.
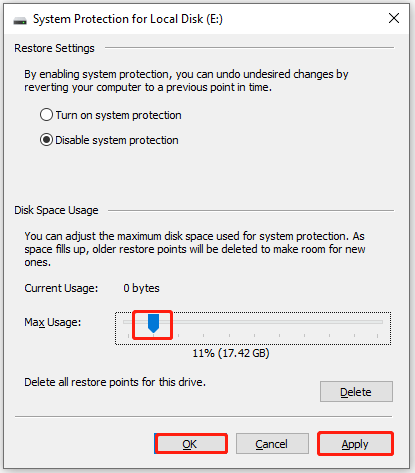
Step 5: Finally, click onApply > OKto save changes.
Fix 2.
Perform a Clean Boot
The clean boot will start Windows with a minimal set of drivers and startup programs.
Heres the tutorial:
Step 1: Sign in to the computer as an administrator.
Step 2: Typemsconfigin theSearchbox, and then selectSystem Configurationfrom the result.
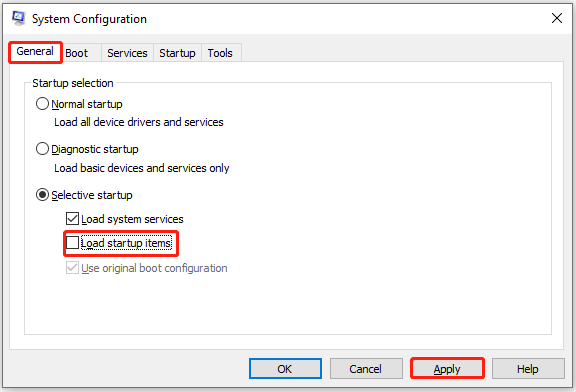
Step 3: In theGeneraltab and underSelective startup, uncheck theLoad startup itemsbox and click onApply.
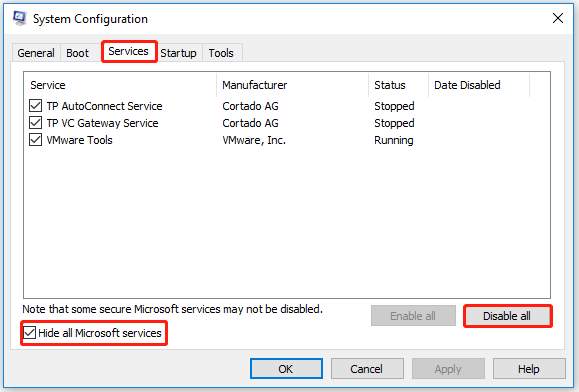
Step 4: Switch to theServicestab, and then tick theHide all Microsoft servicesbox.
Step 5: punch theDisable all > Apply > OKbutton to disable all non-Microsoft services.
Once done, reboot your box and test whether the error disappears.
Fix 3.
Then right-clickCommand Promptto selectRun as administrator.
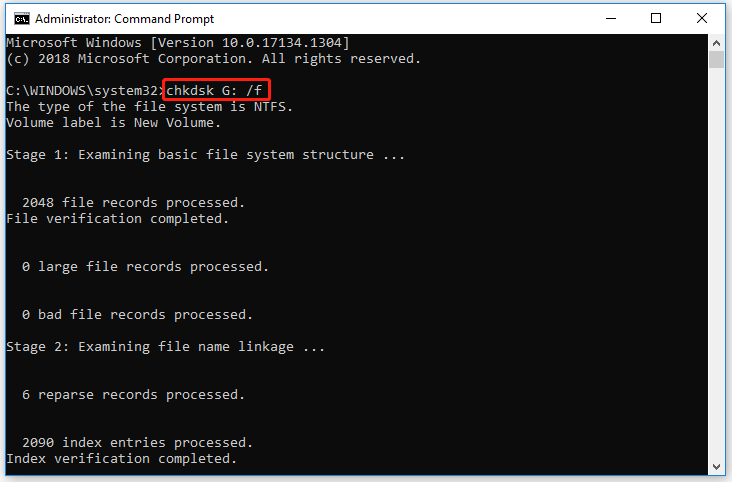
Step 2: In the Command Prompt window, pop in thechkdsk G: /fcommand and pressEnter.
G represents the hard drive partition letter.
To run SFC, you could follow the steps below.
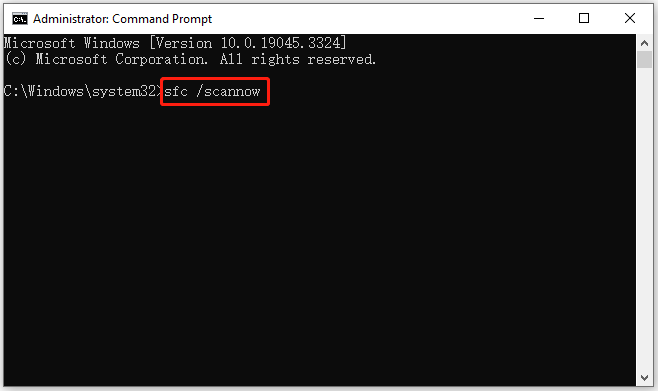
Step 1: Open Command Prompt as administrator as the steps above.
Step 2: In the Command Prompt window, typesfc /scannowand pressEnter.
Step 3: When the SFC tool completes its task, typeDISM.exe /Online /Cleanup-image /Restorehealthand pressEnter.
Step 4:Wait patiently until the process is completed.
Fix 5.
Configure Necessary Services
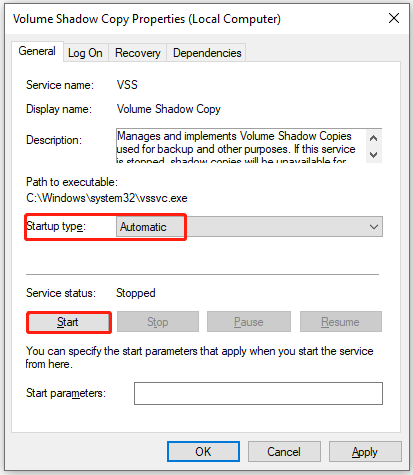
System Restore works primarily with Volume Shadow Copy Service (VSS).
you might use Windows Services Manager to check the status of a service.
To do that, heres the guide.
Step 1: Typeservicesin theSearchbox.
Then right-click theServicesapp to selectRun as administrator.
Step 2: In theServiceswindow, locate theVolume Shadow Copyservice.
Then right-hit it, and selectRestart.
If the service is disabled, double-click it to open its properties window.
Step 3: Set theStartup typetoAutomaticand select theStartbutton.
Step 4: Then select theApply > OKbutton to save the changes and exit the service properties window.
The Windows Backup service performs backup operations on the system.
Fix 6.
This includes executing multiple commands in Command Prompt.
Heres how to do that using a batch file.
In theSave asdialog box, selectAll FilesinSave as bang out.
Then typeVSS.batin theFile namefield and choose theSavebutton to save the file in a desired location on your PC.
Step 3: Right-opt for batch file and selectRun as administrator.
Then click onYesin theUser Account Controlprompt that appears.
Command Prompt will launch and execute all commands one after the other.
when you’ve got re-registered VSS components, close Command Prompt and try creating a restore point again.
Fix 7.
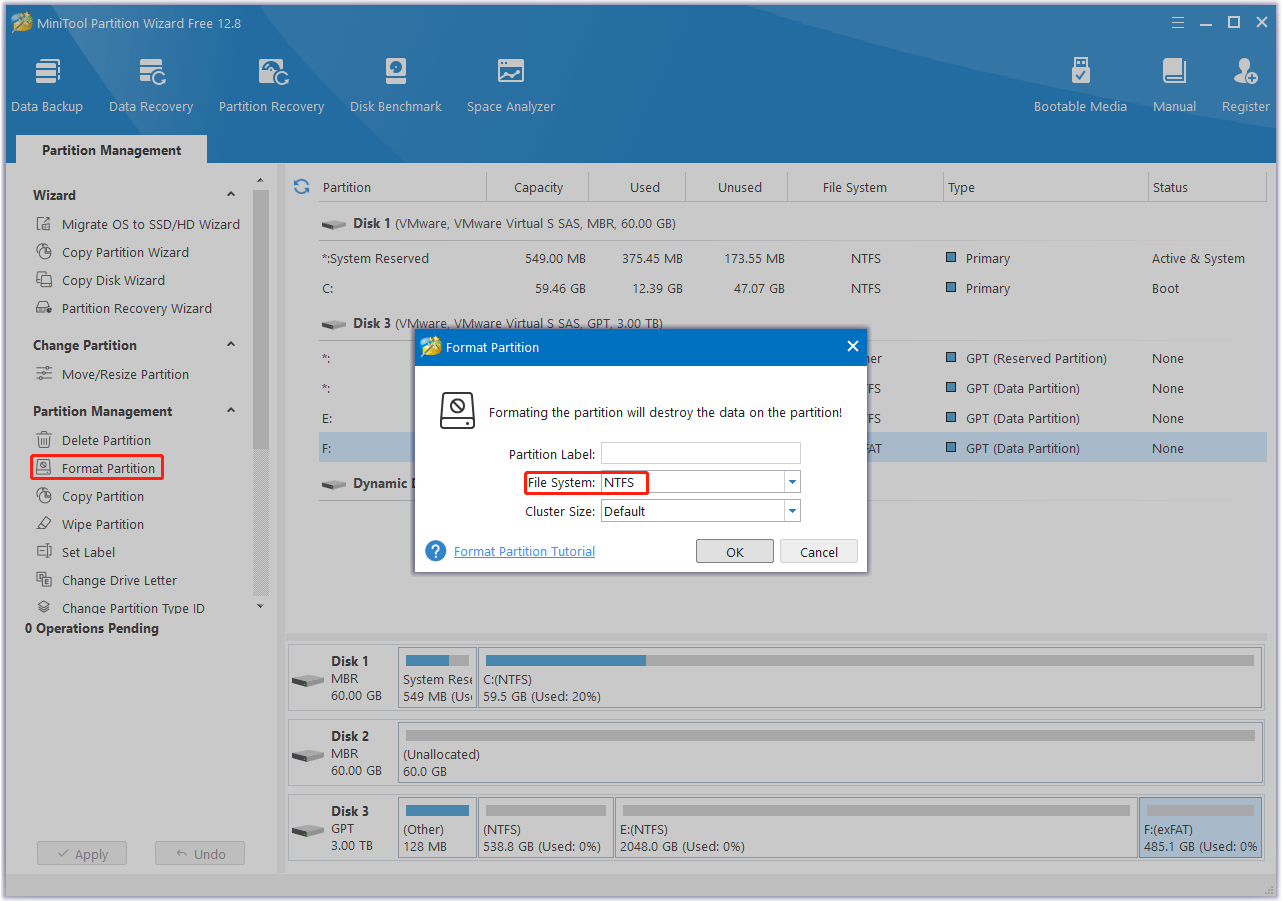
If your target disk is not formatted to NTFS, conflicts may appear during the snapshot process.
To fix this, you’re gonna wanna format the hard drive to NTFS.
Formatting will destroy all data in the target partition, so you should back up data in advance.
To do that, you should take advantage of a third-party formatting tool to execute the operation.
MiniTool Partition Wizard is a great choice.
To format the target drive as NTFS with thisdisk partition software.
Step 1: Launch MiniTool Partition Wizard to enter its main interface.
Step 2: snag the partition that needs formatting and chooseFormat Partitionfrom the left panel.
Step 3: SetNTFSasFile Systemand then clickOK.
Step 4: Finally, click onApplyand thenYesto save the pending changes.
Hope this article can help you solve this issue.
