Due to some reasons, users sometimes need toshrink volume in Windows Server.
What should you do?
Sometimes, for some reason, you should probably shrink volume to make room for other uses.
This post explains the detailed steps about diskpart shrink partition without losing data in Windows 11/10/8/7.
For more details on how to do this step by step, yo continue reading.
#1.
However, this tool has some limitations.
In addition, other conditions should be met to shrink the volume using Disk Management.
Otherwise, theExtend Volume will be grayed out.
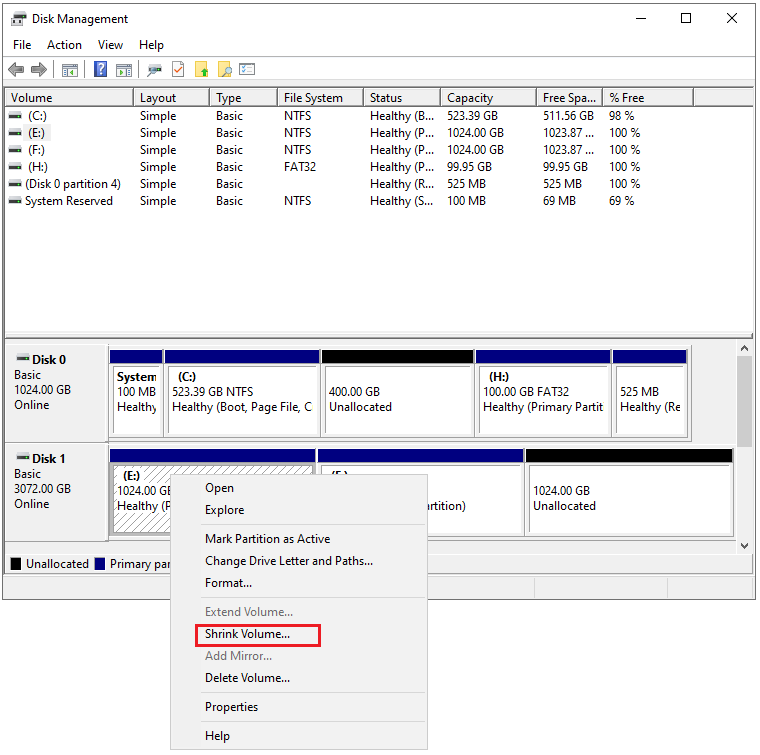
Here are the detailed steps:
Step 1: Right-nudge the WindowsStartmenu and chooseDisk Managementto open.
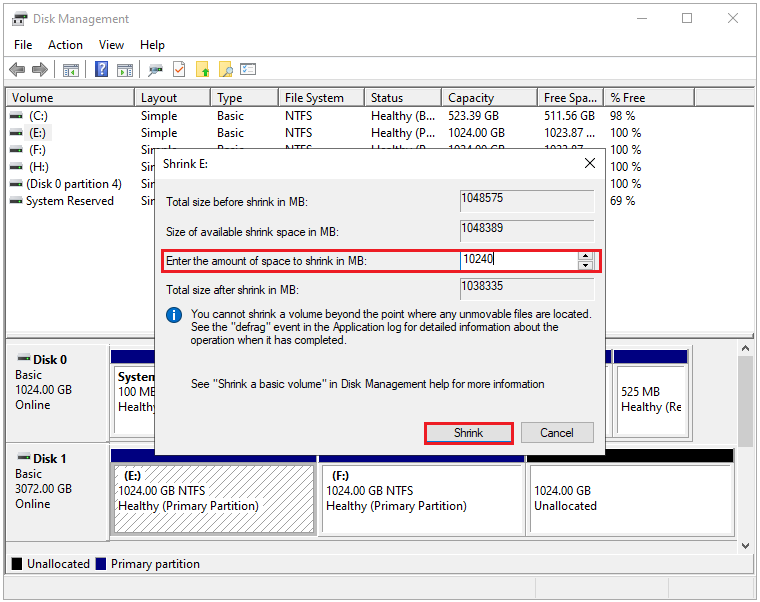
Step 2: Right-tap the partition you want to shrink and choose theShrink Volumeoption to reduce the partition size.
Step 3: Enter the amount of space that you want to shrink in MB.
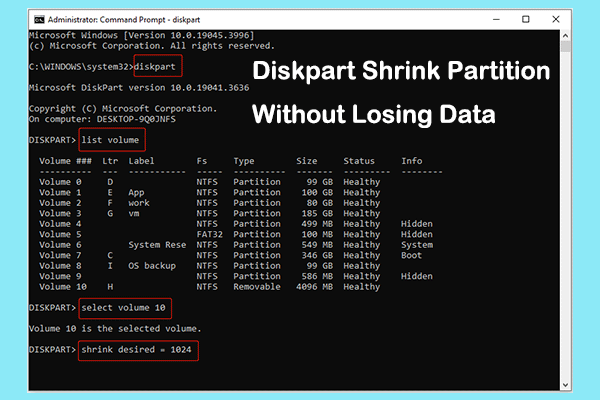
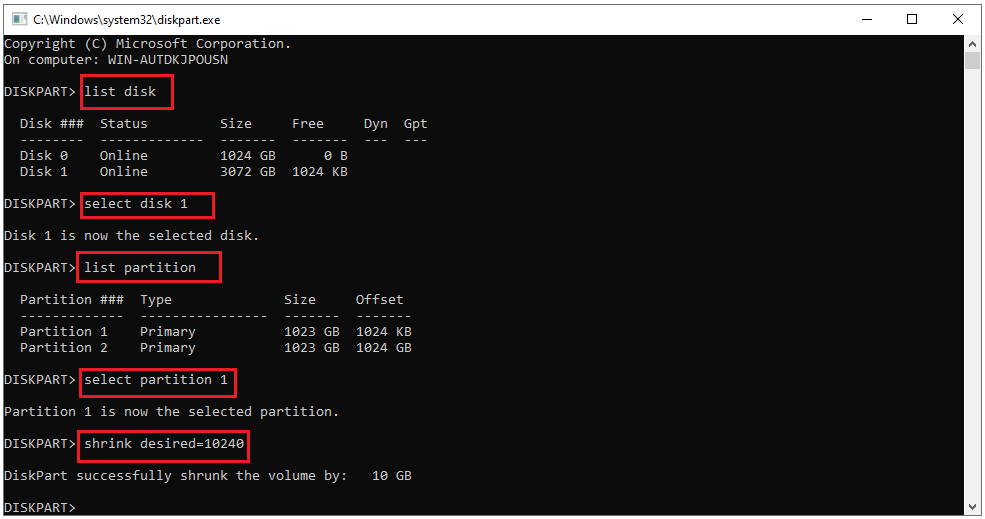
#2. through special command characters.
Here are the detailed steps to shrink volume.
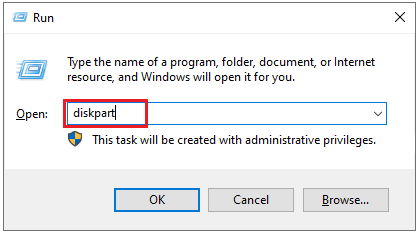
Step 1: Press theWindows logo key + Rto open theRunbox.
Just like what happened to this forum user.
So how do you solve the Unable to shrink volume in Windows Server problem?
Here are two methods to help you overcome all difficulties and successfully shrink the volume in Windows Server 2012/2016/2019/2022.
Here are the steps below:
#1.
Disable Hibernation Mode
1.
Press theWin + Rkey to open theRunbox.
Inputcmdand hitEnterto open theCommand Promptwindow.
At theCommand Promptwindow, typepowercfg.exe /hibernate off, and then pressEnter.
Disable Page File
1.
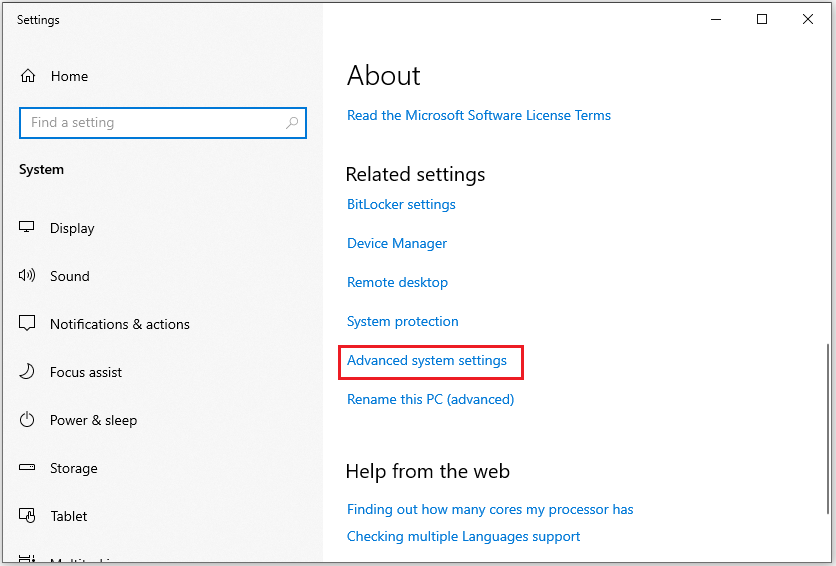
Click theFile Explorericon to open and right-clickThis PCto selectProperties.
Click onAdvanced system settingsunderRelated settingsfrom the right panel.
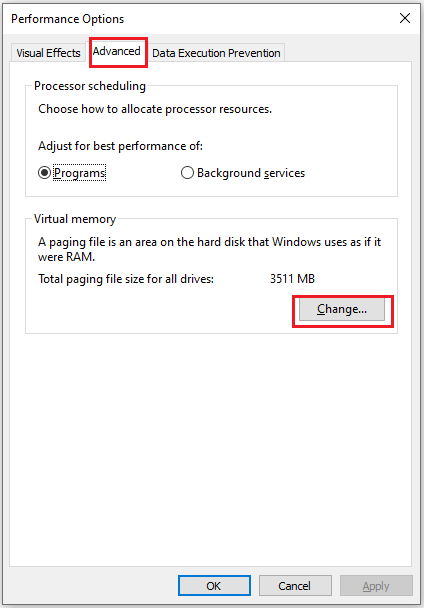
In theAdvancedtab, tap on theSettingsbutton underPerformance.
SelectAdvancedtab from the top and click onChangebutton underVirtual memory.
Uncheck theAutomatically manage paging file size for all drives.
Check theNo paging fileoption and clickSet.
Then, click onYesto confirm.
- hit theOKbutton to save the changes.
Disable System Protection
1.
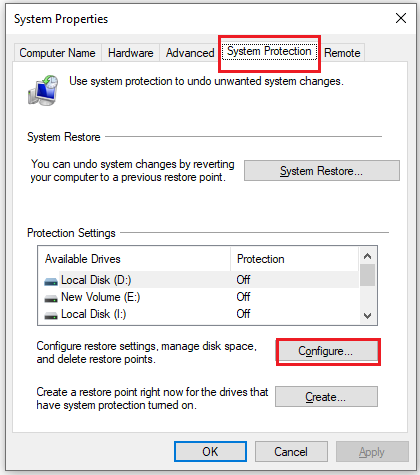
Then, clickCreate a restore pointfrom the results to open it.
In theSystem Protectiontab, clickConfigure.
UnderRestore controls, check theDisable system protectionoption and clickApply.
It is a simple and easy-to-use partition manager.
With this tool, you’ve got the option to manage your disks well.
Many users use this partition manager to resize partitions to get more disk space.

Step 1: grab the button below to download MiniTool Partition Wizard Free Edition.
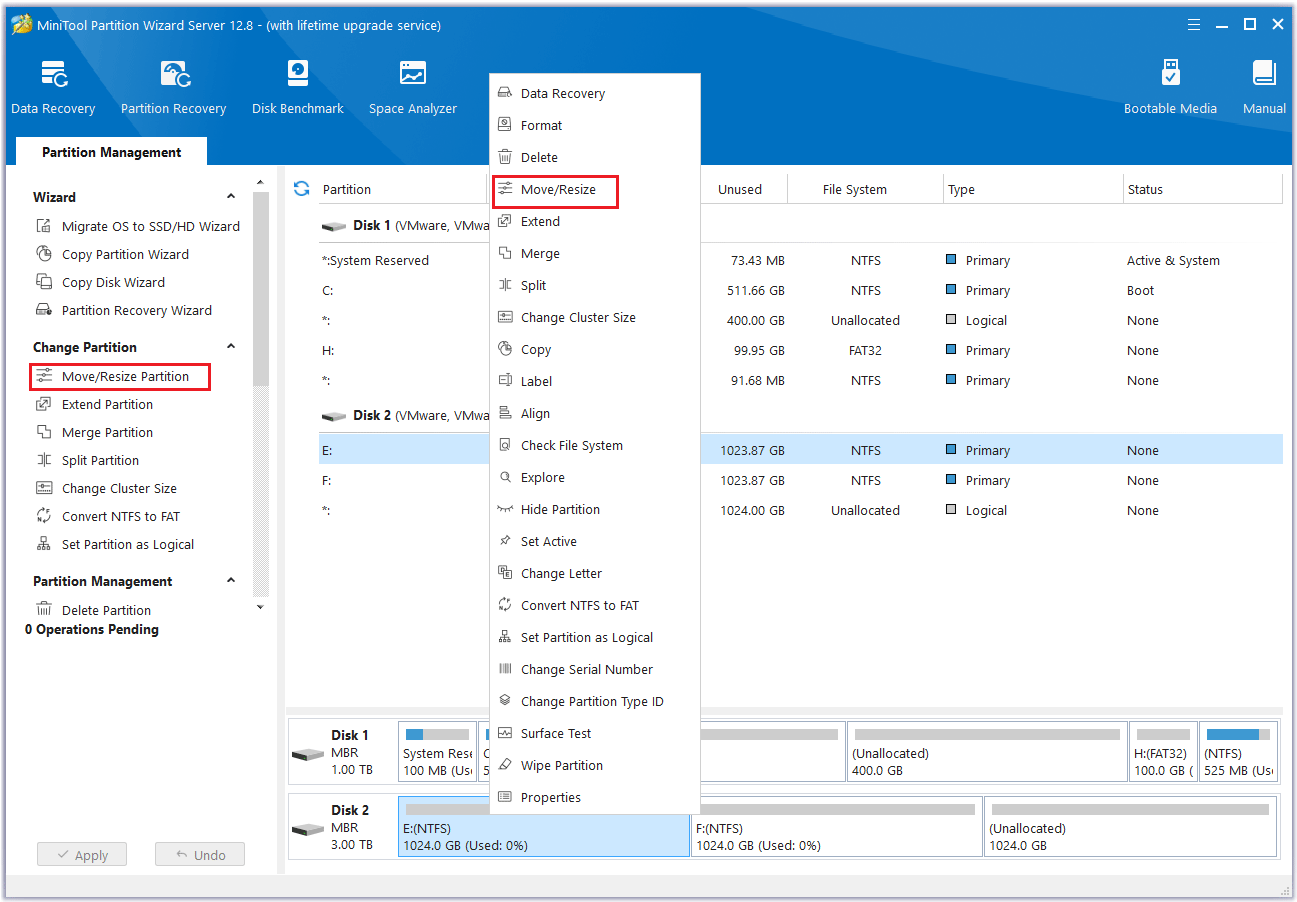
Install it on your setup and launch it to get the main interface.
opt for desired partition, then choose one of the options below to begin the shrinking process.
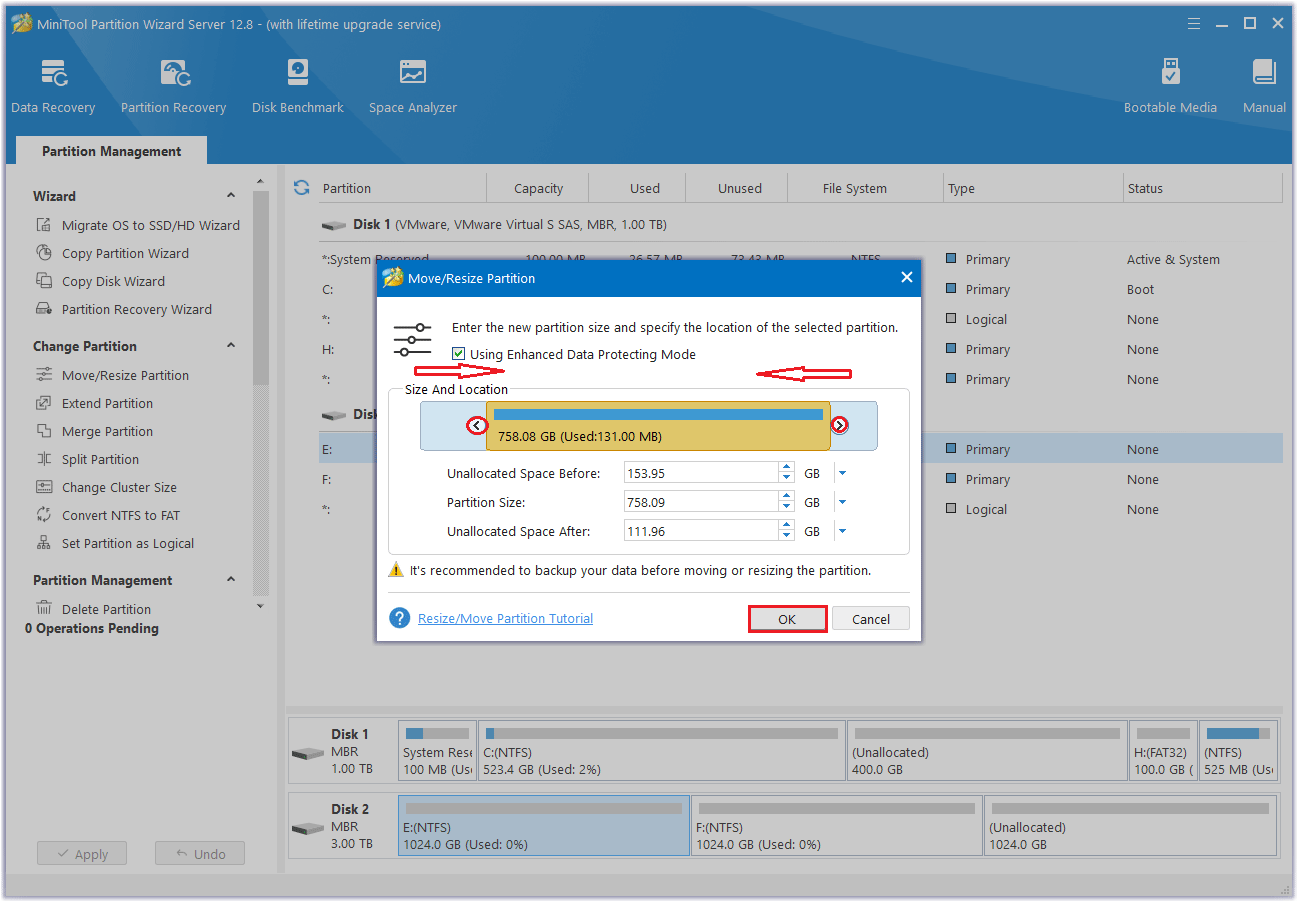
Alternatively, you could manually specify the size you want to reduce.
Consequently, there will be unallocated space both before and after the target partition.
What can you do with this unallocated space?
It only takes a few steps to do this with MiniTool Partition Wizard.
Below we will provide you with the detailed steps for this operation.
#1.
Step 1: Launch MiniTool Partition Wizard to its main interface.
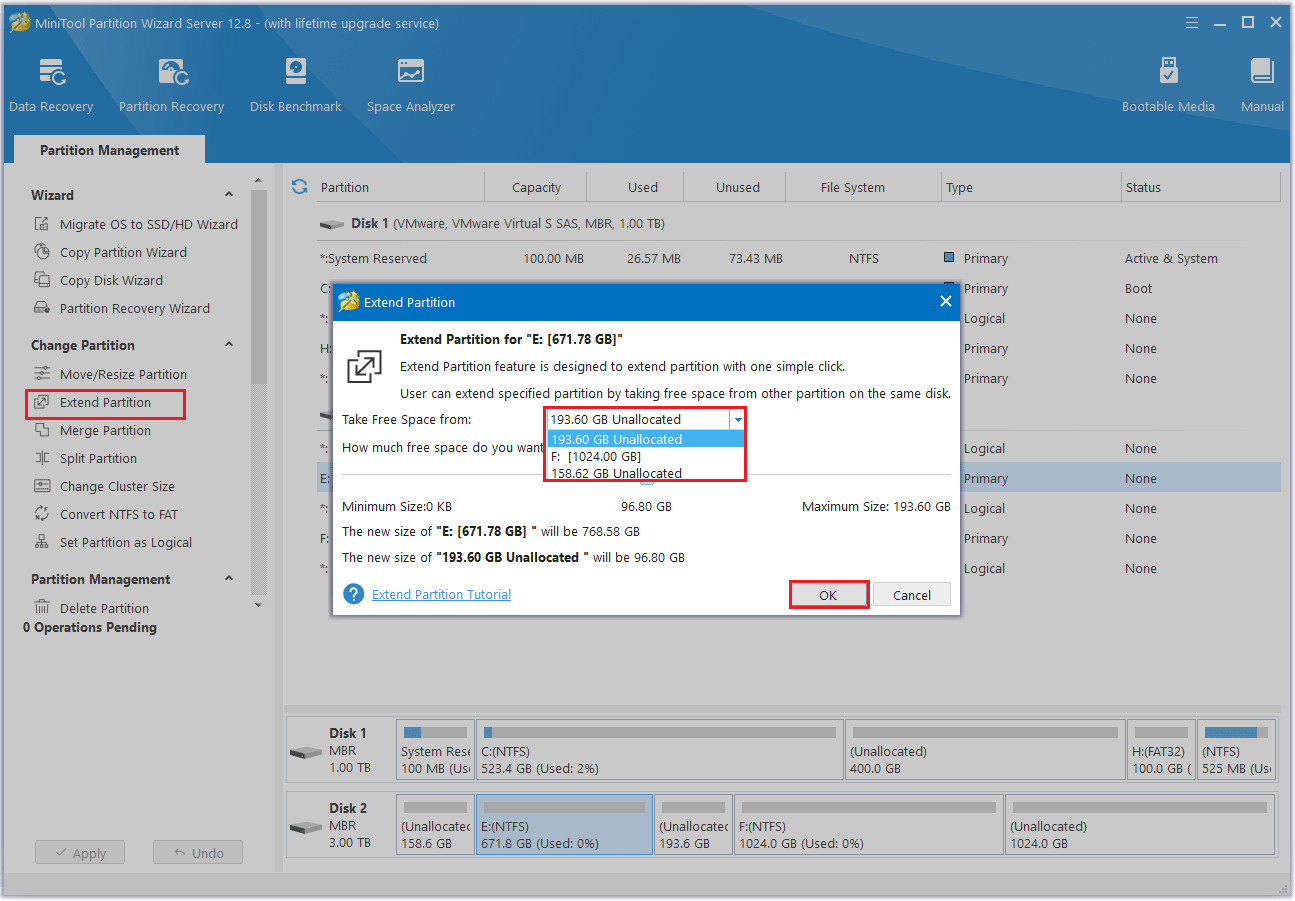
Then right-nudge the partition to be extended and selectExtend.
And you’ve got the option to also selectExtend Partitionfrom the left action panel.
Then clickOKto return to the main interface.
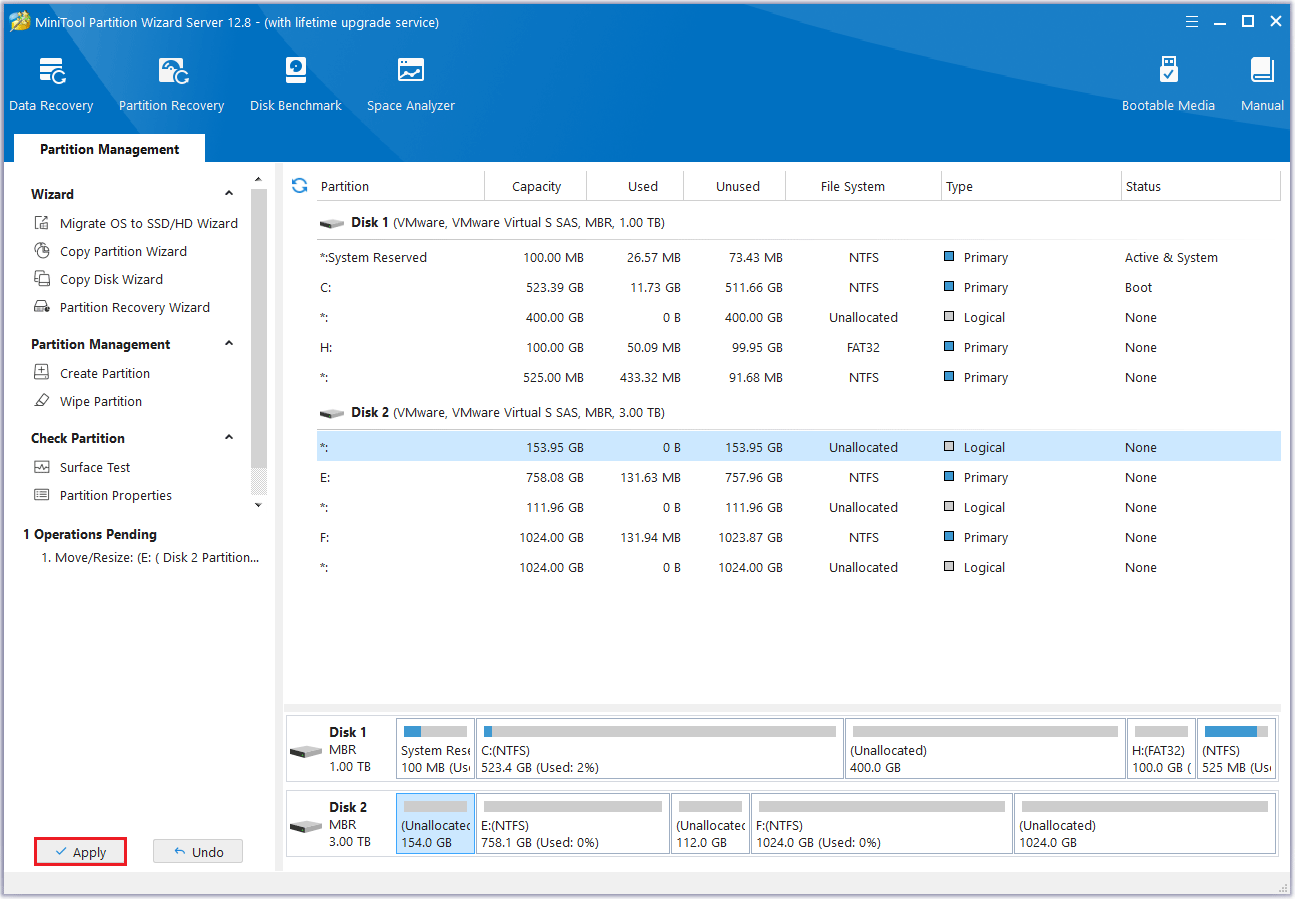
Then it’s crucial that you click theApplybutton to perform all changes.
#2.
Create Partition
TheCreate Partitionfeature allows users to create a new volume with specified unallocated space.
In this case, this feature can easily manage various data by category.
Or you’re able to right-choose the unallocated space and choose theCreateoption from the drop-down menu.
After that, click theOKbutton.
Step 3: Review the creation results and then click theApplybutton.
This article describes how to shrink volume in Windows Server and how to use the reduced space.
We also introduced the problems you may encounter and how to solve them.
You will find that MiniTool Partition Wizard is a relatively better choice.
In addition, we also introduced how to use unallocated space to improve space utilization after shrinking the partition.
For example, create a new partition or extend the partition.
Based on this, you might try it.
