But if you want to free up the maximum amount of space, you gotta disable reserved storage.
This post will show you a guide on Windows 10 reserved storage and teach you how to disable it.
The new Reserved Storage feature was also introduced in Windows 10 1903, which may offend many users.
As Microsoft acknowledges, many systems end up not being updated because of the small amount of storage.
Typically, the gear is filled with apps, music, and photos.
While you may find the update annoying, its useful because it ensures all sorts of very important securities.
In addition, some regular applications often experience difficulties if they approach storage capacity.
Its main purpose is to improve the functioning of your gear.
These may not work as expected because there is less free space for the functioning.
But its worth noting that the very first reserved storage may take up 7GB storage.
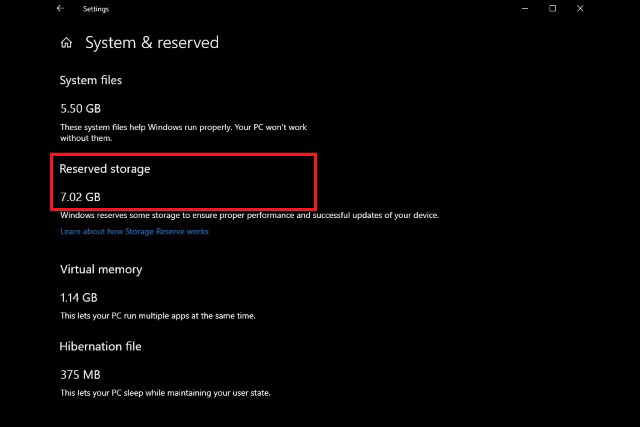
Head toSettings>System>Storageand then clickShow More Categories>Systems & Reserved.
If you seeReserved Storagewith7+ GBof storage space in use, your system is using reserved storage feature.
If there is noReserved Storagehere, which means your system is not using any reserved storage.
Here is how you’ve got the option to disable reserved storage.
Step 3: LocateShippedWithReservesand double-select it.
Step 4: Change theValue datafrom1to0, and then clickOK.
After finishing all the steps above, reboot your setup to apply all changes.
If you dont want to use this feature, you could also follow the steps above to disable it.
