Hard drives can be external or internal.
In this post, I will show you how to add a hard drive to a PC from scratch.
Otherwise, the hard drive installation may fail.
#1.
Interface
Hard drives have various interfaces like IDE, SATA, M.2, etc.
Nowadays, SATA and M.2 interfaces are the mainstream.
When you pick a hard drive, you should see to it its interface is supported by your rig.
Otherwise, the hard drive wont install or work.
How to check what hard drive interface is supported by your gear?
it’s possible for you to try the following 3 ways.
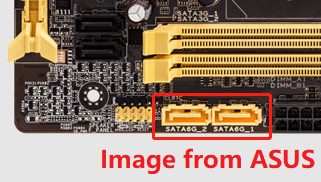
Here, I will show you pictures of the SATA and M.2 sockets to help you identify them easily.
you’ve got the option to identify it easily.
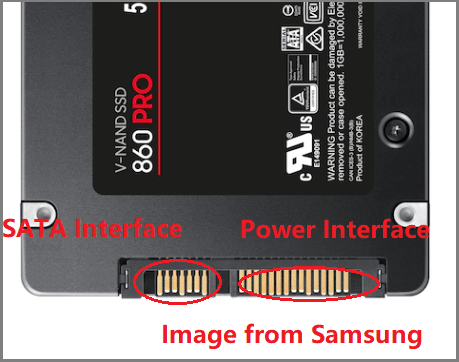
you’re able to insert the SATA hard drive into a laptop directly, without cables.
you’re free to identify it easily.
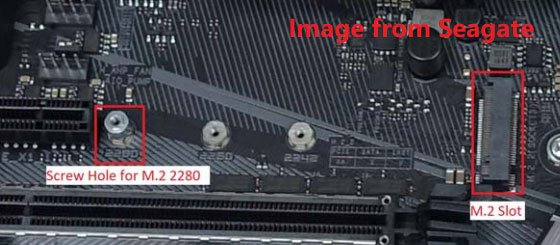
M.2 Socket
Whether on a laptop or a desktop computer, the M.2 slot looks the same.
Most M.2 slots are M key and some are B+M key.
To know more about them, you might readthis post.
#2.
Size
In most cases, an M.2 hard drive is an M.2 SSD.
Its common size should be 2230, 2242, 2260, or 2280.
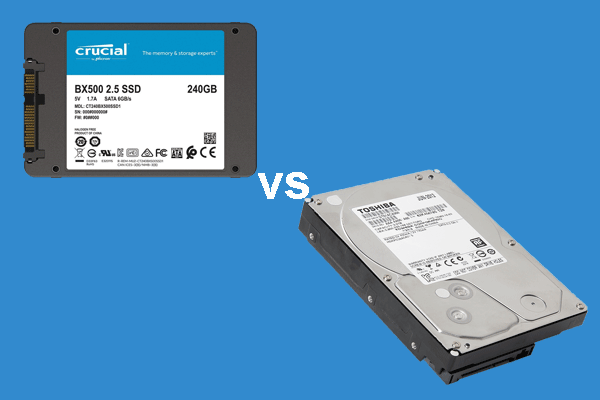
A SATA hard drive could be either a SATA HDD or a SATA SSD.
All SATA SSDs are 2.5-inch.
As for SATA HDDs, they could be either 2.5-inch or 3.5-inch.
In most cases, 3.5-inch HDDs could be usually faster than 2.5-inch HDDs.
What are the differences between 2.5 HDD and 3.5 HDD?
This post shows some differences between these two hard drive form factors.
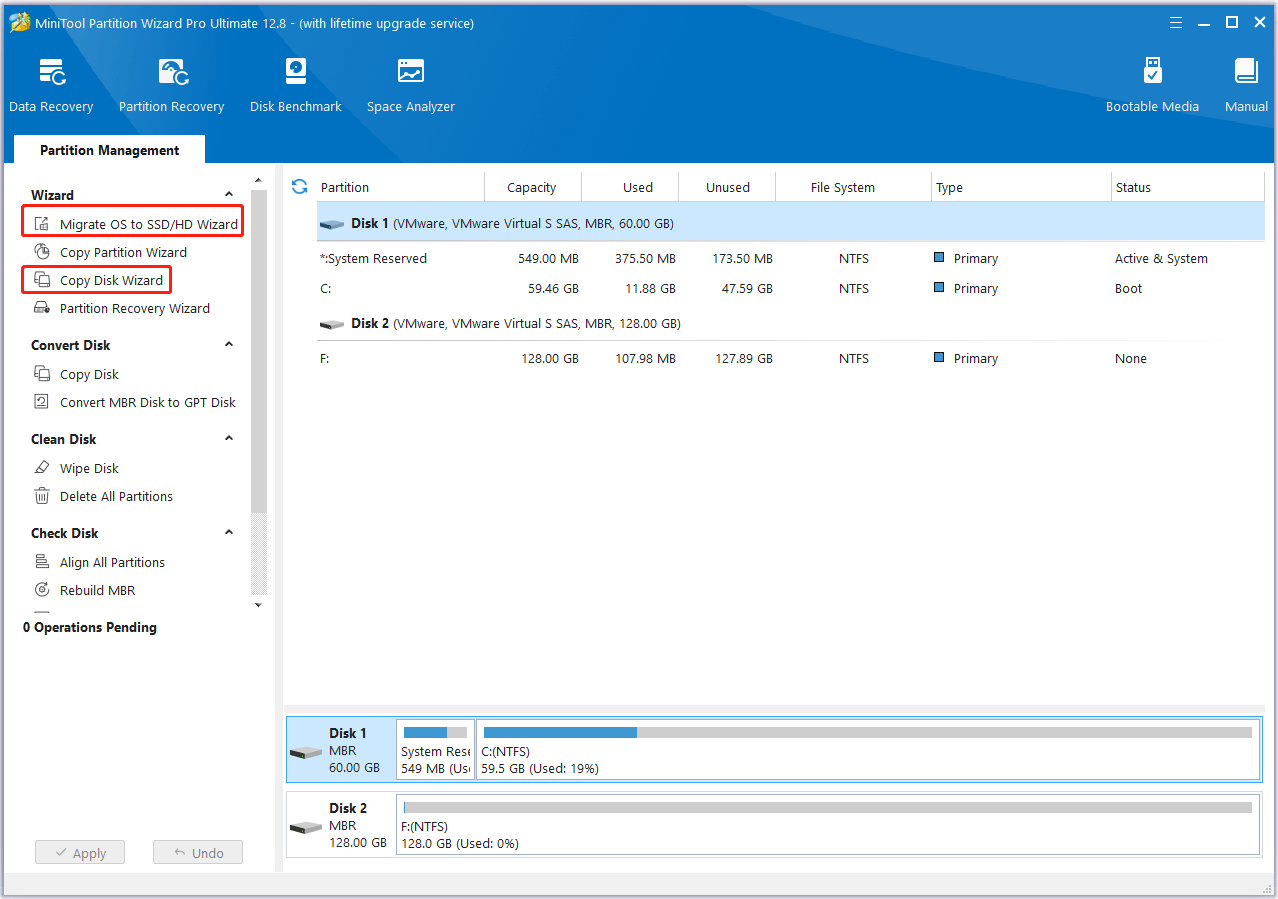
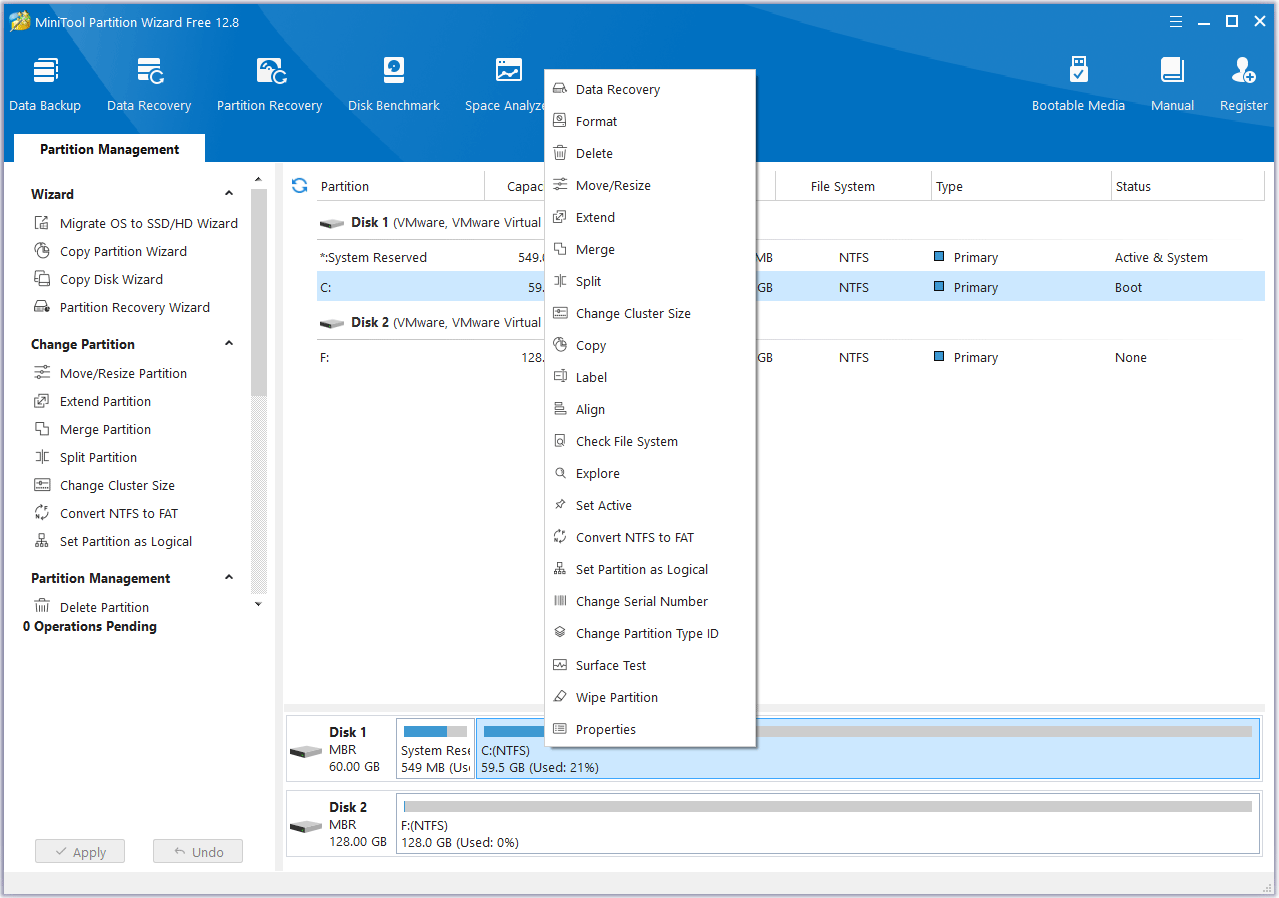
To do the disk cloning or OS migration, I suggest you use MiniTool Partition Wizard.
Laptop users usually ask this question.
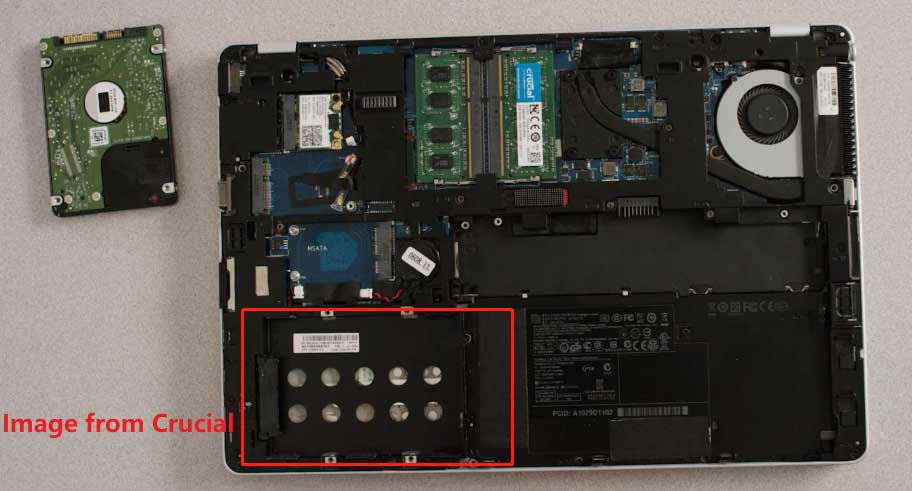
This guide shows how to install a 2.5-inch SATA SSD or HDD to a laptop.
Step 1:Disconnect your laptop from its charger and then turn off your laptop.
Step 2:Use a screwdriver to remove all screws on the bottom panel.
Step 3:After removing the bottom of the laptop, remove the battery if possible.
Then, locate the SATA hard drive bay.
If there is no old hard drive, remove the hard drive cage directly.
Step 5:Fasten the new SATA hard drive into the hard drive cage.
Then, place the hard drive into the hard drive bay and fasten it.
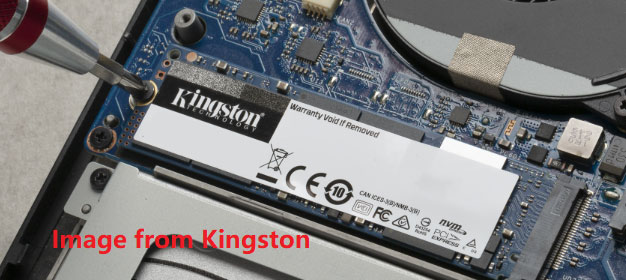
Similarly, you should probably remove the laptop bottom and then locate the M.2 hard drive bay.
Here is the guide:
Step 1:Shut off and unplug your setup.
Remove the side cover of the chassis.
It may be fastened by screws.
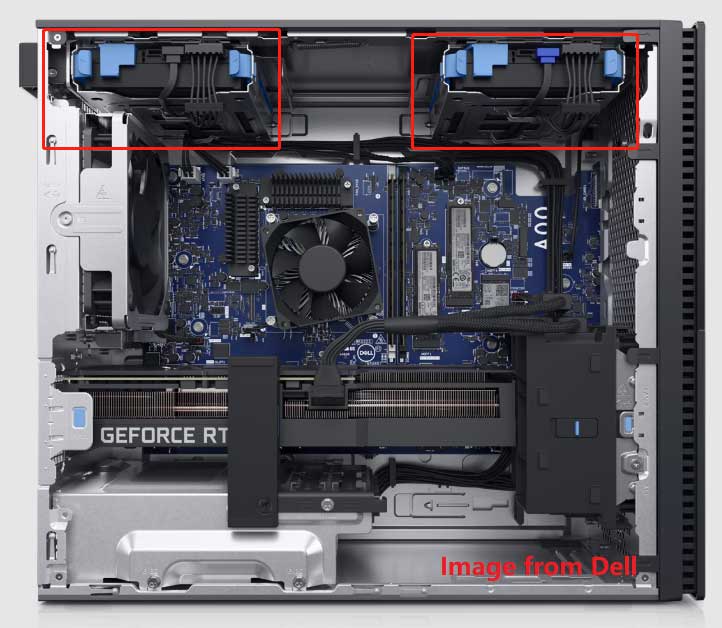
Step 2:After removing the panel, you could see the inside parts of the PC chassis.
Then, you’re free to locate the SATA hard drive bays or cages easily.
They are usually located in the four corners of the chassis.
If your rig uses the hard drive cage, place back it and fasten it.
Then, connect the SATA power cable to the drive and the PSU.
Step 6:If you disconnected other cables before inside the PC chassis, reconnect them.
Then, place back the side panel of the chassis and fasten it.
Connect all cables of the PC.
The only difference is the way you disassemble the computer.
What to Do After Installing a Hard Drive?
After installing a hard drive, you should check that it is detected by your PC.
Then, you may need to repartition the hard drive for better use.
Then, you might try MiniTool Partition Wizard.
It can help you do these jobs for free.
Besides, this software can also help youconvert MBR to GPT,recover hard drive data, etc.
This post offers a detailed guide.
When you do that, you may need to clone the disk or repartition the hard drive.
Then, you’ve got the option to try MiniTool Partition Wizard.
if you run into issues when using this software, contact us via[email protected].
We will get back to you as soon as possible.
