Its been quite a long time since Microsoft released the new Windows 11.
But it still keeps getting new issues over and over again.
Sometimes, the issues are with the Bluetooth function.
Save changes
Whereas sometimes, theyre with the systems sound.
Like these, there are numerous common problems that you may face with the latest Windows 11.
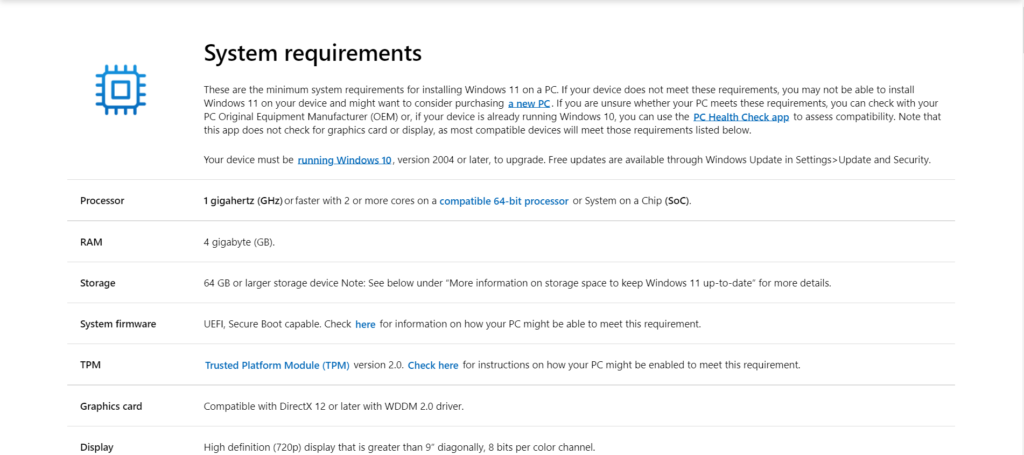
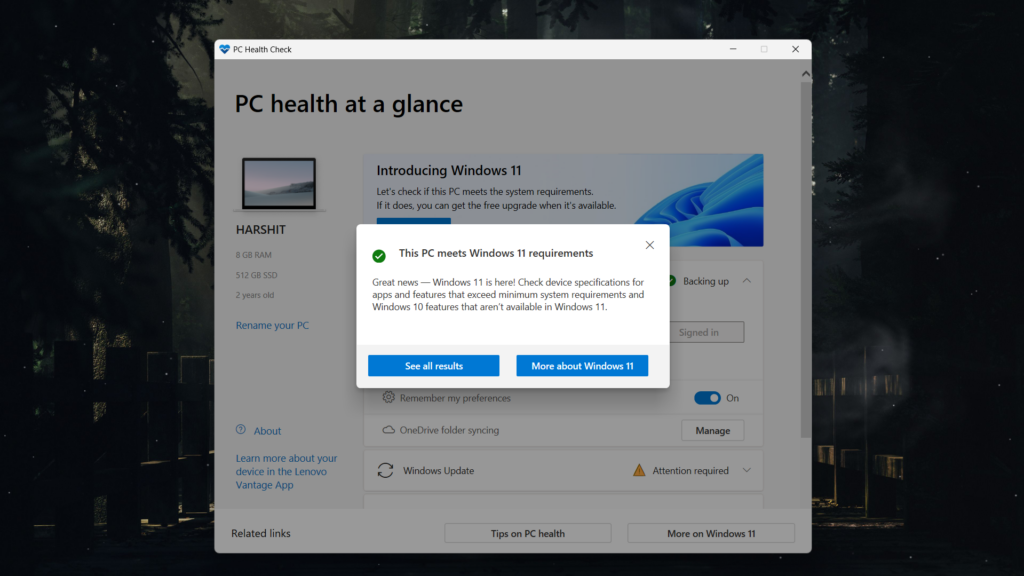
This issue could appear for varied reasons, such as disabled TPM 2.0, Secure Boot, etc.
Luckily, it can easily be fixed if it occurs.
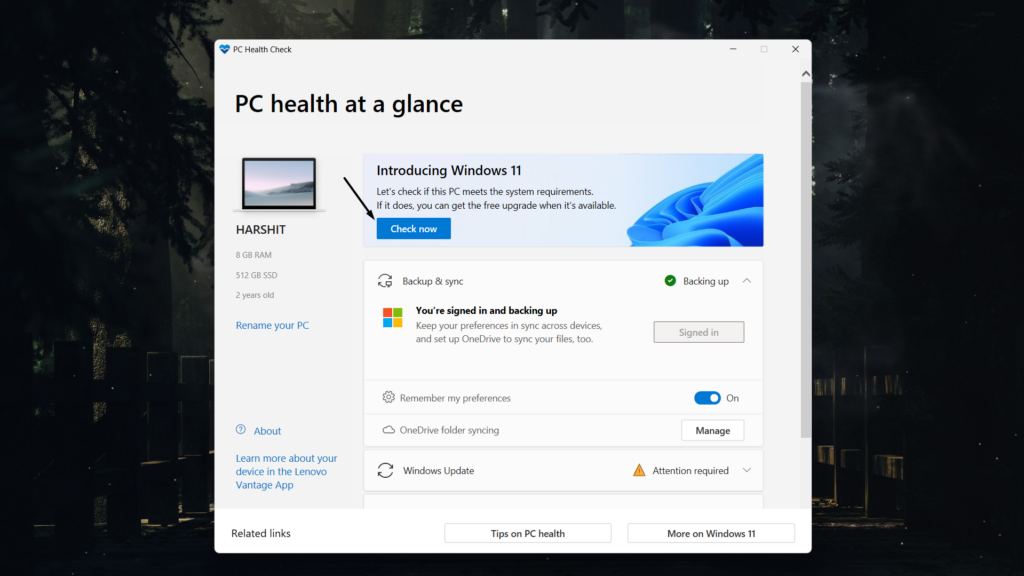
2.Once its installed, open it on your system and click theCheck Nowbutton to start the scan.
Its essential to keep it enabled to run Windows 11.
2.After entering theUEFI/BIOS, look for theTPMtoggle in theSecurityorAdvancedtab of it.
3.Once found,set theTPM toggletoOn,Enabled,Firmware TPM, or whatever its on your PC.
4.Lastly, click theSave and ExitorExitbutton to save all the recent changes on your PC.

In case you cant get a new drive, simplyformat the existing one.
If its disabled, this issue can appear without any doubt.
2.In theSecuritysection, toggle onSecure Bootand then pressF10to save the changes.

In this case, its better touninstall third-party antivirus programsfrom the PC and then try installing new PC updates.
2.On theAppsscreen, clickInstalled appsand then look for the antivirus app you better remove.
3.Next to yourantivirus program, click thethree dots (…)and chooseUninstallfrom the dropdown menu.
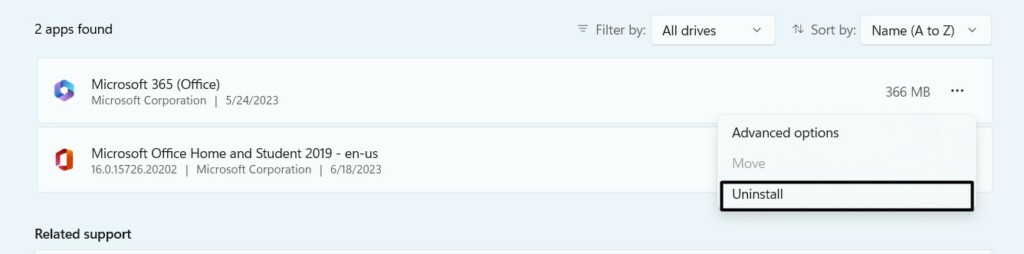
4.Once done, clickUninstallin the new promptto remove the antivirus app from your PC.
Free Up Your Disk Space
You may also face this issue because of insufficient storage.
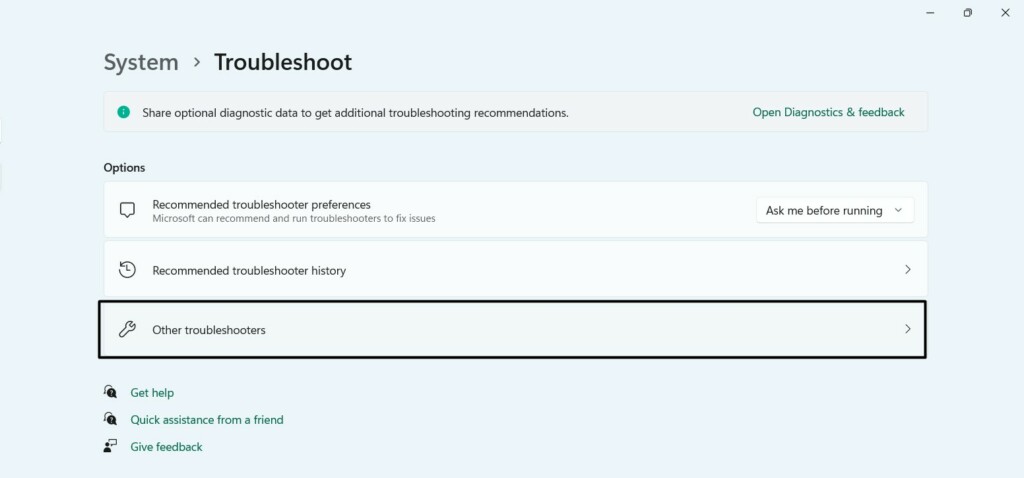
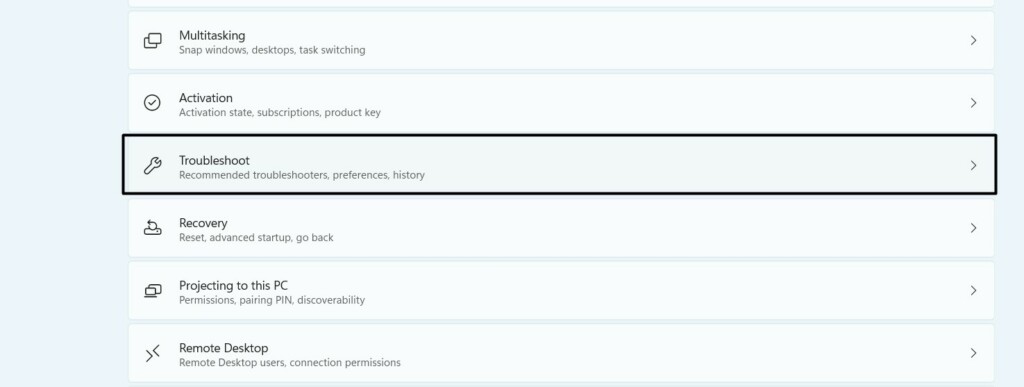
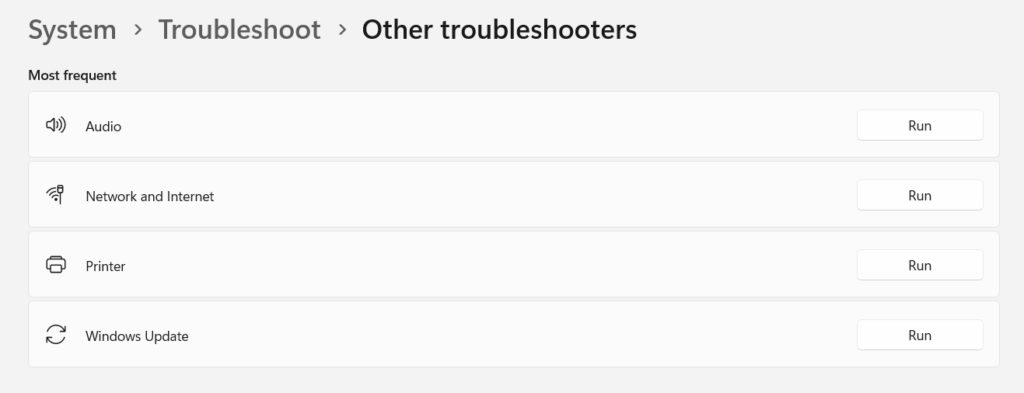
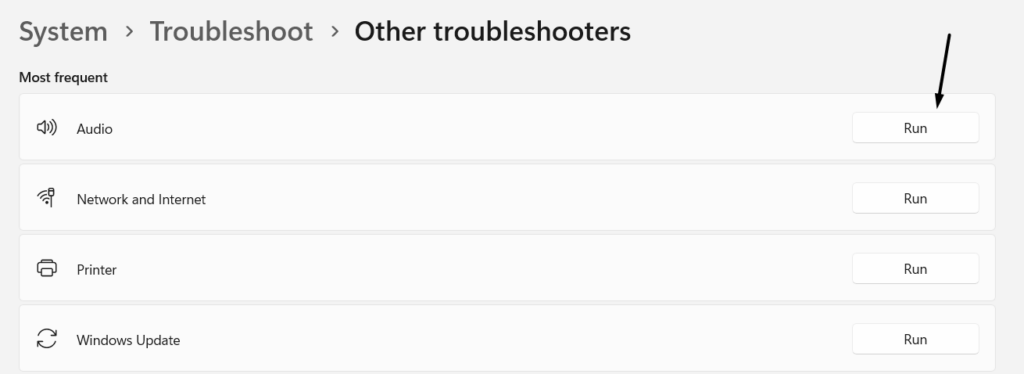
2.Click theTroubleshootoption, and on the next screen, selectOther troubleshooters.

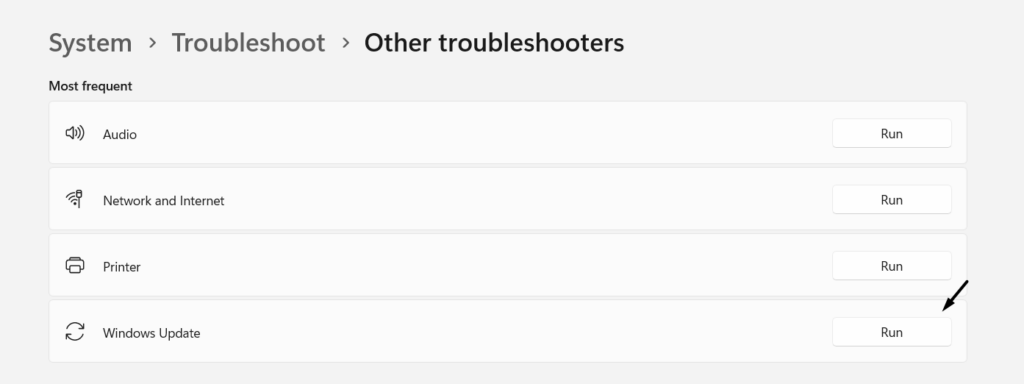
3.Under theMost frequentsection, click theRunbutton next to theWindows Updateoption.
4.Lastly, follow the on-screen prompts to start the Windows Update troubleshooting process on your PC.
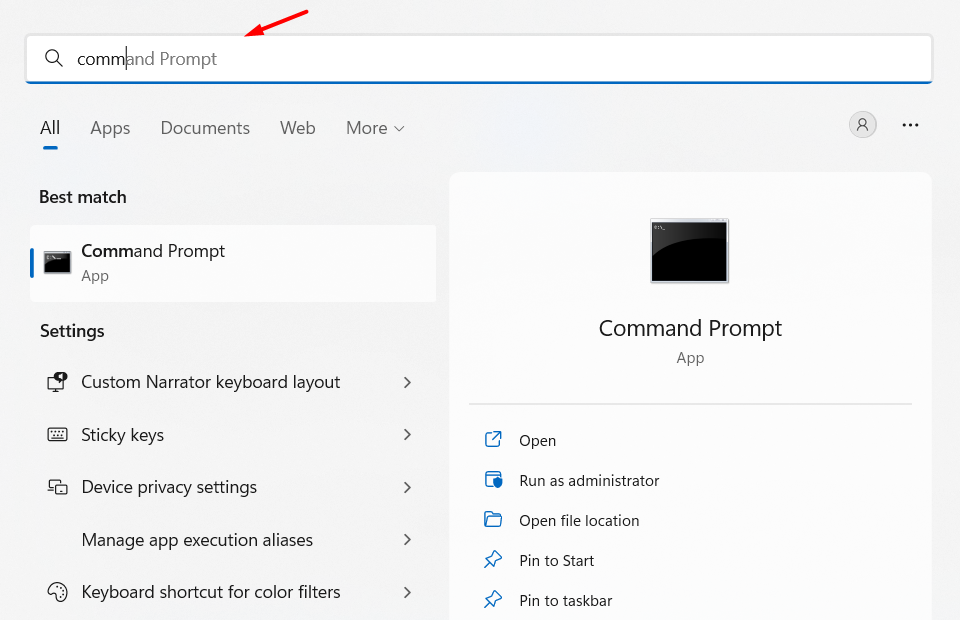
2.Choose theRun as administratoroption from the search results to open it with admin rights.

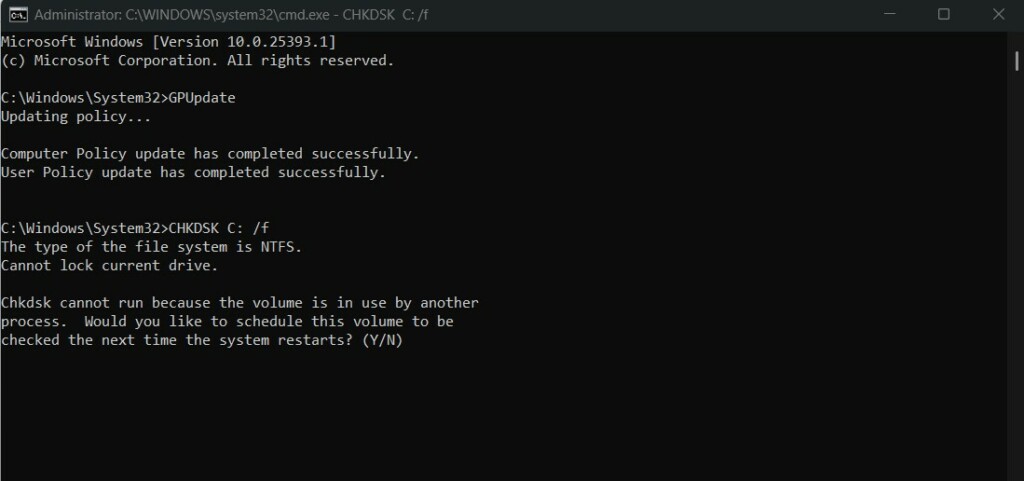
3.InCommand Prompt, copy-paste thechkdsk/f C:command in it and press theEnter key.
4.After executing the above-listed command, the system will start repairing the storage drive.
So run this tool on your Windows 11 computer and verify if it fixes the sound-related problems.
2.On the next screen, expand theOther troubleshootersoption to access all the built-in tools.
3.On theOther troubleshootersscreen, under theMost frequentsection, look forAudio.
4.Next to theAudiotroubleshooter, click theRunbutton to begin the Audio troubleshooter.
5.In theGet Helpwindow, follow the on-screen instructions to find and fix sound-related issues.
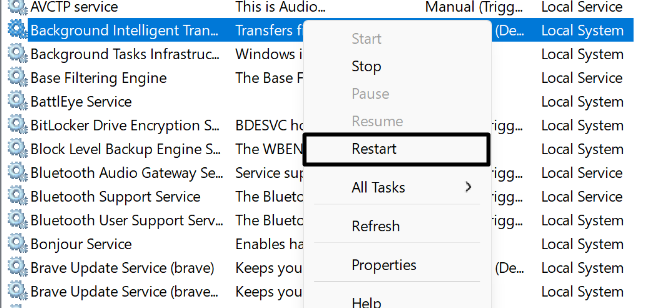
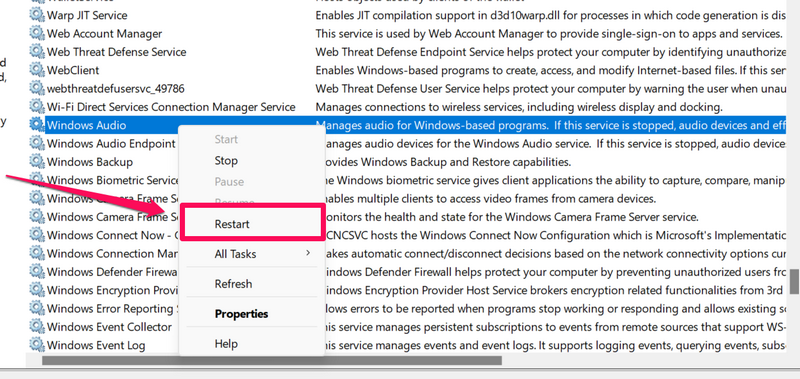
It could be possible that this service isnt working on your PC, which is resulting in this issue.
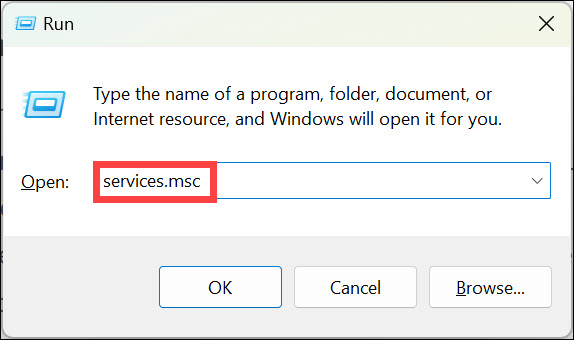
2.Press theEnter keyorOKbutton in the prompt to launch theServices utilityon your PC.
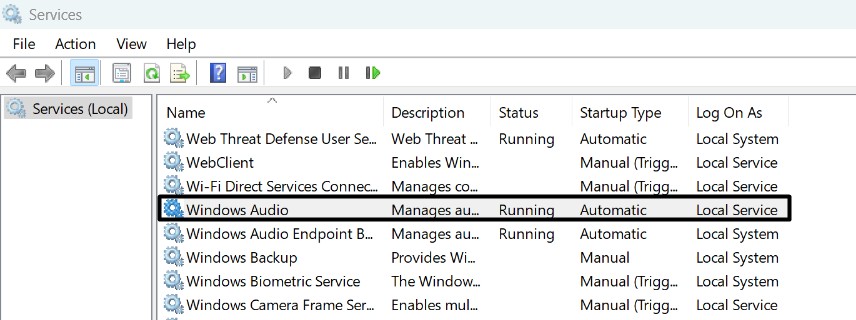
3.In theServiceswindow, look for theWindows Audioservice, and once found, right-click it.
4.Choose theRestartoption from the contextual menu to restart the Windows Audio service.
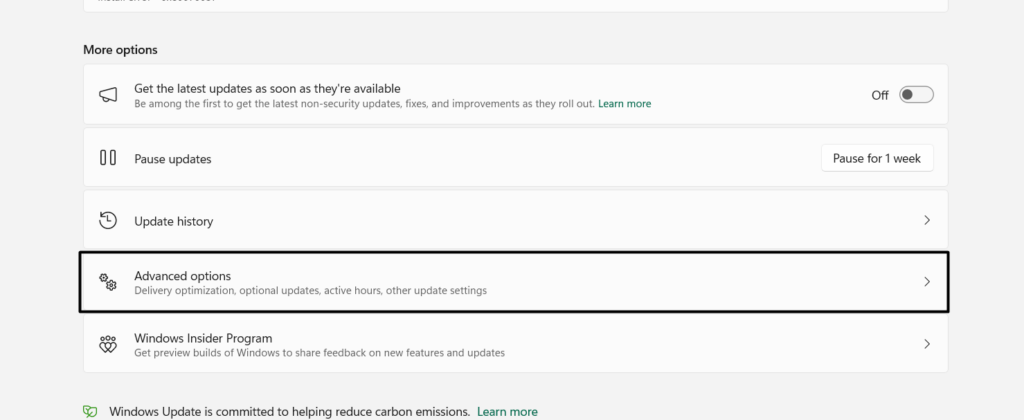
2.On theWindows Updatescreen, chooseAdvanced optionsand selectOptional updates.

3.Click theCheck for updatesbutton at the top to look for new optional Windows updates.
4.In the end, click theDownload and installbutton to roll out the pending Windows updates.
Also, ensure thecables are properly connectedto your Windows 11 PC.
They say itdoesnt bring up the PCor constantly lags and freezes while using.
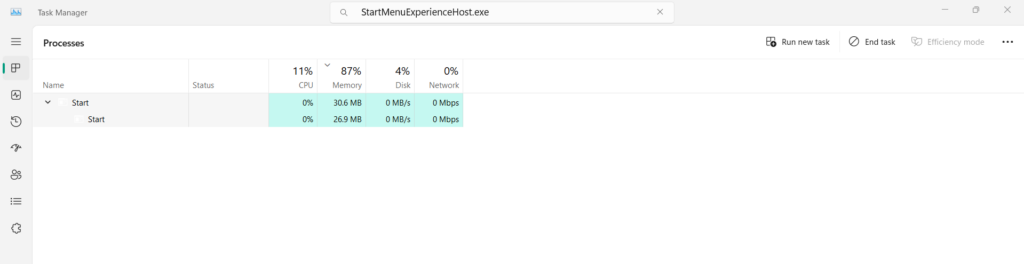
You could also face similar issues with your PCs Start Menu at any time.
2.InTask Manager, go to theServicestab and find theStartMenuExperienceHost.exeservice.
3.Once found, right-click it, and then chooseEnd taskfrom the contextual menu to end it.
Once done, kickstart your Windows computer and peek if the File Explorer works properly now.
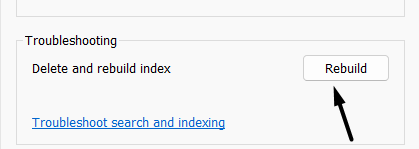
In this case, its recommended torebuild the Windows Search Indexto get the Start Menu back to work.
3.In theAdvanced Optionswindow, click theRebuildbutton to start the rebuilding process.
For instance, it may not open on the PC or keep crashing while working.
Luckily, all the issues with the File Explorer utility can be fixed.
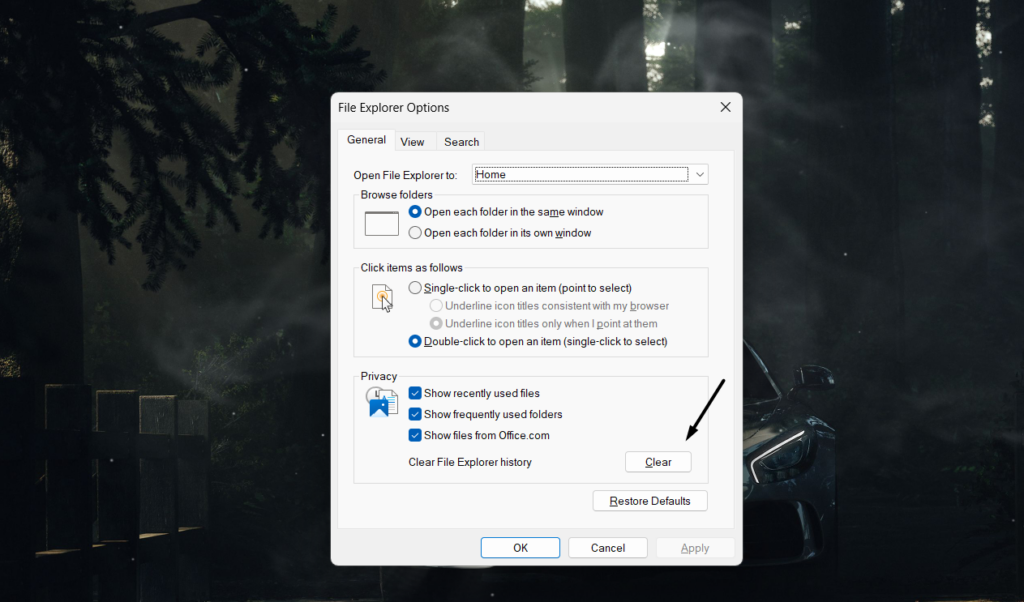
If this issue appears to you, simply clear its history and check the issues status.
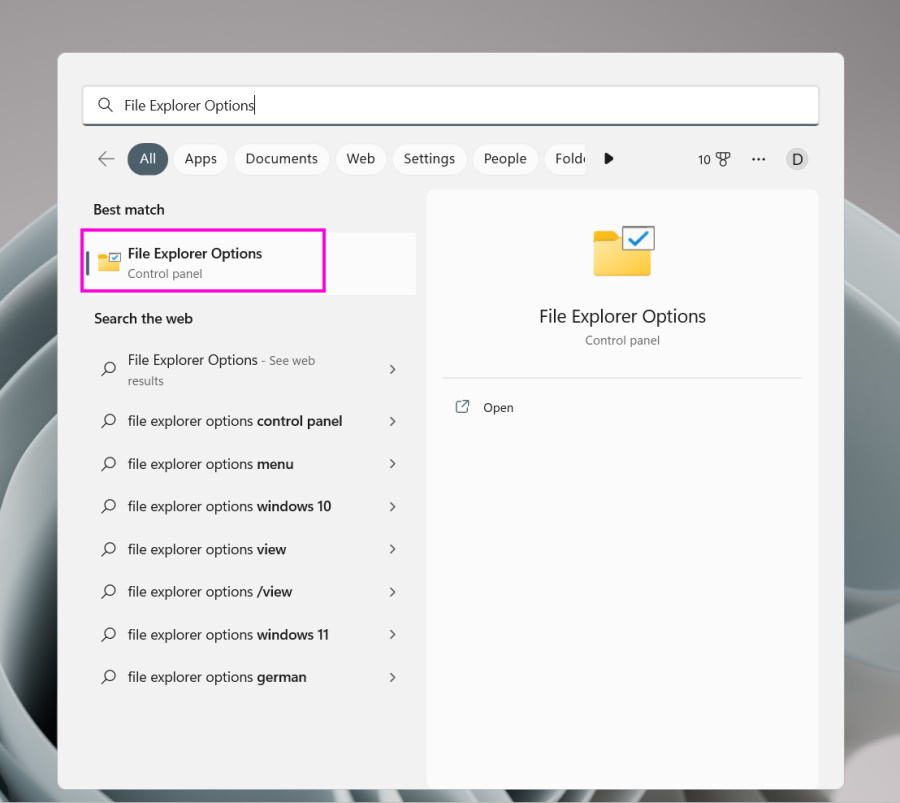
2.From theBest matchsection in the Windows search results, chooseFile Explorer Options.
3.In theFile Explorer Optionswindow, under thePrivacysection, click theClearbutton.
Once the File Explorers cache file has been cleared, check whether the problems with it are fixed.
3.After doing so, youll see that the SFC scan has been started and fixing the corrupted files.
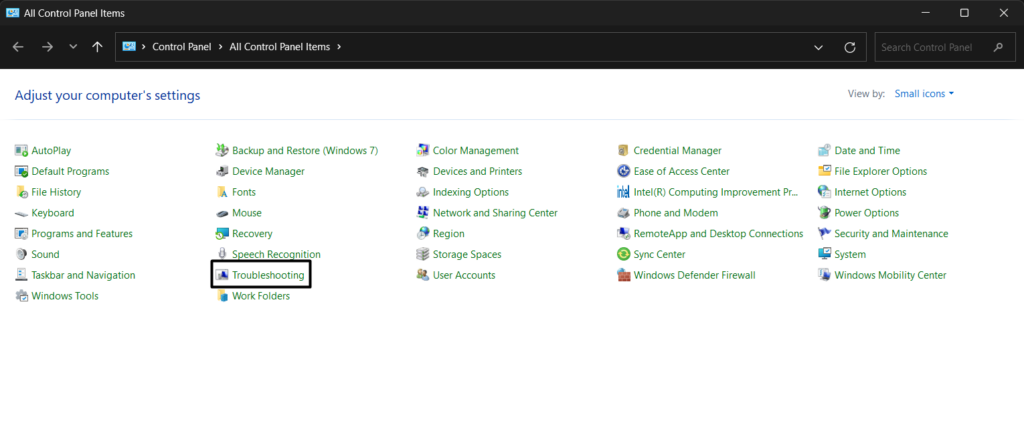
2.In theControl Panelwindow, setView by:toSmall iconsby choosing it from the menu.
3.Search for theTroubleshootingoption and then select it to launch the troubleshooter on your PC.
4.On the next screen, click theRun maintenance tasksoption and then click theNextbutton.
5.Lastly, follow the on-screen instructions to initiate the troubleshooter and resolve issues with it.
For instance, it constantly lags,crashes, or even works slowly for them.
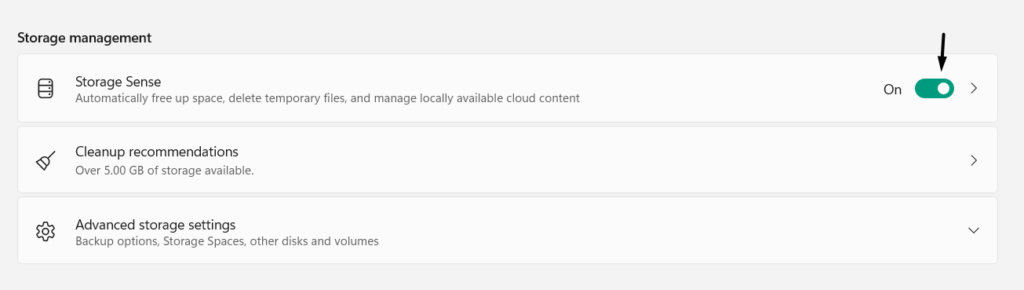
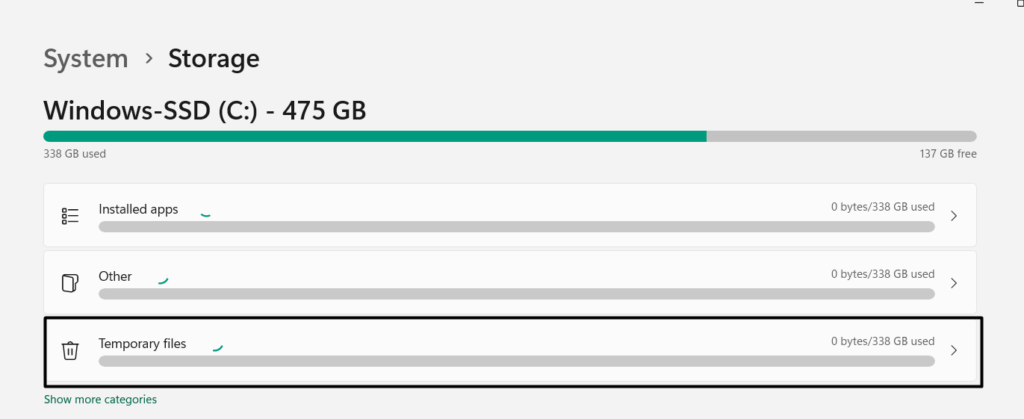
We suggest youenable the Storage Sense featureon your Windows 11 PC or laptop to improve its overall performance.
2.In theSystemcategory, look for theStorageoption, and once found, select it to go to theStoragesection.
3.In theStoragewindow, turn on the toggle next toStorage Senseto enable Storage Sense.
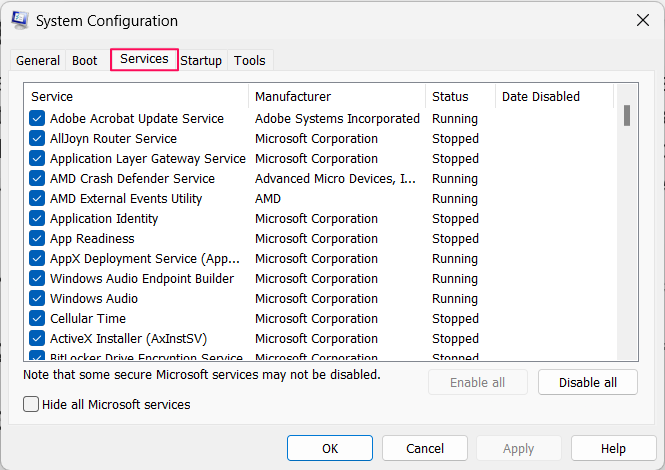
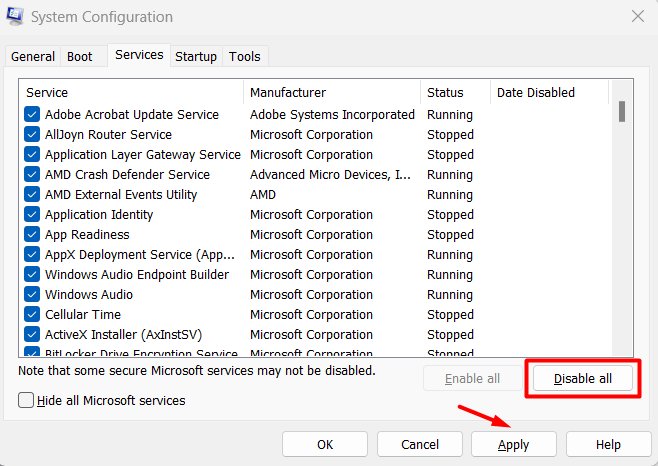
Disable Unnecessary Third-Party Services
Third-party services also make the PC slow and laggy.
2.Go to theServicestab inSystem Configurationand search for all the unnecessary services.
3.Tick the boxes next to all the services you want to turn off and clickDisable allto disable them.
4.Lastly, reboot your Windows 11 PC or laptop and check whether the situation has improved.
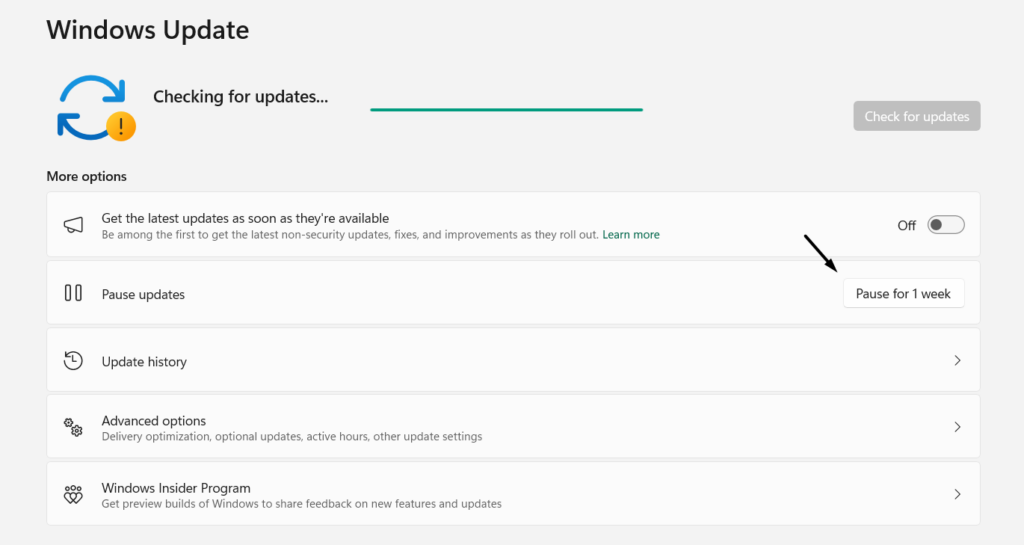
2.On theWindows Updatescreen, click thePause for 1 weekbutton next toPause updates.
Some programs contribute to the proper functioning.
As a result, they affect the systems performance.
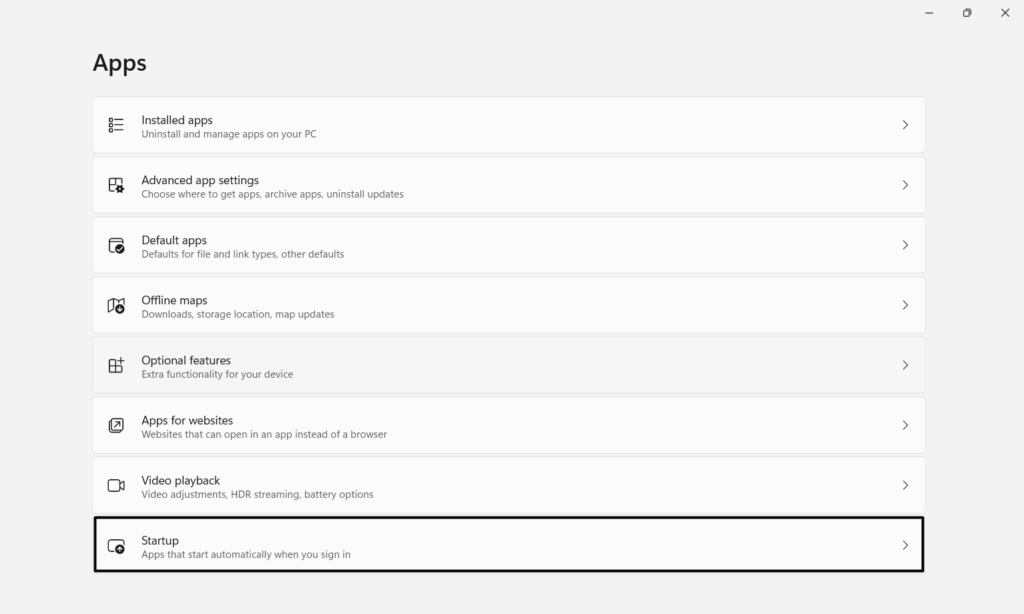
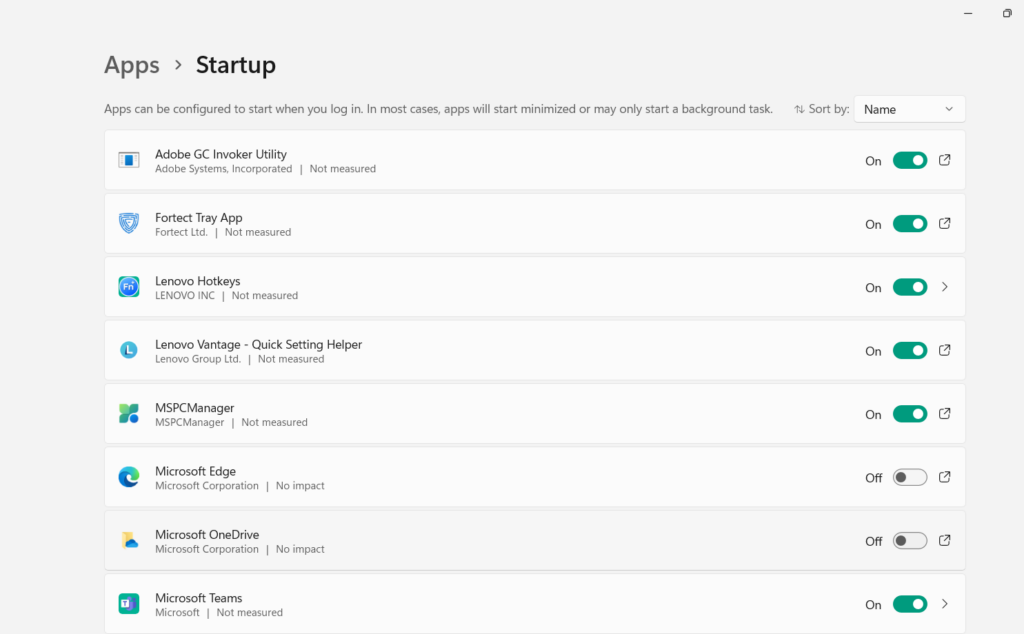
2.SelectStartupand look for the apps and programs that arent necessary to boot at the startup.

3.turn off the toggle next to all unnecessary apps you found and check the systems performance.
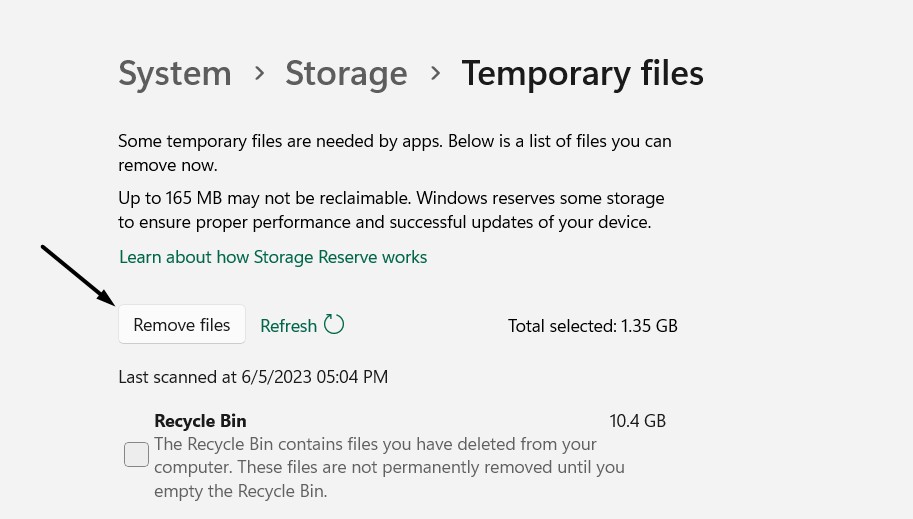
2.In theStoragewindow, click theTemporary filesoption to move to theTemporary filessection.
3.Once the total temporary files are calculated, click theRemove filesbutton to delete them.

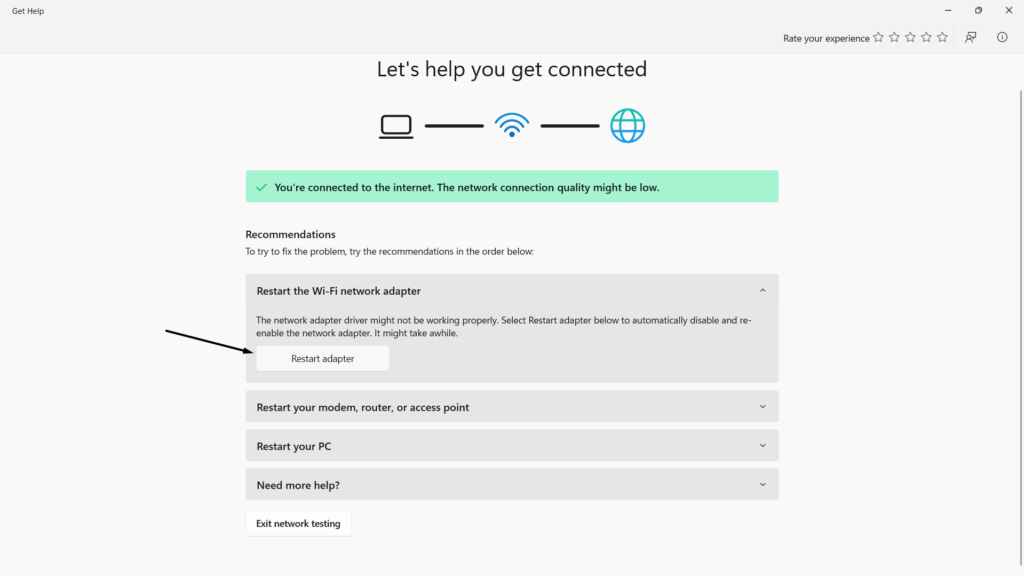
Some users also said that their WiFi keeps dropping and, at times, doesnt find nearby WiFi.
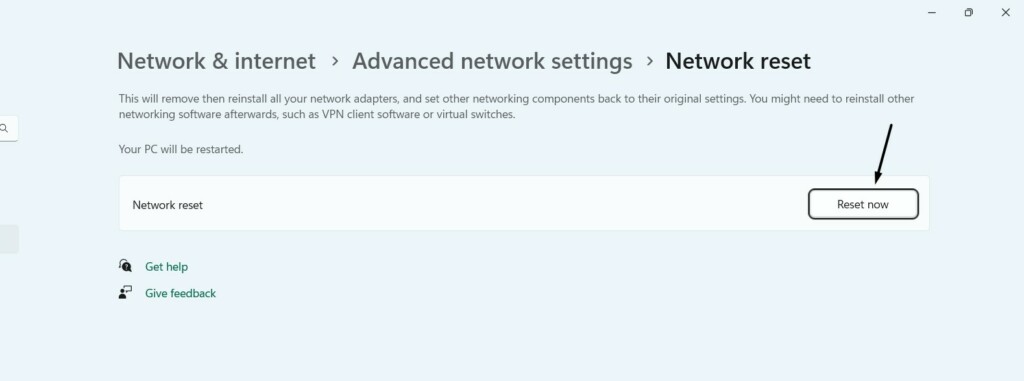
Doing so will fix the issue if theyre appearing for misconfigured parameters.
2.In theNetwork & internetwindow, select theAdvanced data pipe settingsoption to go ahead.
3.Choose theNetwork resetoption underMore prefs, and then click theReset nowbutton.
4.Click theYesbutton in the new button to reset your Windows 11 web connection options to default.
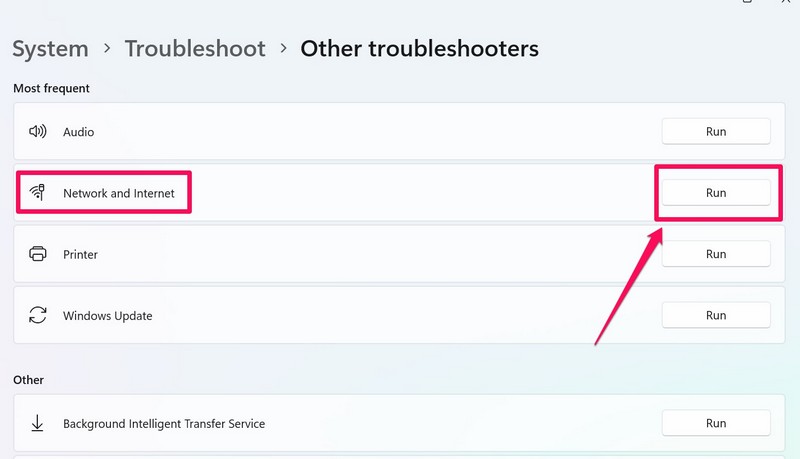
2.Once youre there, clickOther troubleshootersand proceed to theMost frequentsection.
3.UnderMost frequent, look for theNetwork and Internetand click theRunbutton next to it.
4.In the new window, underRestart the Wi-Fi connection adapter, click theRestart adapterbutton.
5.Once done, check whether the issues with your PCs WiFi and ethernet functions are fixed.

Update data pipe Adapters
Issues with WiFi and ethernet also occur due to outdated data pipe adapters.
In case the same issue appears to you,upgrade your Windows 11 PCs data pipe adapters.
you could update the drivers in theOptional updatessection of SettingsWindows Updatecategory.
So ensure that it isnt the same.
To confirm this isnt the same, unplug the cable from both ends and re-plug it.
If this doesnt fix the issue, ensure yourethernet cable has no wear and tear.

To check this, connect the ethernet cable to a different port in your router and the PC.
To fix this issue, consider checking the systems data pipe adapters power management options and disallow this permission.
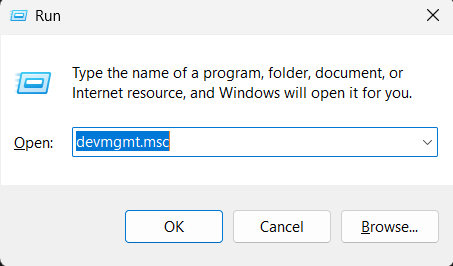
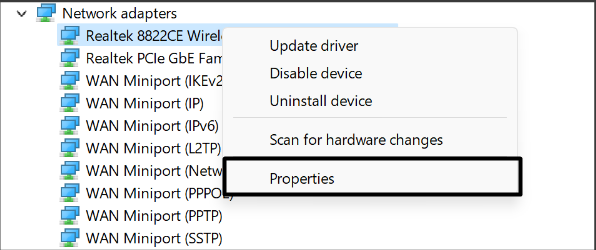
2.InDevice Manager, open theNetwork adapterssection and right-select any WiFi web connection adapter.
3.Choose thePropertiesoption from the context menu and head to itsPower Managementtab.
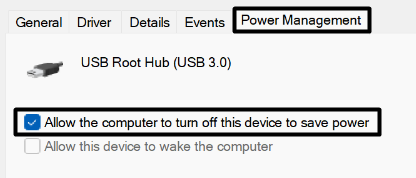
4.In the same window, deselectAllow the computer to turn off this rig to save power.
5.Lastly,clickOKat the bottom of the tab to stop your WiFi from disconnecting again and again.
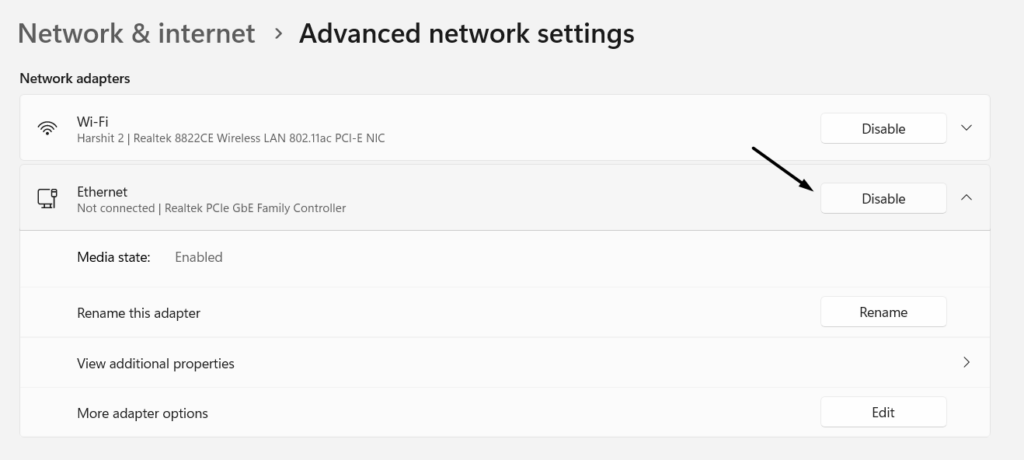
2.On the next screen, underNetwork adapters, clickDisablenext to theEthernetoption.
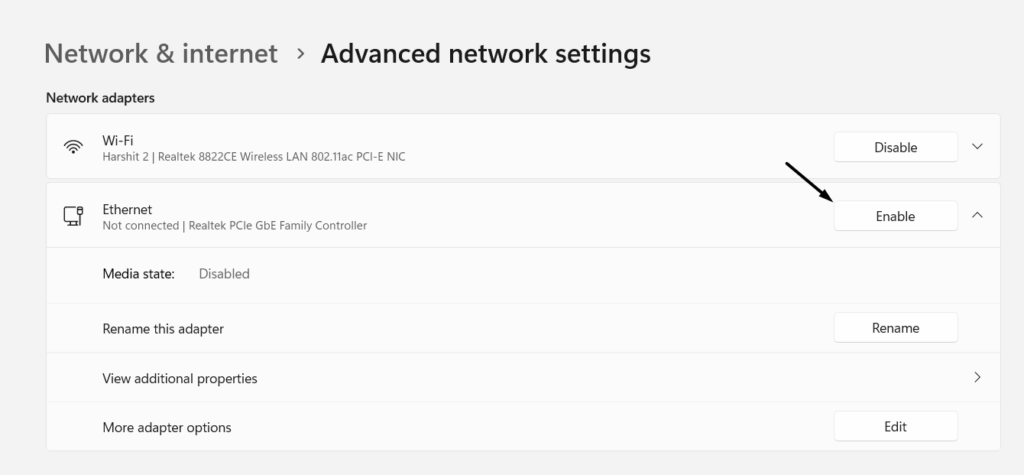
3.Once done, click theEnablebutton next to it to re-enable it on your PC and fix the issue.
Screen Flashes, Flickers, or Gets Blurry
Constant screen flickering and blurriness are also common Windows 11 problems.

They are usually triggered by outdated display adapters.
If this doesnt work, reinstall the adapters on your PC in the rig Manager app.
In case you cant uninstall the app, consider updating it or reinstalling it.

But what if you cant do so?
But no matter what the reason is, weve already got some fixes to fix it.
But yo note that this is only good if this issue occurs occasionally, not every time.
If it appears regularly, consider trying other shared workarounds to fix this issue.
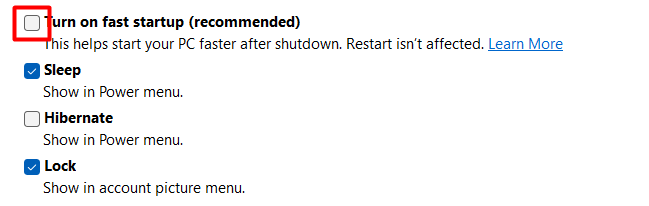
Disable Fast Startup
Fast startup is known for accelerating system startup.
But sometimes, it negatively impacts the shutdown process.

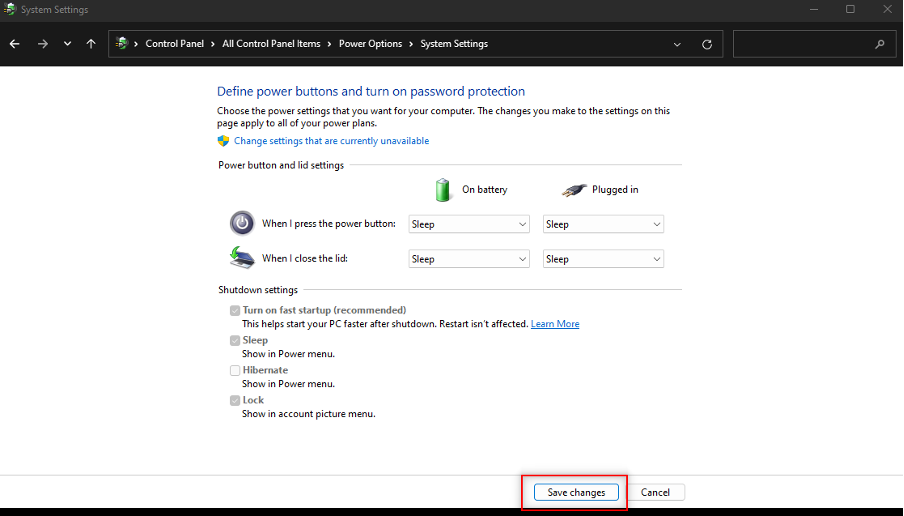
2.Once theControl Panelutilityis opened on your PC, setView by:toSmall iconsat the top.
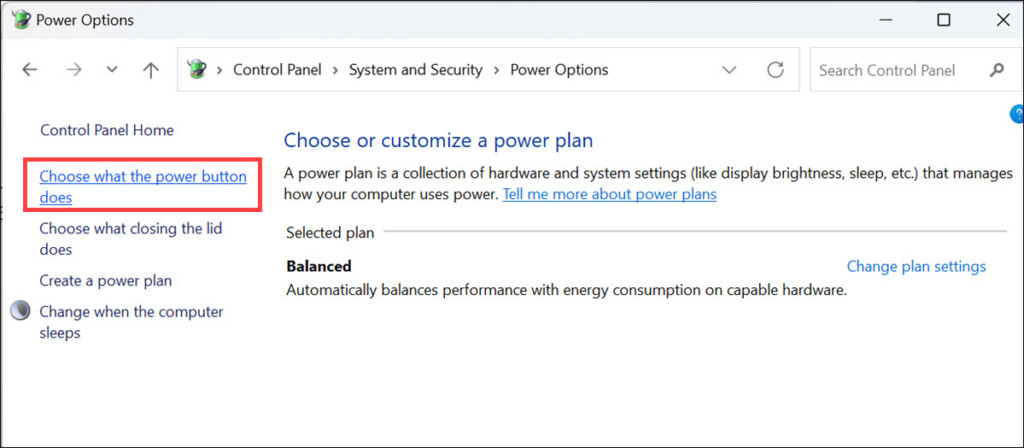
3.SelectPower options, and from the left side, selectChoose what the power button does.
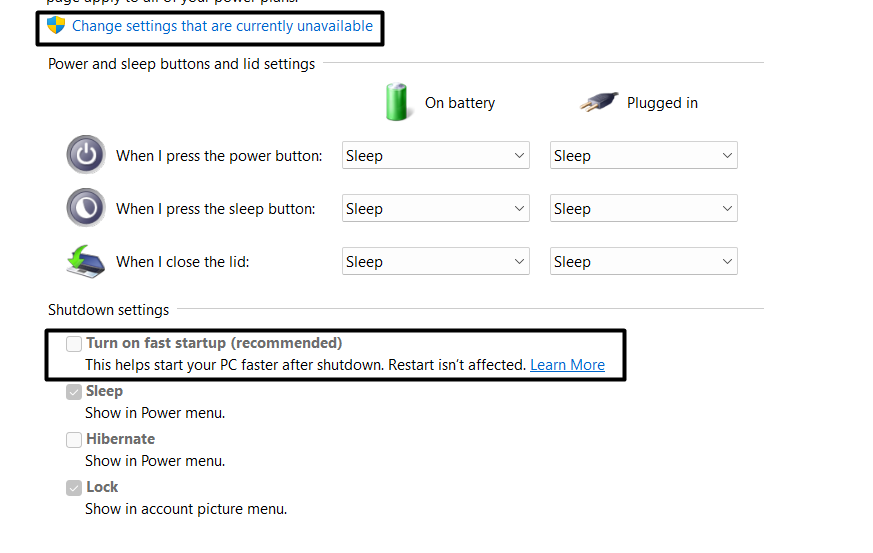
4.On the next screen, underShutdown parameters, unselect theTurn on fast startupoption.

5.In the end, click theSave changesbutton to save all the recent changes and fix the issue.
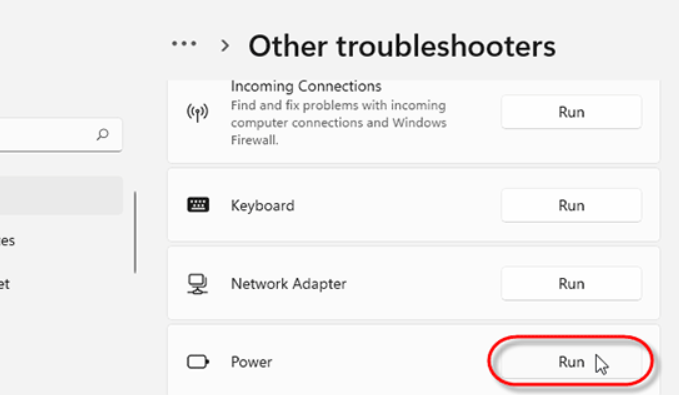
Sorun the Power troubleshooter on your PCand peek if it fixes the issue.
2.In theOther troubleshooterssection of theTroubleshootsection, look forPowerunderOthers.
3.Click theRunbutton next toPowerto start the Powertroubleshooter on your Windows 11 PC.
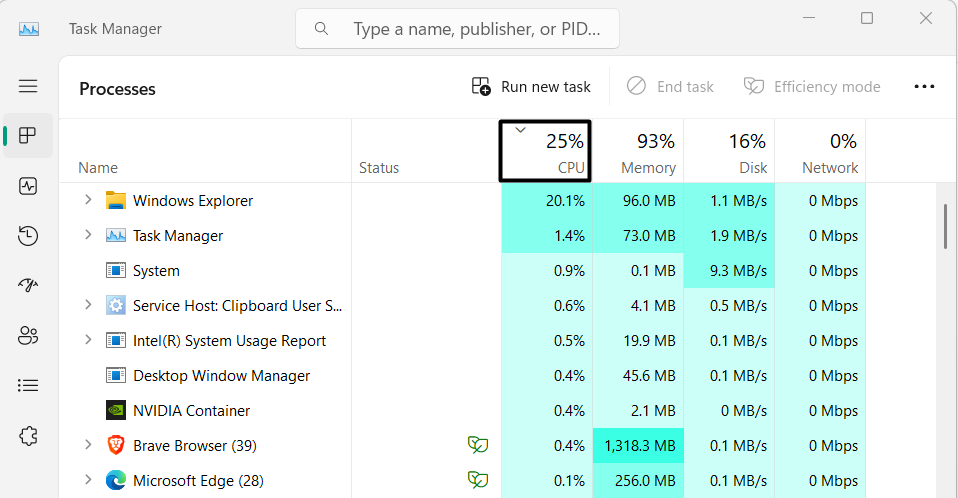
Check Running Processes
Sometimes, processes running the PCs background also stop the PC from shutting down.
This could be the same in your case.
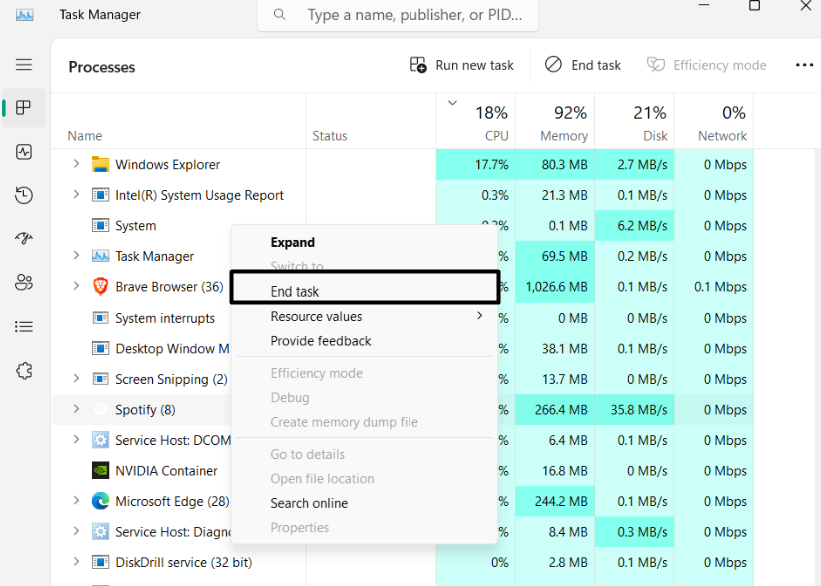
2.In theProcessestab, clickCPU, Memory, and Diskto sort the high resource-consuming task.
3.Look for the unnecessary processes and right-punch one of them to get the context menu.
4.ChooseEnd taskfrom the right-click menu to force exit the process and do so with others.
5.In the end, do the same withother unnecessary processes and tasks.
Once done, shut down your Windows 11 PC or laptop to check whether the situation has improved now.
Luckily, the slow startup time can be improved bytrying a few easy tips.
2.SelectPower options, and from the left pane, selectChoose what the power button does.
3.Tick theTurn on fast startup(recommended)checkbox to enable Fast startup on your PC.
Disable Unwanted Startup Apps
We suppose you know about startup apps.
You might also know how startup apps can affect the system performance as well as the boot time.
Considering this, we suggest youdisable unnecessary startup programsand then check whether it improves the startup time.
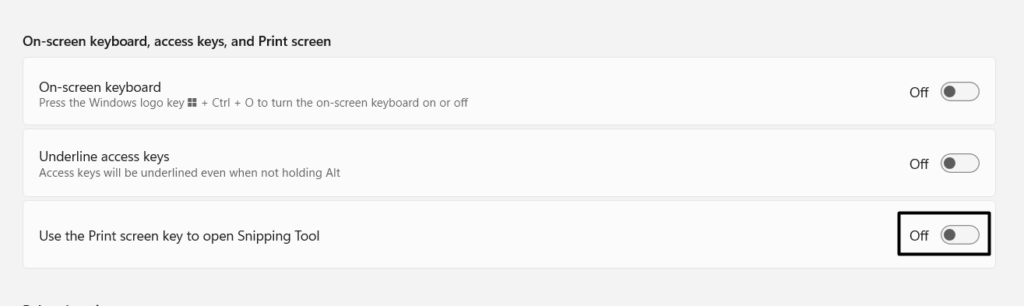
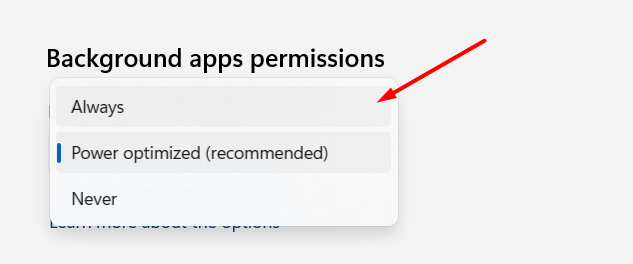
This could also happen with your Windows 11 PCs Snipping Tool.
Thus, we suggest you allow it torun in the background.
2.Click theInstalled appsoption, and on the next screen, look for theSnipping Toolapp.
3.Next toSnipping Tool, click thethree dots (…)and chooseAdvanced optionsfrom the menu.
4.Go toBackground apps permissionsand setAllow this app run in backgroundtoAlways.
Snipping Tool must now work properly on your Windows 11 PC or laptop without such issues.
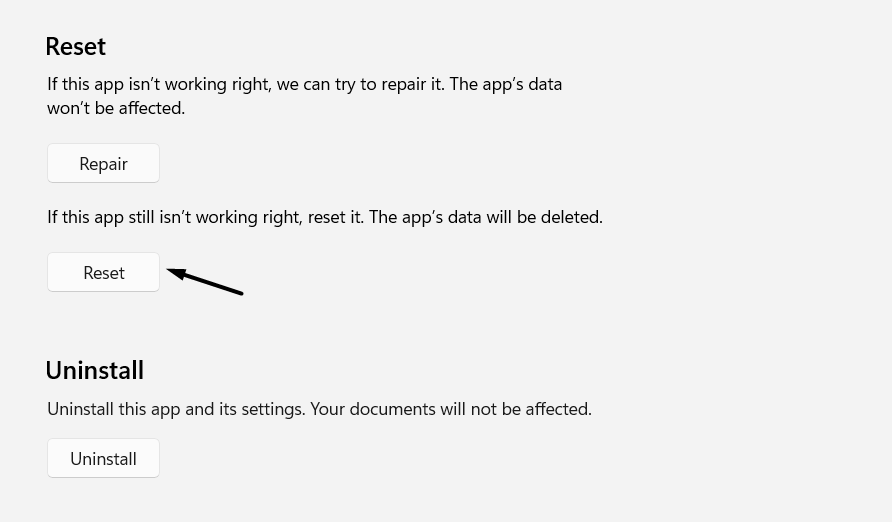
Doing so will remove all its data from your Windows 11 PC or laptop and refresh it.
2.Once youve reached there, scroll down to theResetsection of it and click theResetbutton.
3.Once the reset process is finished, verify if issues with Snipping Tool have now been fixed.
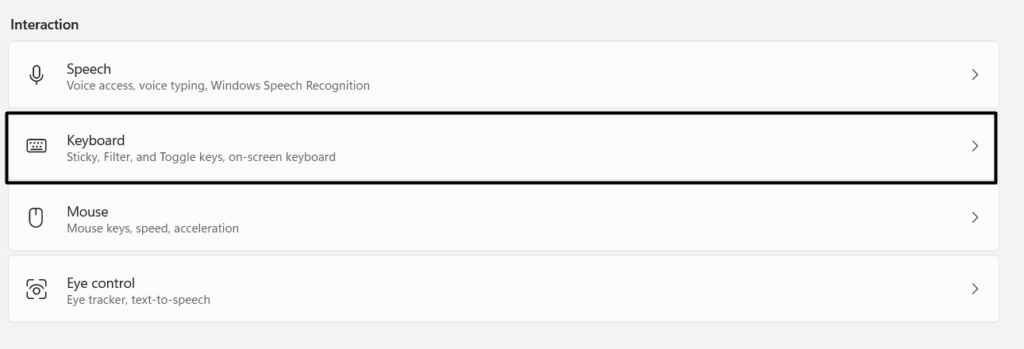
To open it using it, the above option must be enabled.
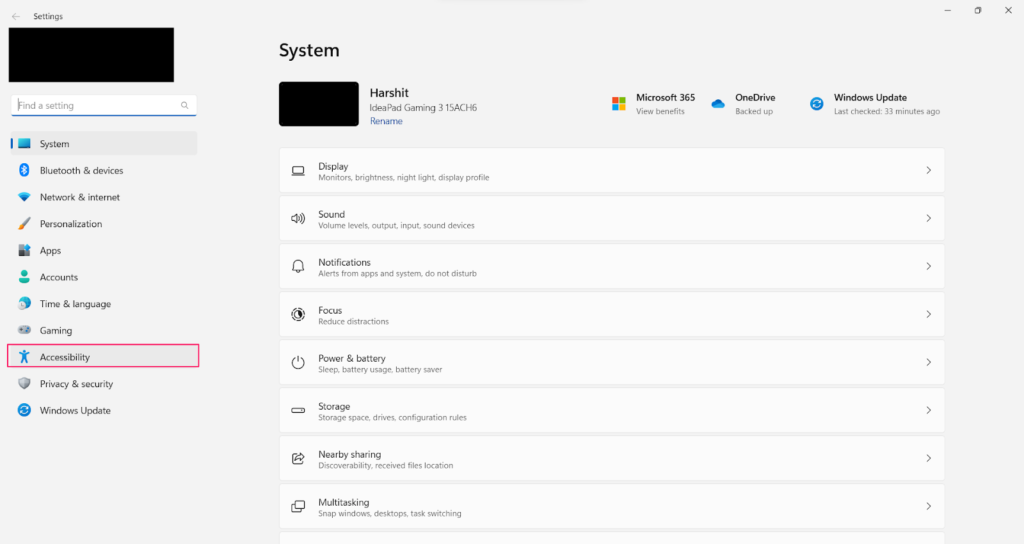
2.In theAccessibilitywindow, under theInteractionsection, choose theKeyboardoption.
Not only this, but sometimes it becomes unresponsive and makes us unable to jot down in Windows search.
2.In theTroubleshootwindow, selectOther troubleshootersand look forSearch and Indexing.
3.Once found,click onRunnext to theSearch and Indexing troubleshooteron your screen.
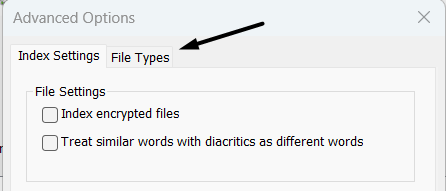
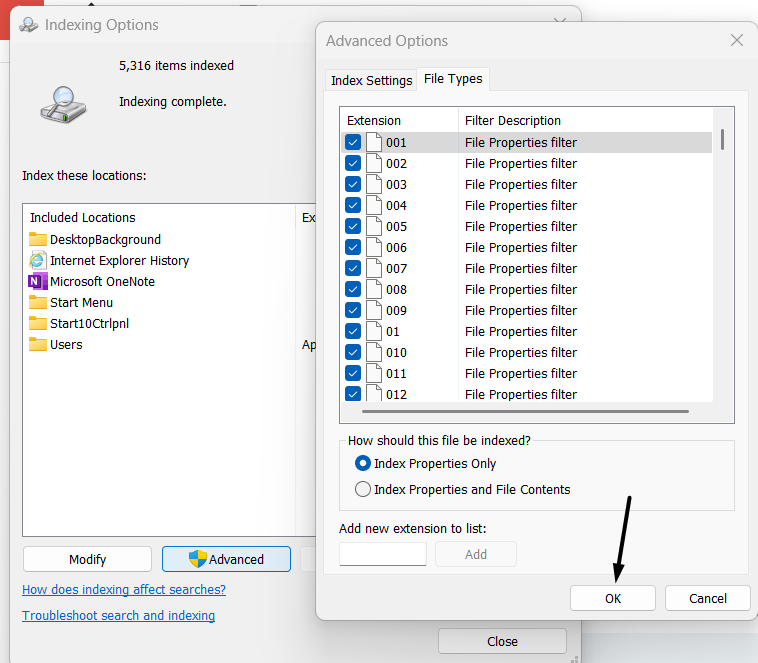
2.In theIndexing Optionswindow, click theAdvancedoption to go to Advanced controls.
3.Go to theFile Typestab and then select theIndex Properties and Contentradio button.
4.After doing so, click theOKbutton at the bottom of the prompt to save all the recent changes.
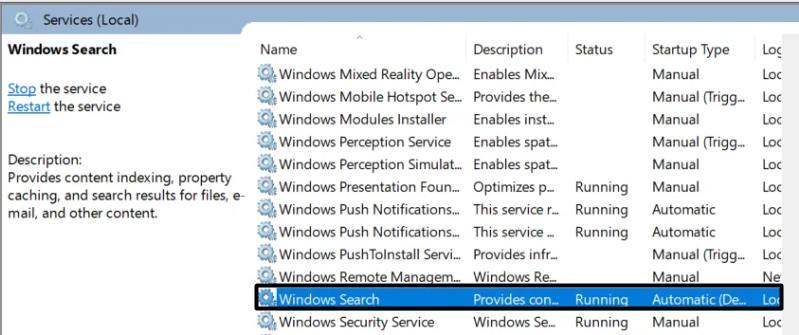
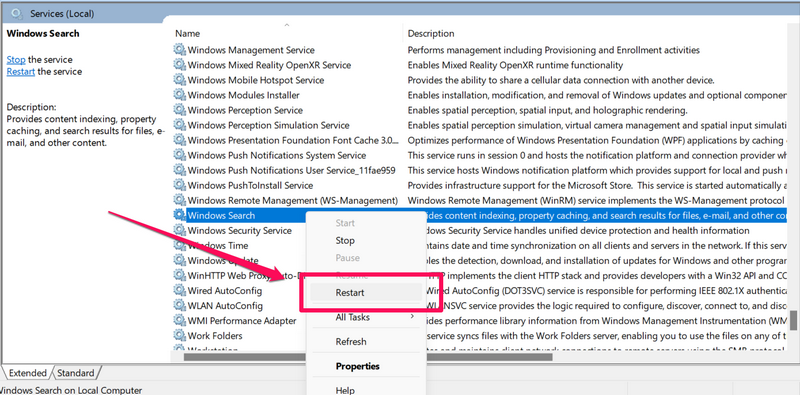
There may be a possibility that its having issues in working, which is resulting in this issue.
2.After finding it, right-tap on it, and then choose theRestartoption from the right-click menu.

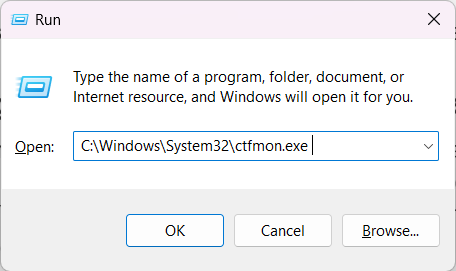
It could be possible that it isnt working on your PC, due to this, its having issues.
2.Once done, click theOKbutton or press theEnter keyto run theCTF loader on your PC.
After doing this, peek if the issues with your systems Windows Search Box are fixed or not.
Considering this, we suggest youre-register Microsoft Store appson your PC to fix these issues.
Varied factors may cause this issue, like incorrect printer configs, faulty cables, etc.
Fortunately, the problems with the printer can be fixed.

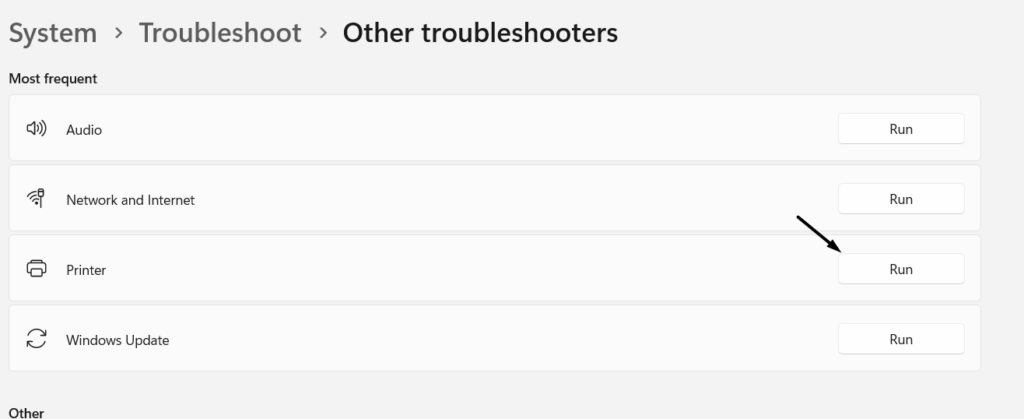
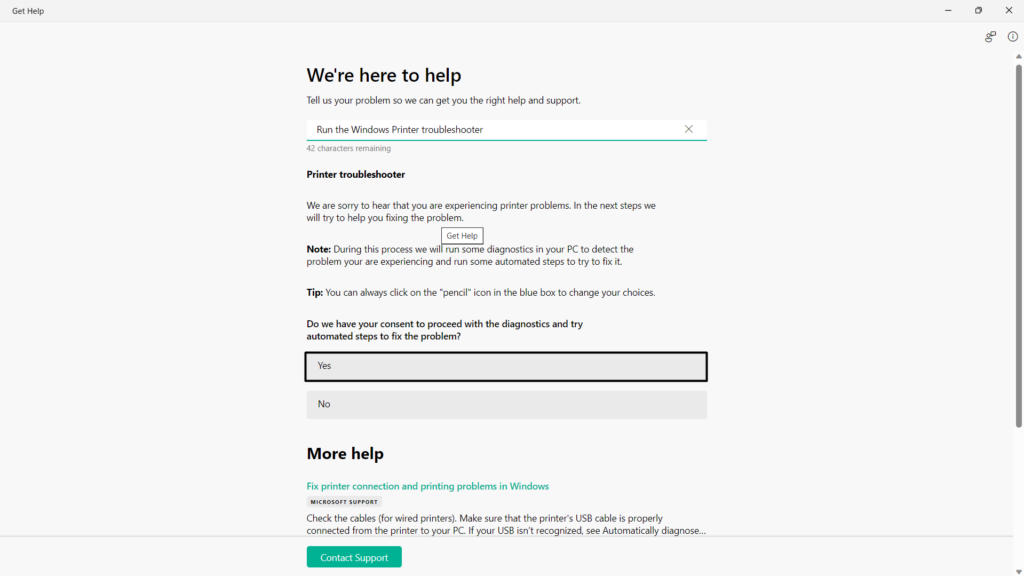
Sorun the printer troubleshooteron your Windows 11 PC and find out if it fixes the issue.
2.On theOther troubleshootersscreen, underMost frequent, click theRunbutton next toPrinter.
to start the troubleshooting.
you’re able to update them in theOptional updatessection of the parameters program.
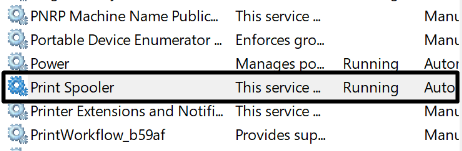
This is because it plays a major role in the working of the printer.
So, we suggest yourestart this particular serviceon your PC to fix all the issues with its functioning.
2.Press theEnter keyorOKbutton in the same prompt to launch theServices utilityon the PC.
3.In theServiceswindow, simply look for thePrint Spoolerservice and then right-tap on it.
4.Finally,select theRestartoption from the contextual menu to restart thePrint Spoolerservice.

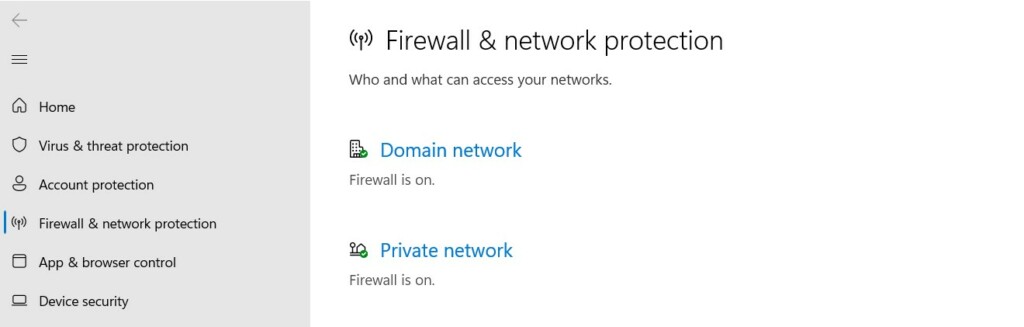
2.From the search results, underBest match, select theWindows Securityapp to open it.
3.On the next screen, selectFirewall & web connection protectionfrom the left navigation pane.
4.ClickPrivate web link, and on the next screen, switch on the toggle underMicrosoft Defender Firewall.
5.Head back, click thePublic networkoption, and then kill the same toggle on the next screen.
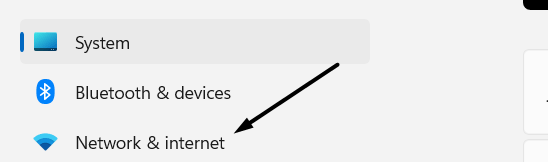
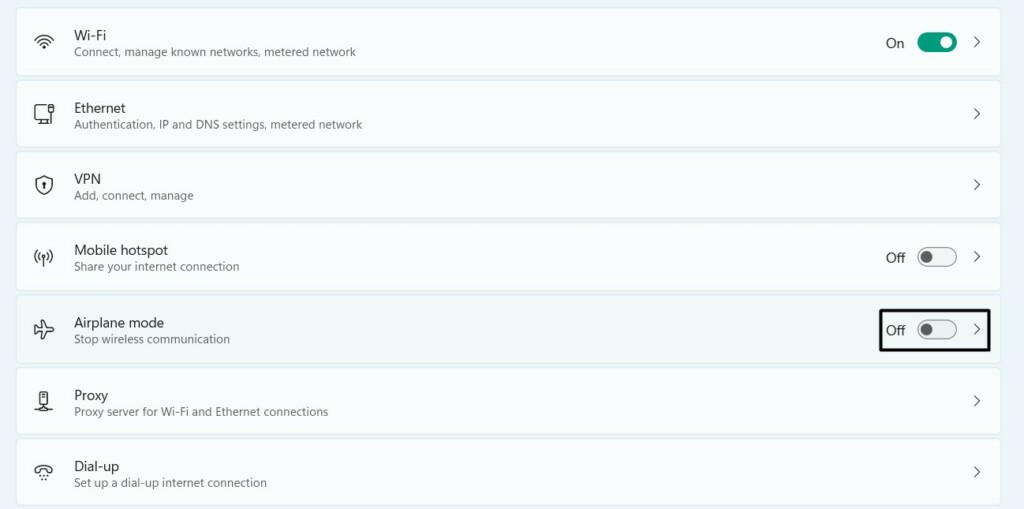
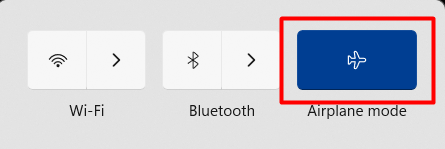
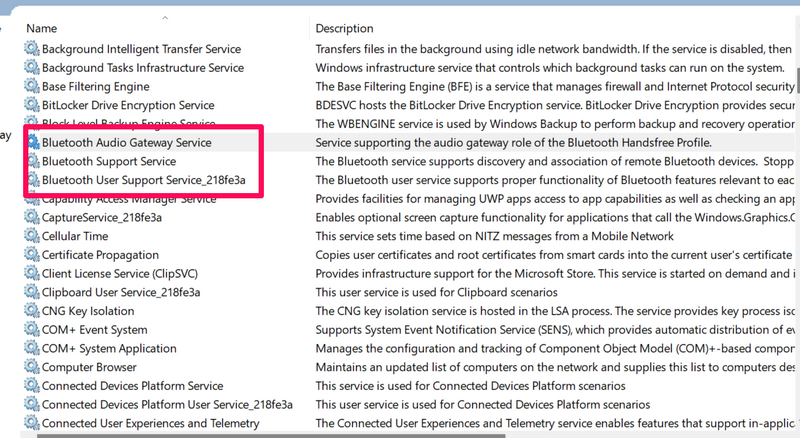
Some users say that the Bluetooth icon disappears on their Windows 11 PC or laptop.
Whereas other users say that their PCs Bluetooth doesnt connect to their other devices via Bluetooth.

Luckily, all the issues with Bluetooth can be cured by trying some tips.
you’ve got the option to disable it and verify if the issue is fixed.
2.On theNetwork & internetscreen, look for theAirplane modeand ensure it is disabled.
If its, press it to disable it.
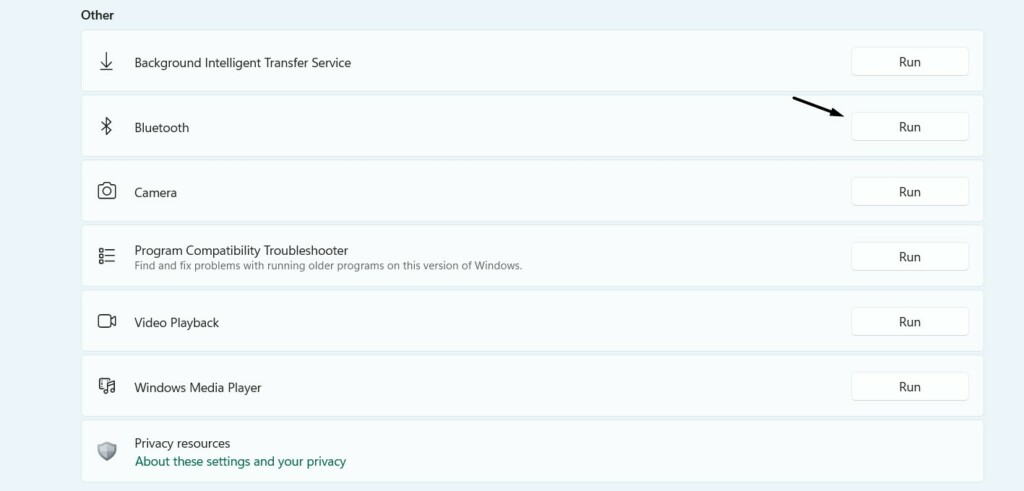
So run this troubleshooter on your Windows 11 PC and see if it fixes issues with Bluetooth.
2.On the next screen, chooseOther troubleshootersand look forBluetoothunderOther.
3.Once found, click theRunbutton next toBluetoothto start the Bluetooth troubleshooter.
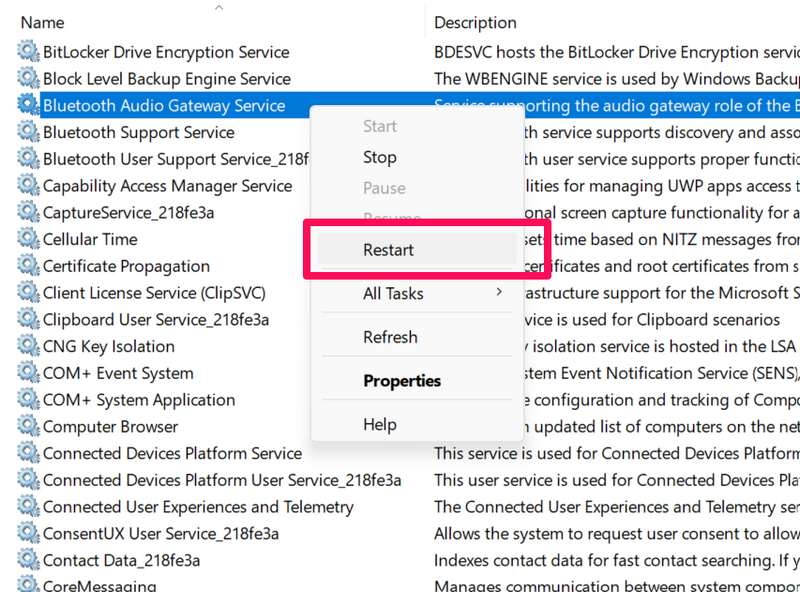
In this case, we suggest yourestart Bluetooth servicesand look to see if this fixes the issue.
So update them in theOptional updatessection of the configs app.
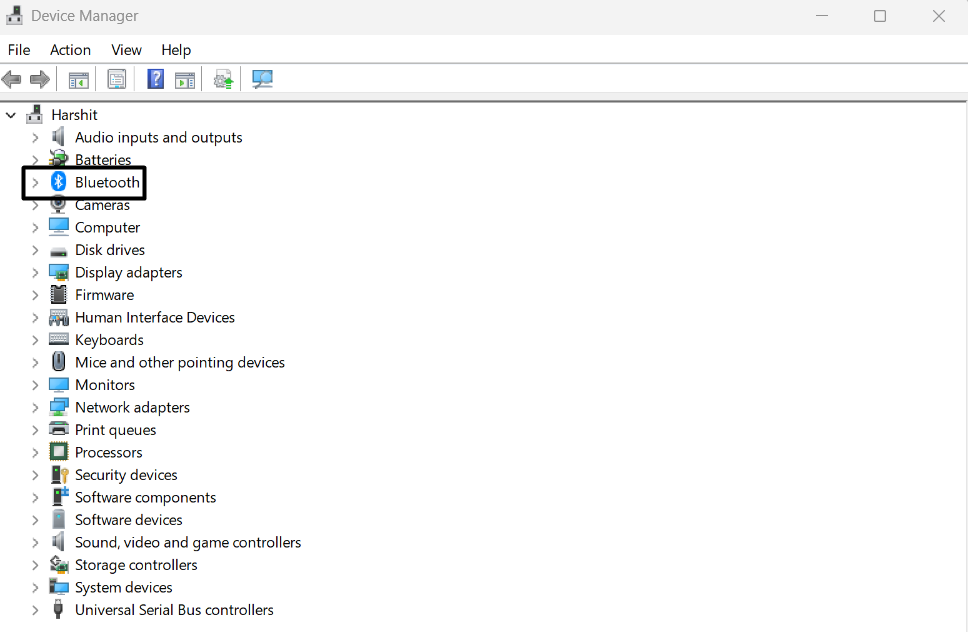
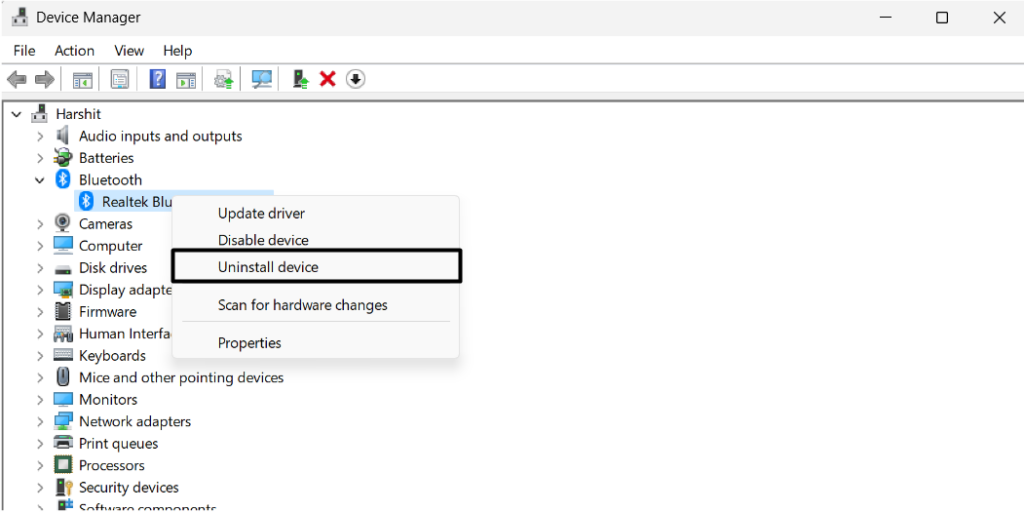
2.ExpandBluetoothby clicking the arrow next to it and right-hit the driver under the same.
3.Choose theUninstall deviceoption from the context menu and then click theUninstallbutton.
Once done, check whether the issue you were facing earlier is fixed now.
Luckily, those issues can be fixed by restarting File Explorer.
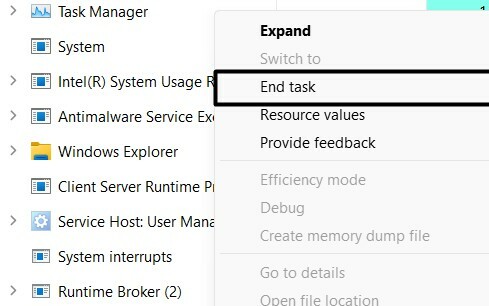
2.Look for theFile Explorertask in theProcessestab, right-click it, and selectEnd task.
3.Once done, reset your Windows 11 computer and confirm whether the problem is fixed.
This could be the same in your case.
Thus, we suggest youupdate your Windows 11 PCand see if new updates fix them.
2.On the next screen, click theCheck for updatesbutton to let the PC search for drivers.
3.If it finds any new updates to install, clickDownload and installto install them on your PC.
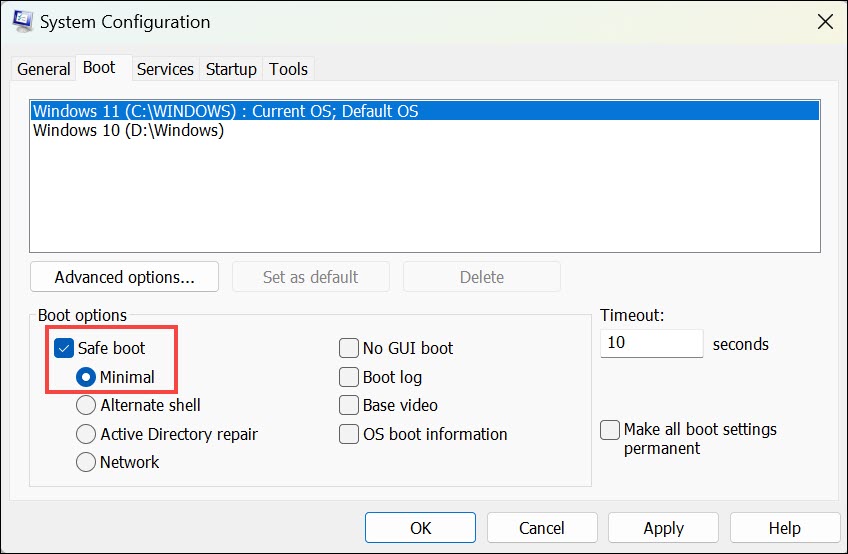
If the PC works properly in Safe mode, it means an app or service is causing this issue.
2.Go to theBoottab and tickSafe bootunderBoot optionsto unlock the Safe mode on your PC.
Save changes
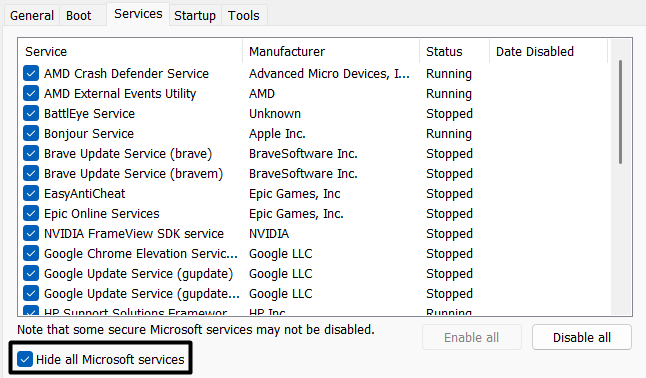
3.Head to theServicestab, and in the same tab, tick theHide all Microsoft servicescheckbox.
4.Click theDisable allbutton to force close all the non-Microsoft services on your system.
5.Once done, go toStartupand clickOpen Task Managerto launch the Task Manager utility.
6.Lastly,right-press a non-Microsoft service in theProcessessection and selectEnd task.
However, this will delete all the data from the system.
2.Open theRecoverysection in prefs and click theReset PCbutton underRecovery options.
3.In the next prompt, select theRemove everythingoption in the next prompt to move ahead.
4.Once done, follow the prompts mentioned on your screen to reset your Windows 11 PC.
FAQs
Are There Any Major Problems With Windows 11?
Until now, weve discovered no major problems with the latest Windows 11.
However, it keeps getting new bugs and glitches, which hampers the entire user experience in seconds.
How Do I Fix All Problems on Windows 11?
The best and easiest way to fix any kind of problem on Windows 11 isresetting the system.
Is Windows 11 Upgrade Causing Problems?
We havent faced any major problems after upgrading the computer to the new Windows 11.

Should I Still Avoid Windows 11?
Its been quite a long time since Windows 11 was launched.
Is Windows 11 Slower Than Windows 10?

The new Windows 11 is much faster than Windows 10.
But at the same time, it also has several issues that ruin the entire user experience with it.
In this guide, we talked about all the most common Windows 11 problems.
Alongside this, we also shared fixes with them.
We hope this guide helped you learn about common Windows 11 issues.
At last, let us know if we miss a common problem.
Well add it to the guide.